Visual Testing
Visual Testing with Figma Designs
You can now compare test execution screenshots with original design files in Figma by adding a design file link and configuring visual testing at the step level. You can also select the target device for accurate comparison. During test execution, Testsigma compares the screenshot with the design file and highlights any differences. This article discusses configuring visual testing with Figma design files in Testsigma.
This feature is available only for Web and Mobile apps and is limited to enterprise accounts. Contact Testsigma Support to enable it for your account.
Prerequisites
Before you begin, ensure that you have referred to:
Visual Testing Using Figma
Section titled “Visual Testing Using Figma”-
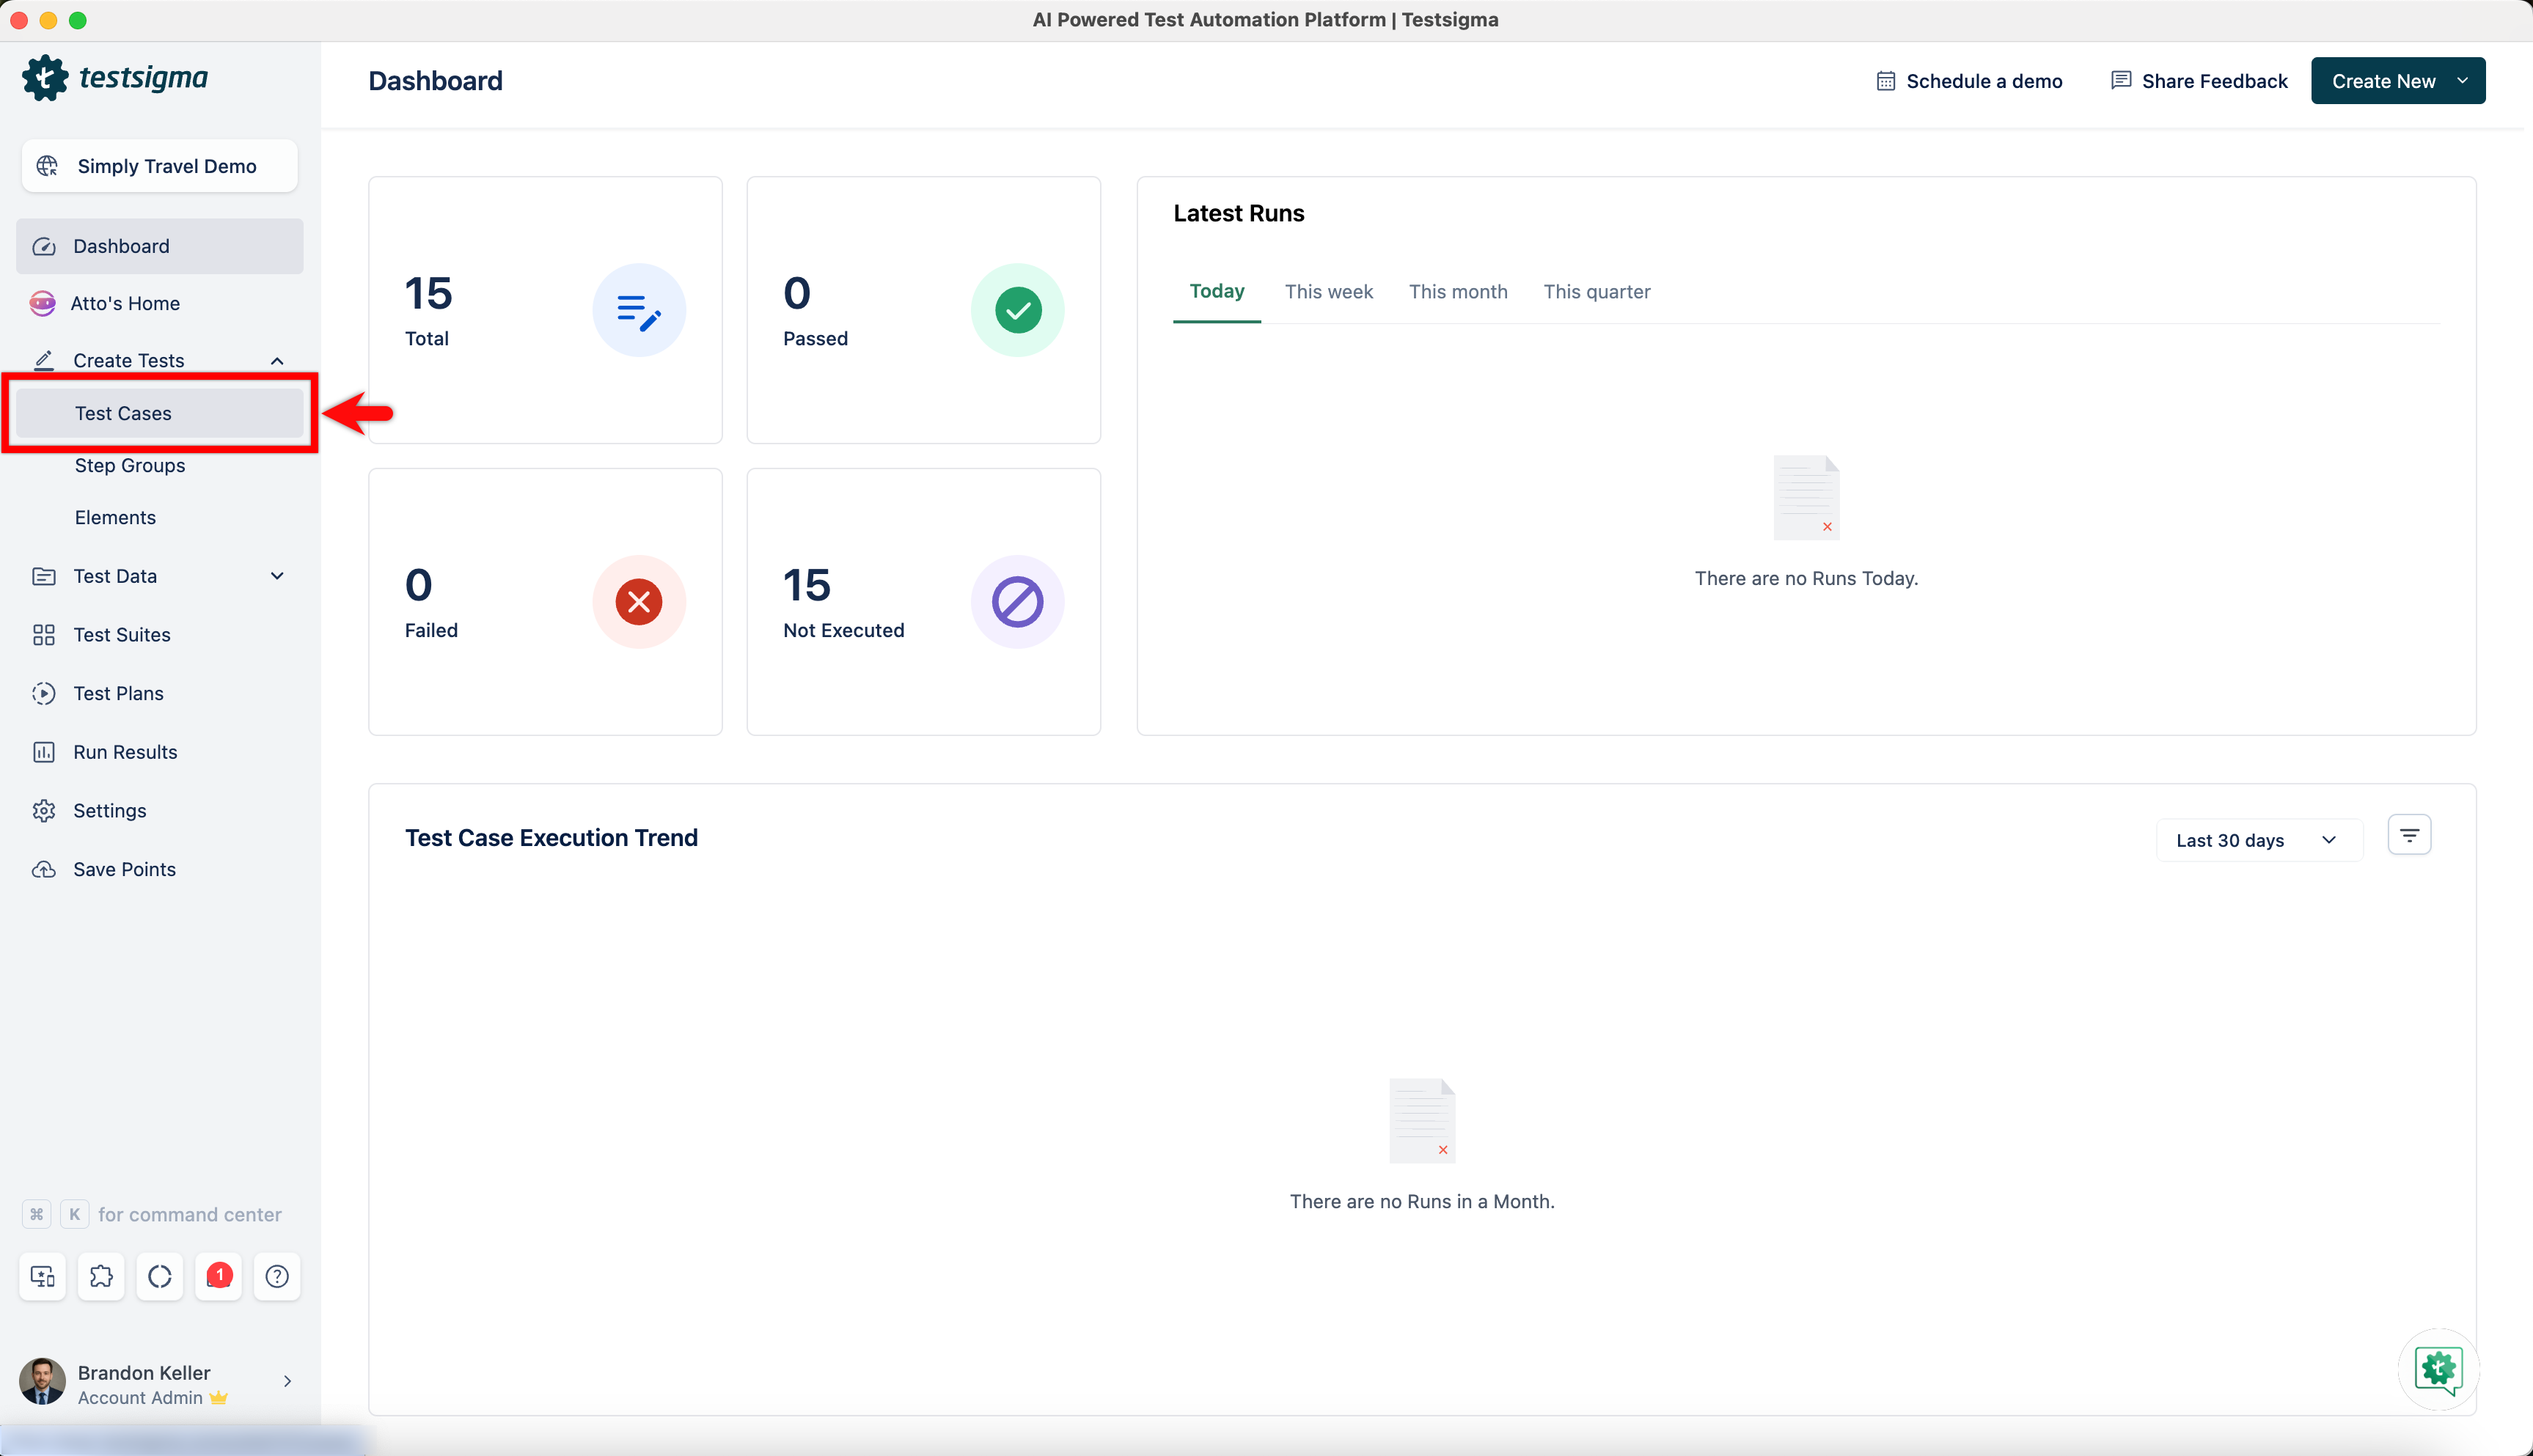
From the left navigation bar, go to Create Tests > Test Cases.
-
Create a test case or open an existing test case.
-
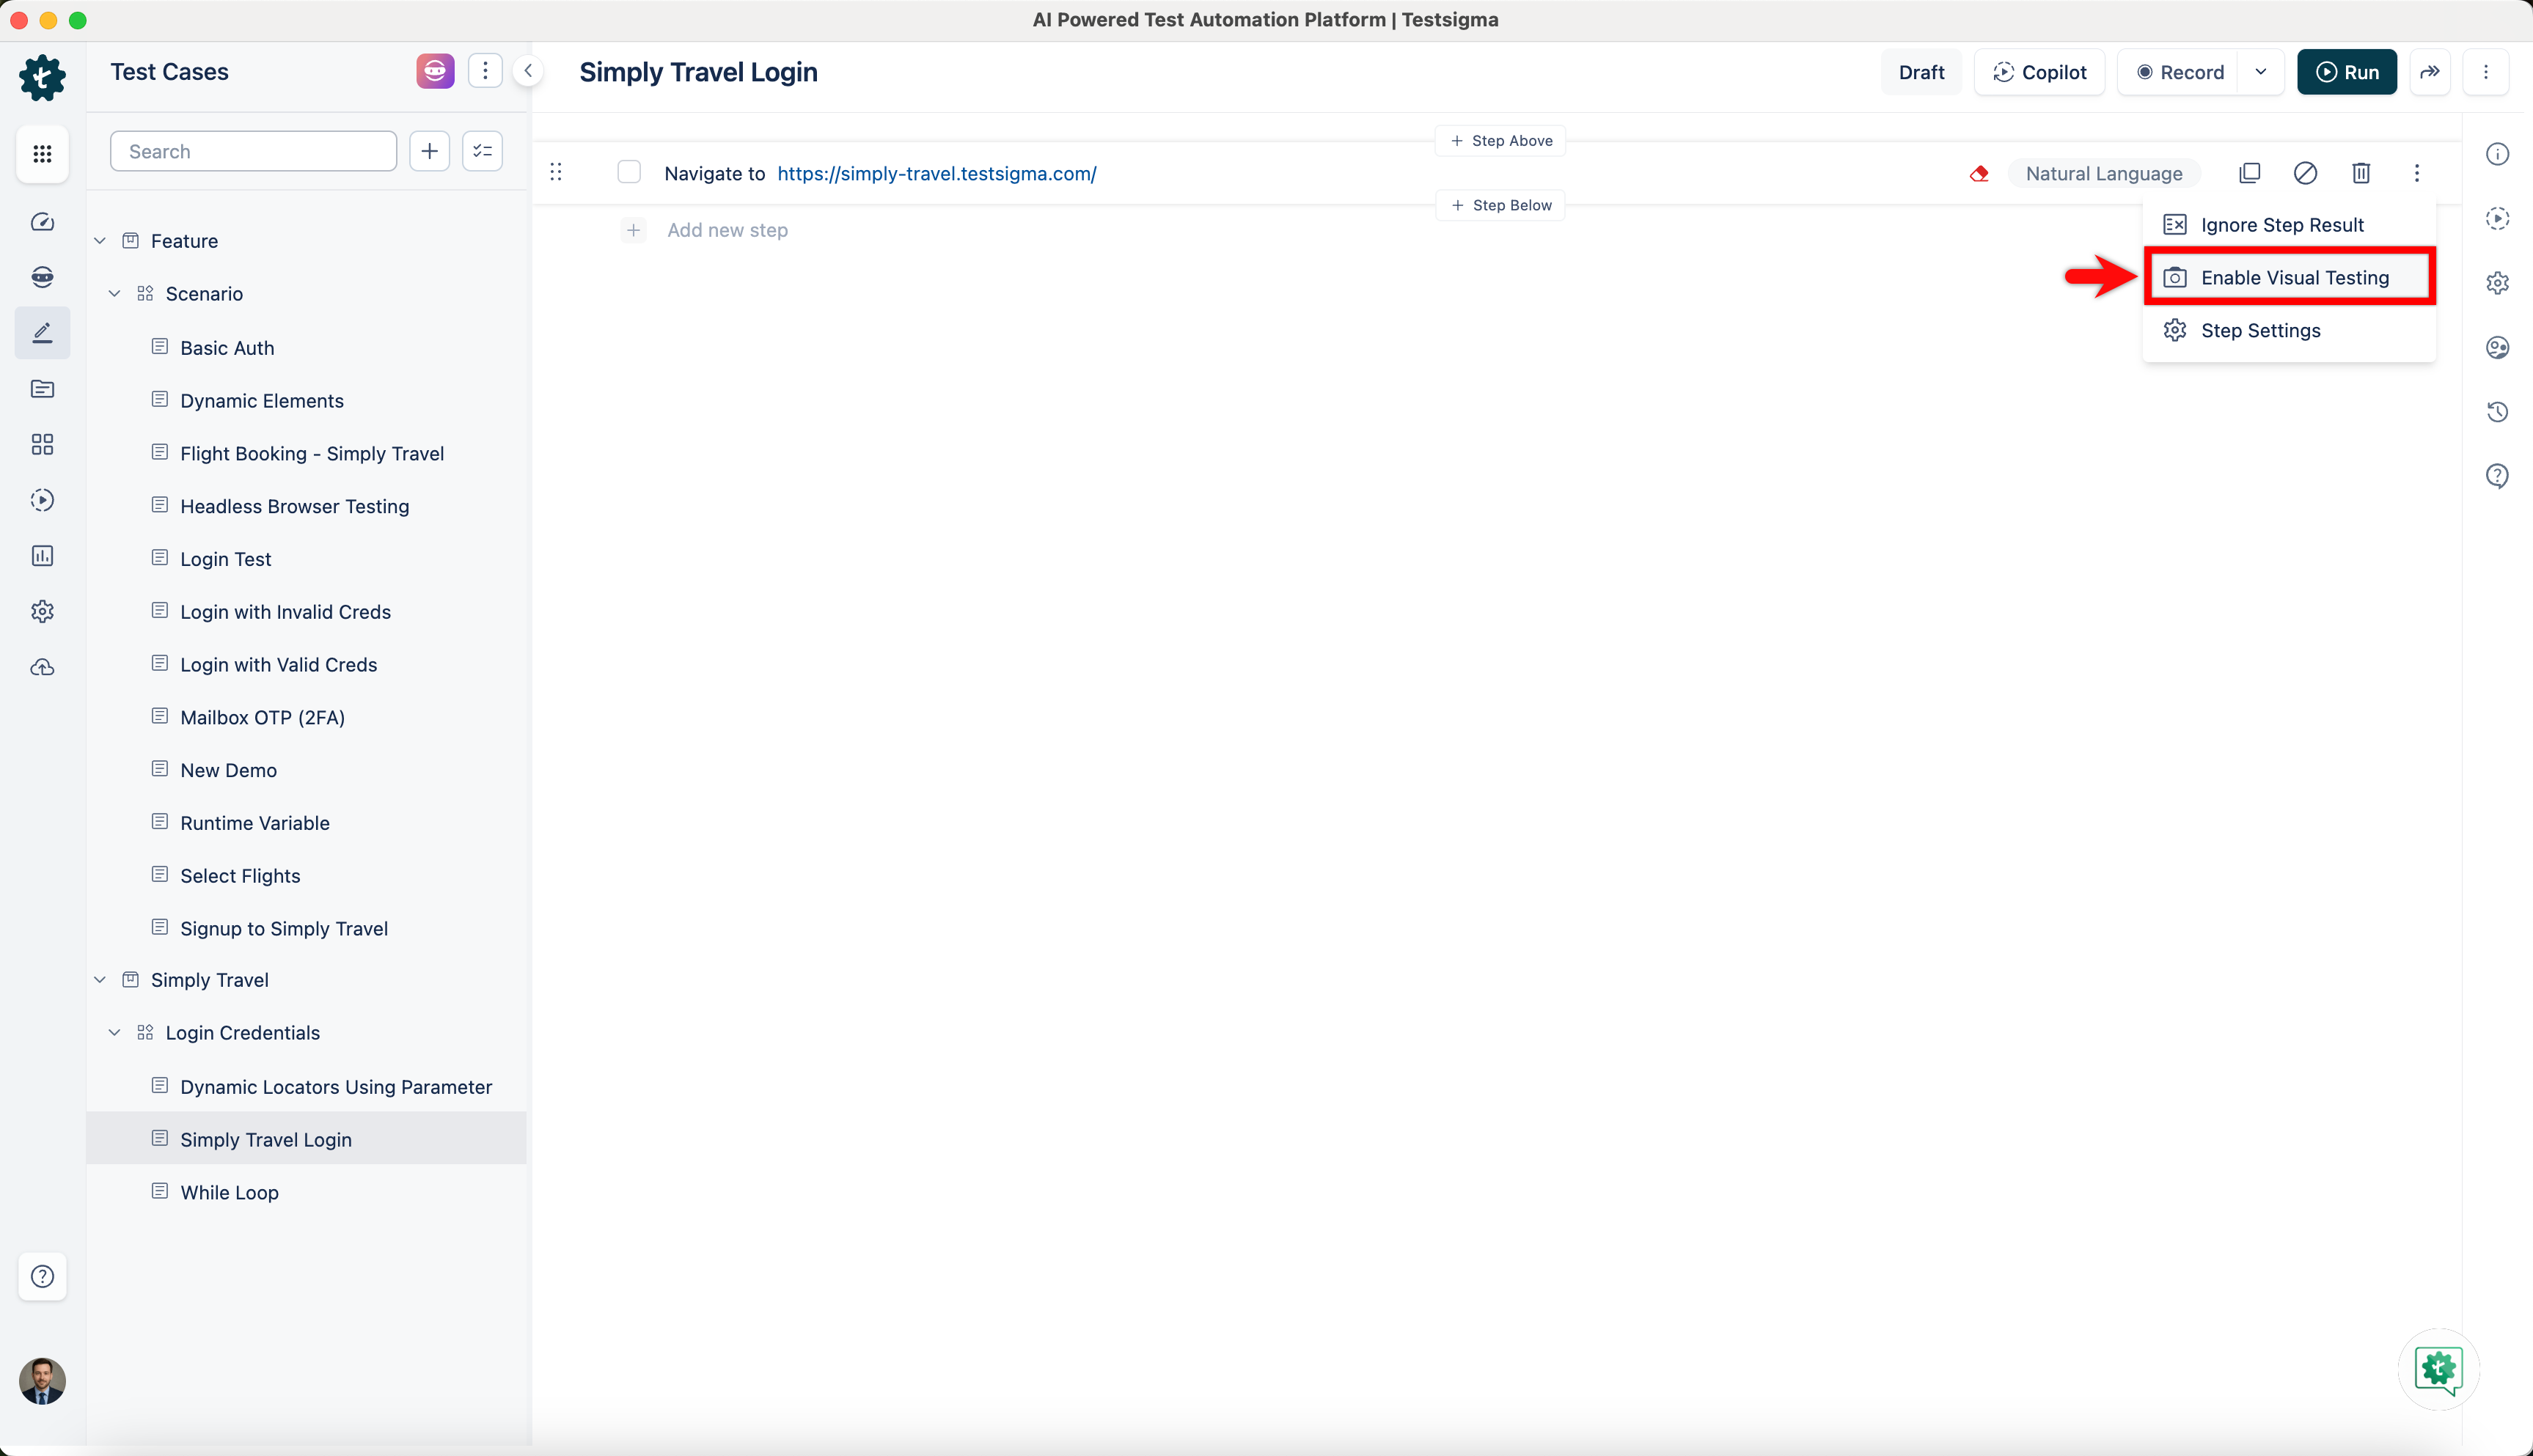
Click the Kebab menu next to the test step, and then select Enable Visual Testing from the dropdown menu.
-
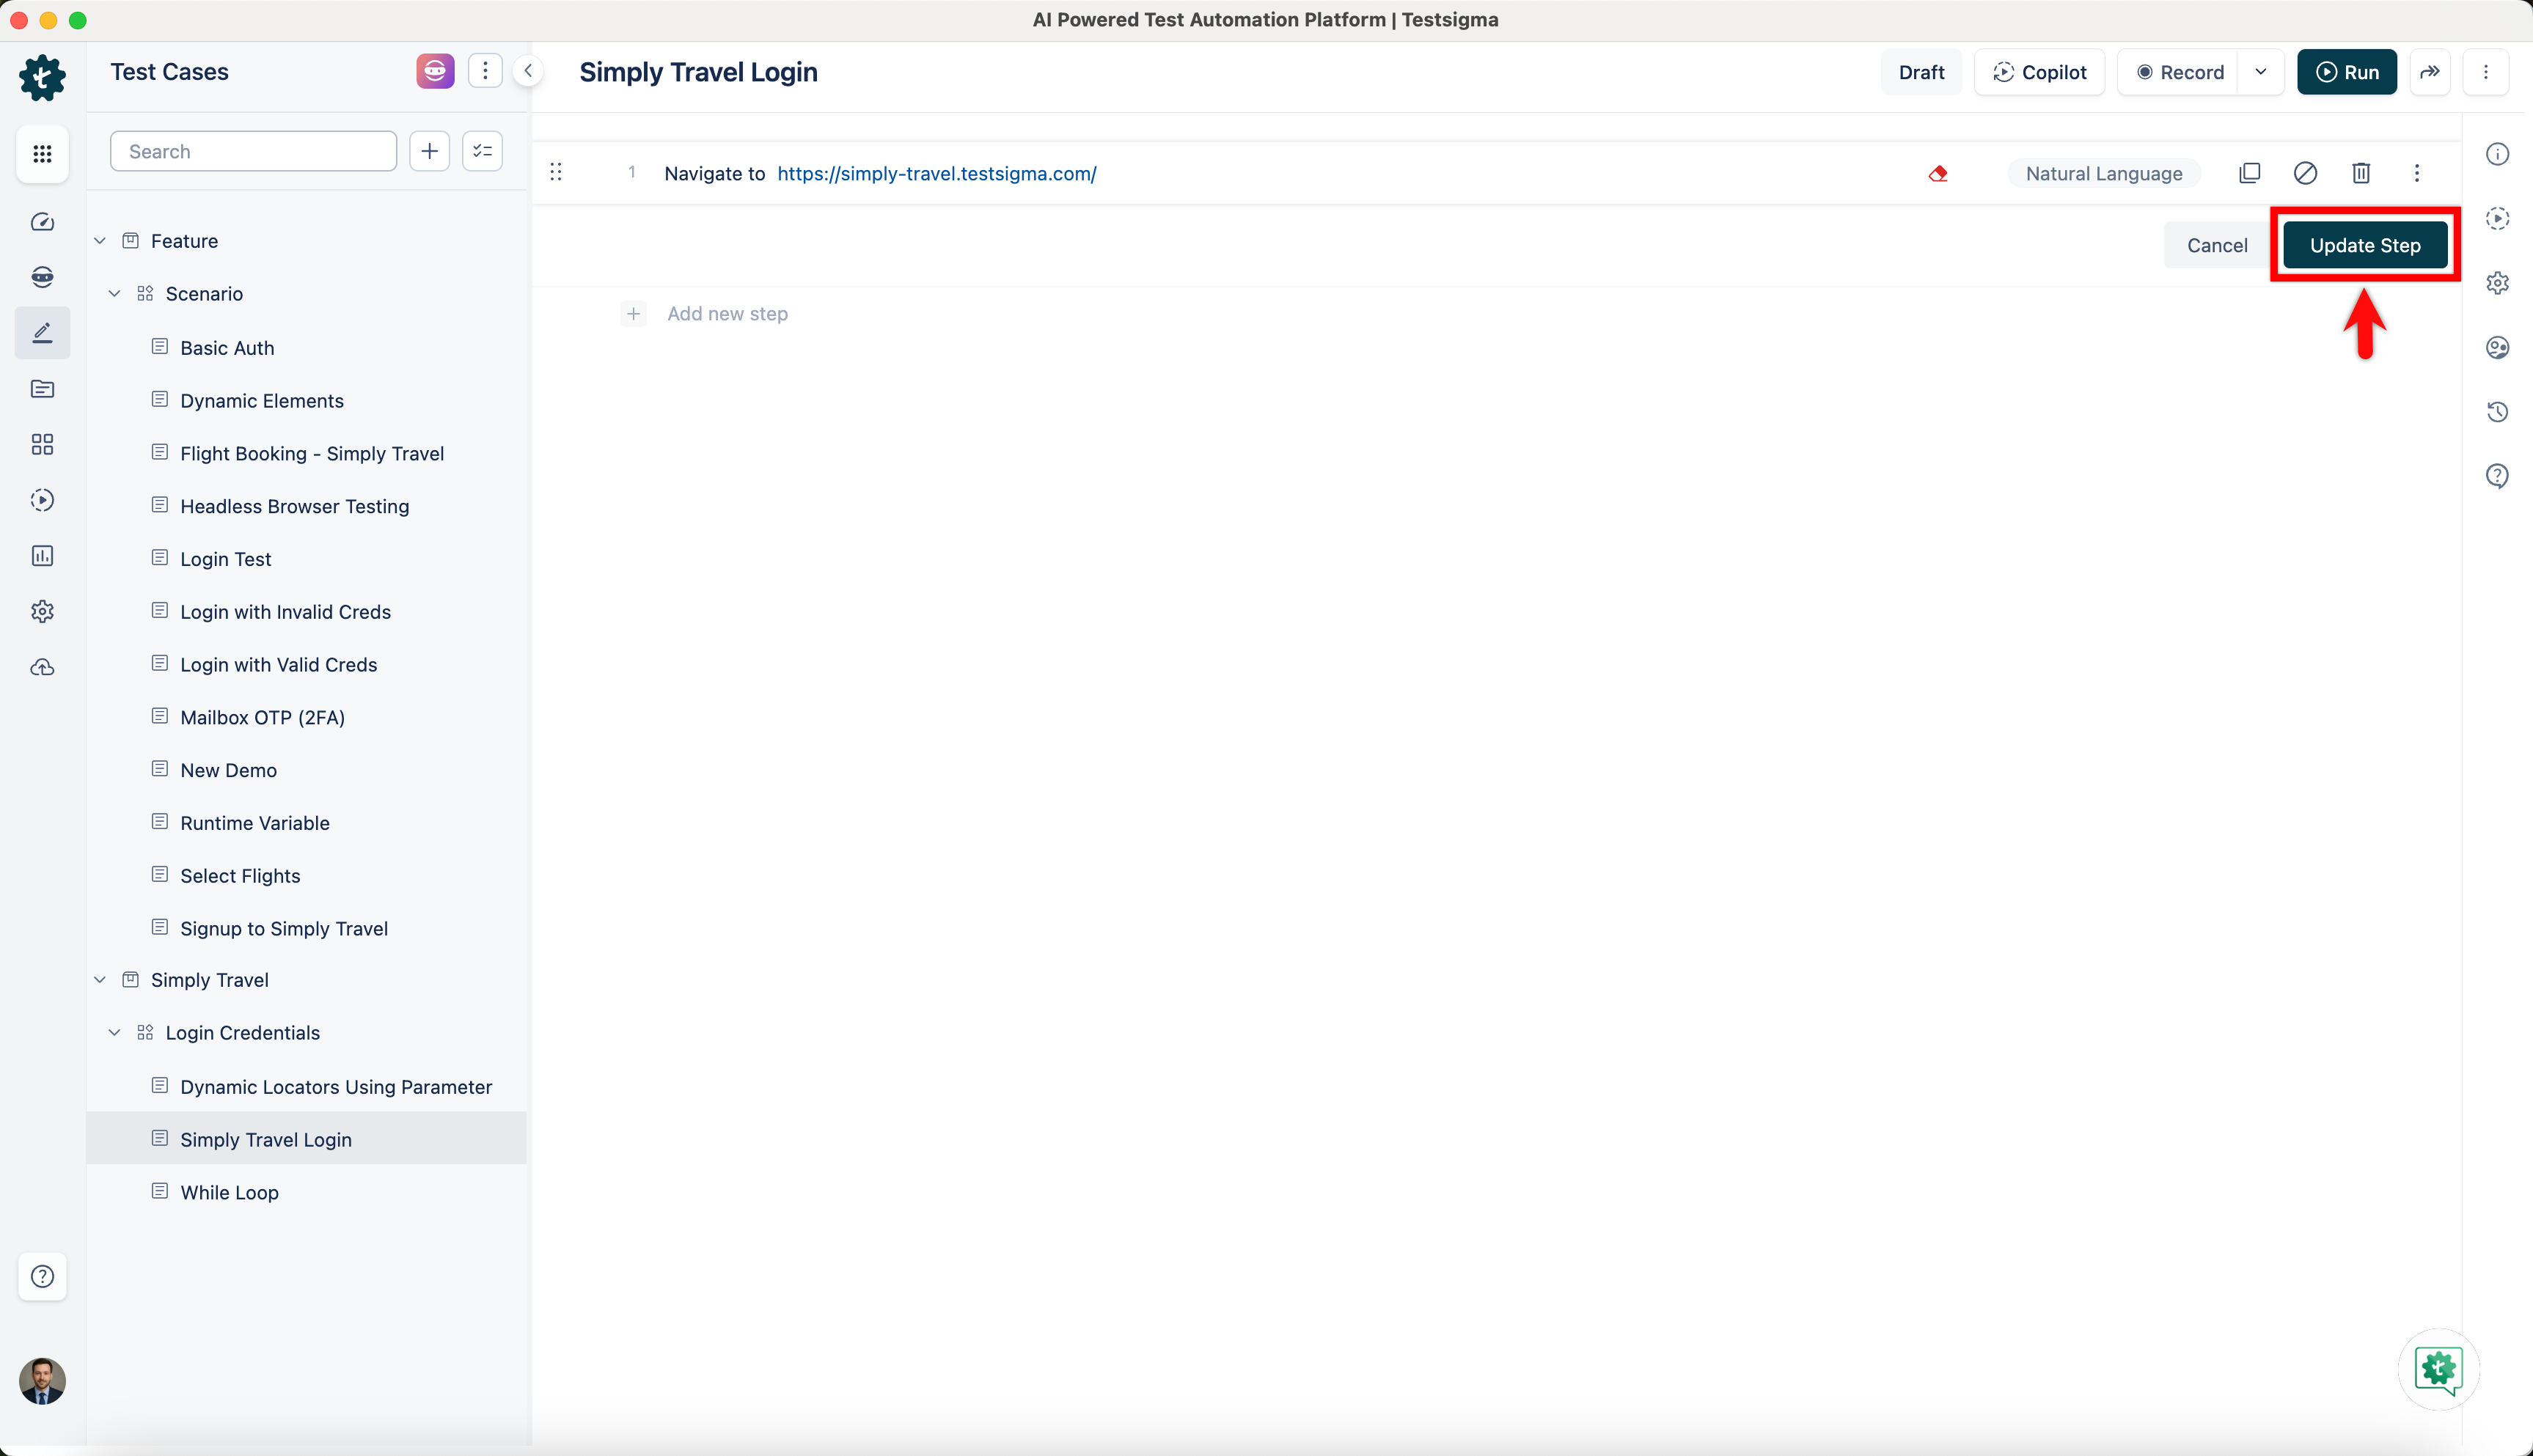
Click Update Step.
-
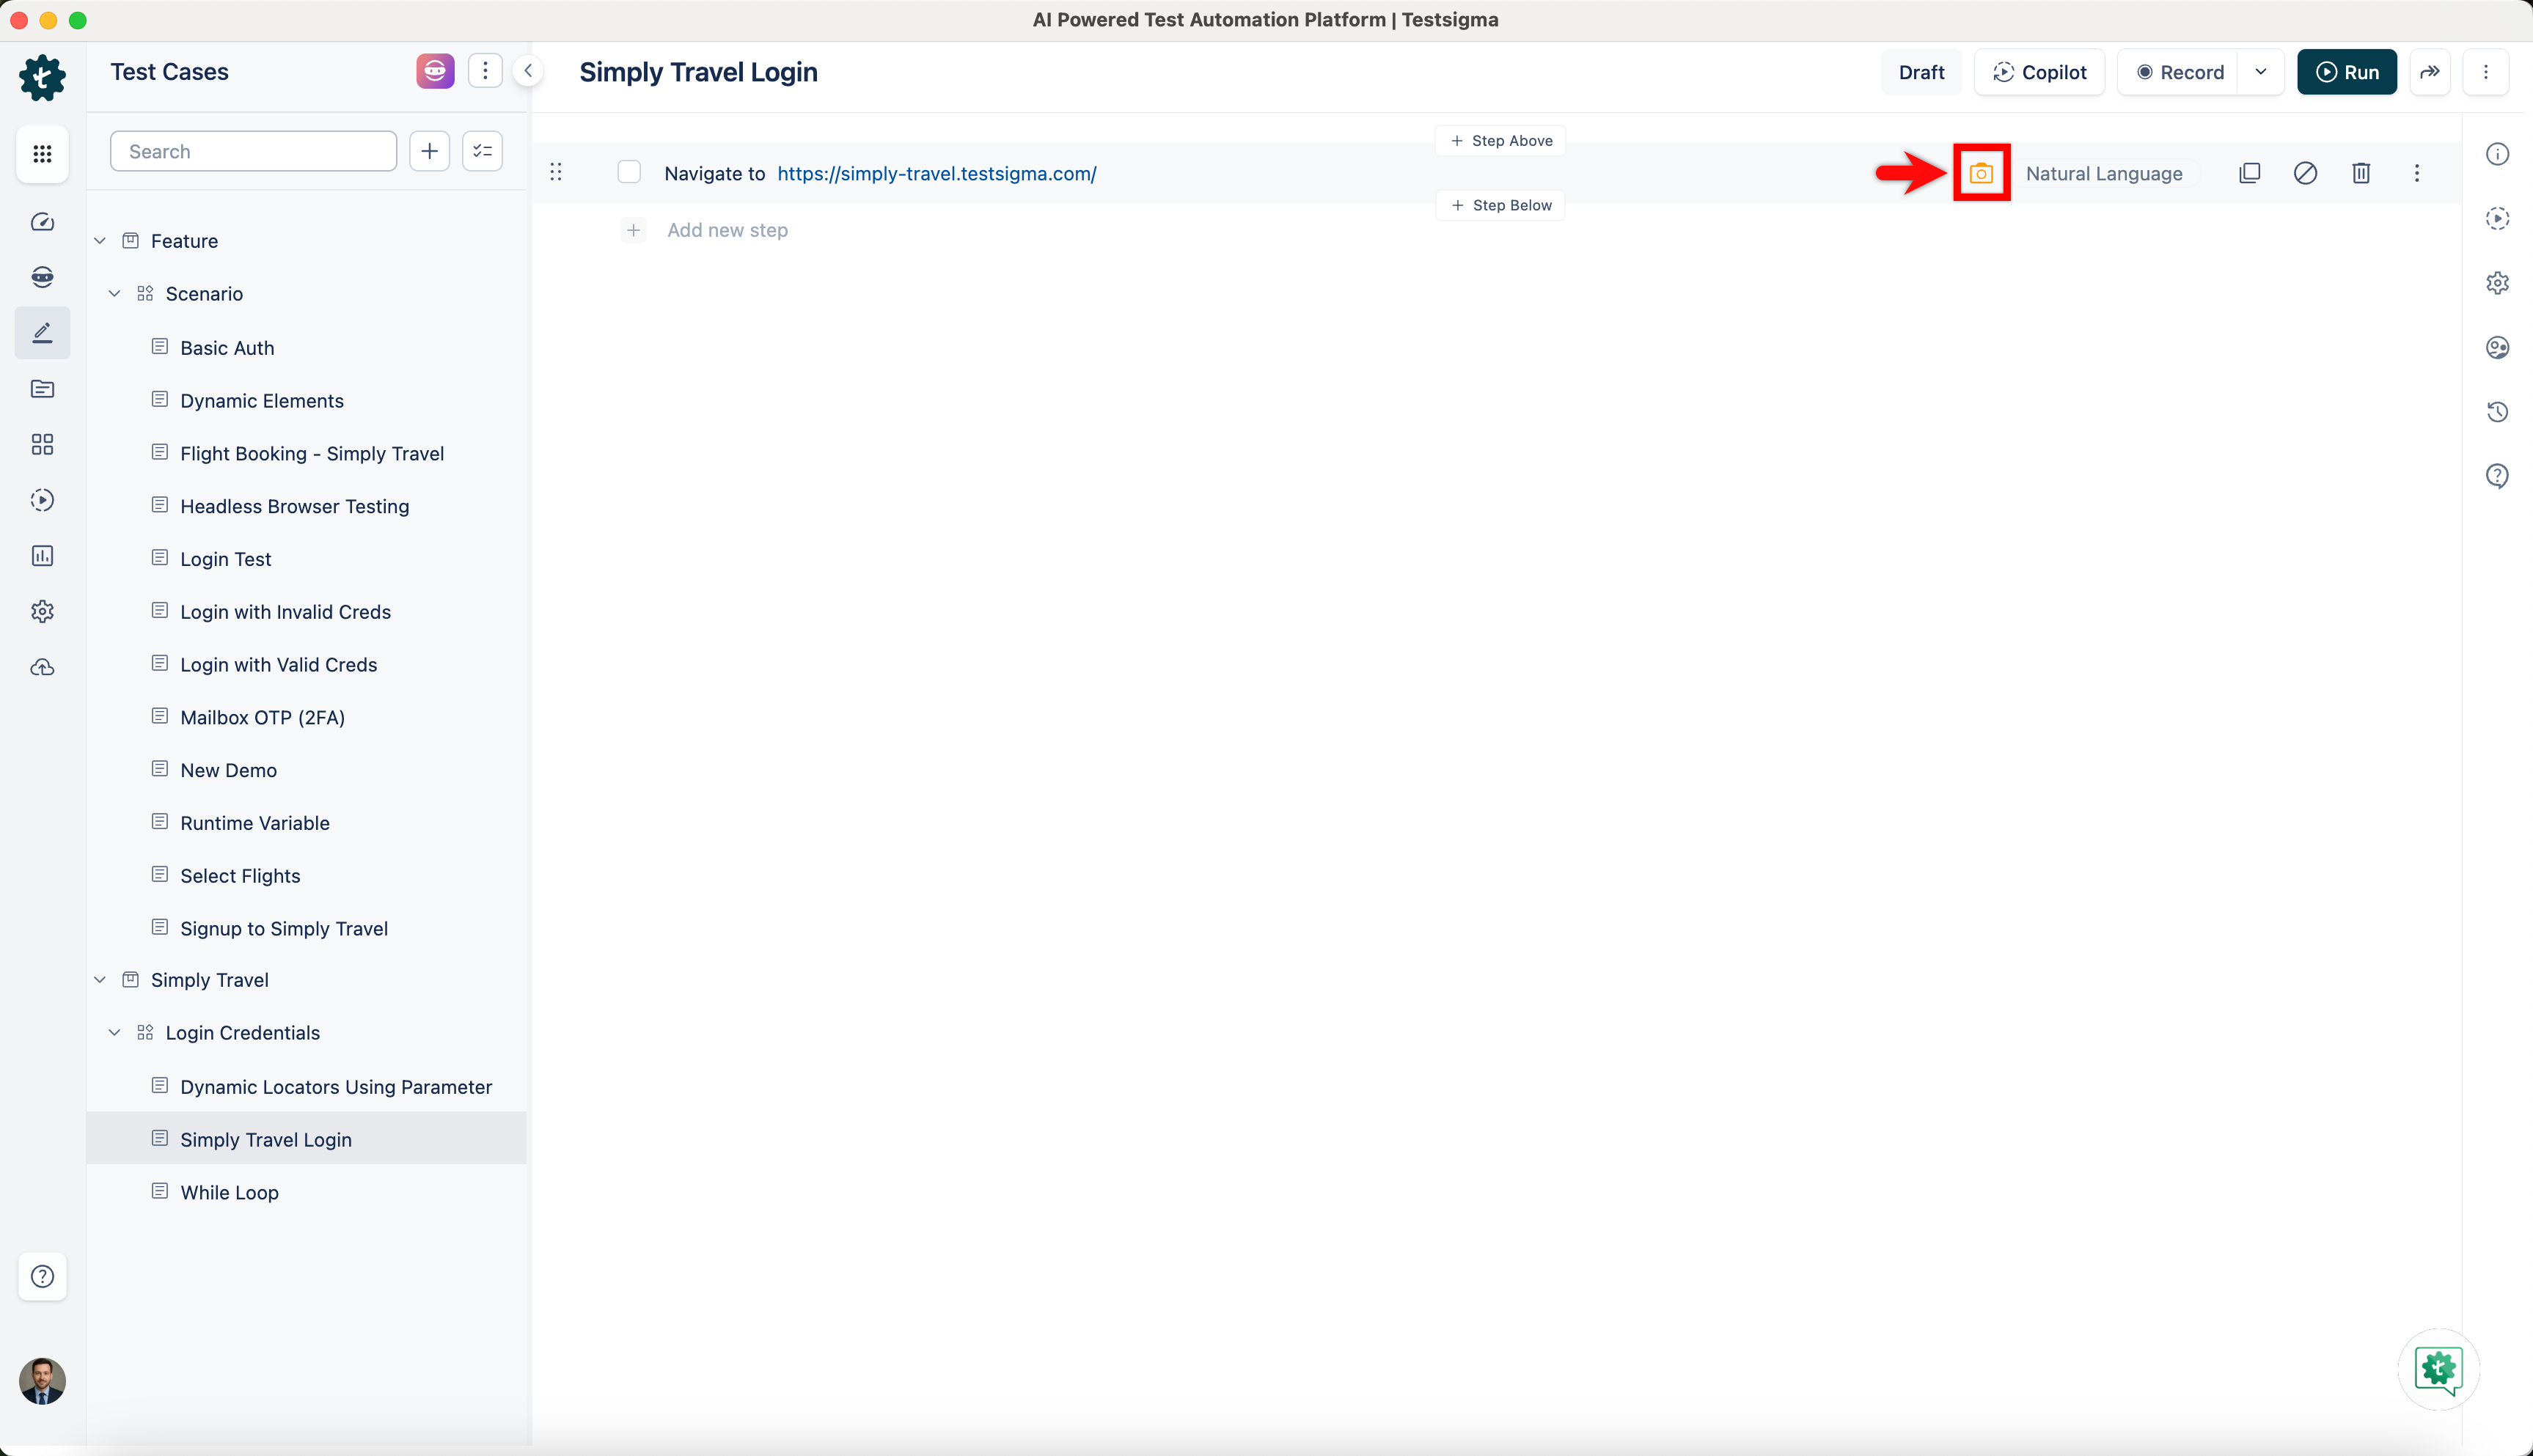
Hover over the test step, and then click the Camera icon. This will open the Visual Difference – Figma section.
-
In the Base Line Image section, click Add Figma Designs.
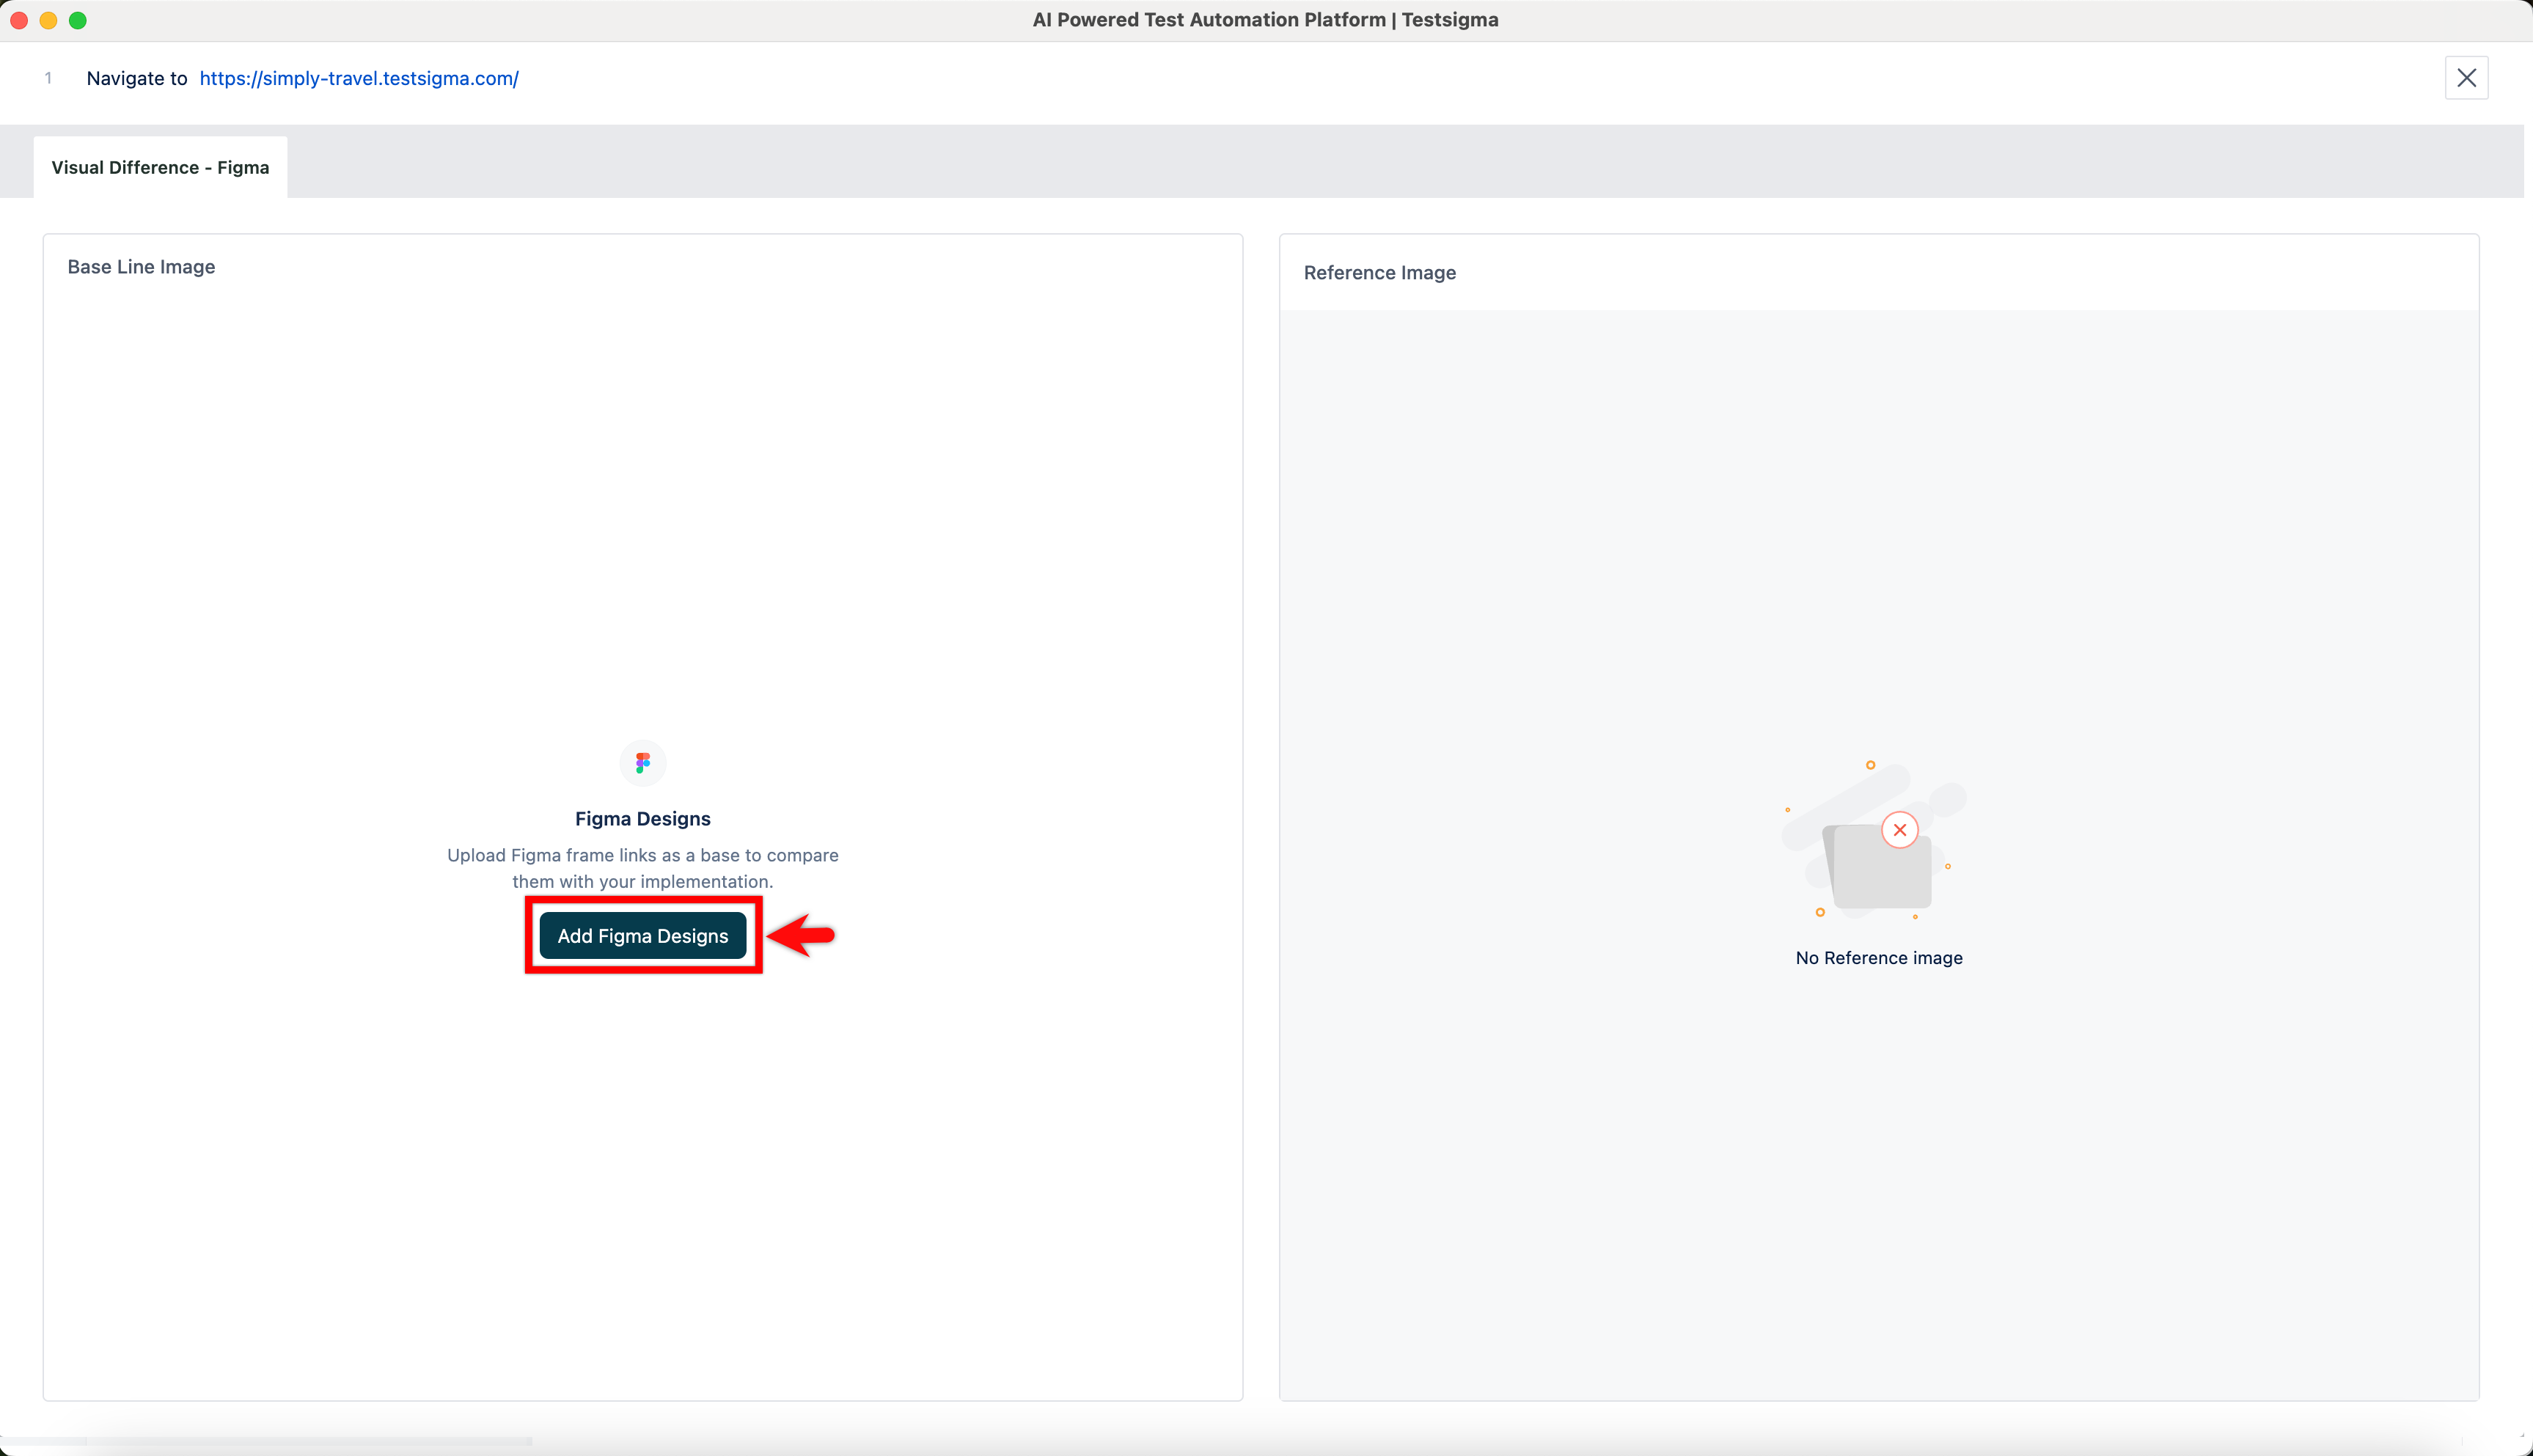
-
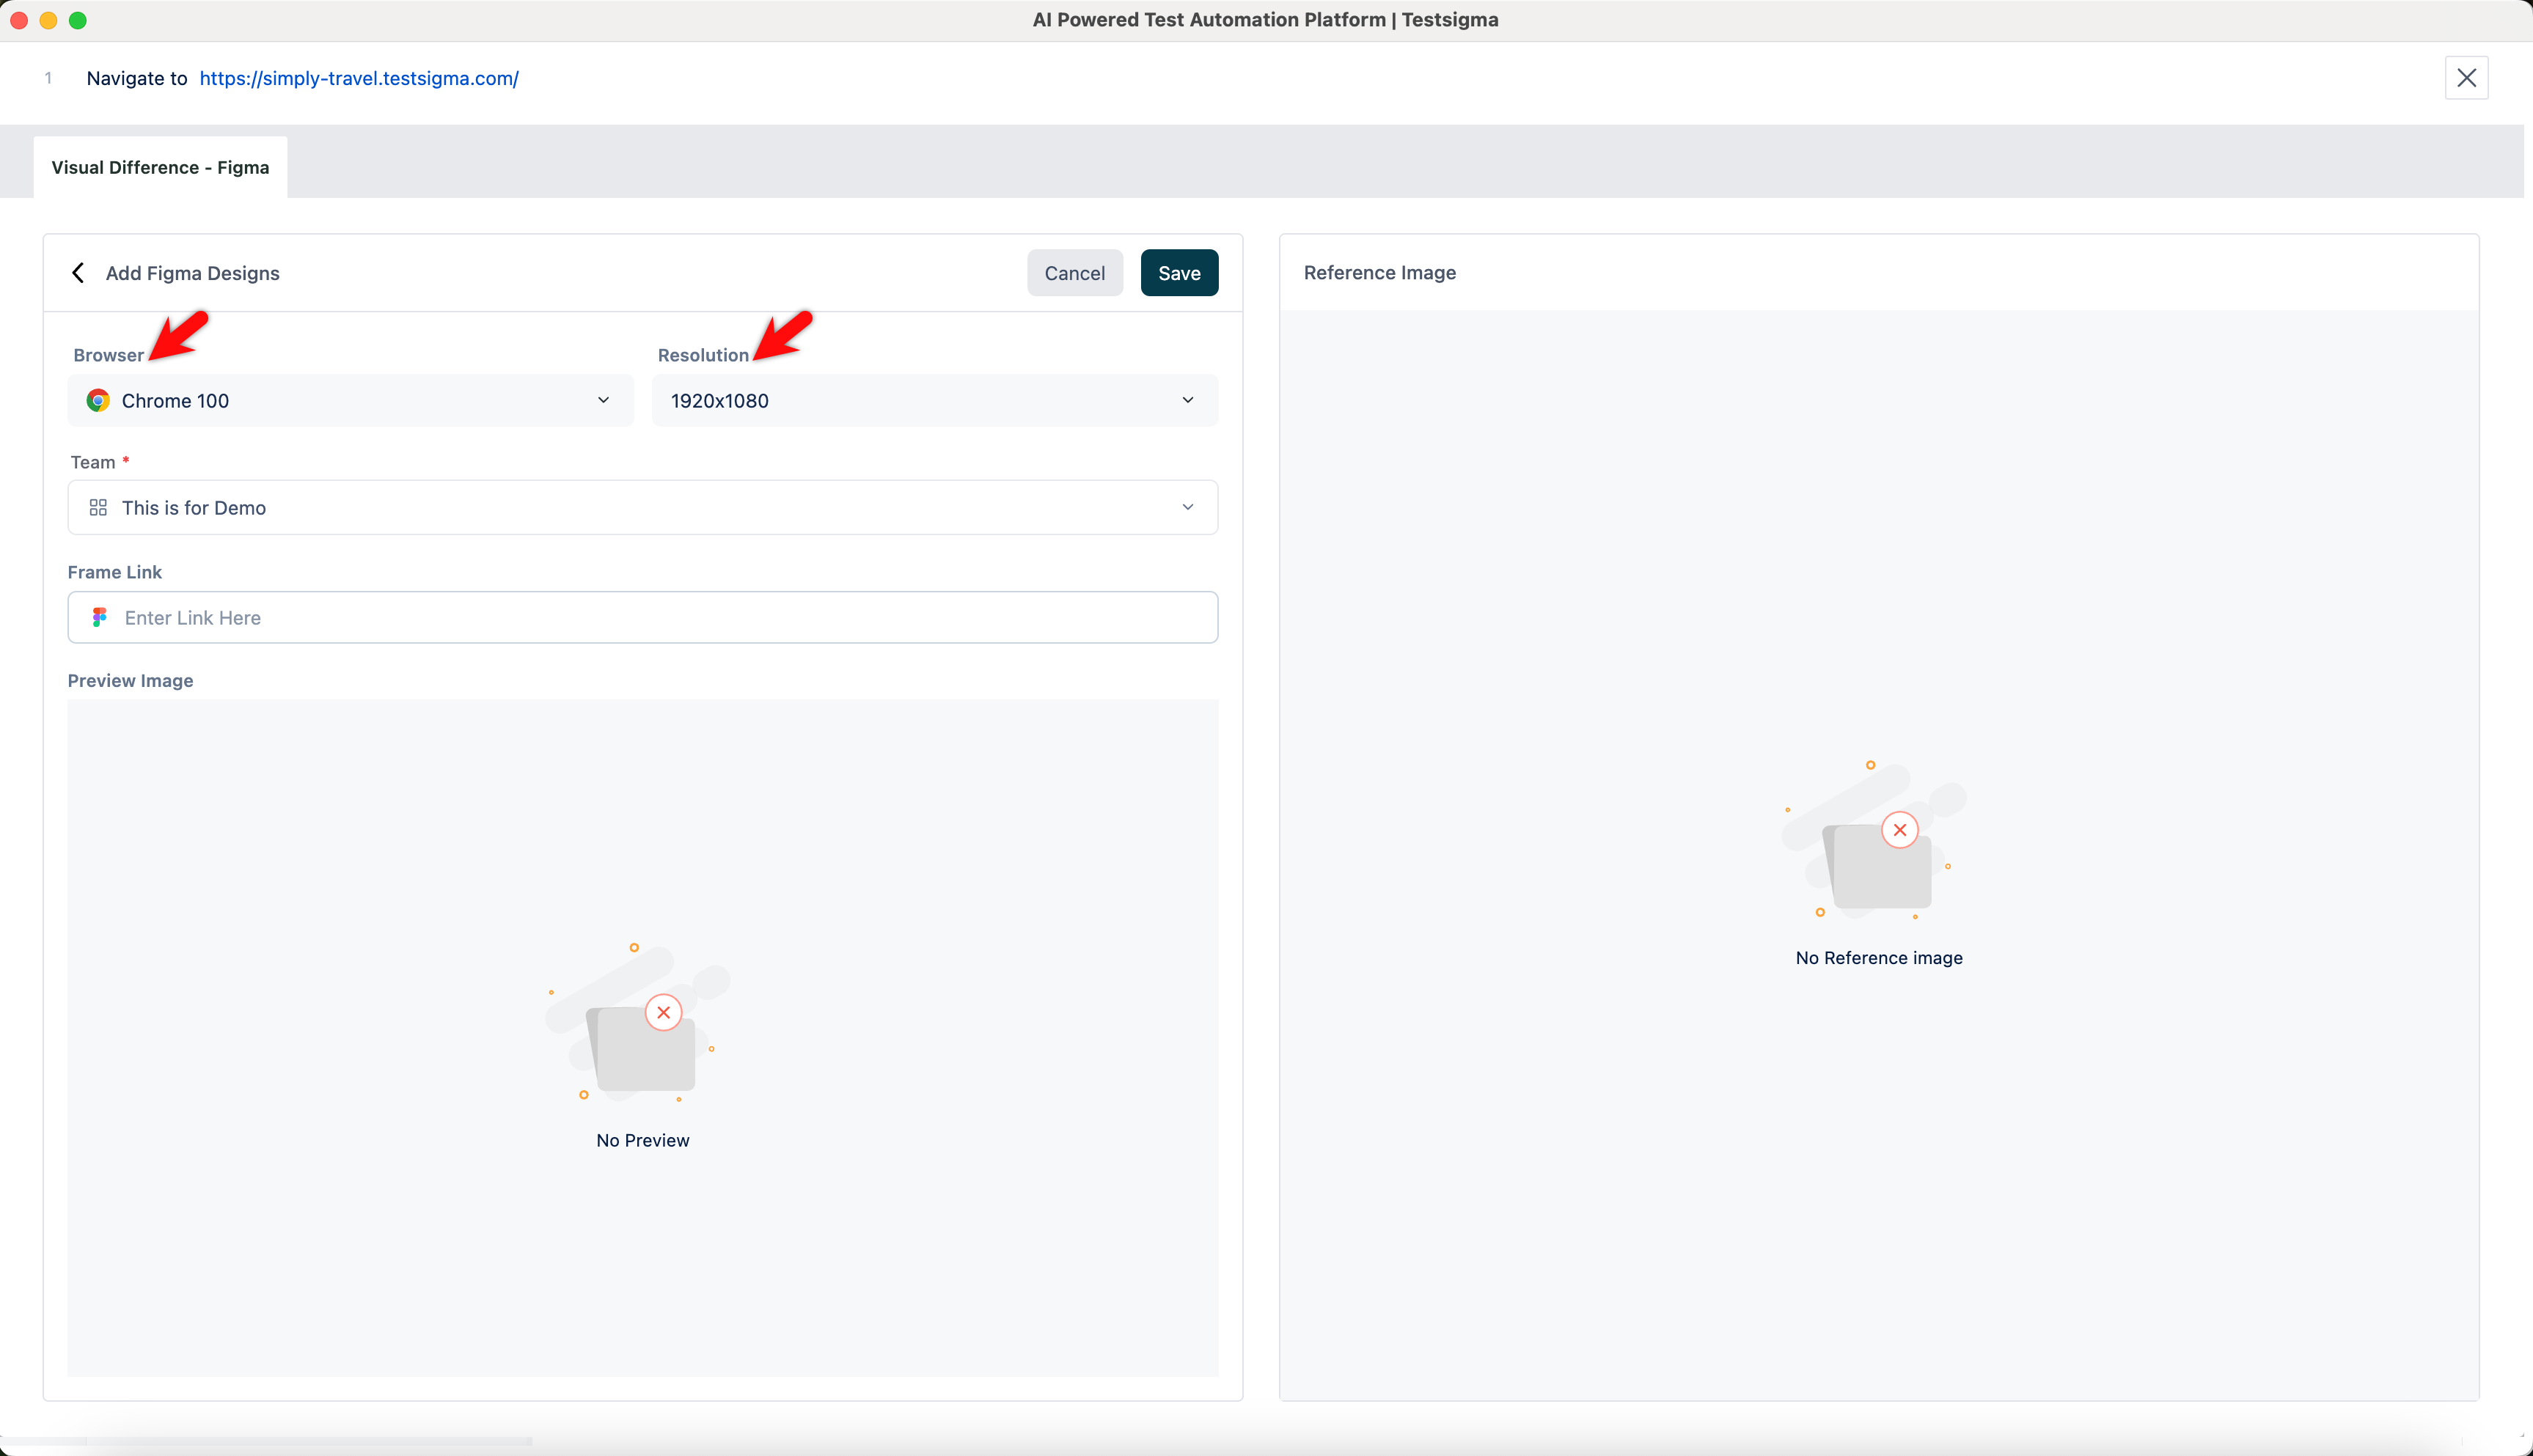
In the Add Devices section, select the Browser and Resolution from the dropdown menus.
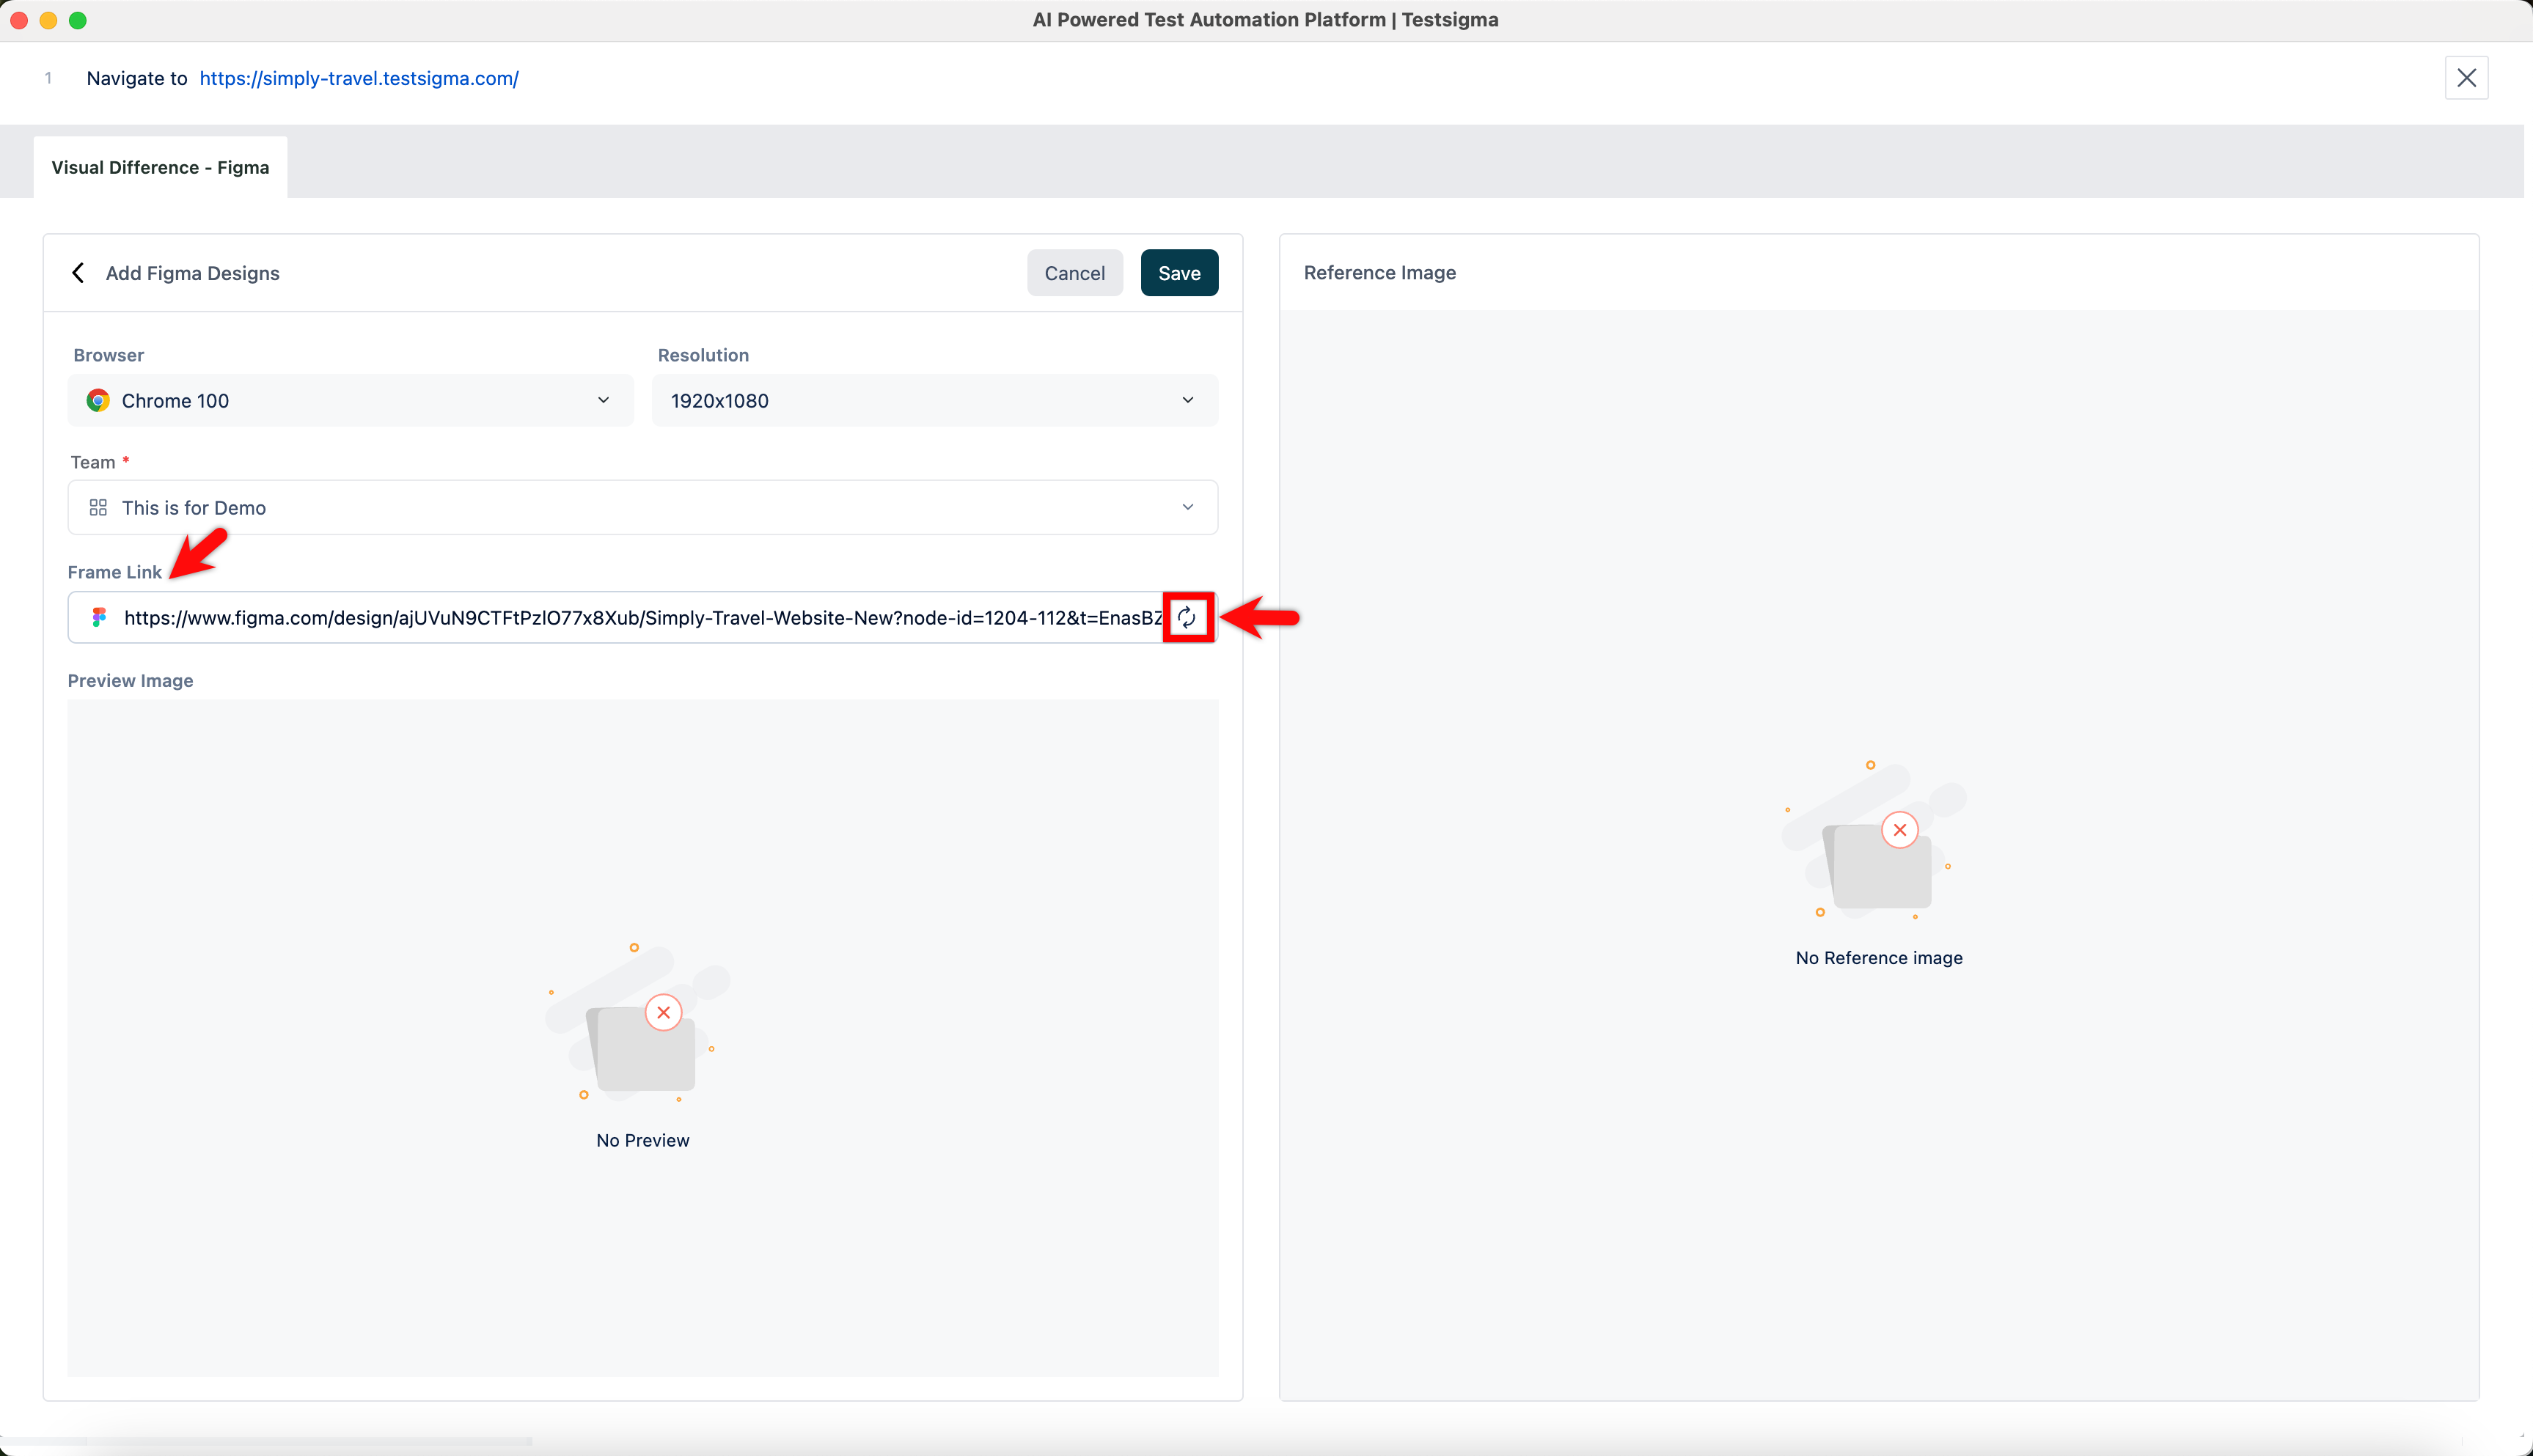
- In the Frame Link text box, enter the Figma frame link, and then click Refresh to verify.
-
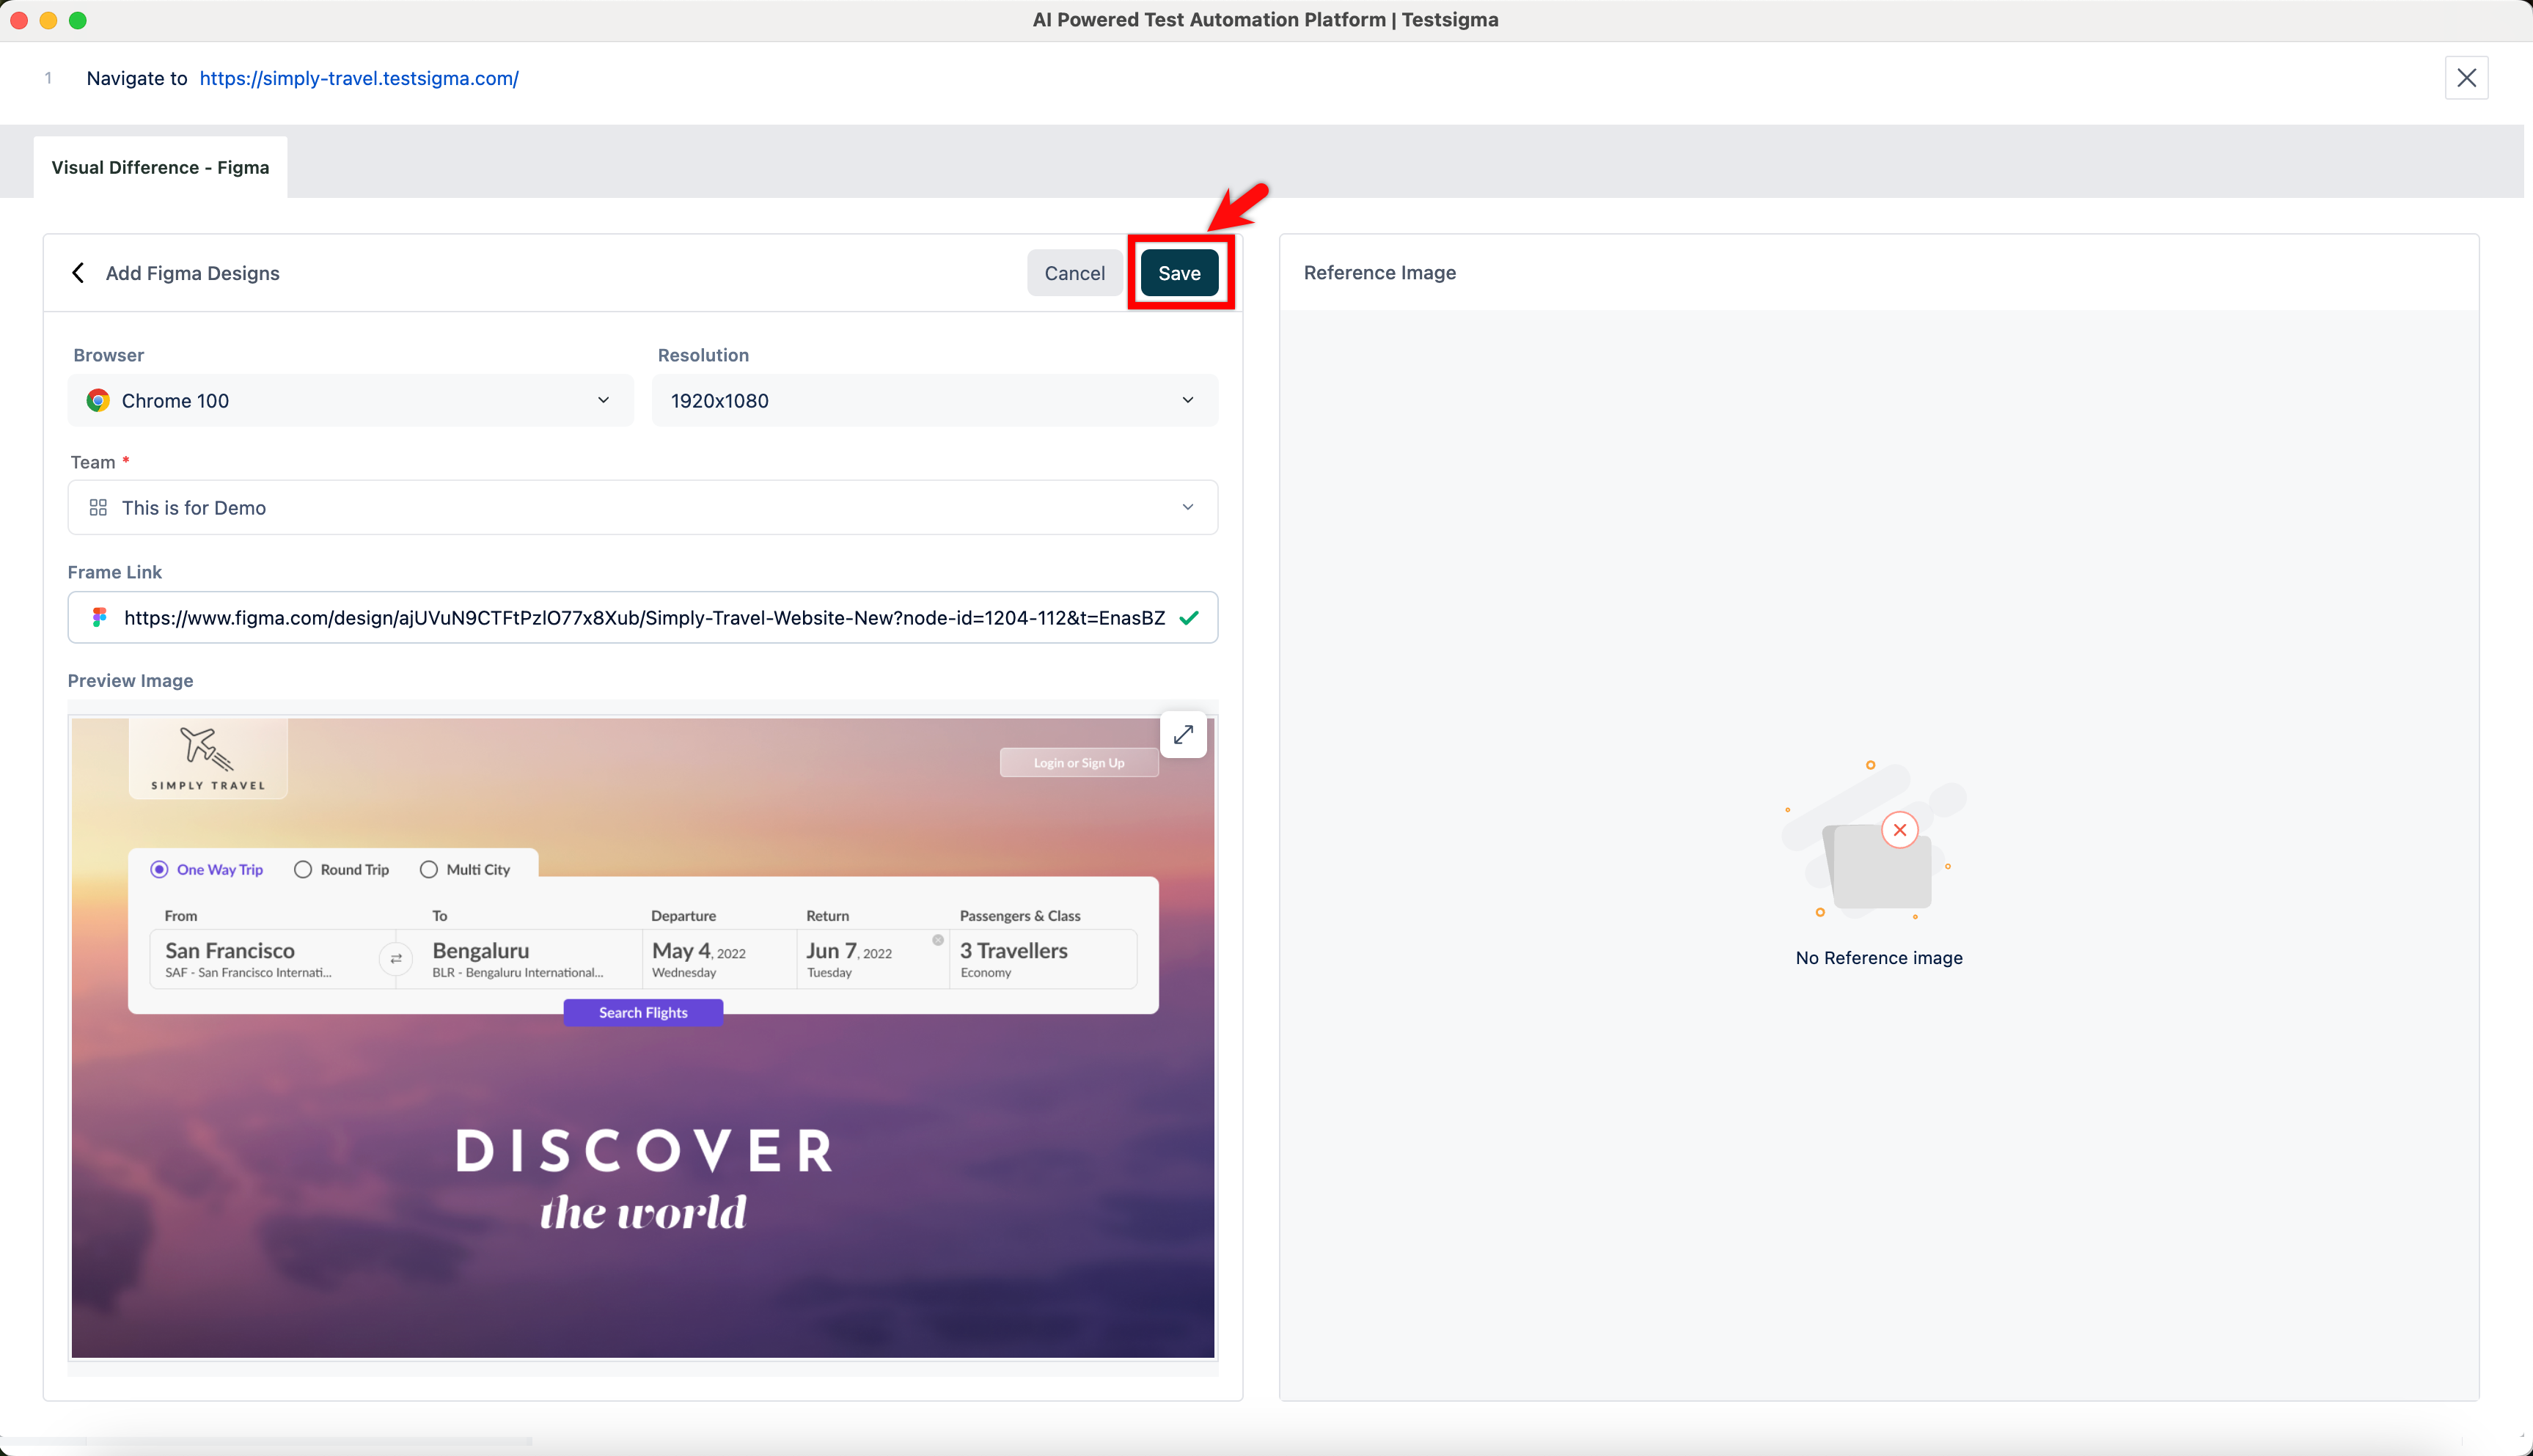
Click Save.
-
Execute the test case. In the test step result, click the Camera icon, and then select the Visual Difference – Figma tab to view the visual testing results.