Test Cases
Image Injection
Testsigma enables you to enhance your testing process by inserting images into your test steps through Image Injection. This feature is handy for scenarios that require interactions with images, QR codes, or visual elements within your application. This documentation will guide you through both methods of injecting images into your test case: manual image upload and camera image injection while recording.
Prerequisites
Before you begin, ensure that you have referred to:
- Documentation on creating test cases.
- Documentation on creating test steps.
- Documentation on creating projects.
- Documentation on creating test data types.
- Documentation on uploading applications.
- Documentation on uploading files.
- Documentation on recording steps for android.
- Documentation on recording steps for iOS.
- Documentation on performing Ad-Hoc runs in android.
- Documentation on performing Ad-Hoc runs in iOS.
Manual Image Injection using NLP
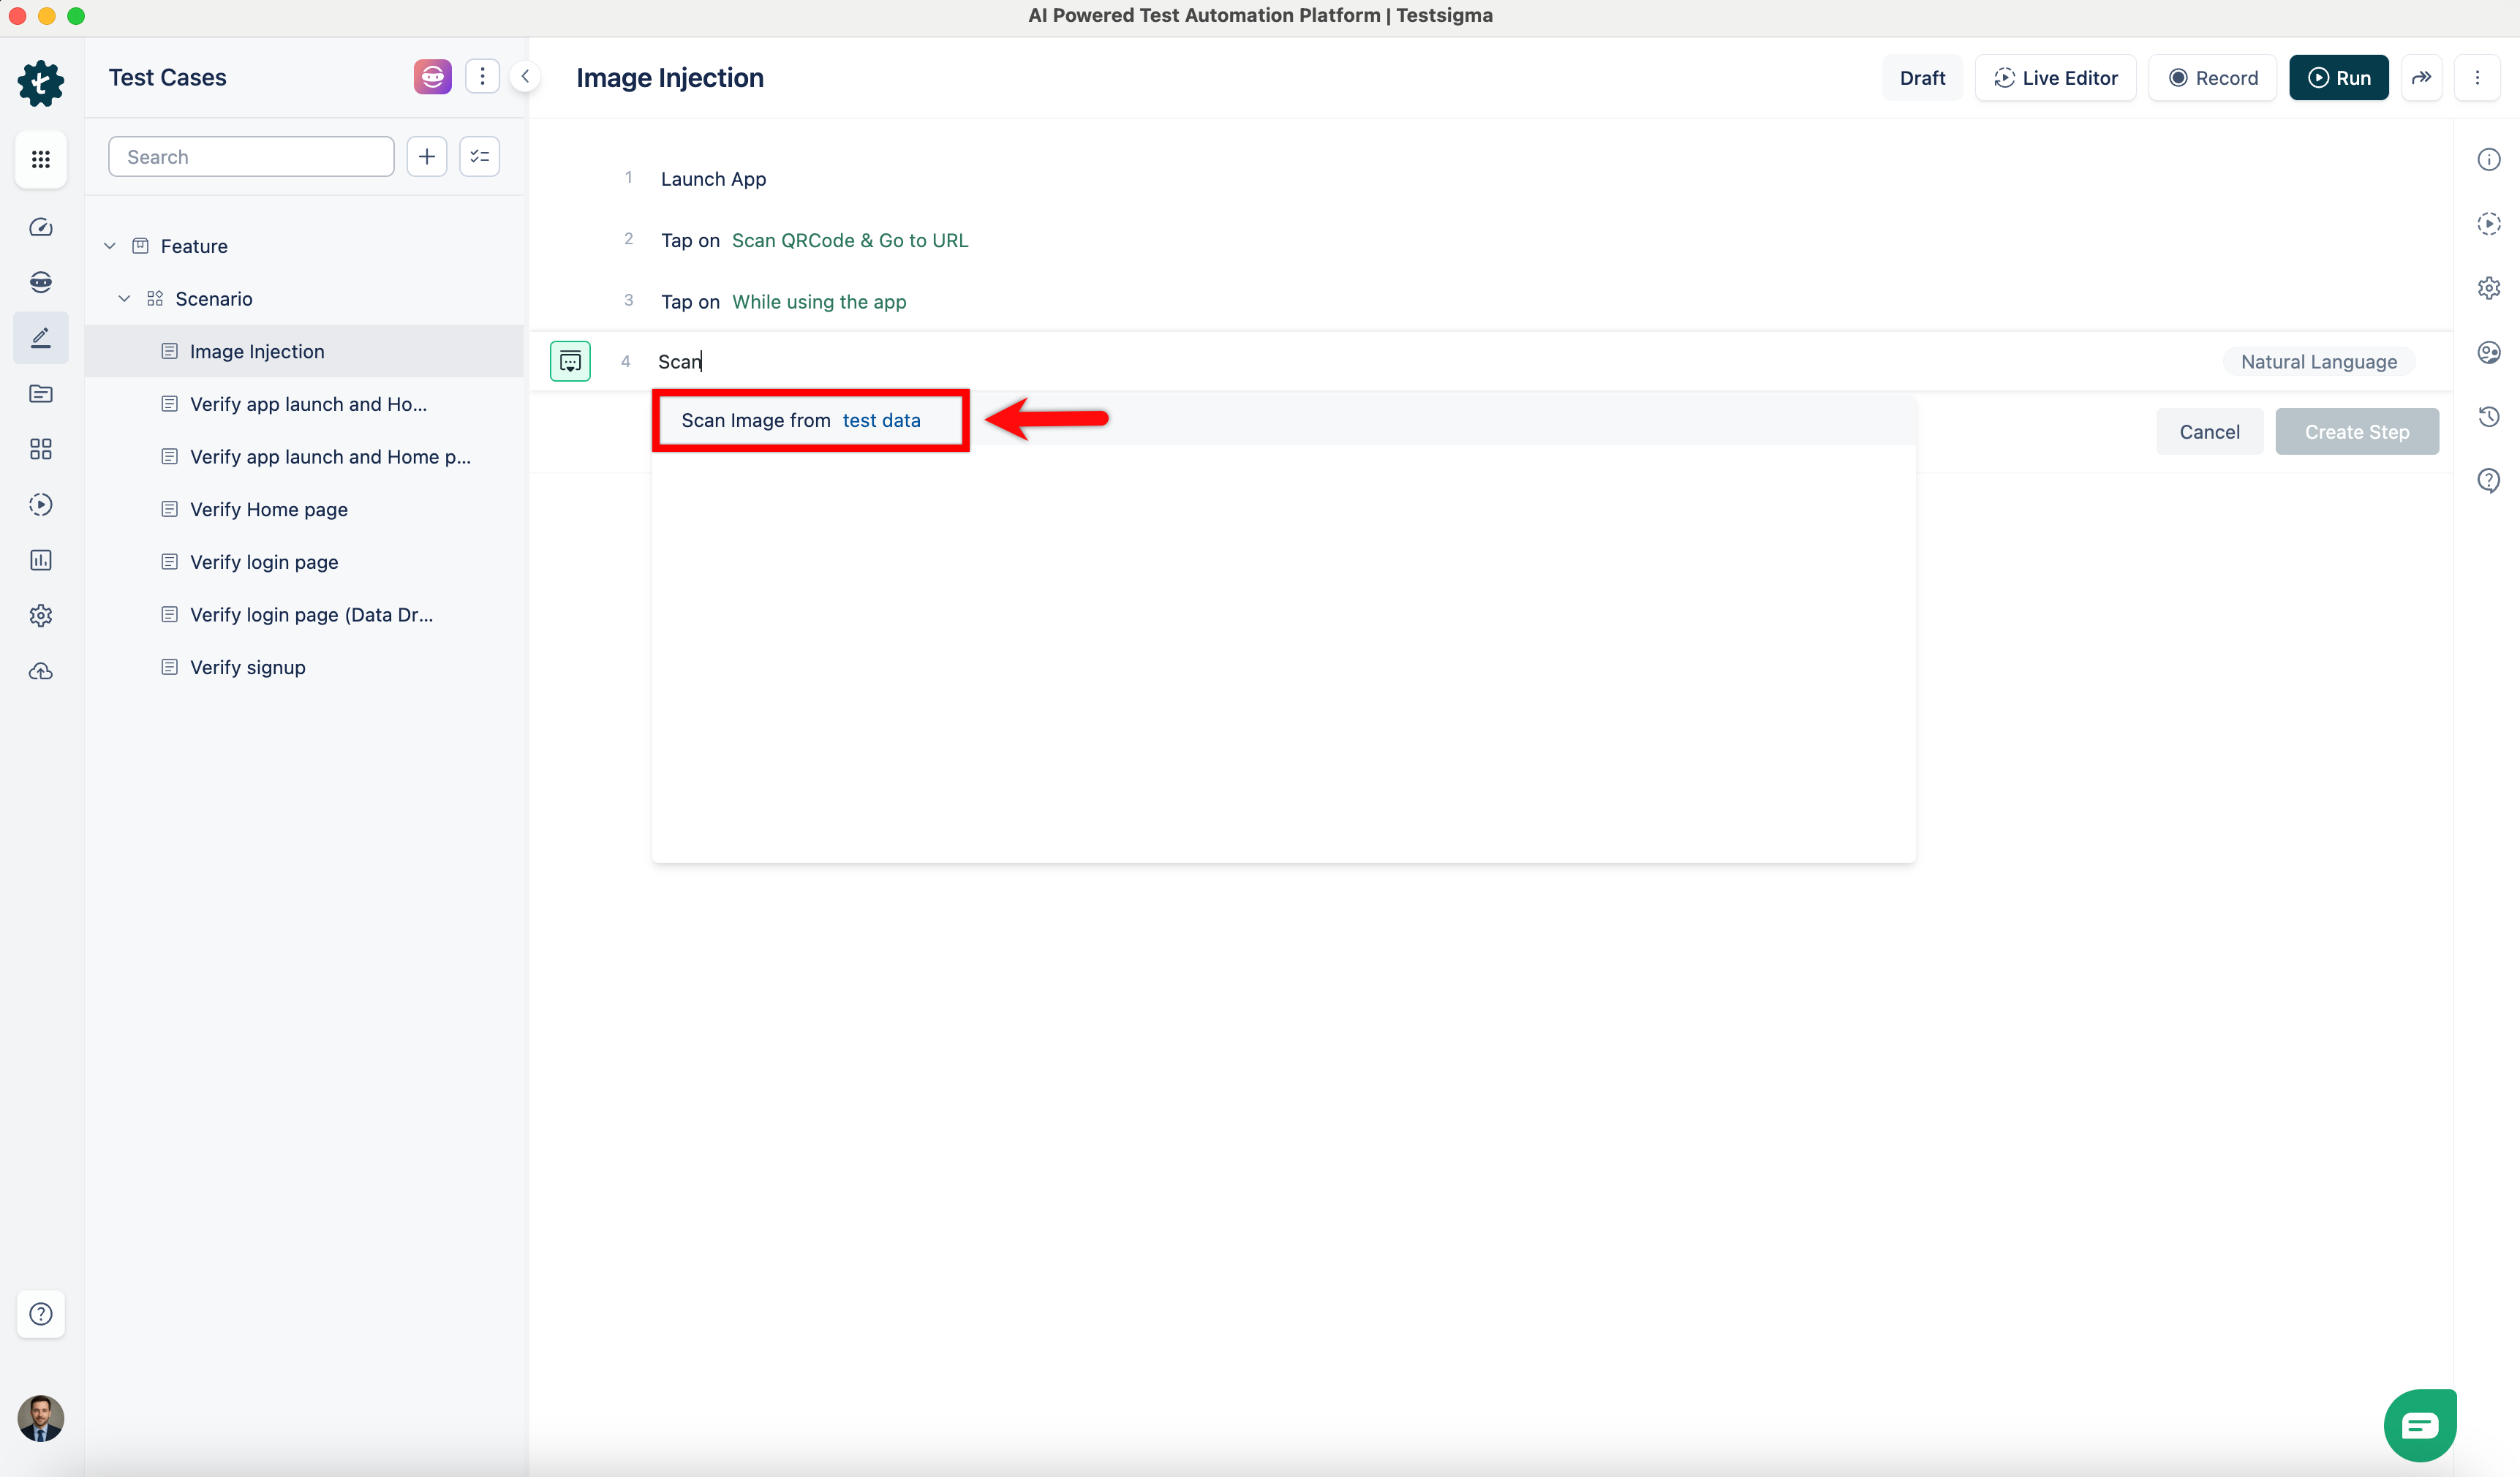
Section titled “Manual Image Injection using NLP”You can manually add image injection to test steps using NLPs. Use the NLP to have the placeholders for test data and replace test data with the ˄ Upload to add QR code images stored in your uploads.
-
Use the NLP - Scan image from test data from the dropdown list of suggestions that appears in the test step by searching.
-
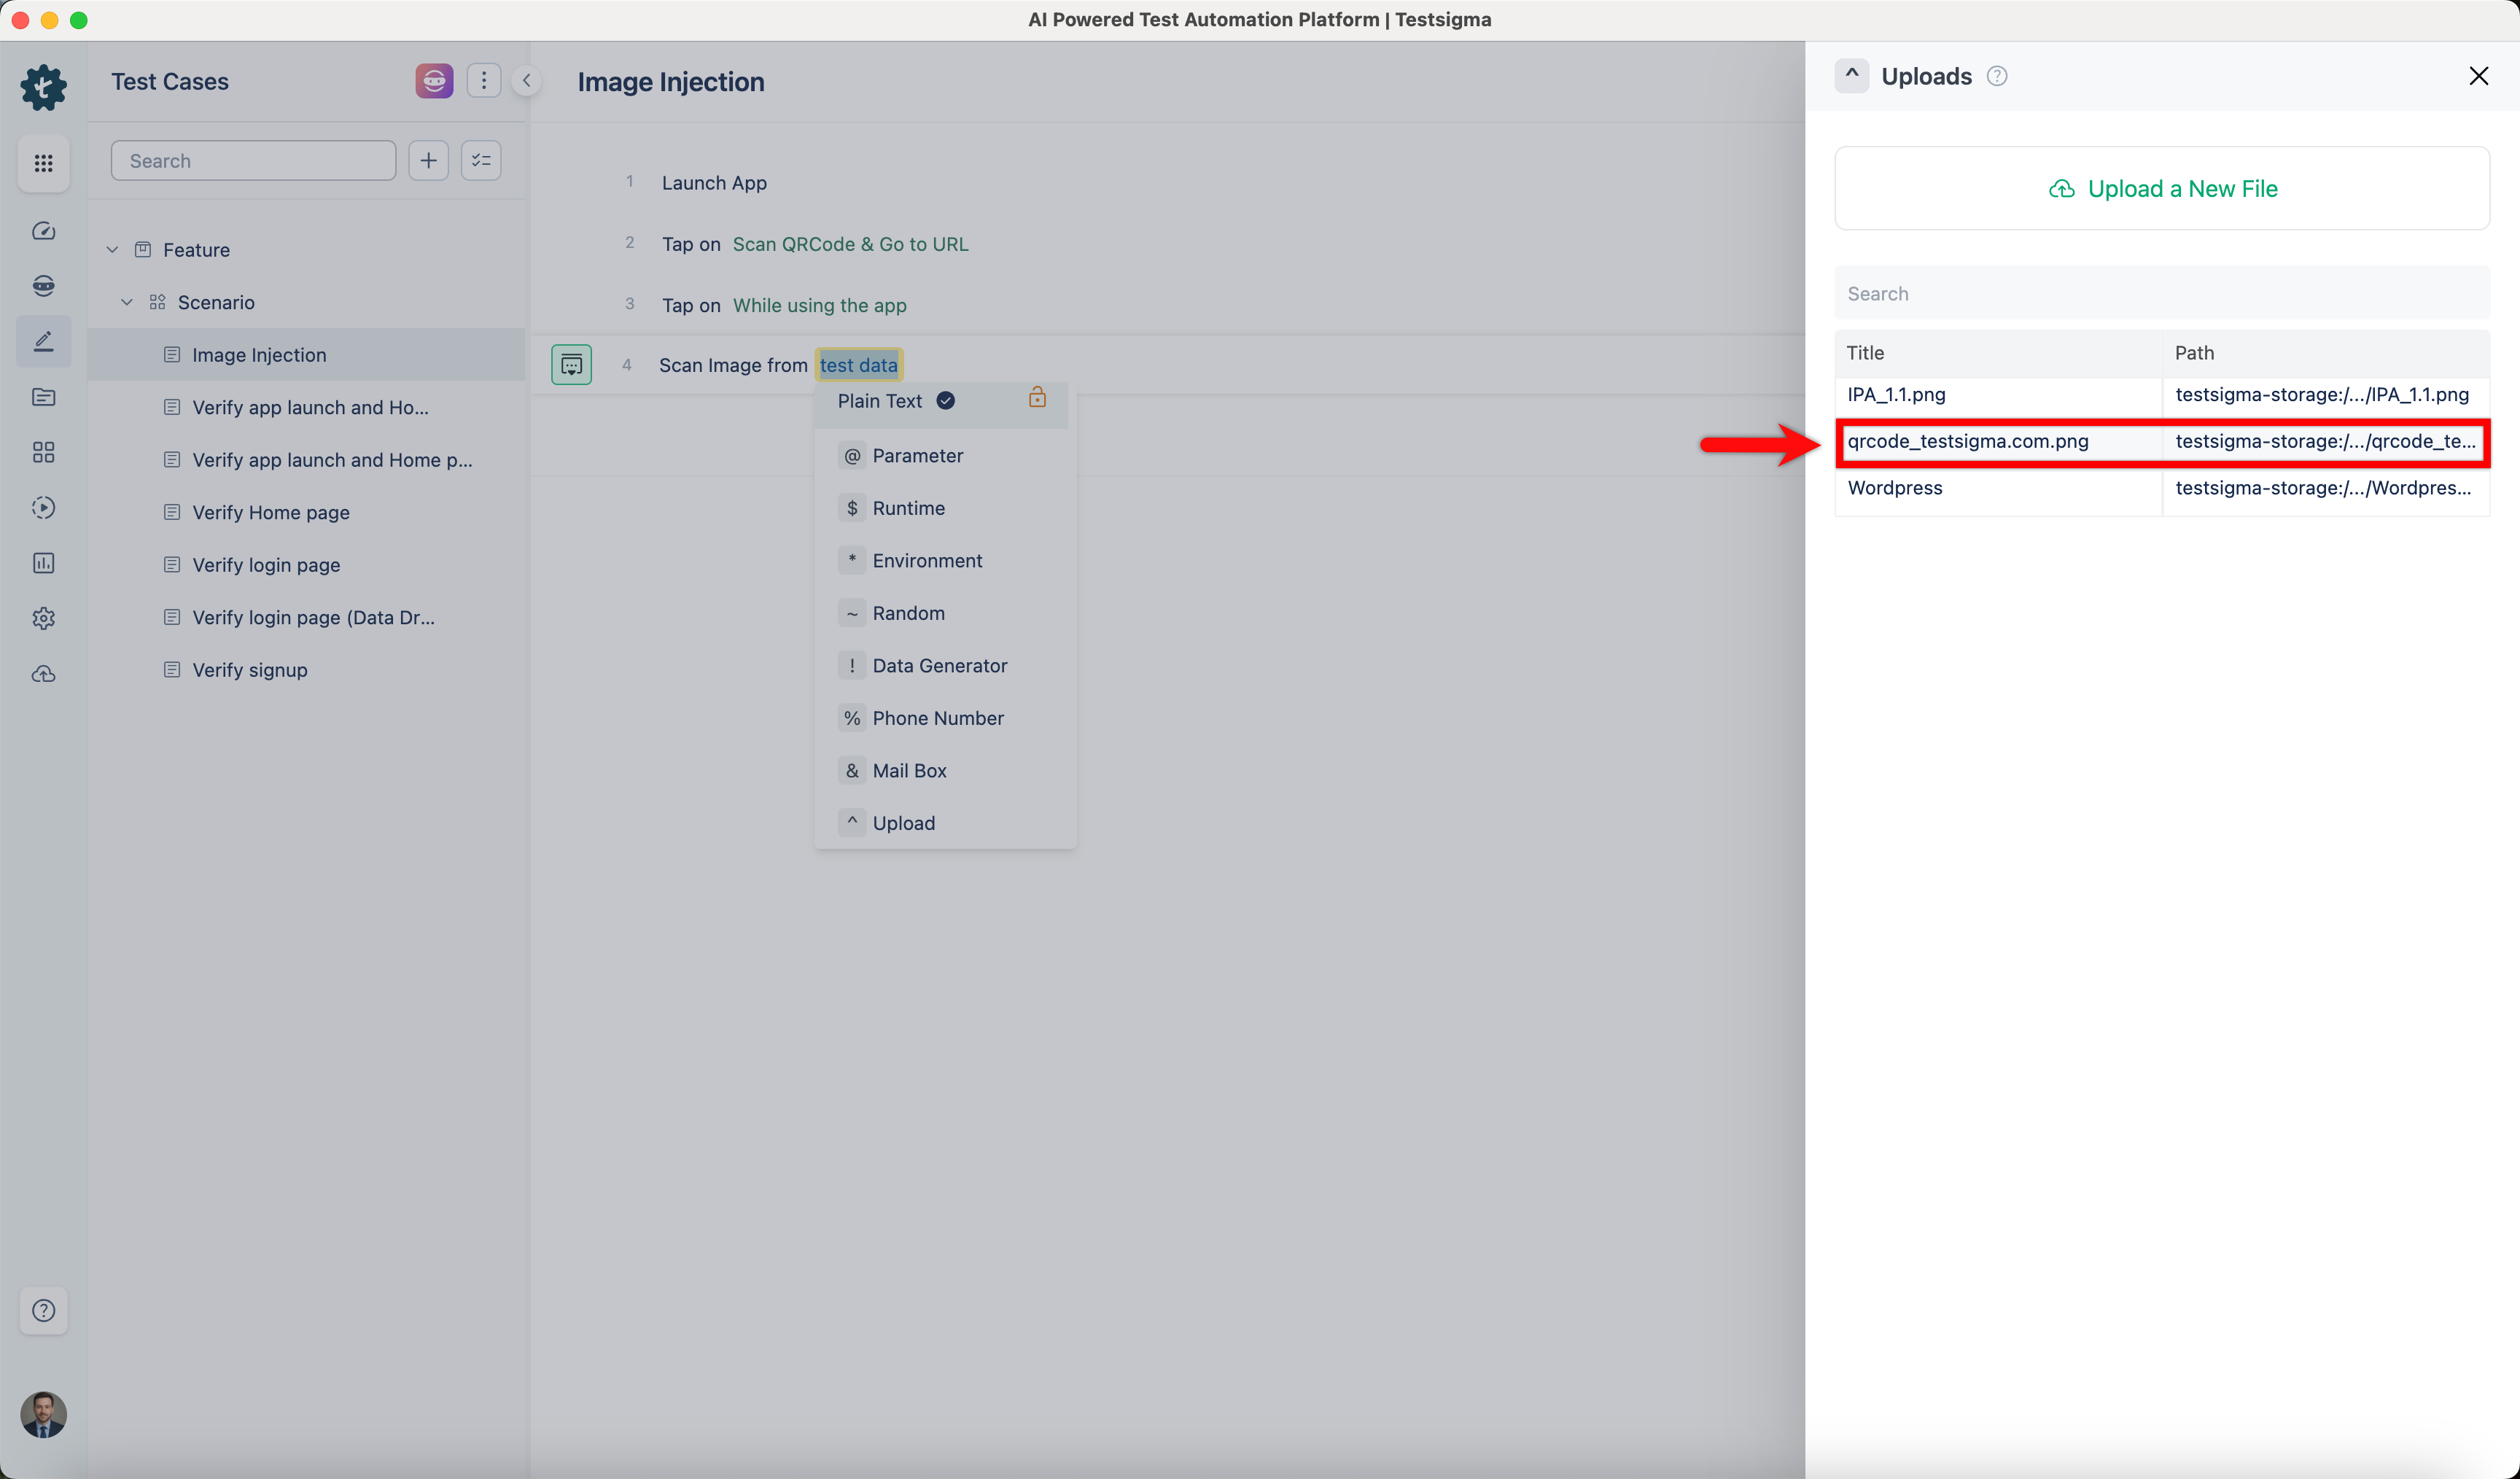
Click the test data placeholder to replace it by selecting the ˄ Upload from the Test Data Types dropdown menu.

-
Select the file you want to add to the test step from the ˄ Uploads section on the right side of the screen.
-
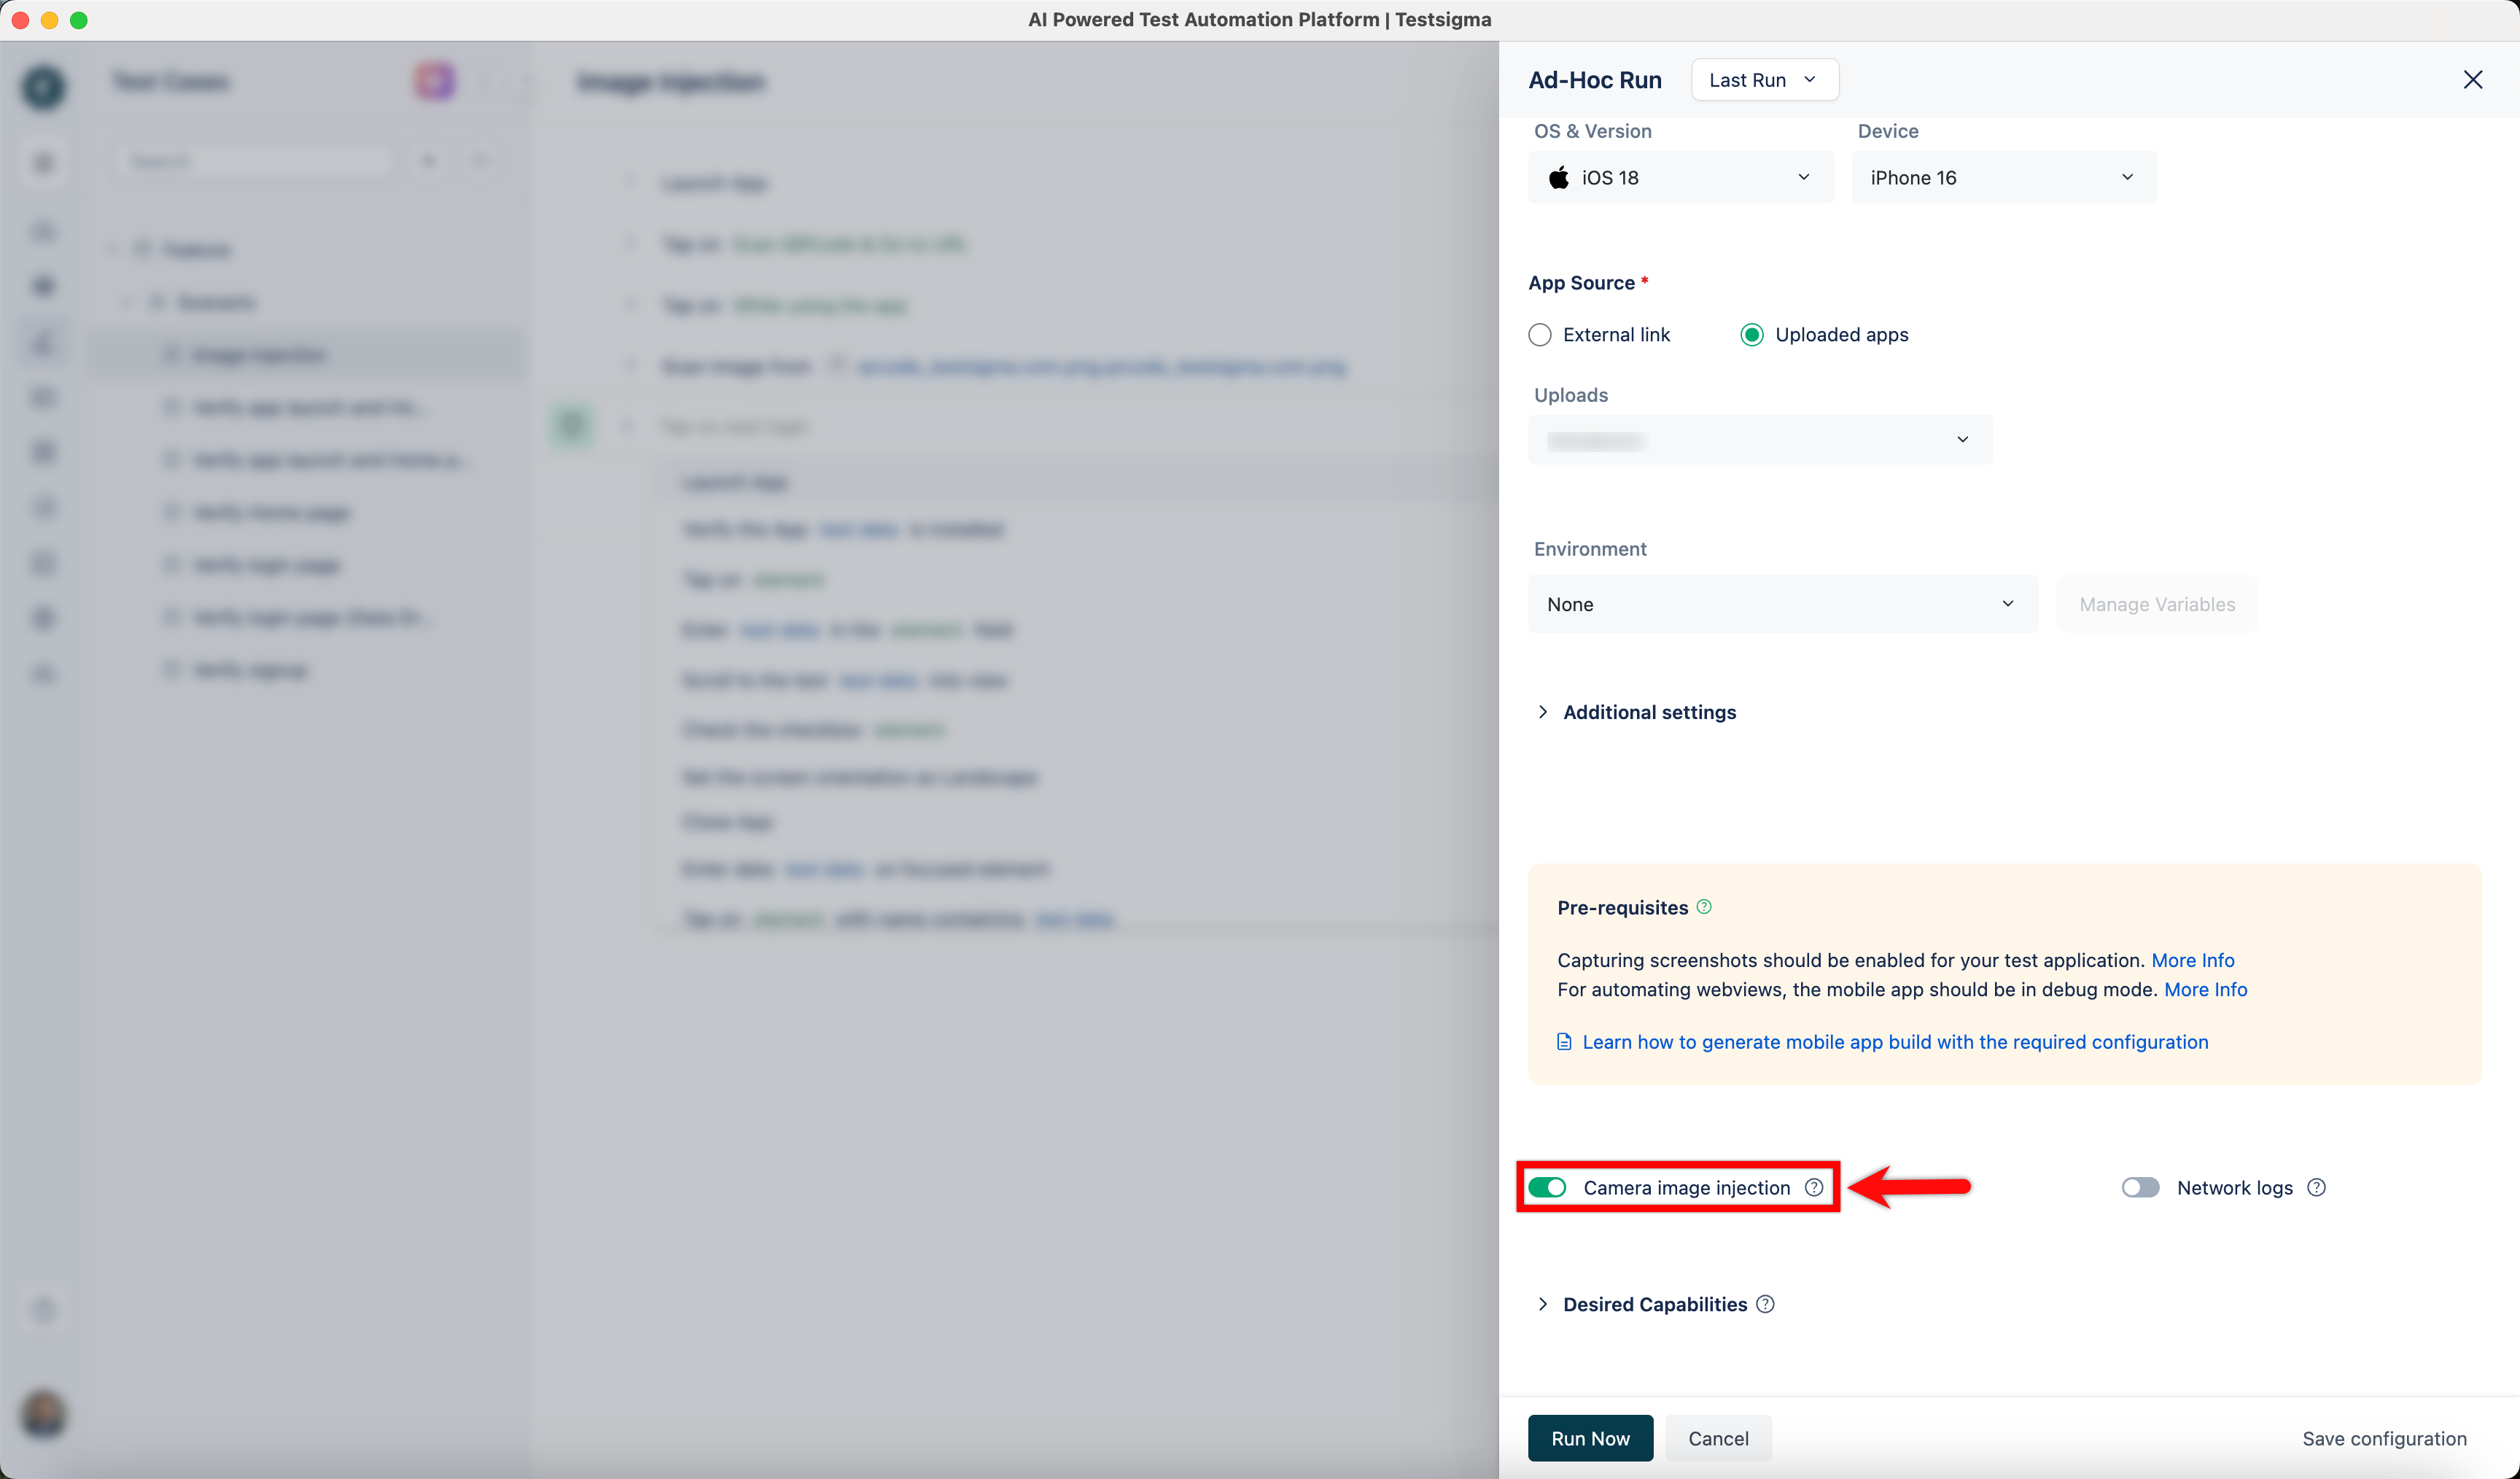
Remember to enable the Camera Image Injection toggle in the Ad-hoc runs page.
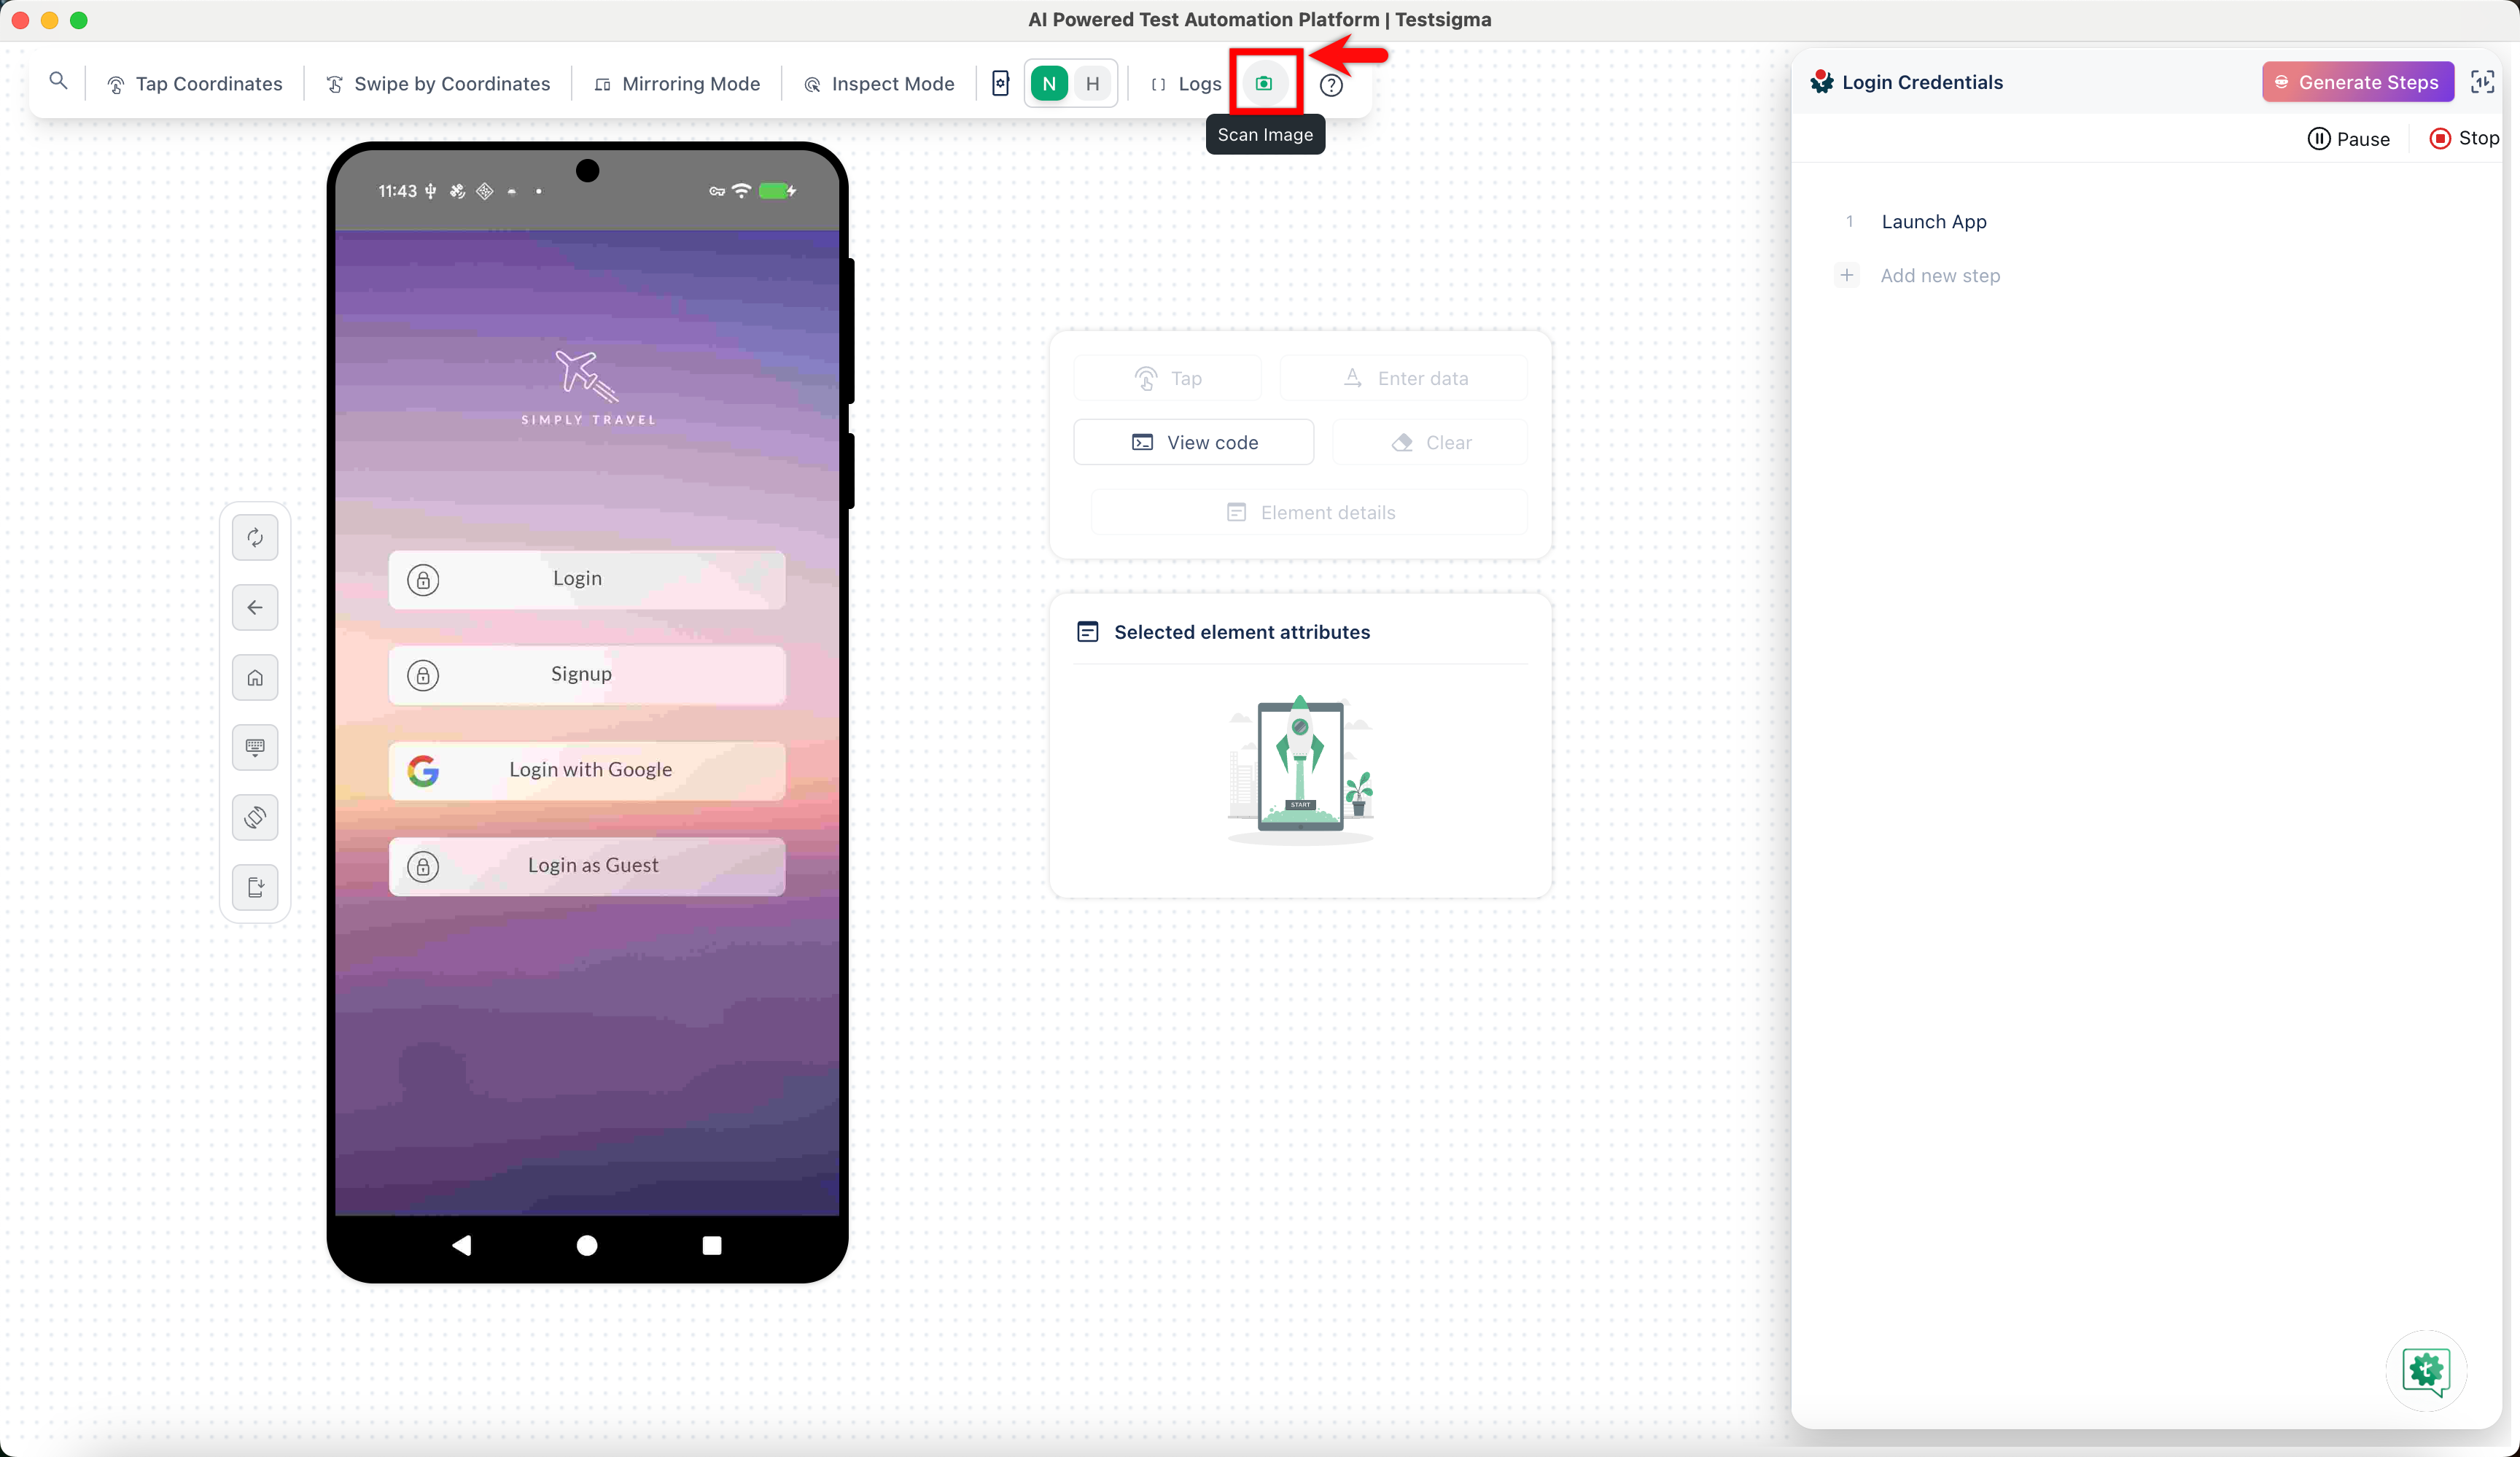
Camera Image Injection during Recording
Section titled “Camera Image Injection during Recording”Simplify the image injection process during the test step recording using the camera image injection feature to insert QR code images directly.
-
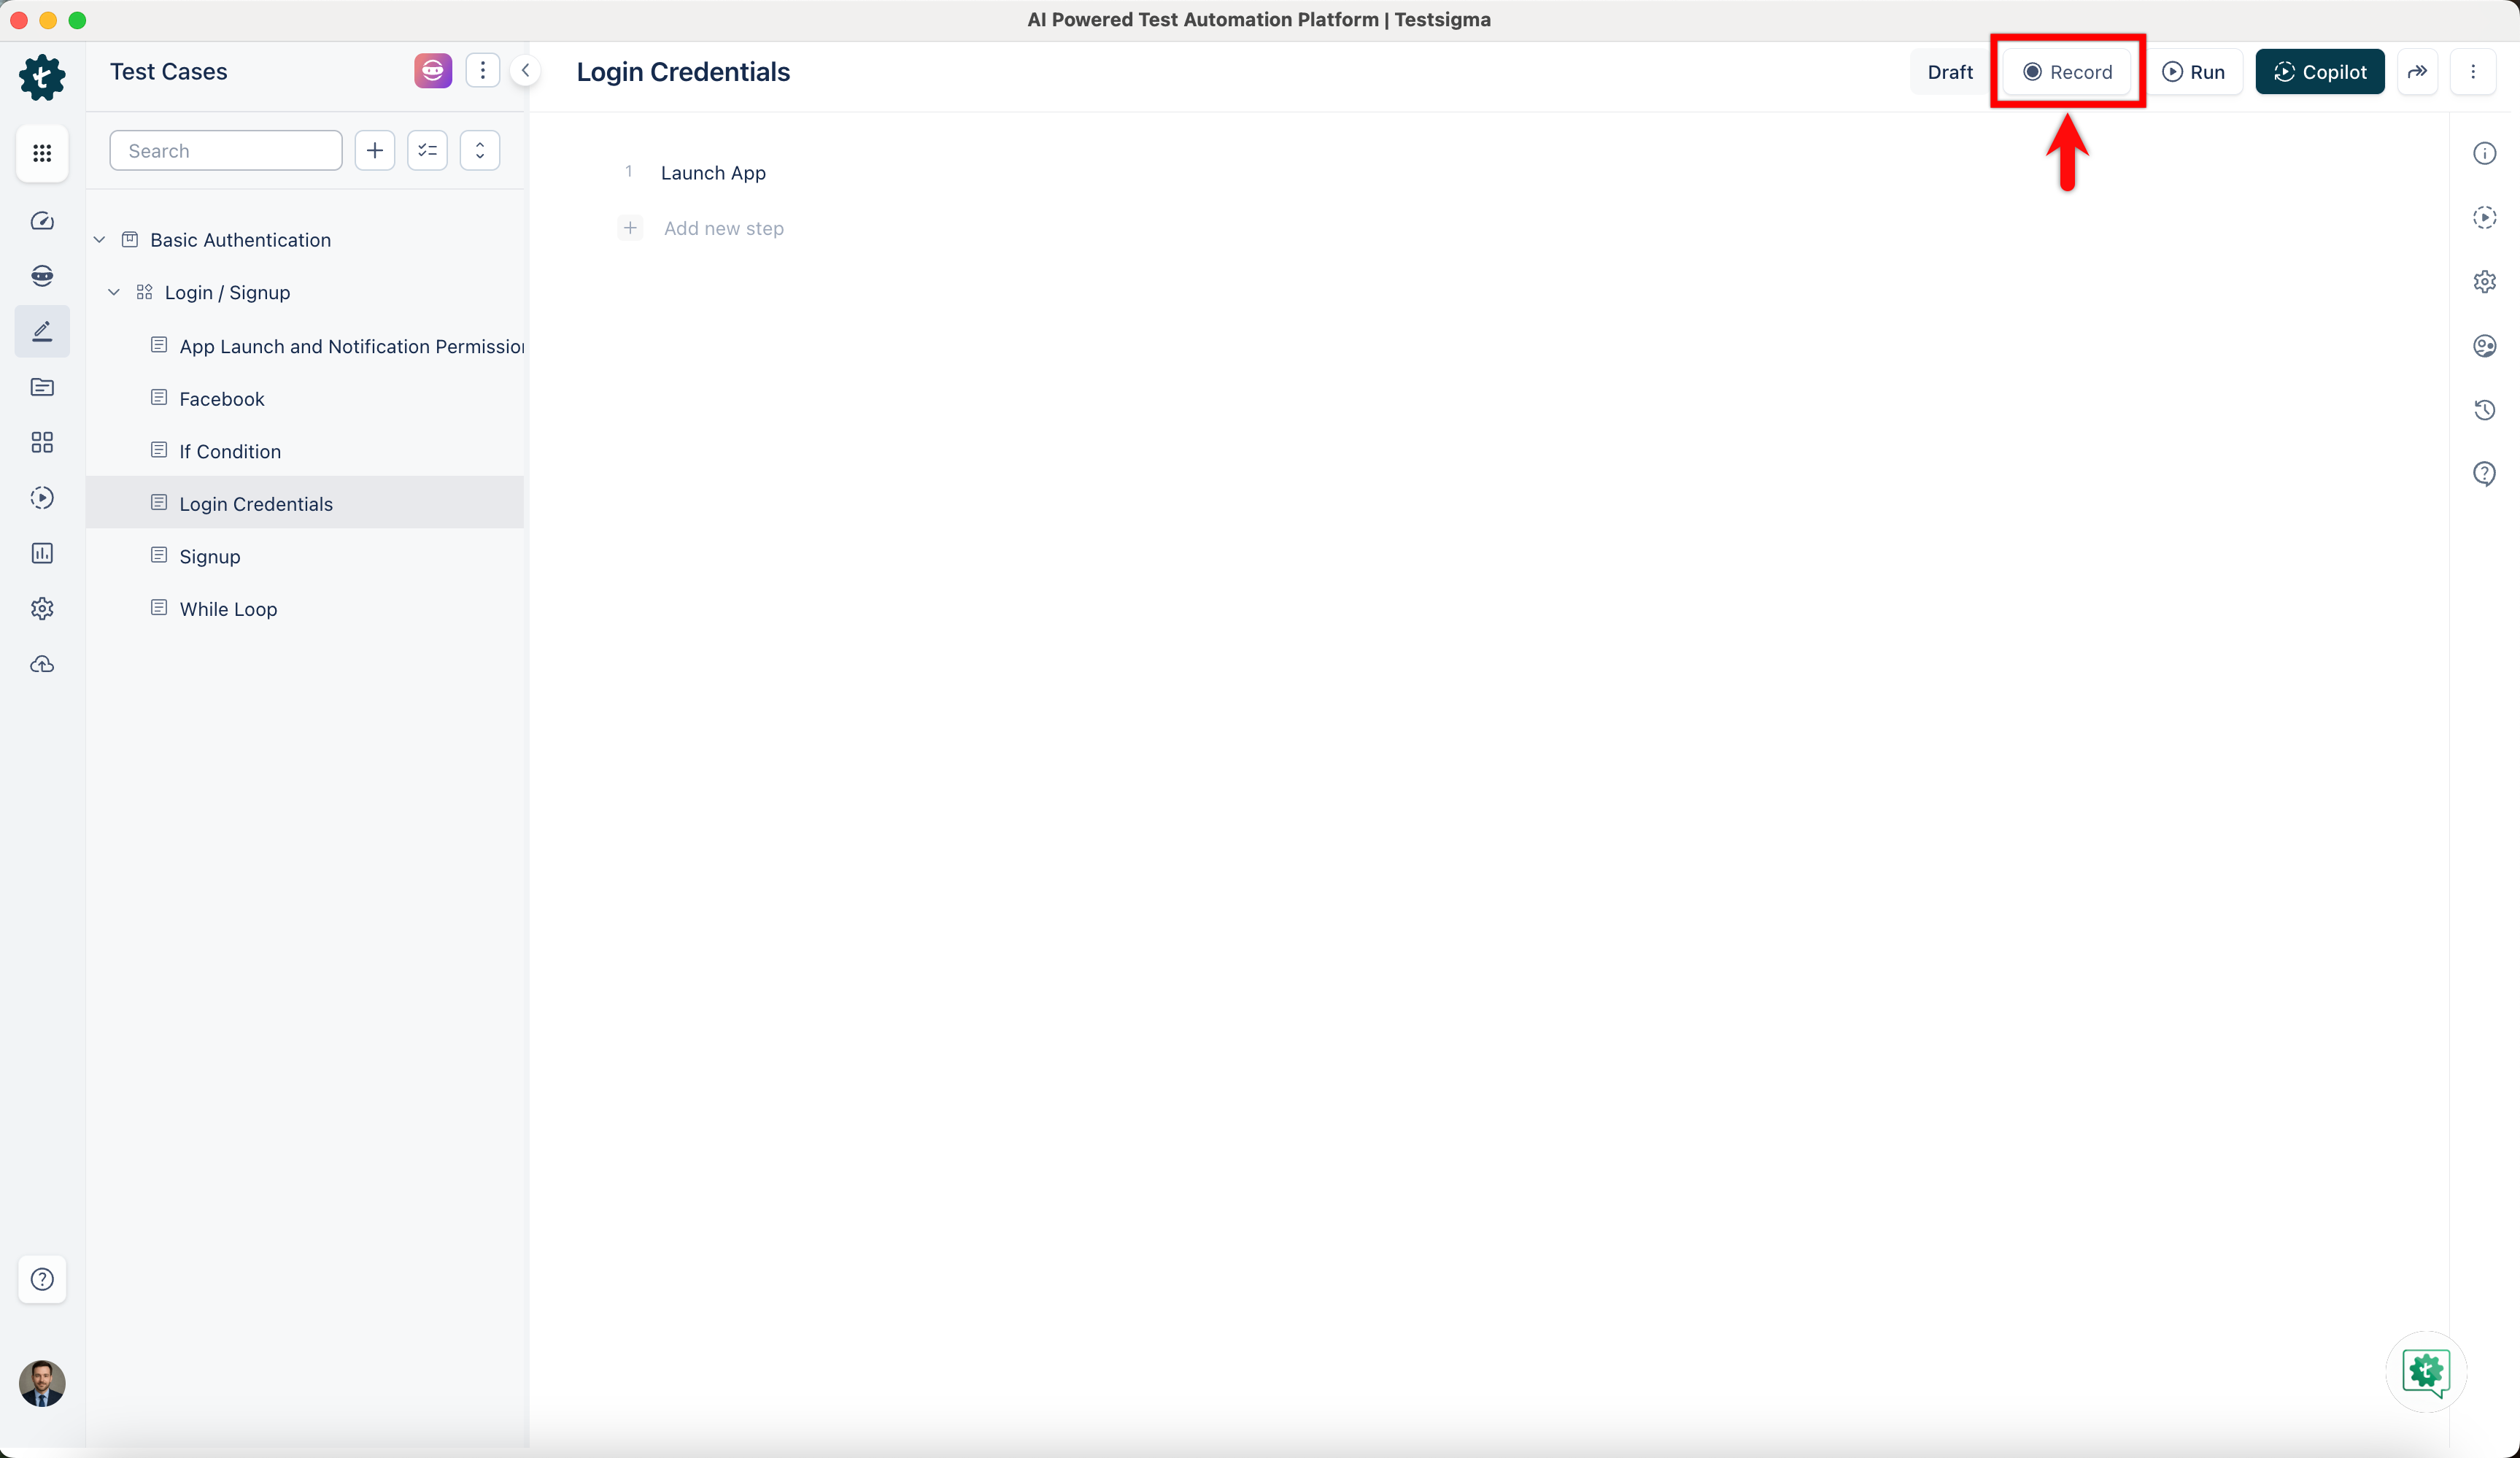
Click the Record button at the screen’s top right corner to bring up the Record Test Steps overlay.
-
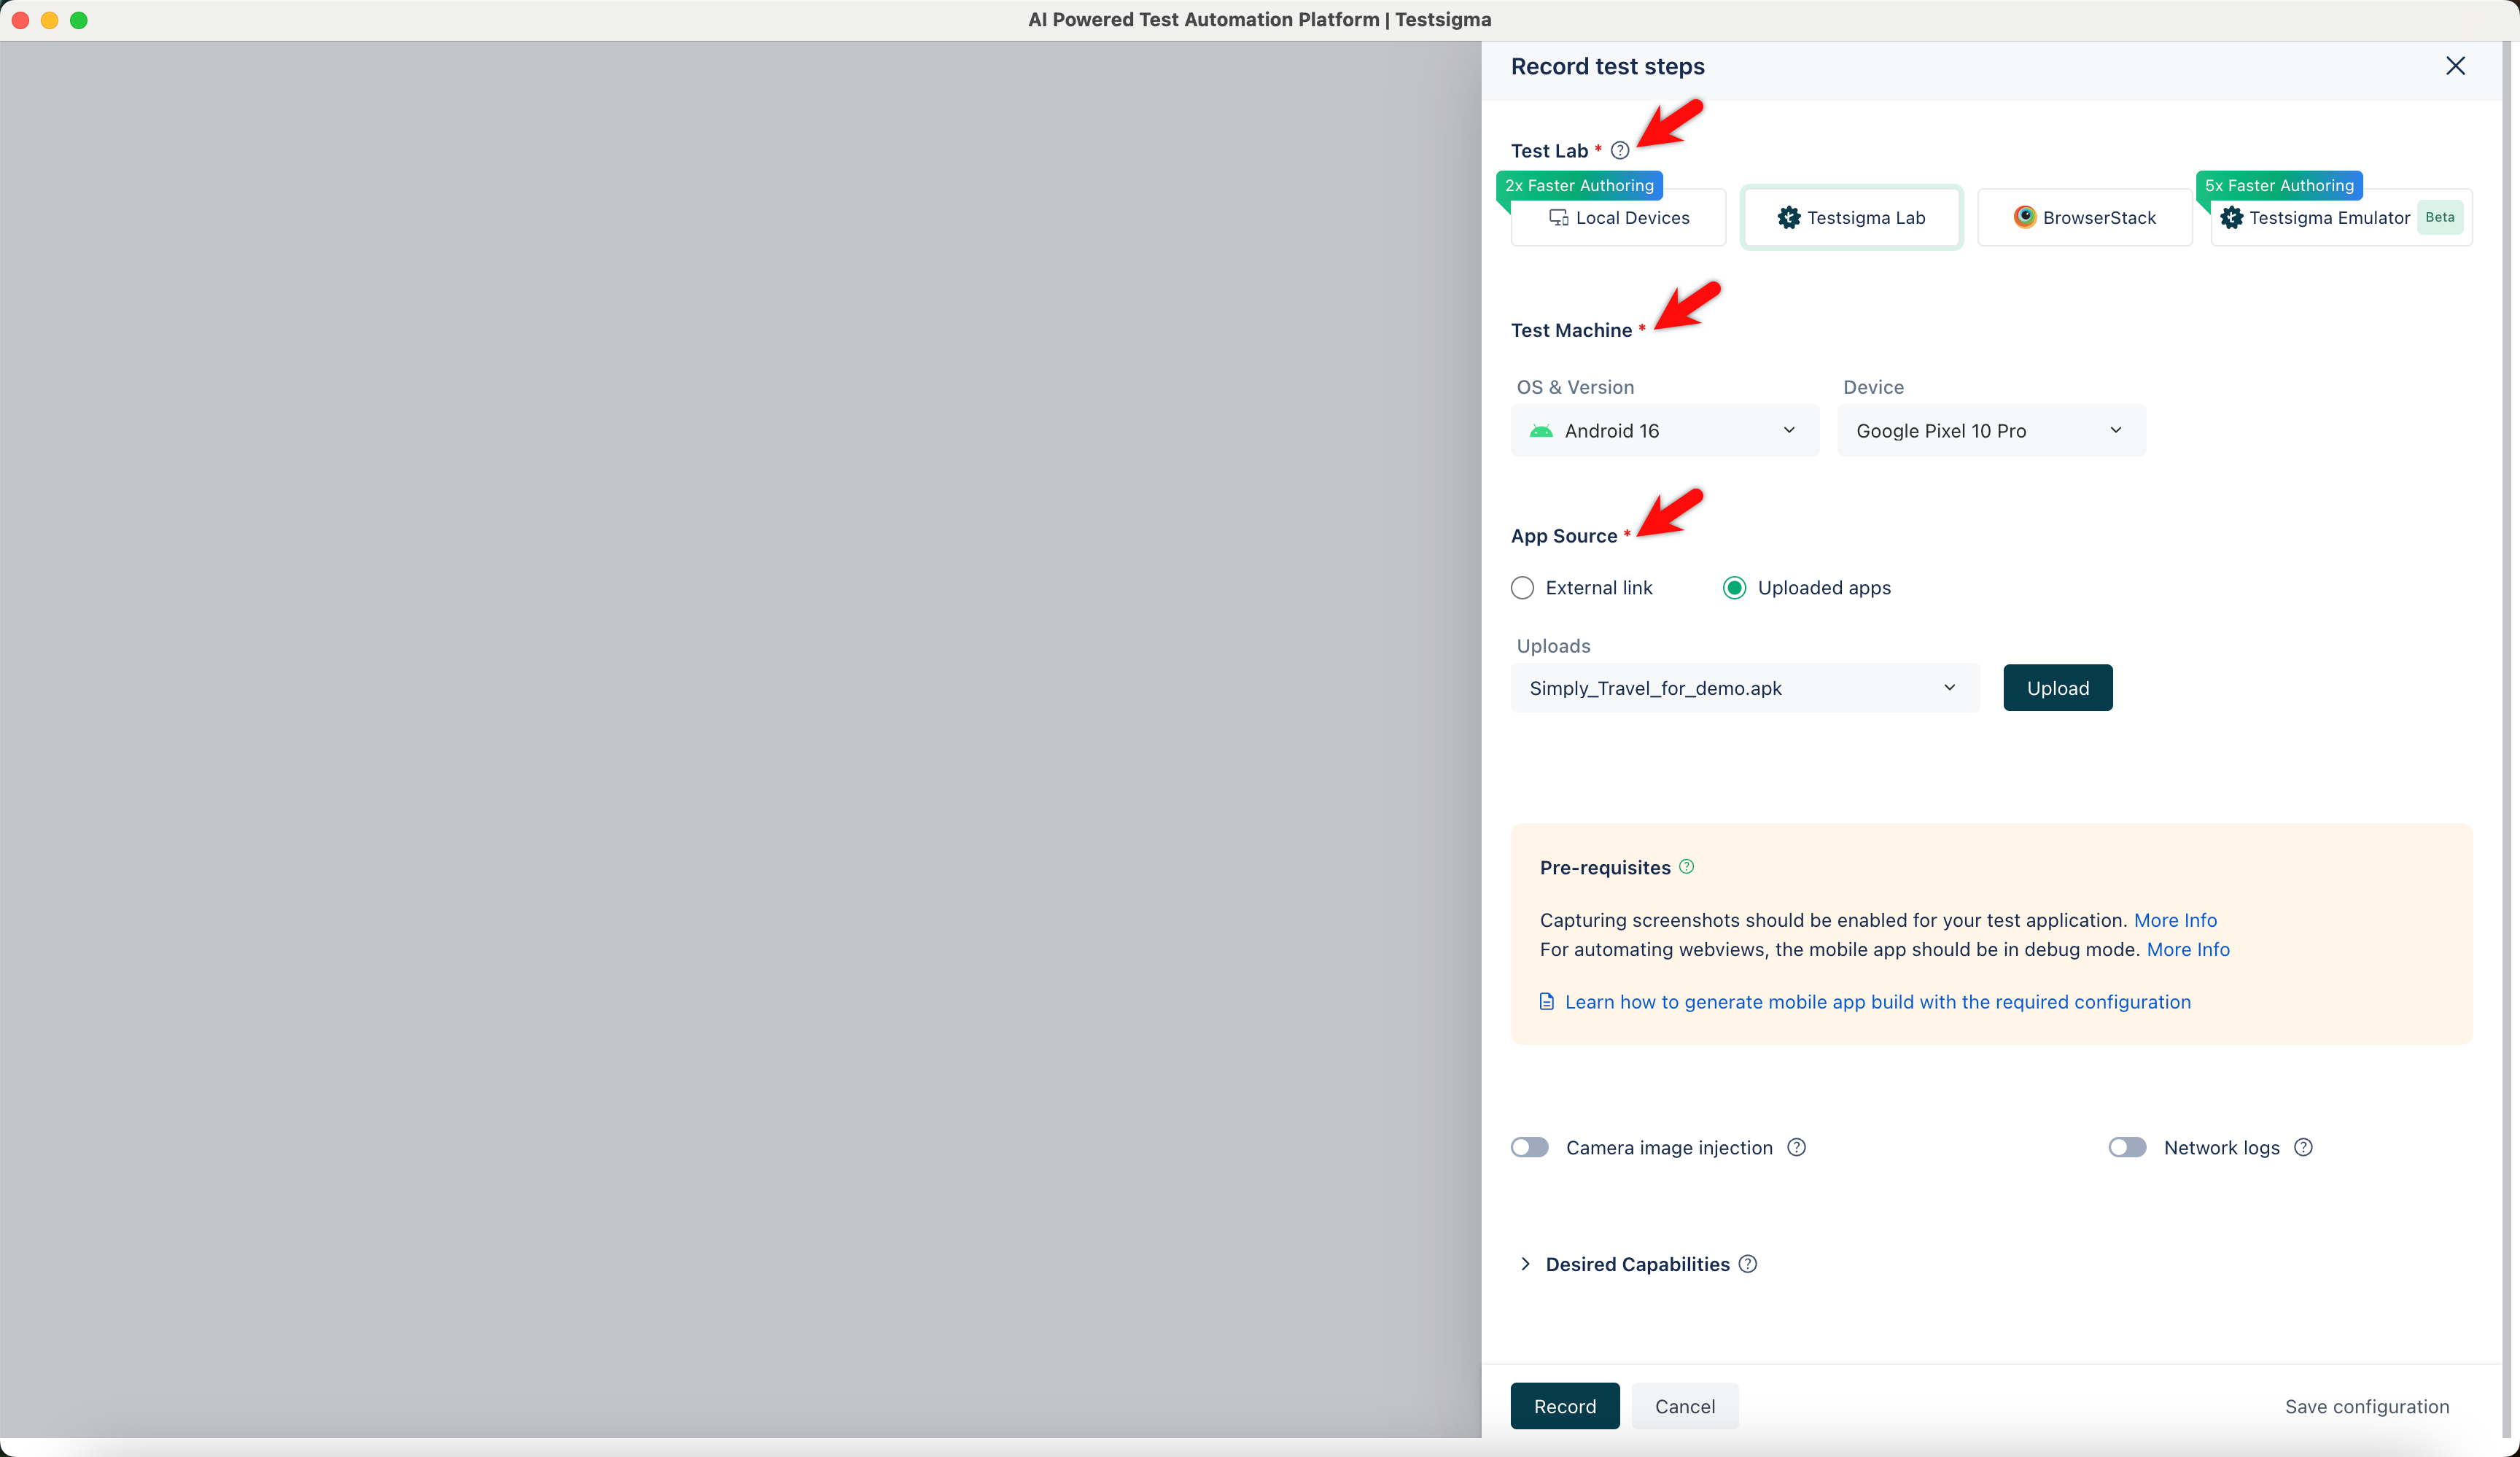
Choose the Test Lab, Test Machine, and App Source.
-
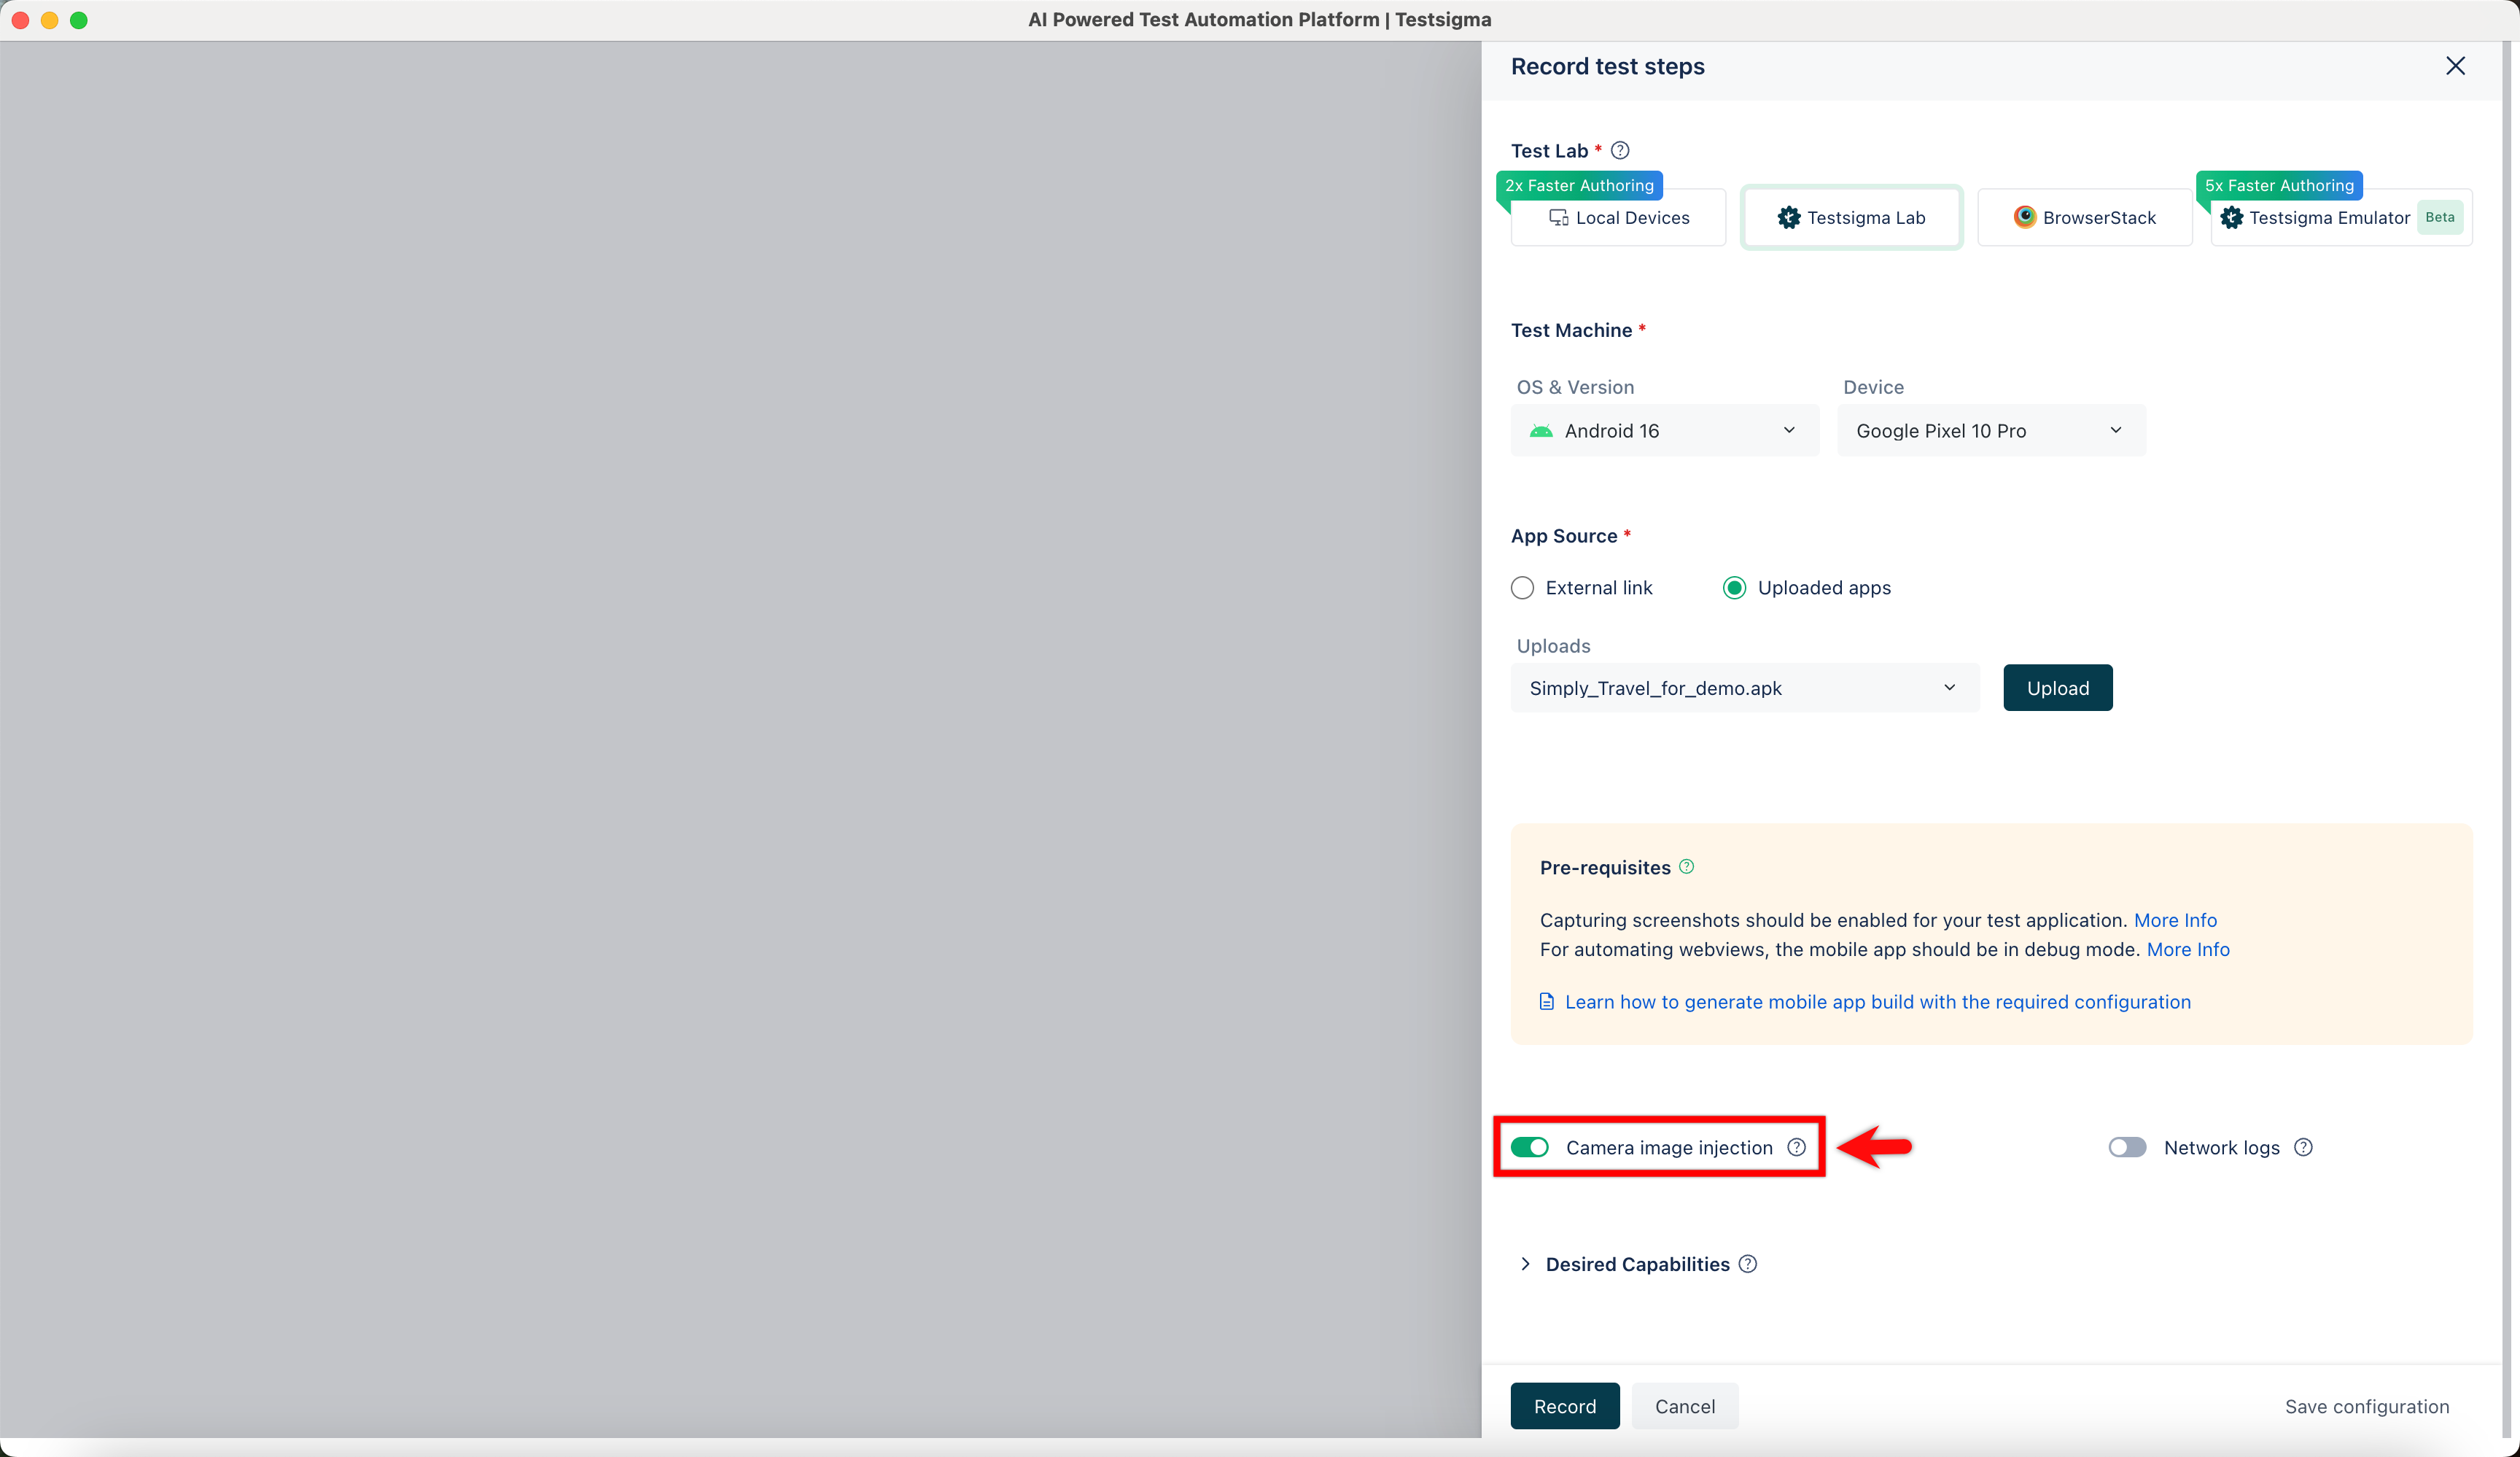
Enable the toggle button for Camera Image Injection while recording test steps.
-
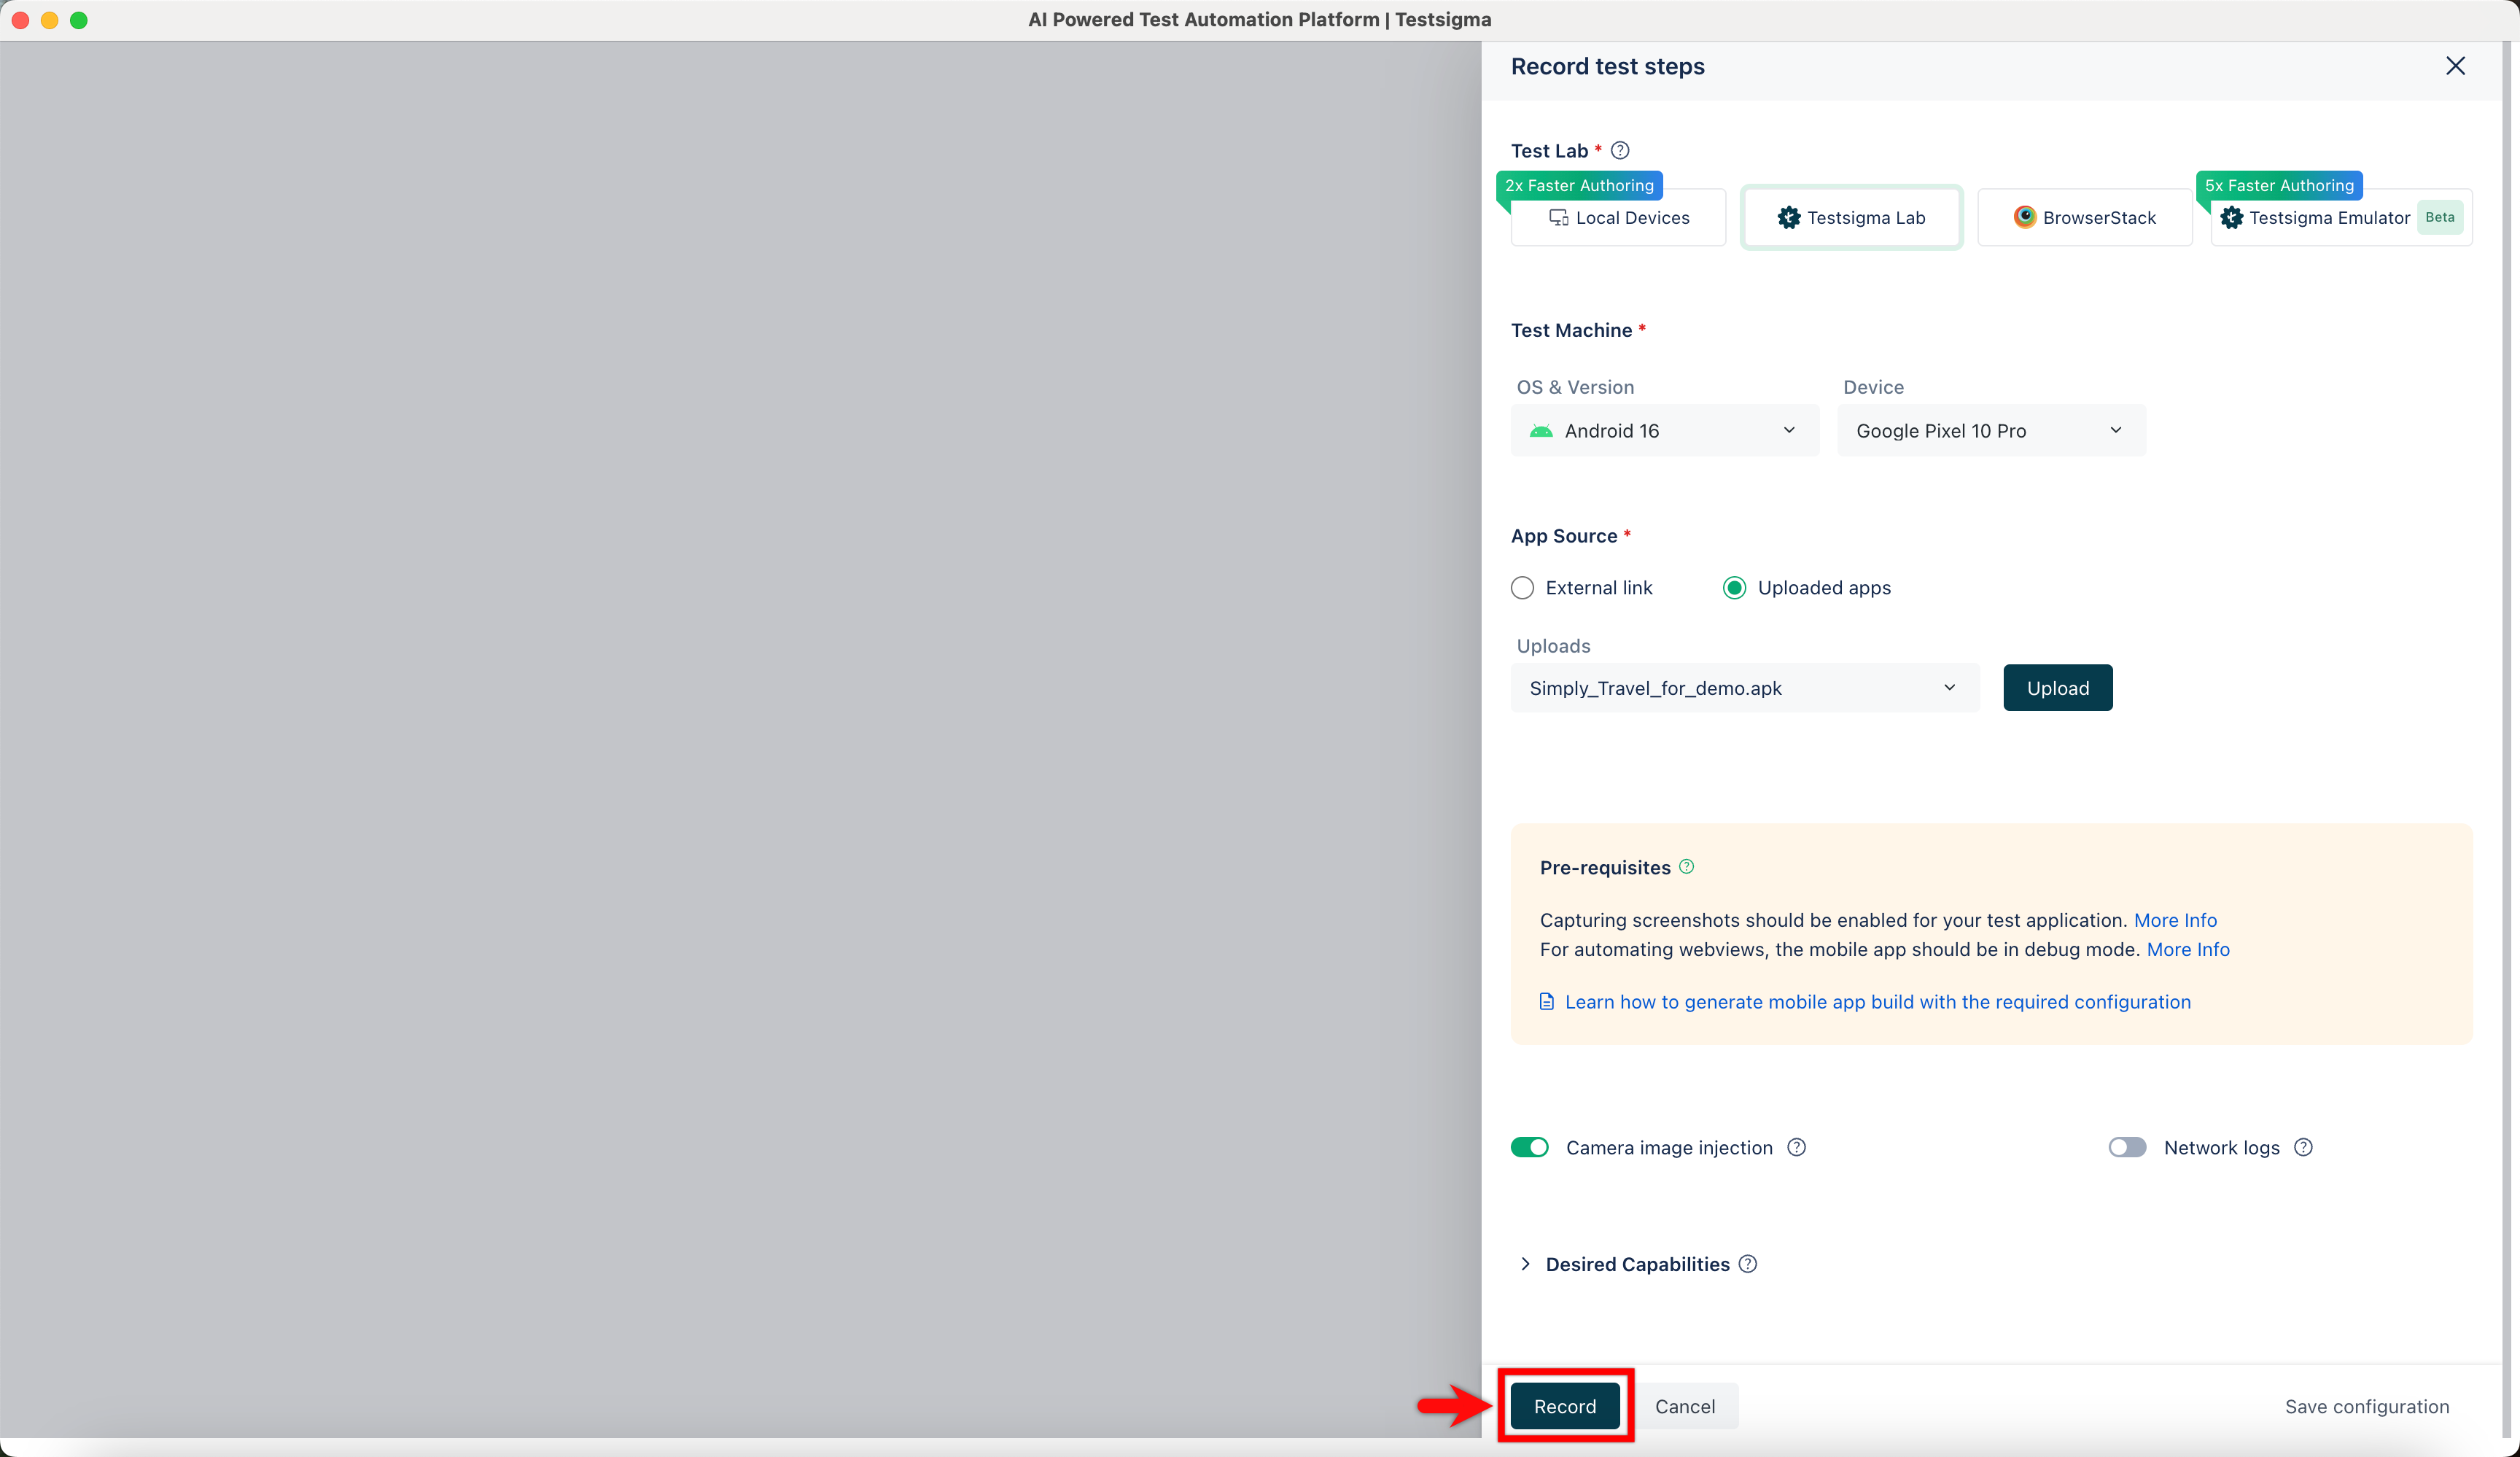
Start recording the test step by clicking the Record button again.
-
Click the Scan Image (Camera) icon in the right sidebar of the Recording page to upload the QR code image. Select the file you want to add to the test step from the ˄ Uploads overlay.