Test Suites
Dynamic Test Suites
Dynamic Test Suites in Testsigma provide an efficient way to streamline test execution by automatically selecting test cases based on predefined filters. Unlike Static test suites, where test cases are manually chosen, dynamic test suites continuously update to include all relevant test cases that match the applied filters.
Prerequisites
Before you begin, ensure that you have referred to:
Create a Dynamic Test Suite
Section titled “Create a Dynamic Test Suite”-
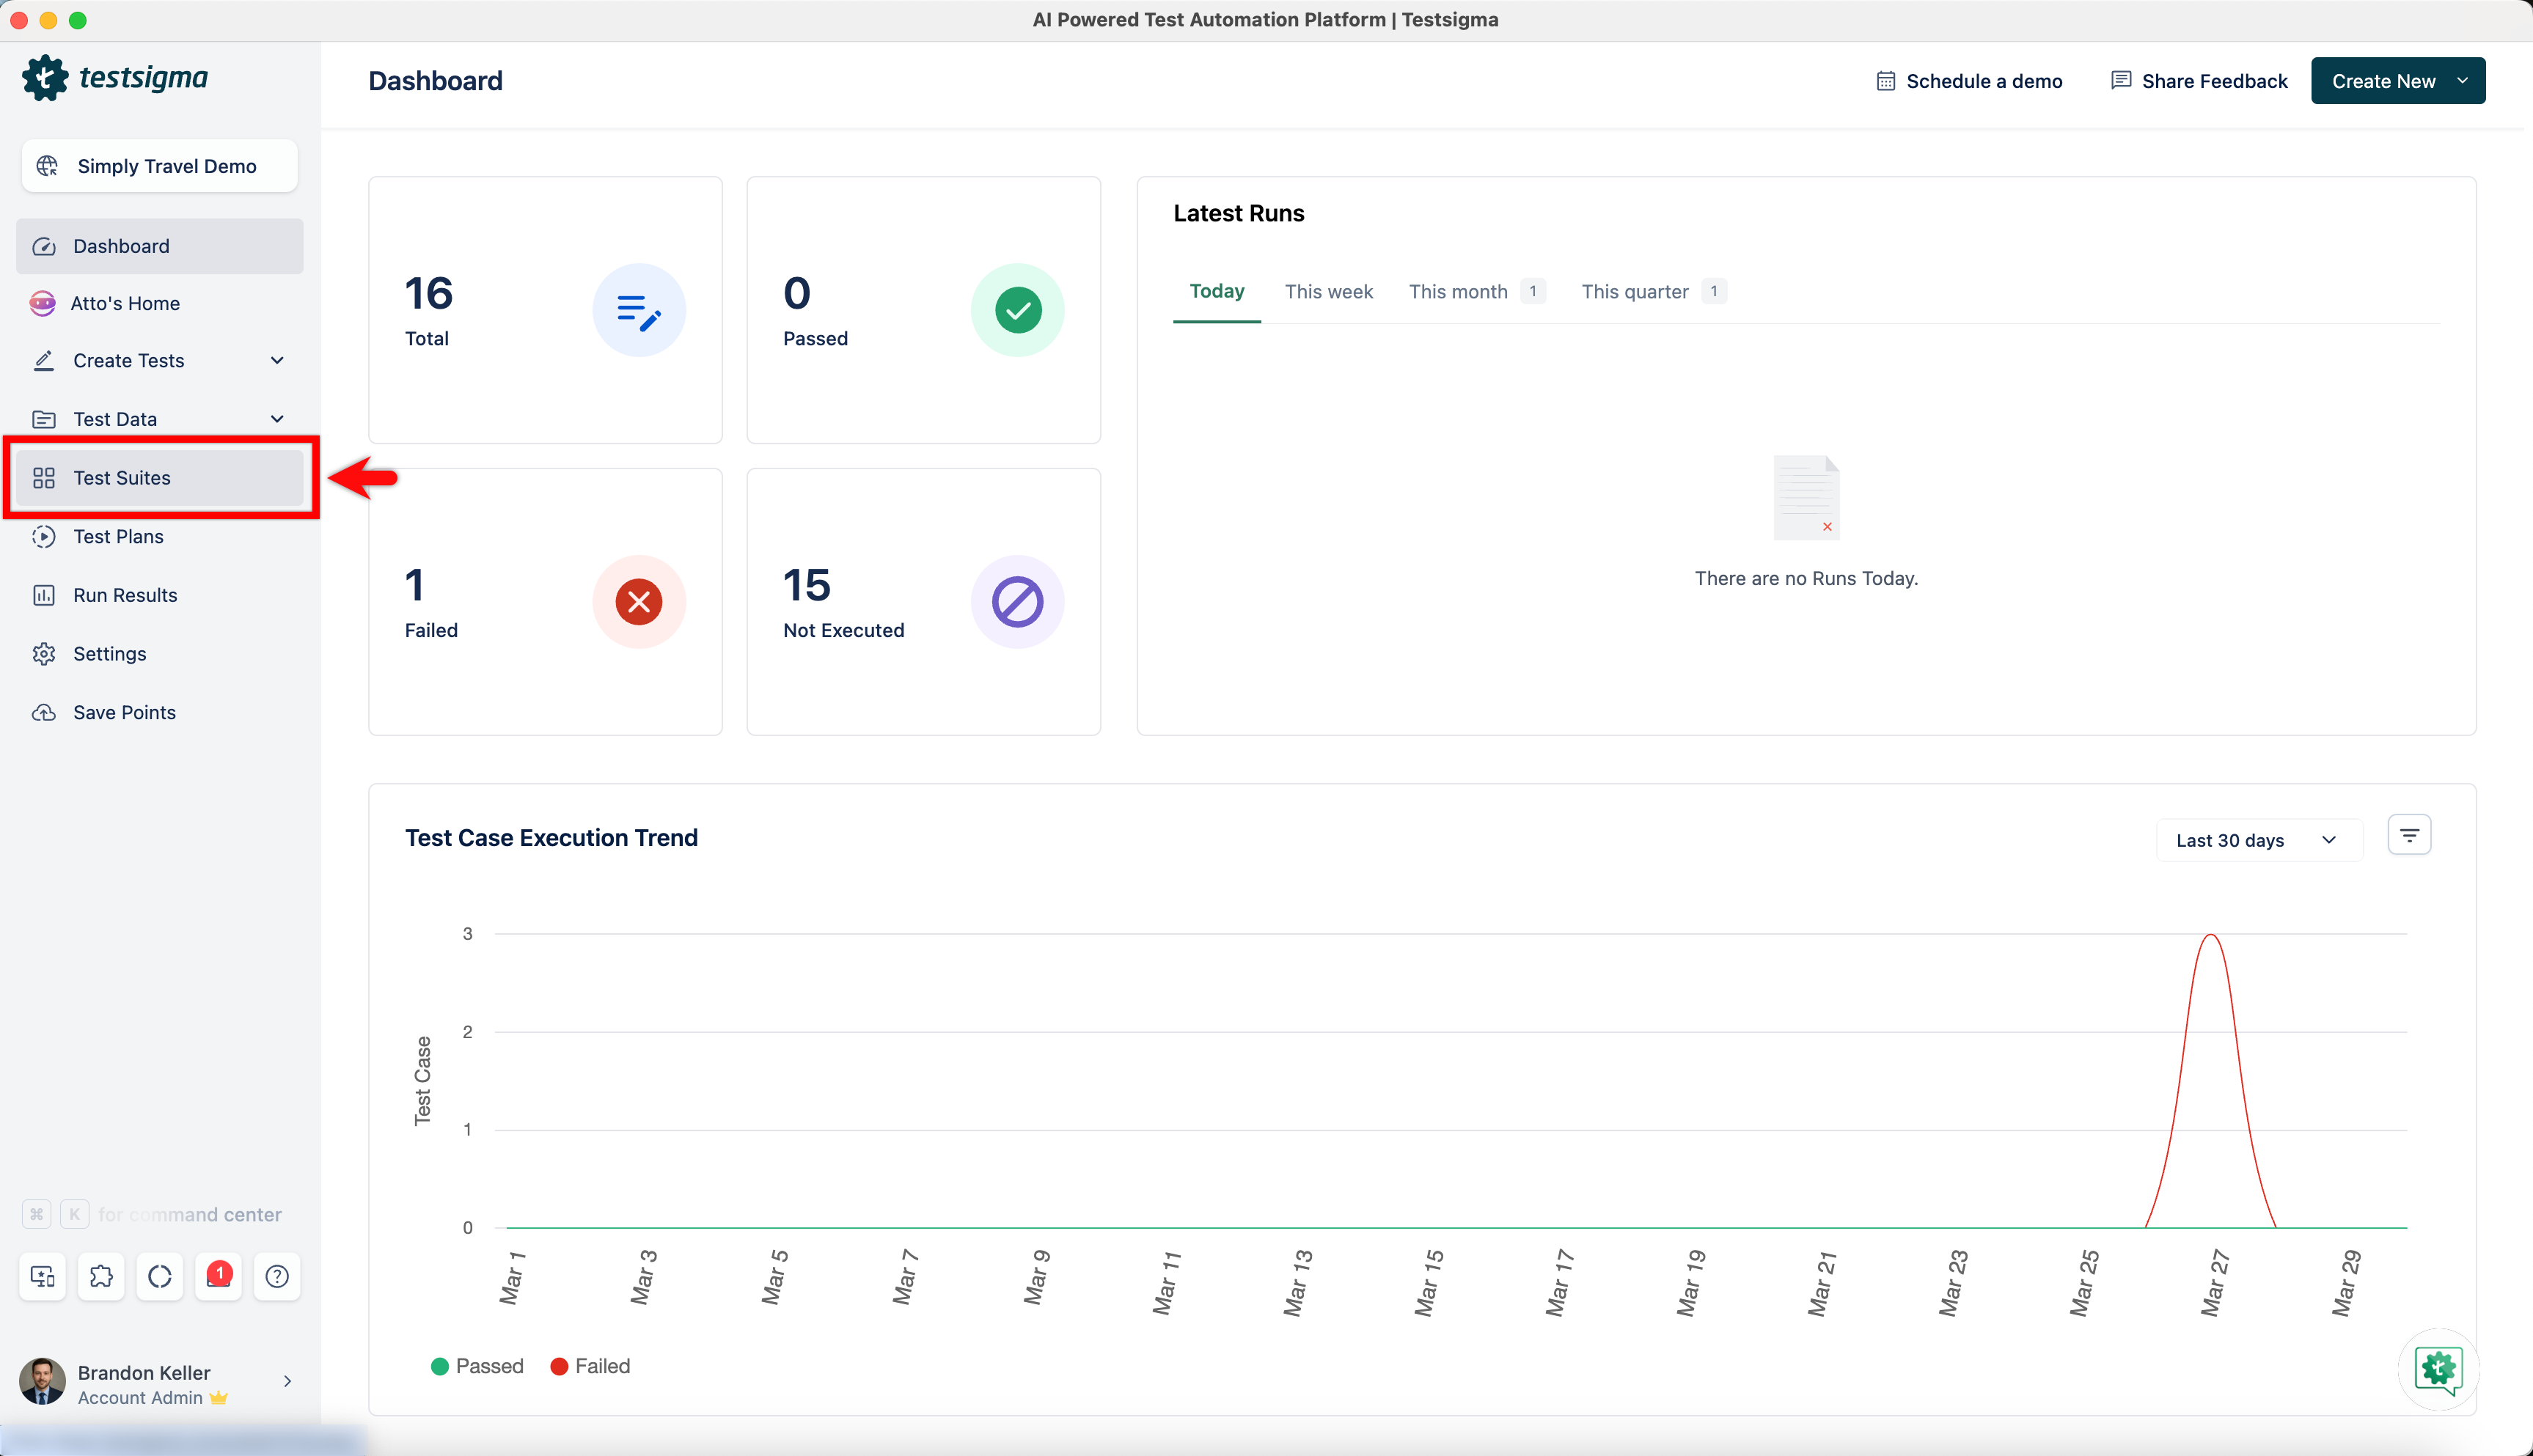
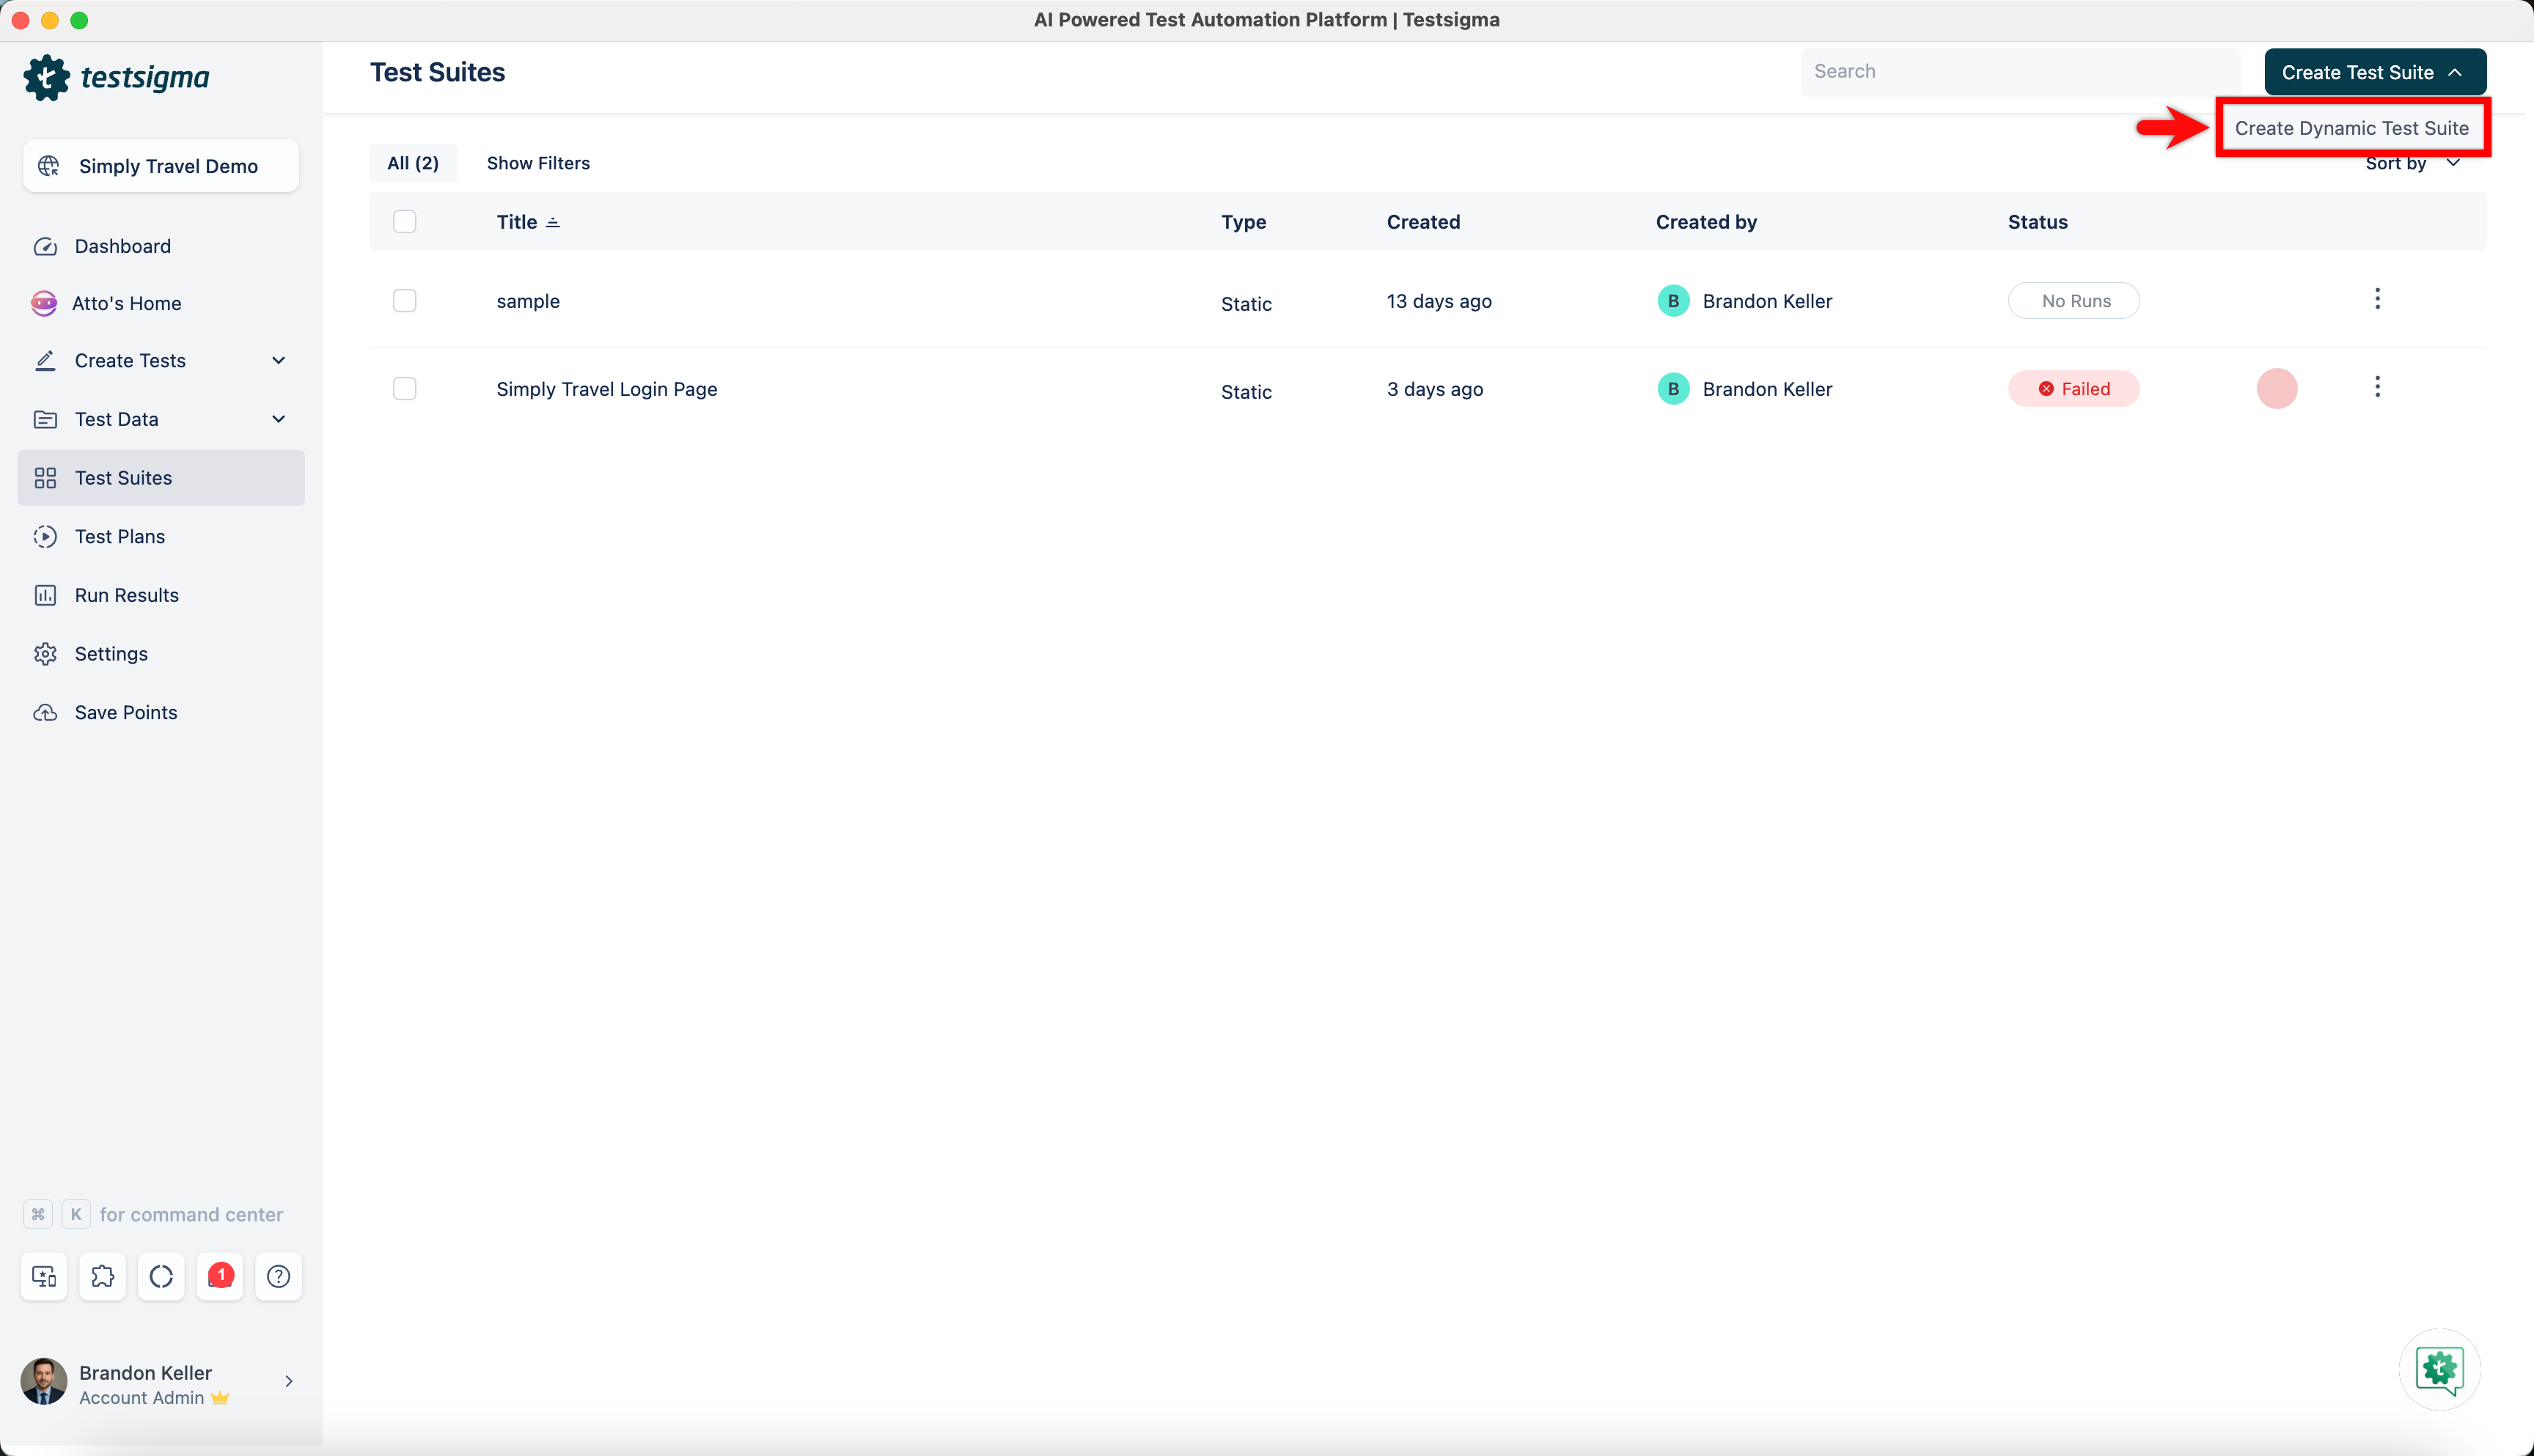
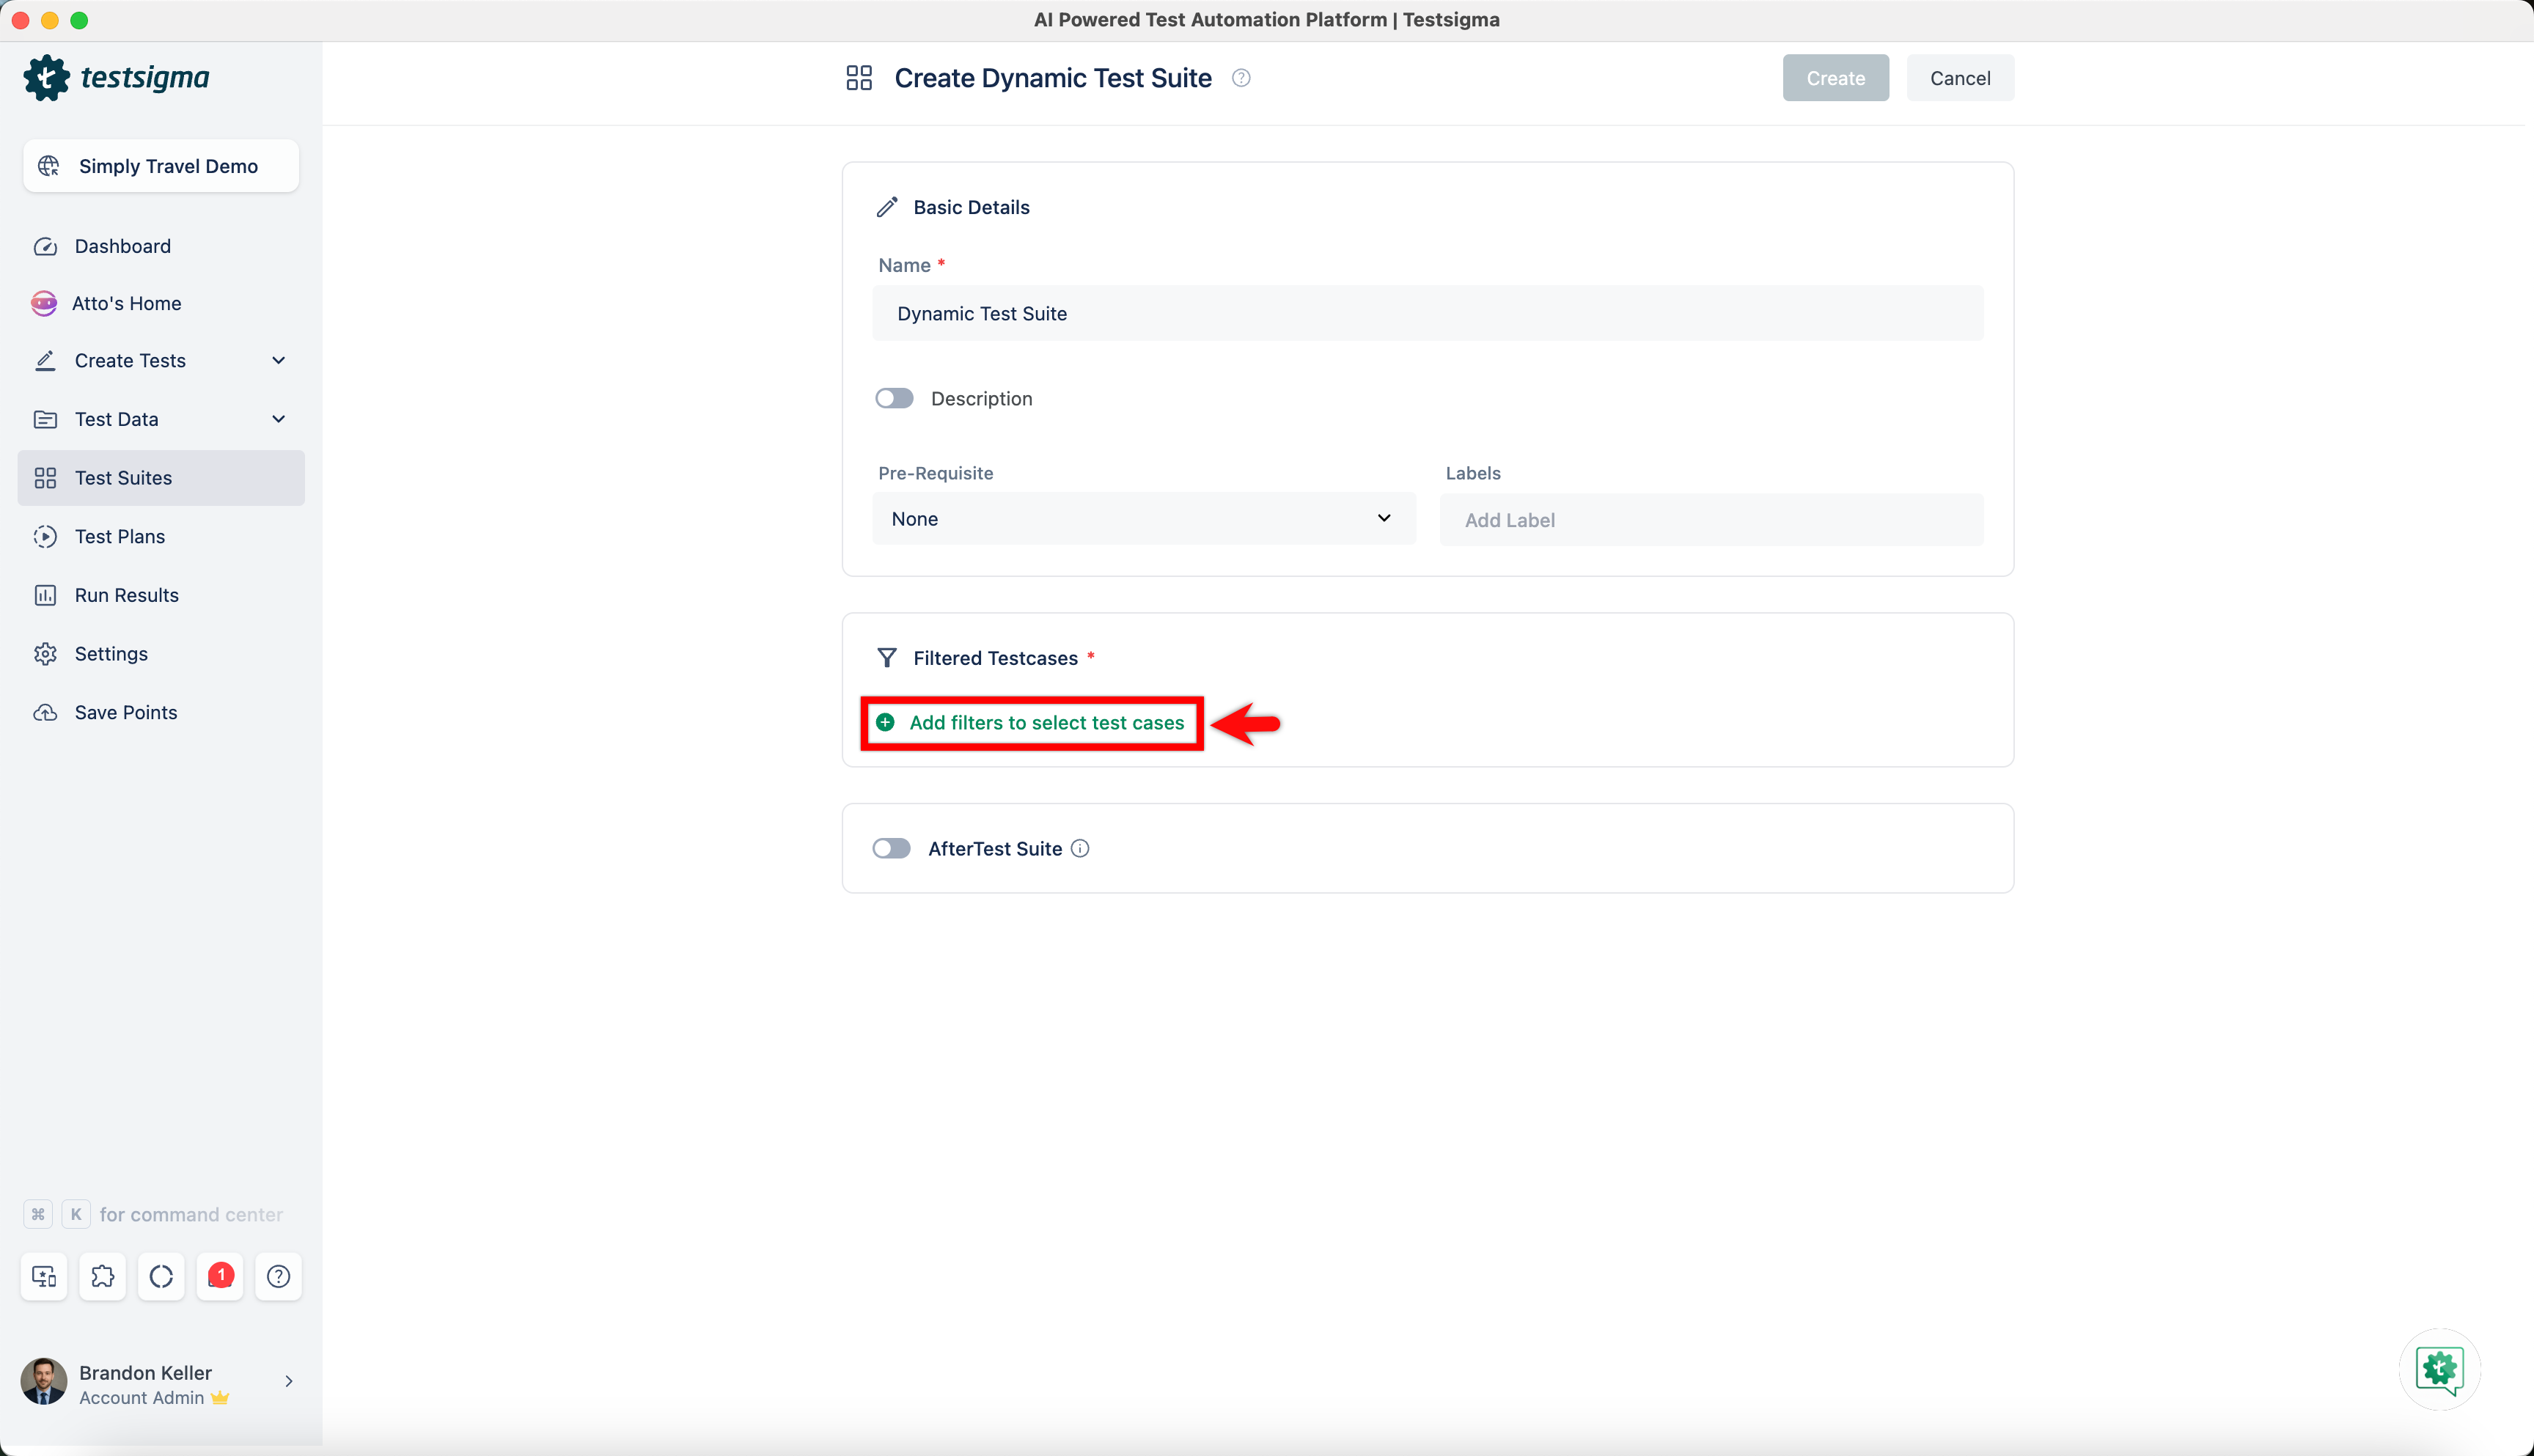
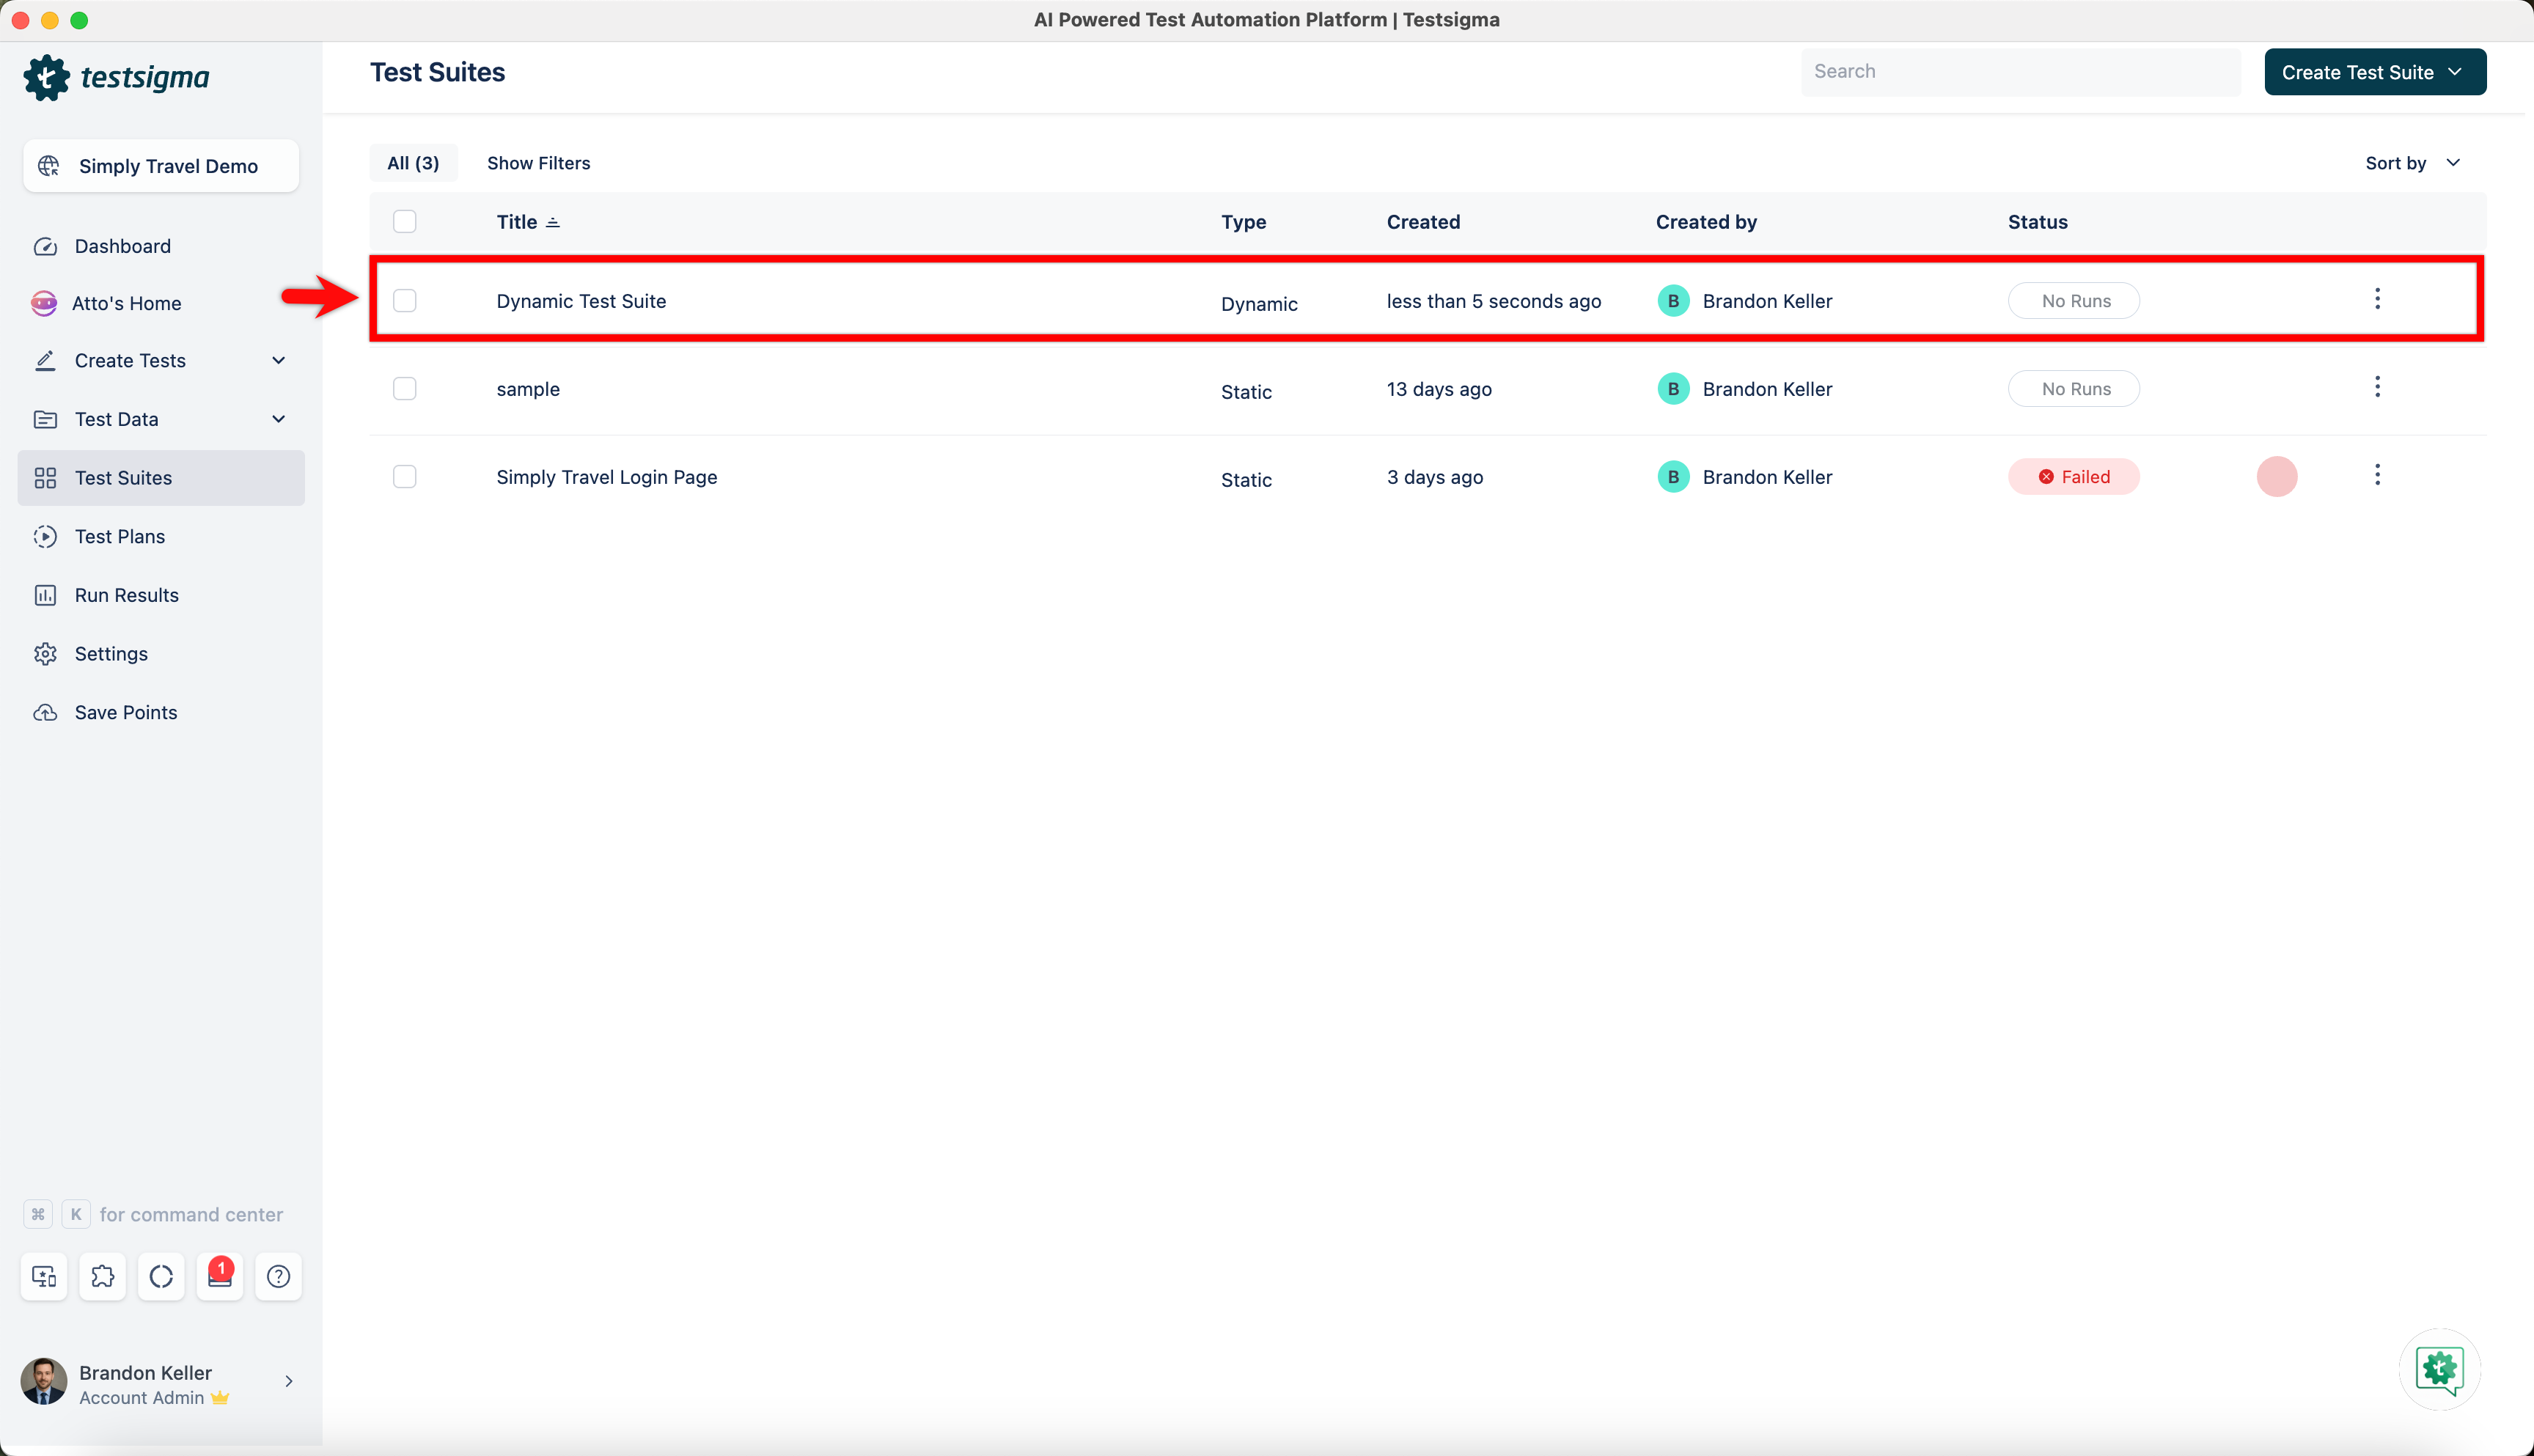
From the left navigation bar, navigate to Test Suites.
-
Expand Create Test Suite and click Create Dynamic Test Suite.
-
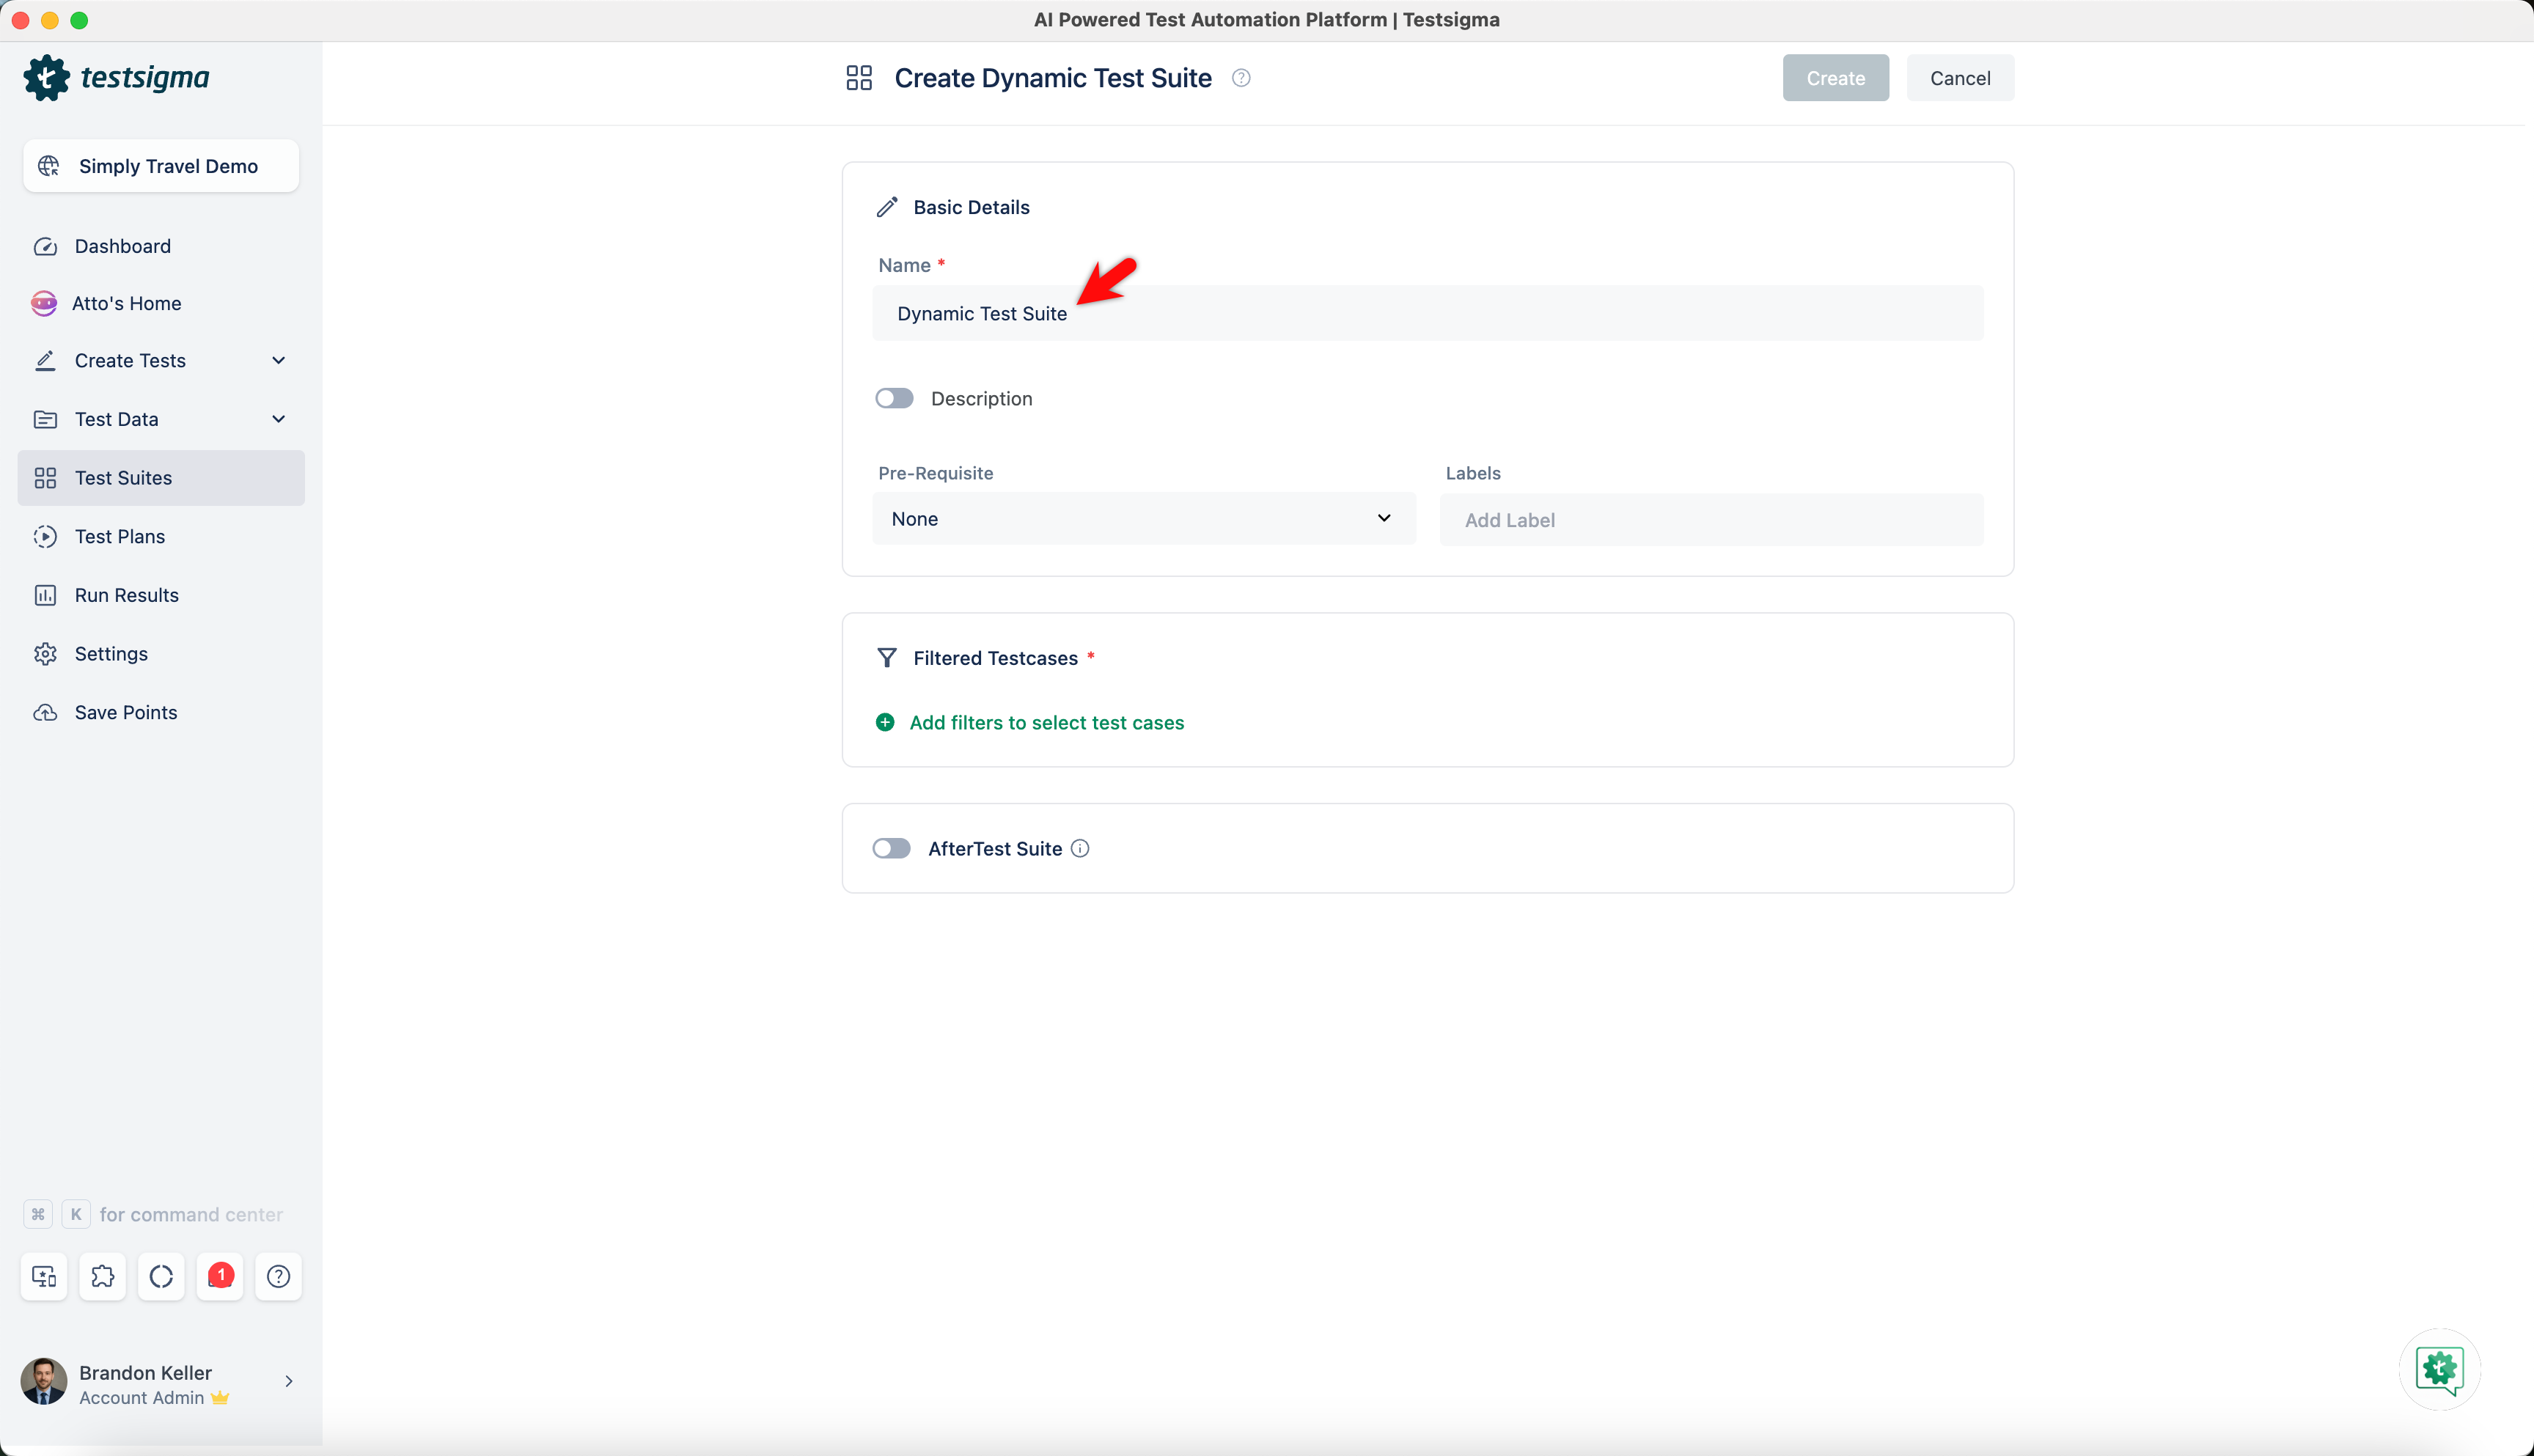
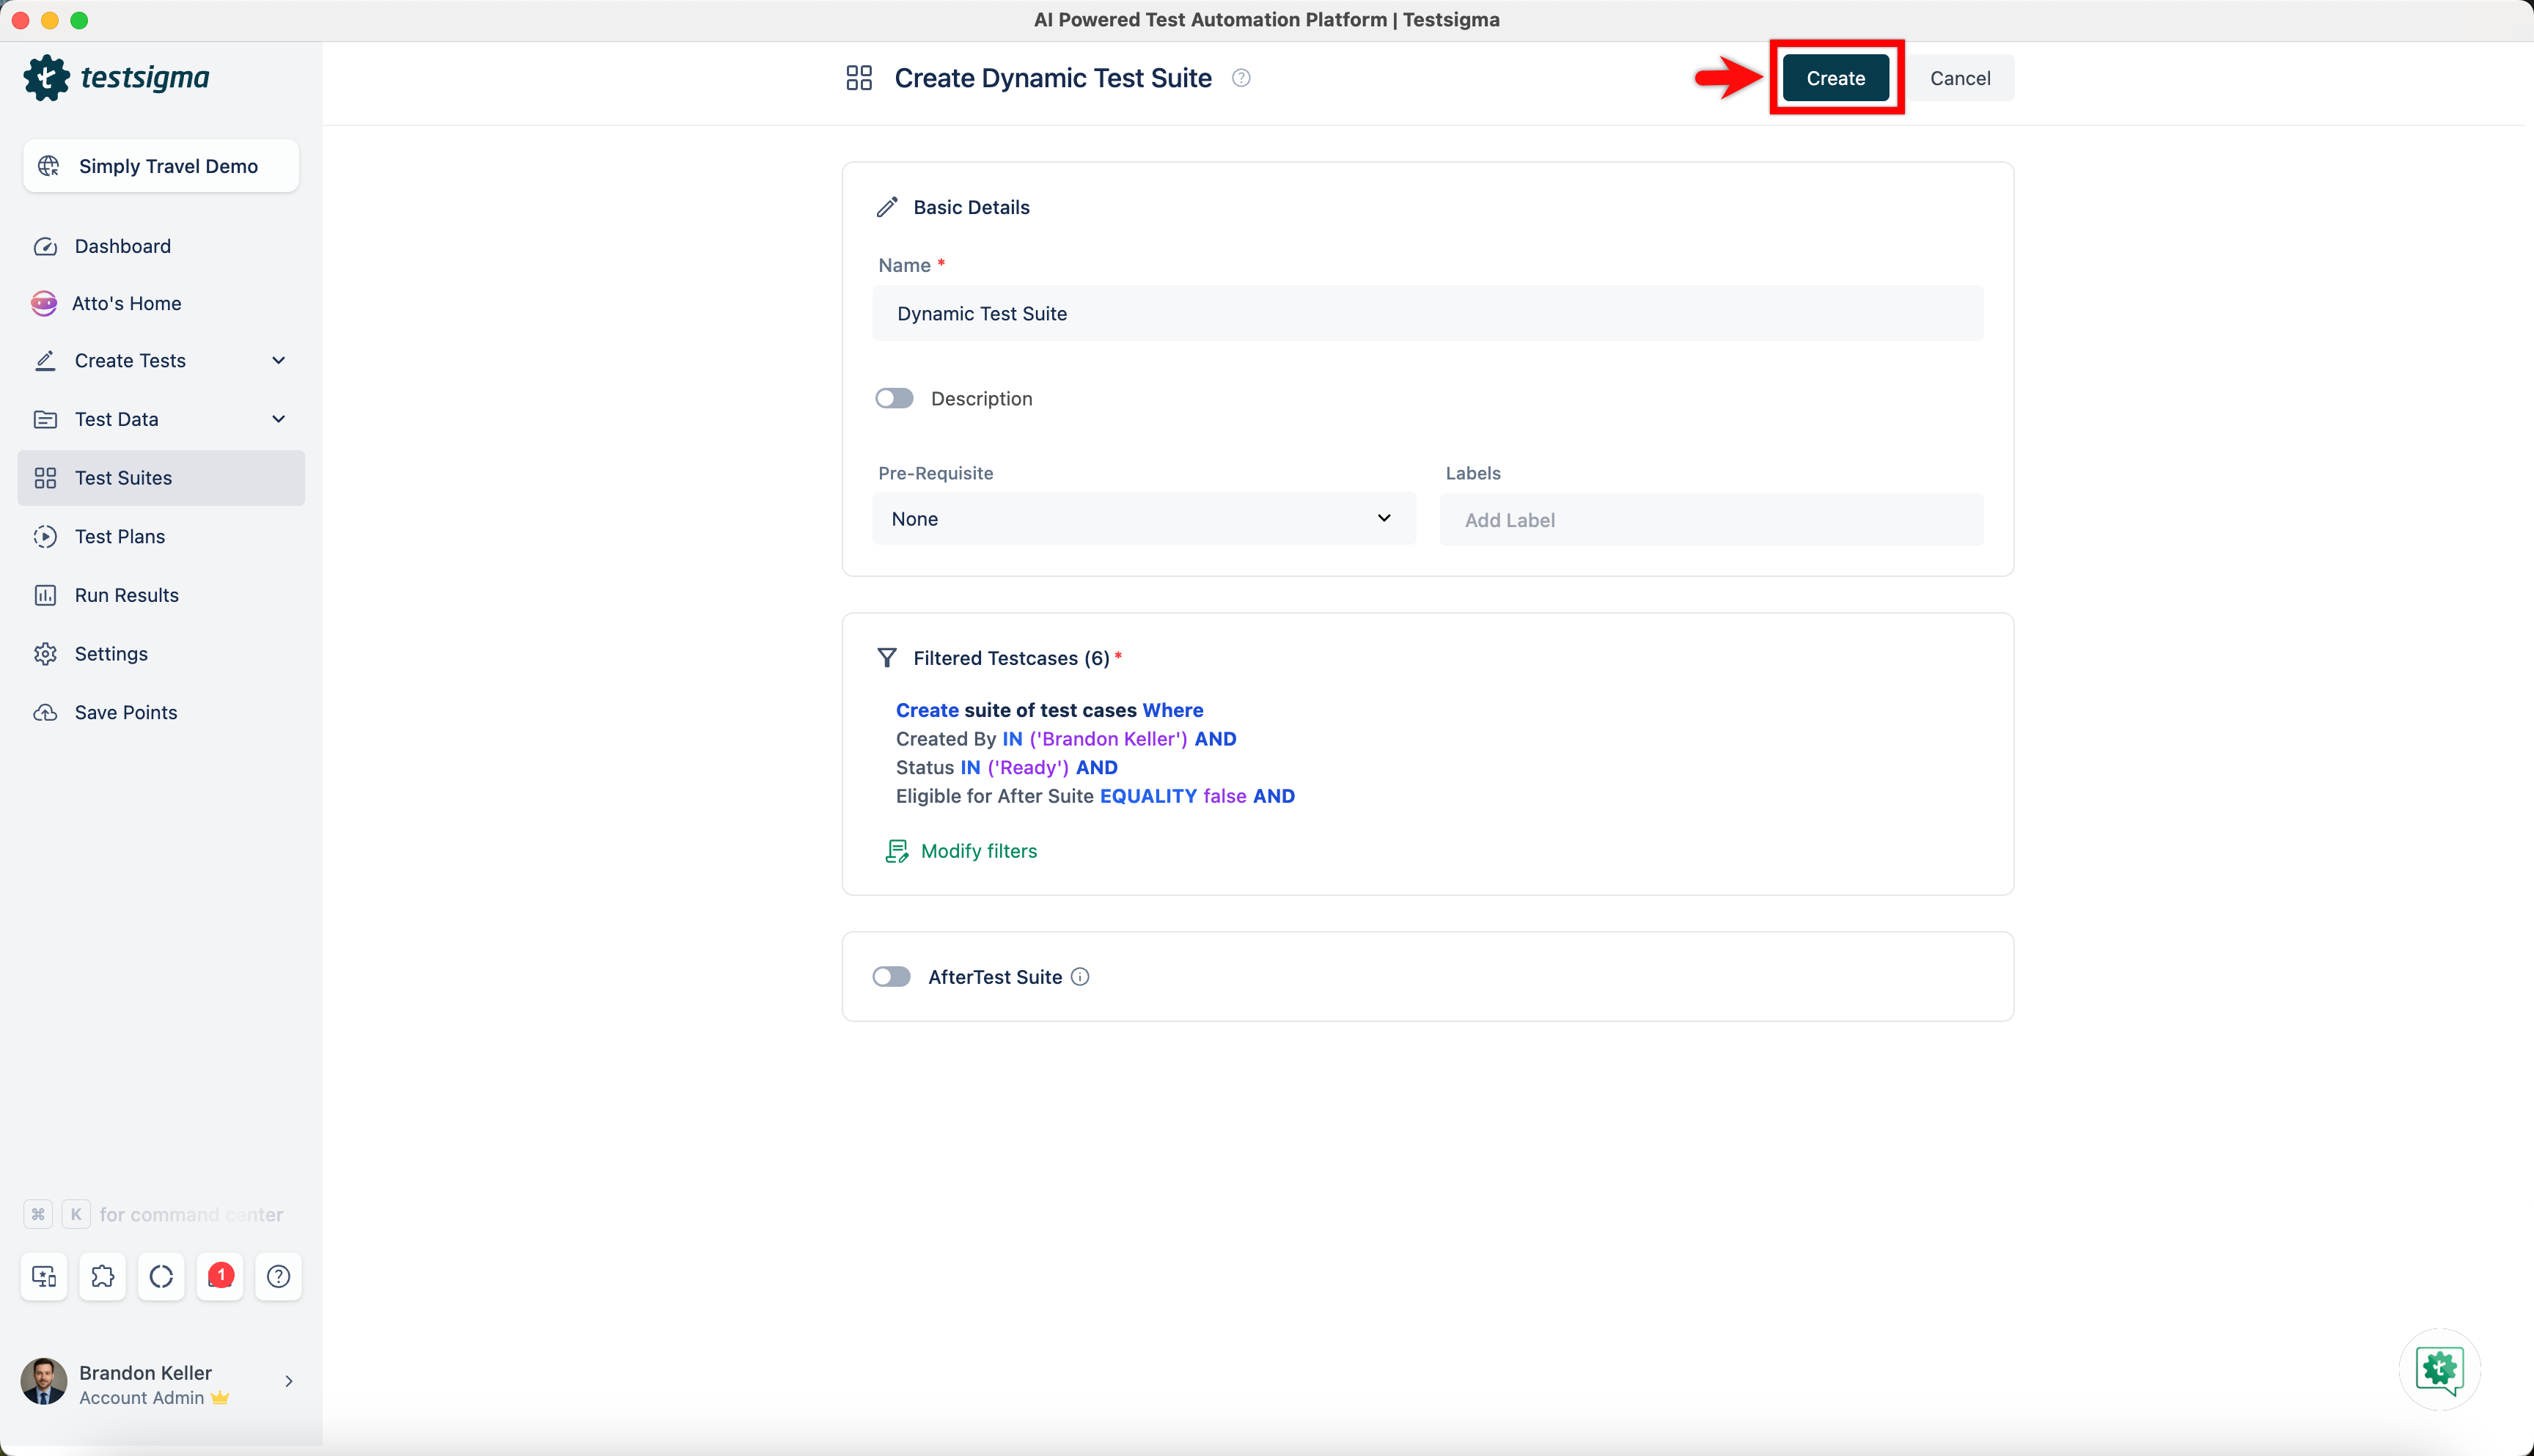
In the Basic Details section, enter a name in the Name field
-
In the Filtered Testcases section, click Add filters to select test cases.
-
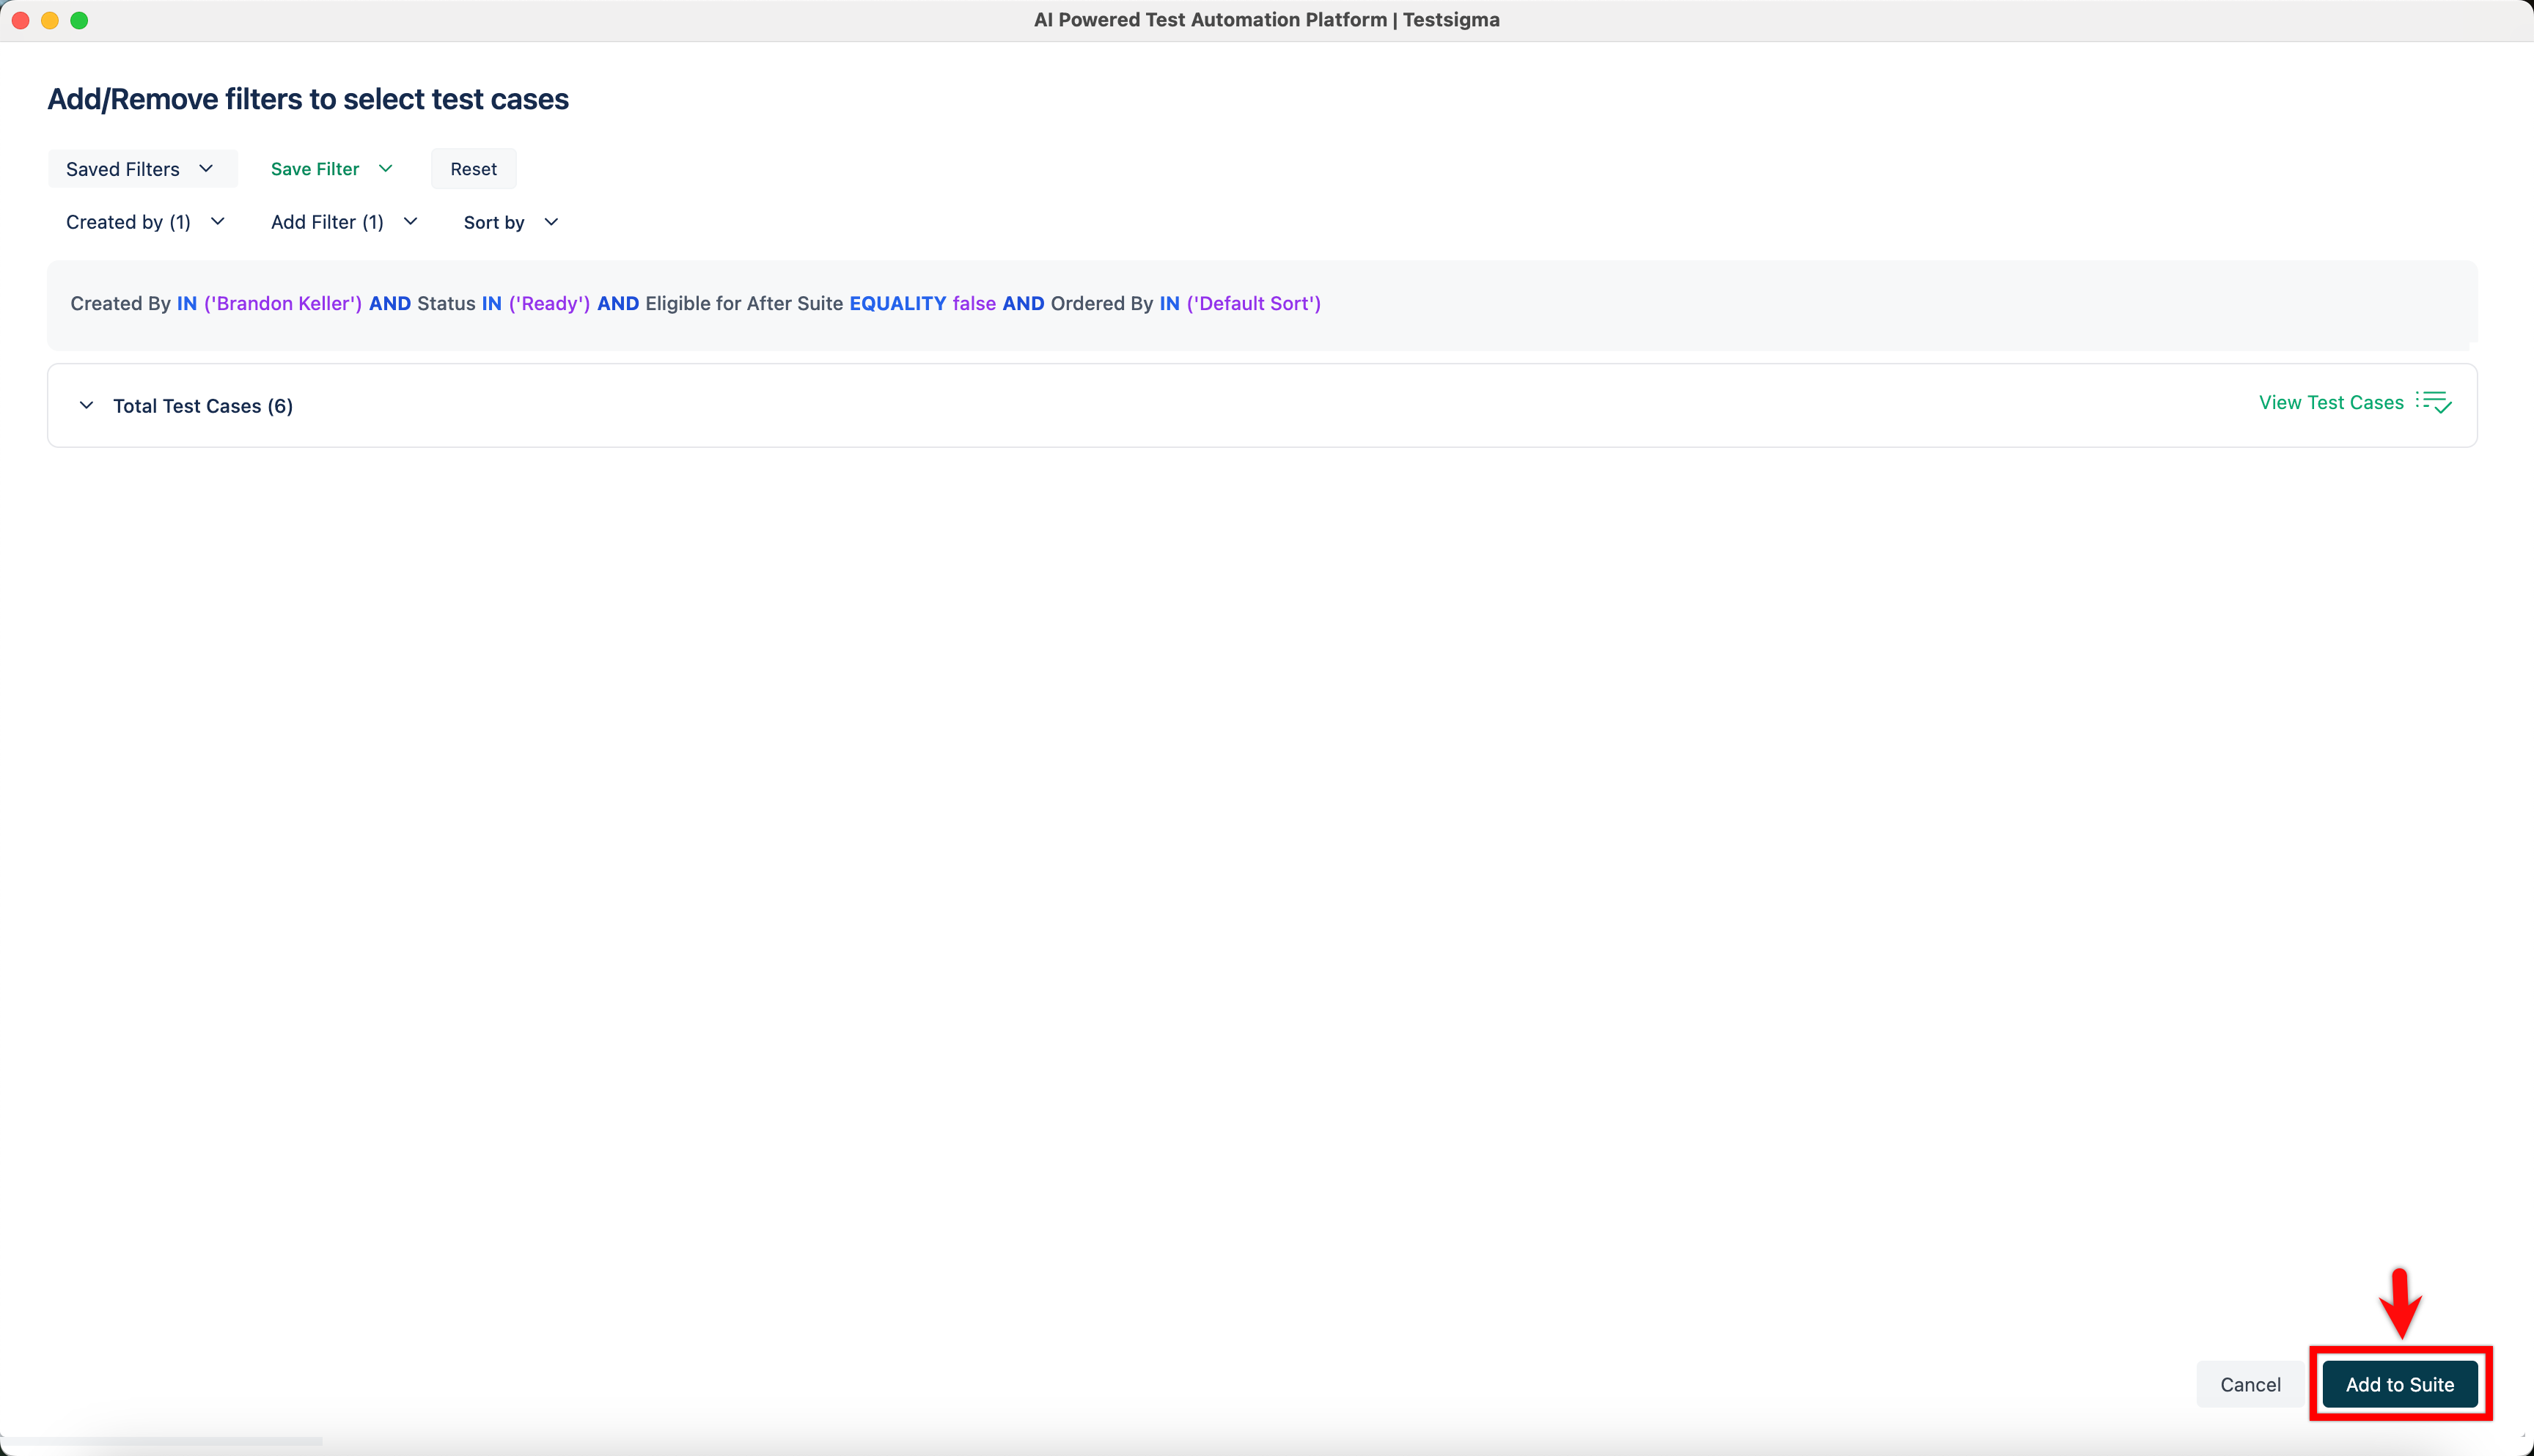
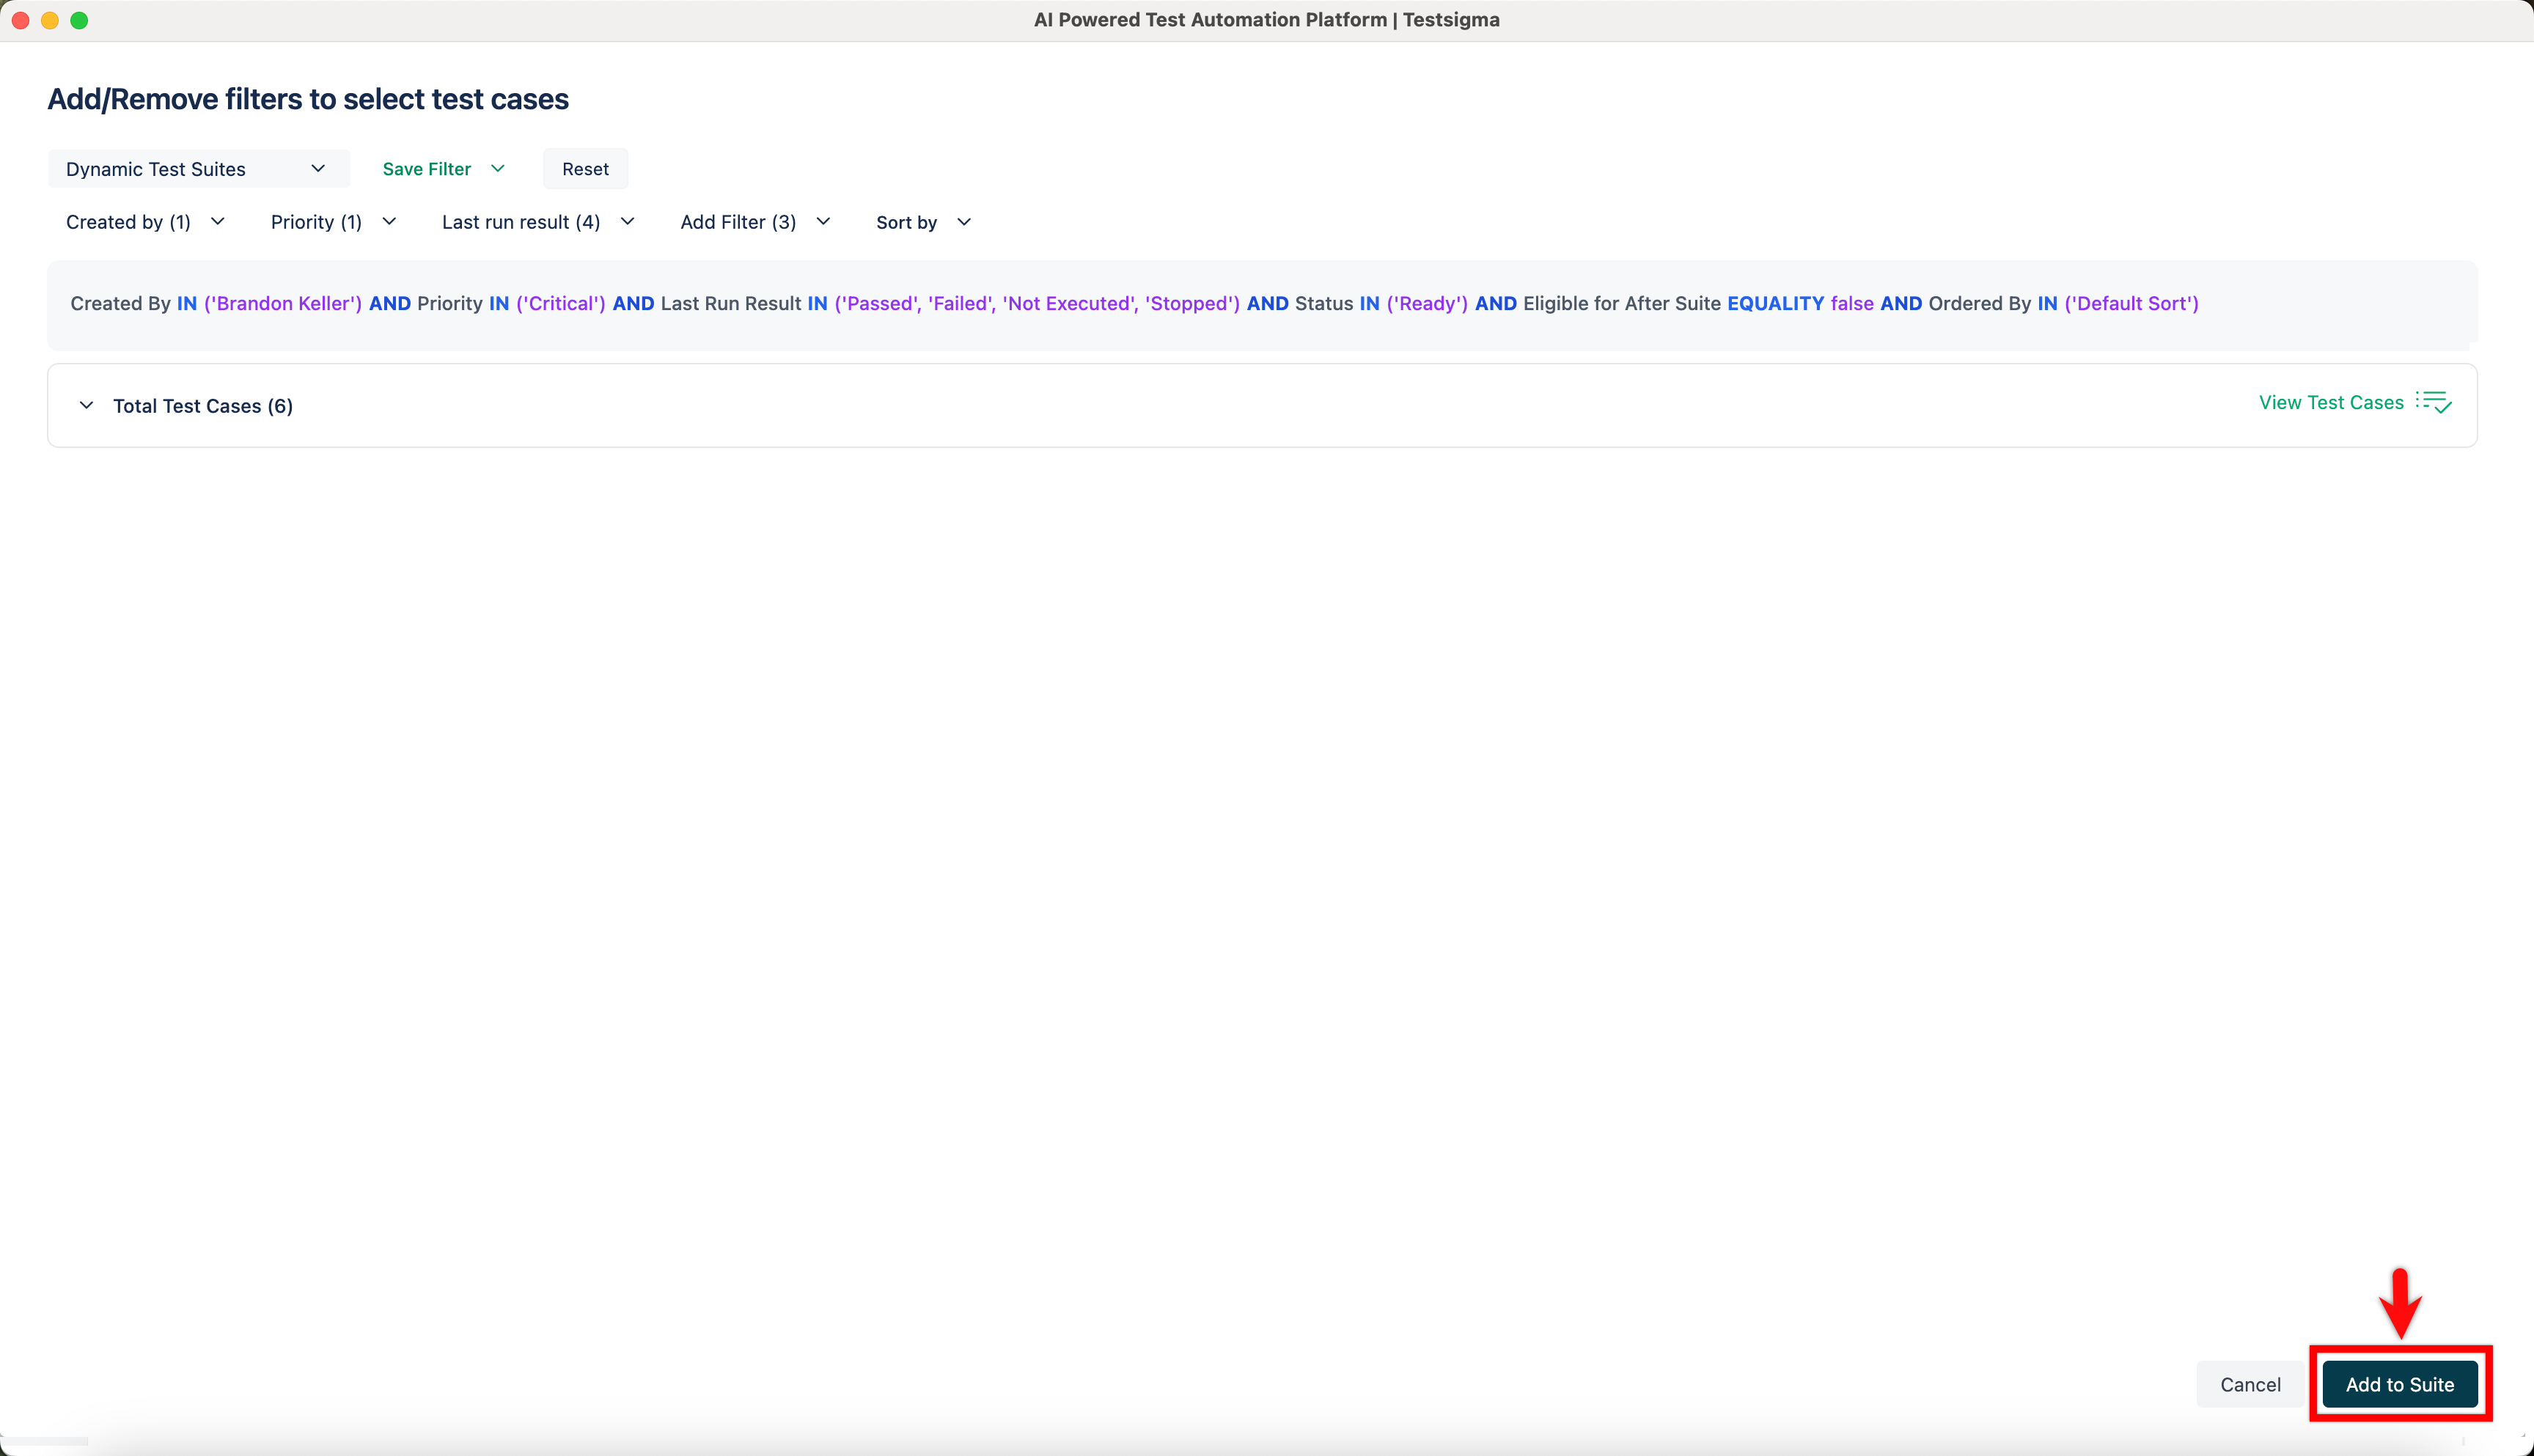
In the Add/Remove filters to select test cases screen, expand Add Filters and select the required filters.
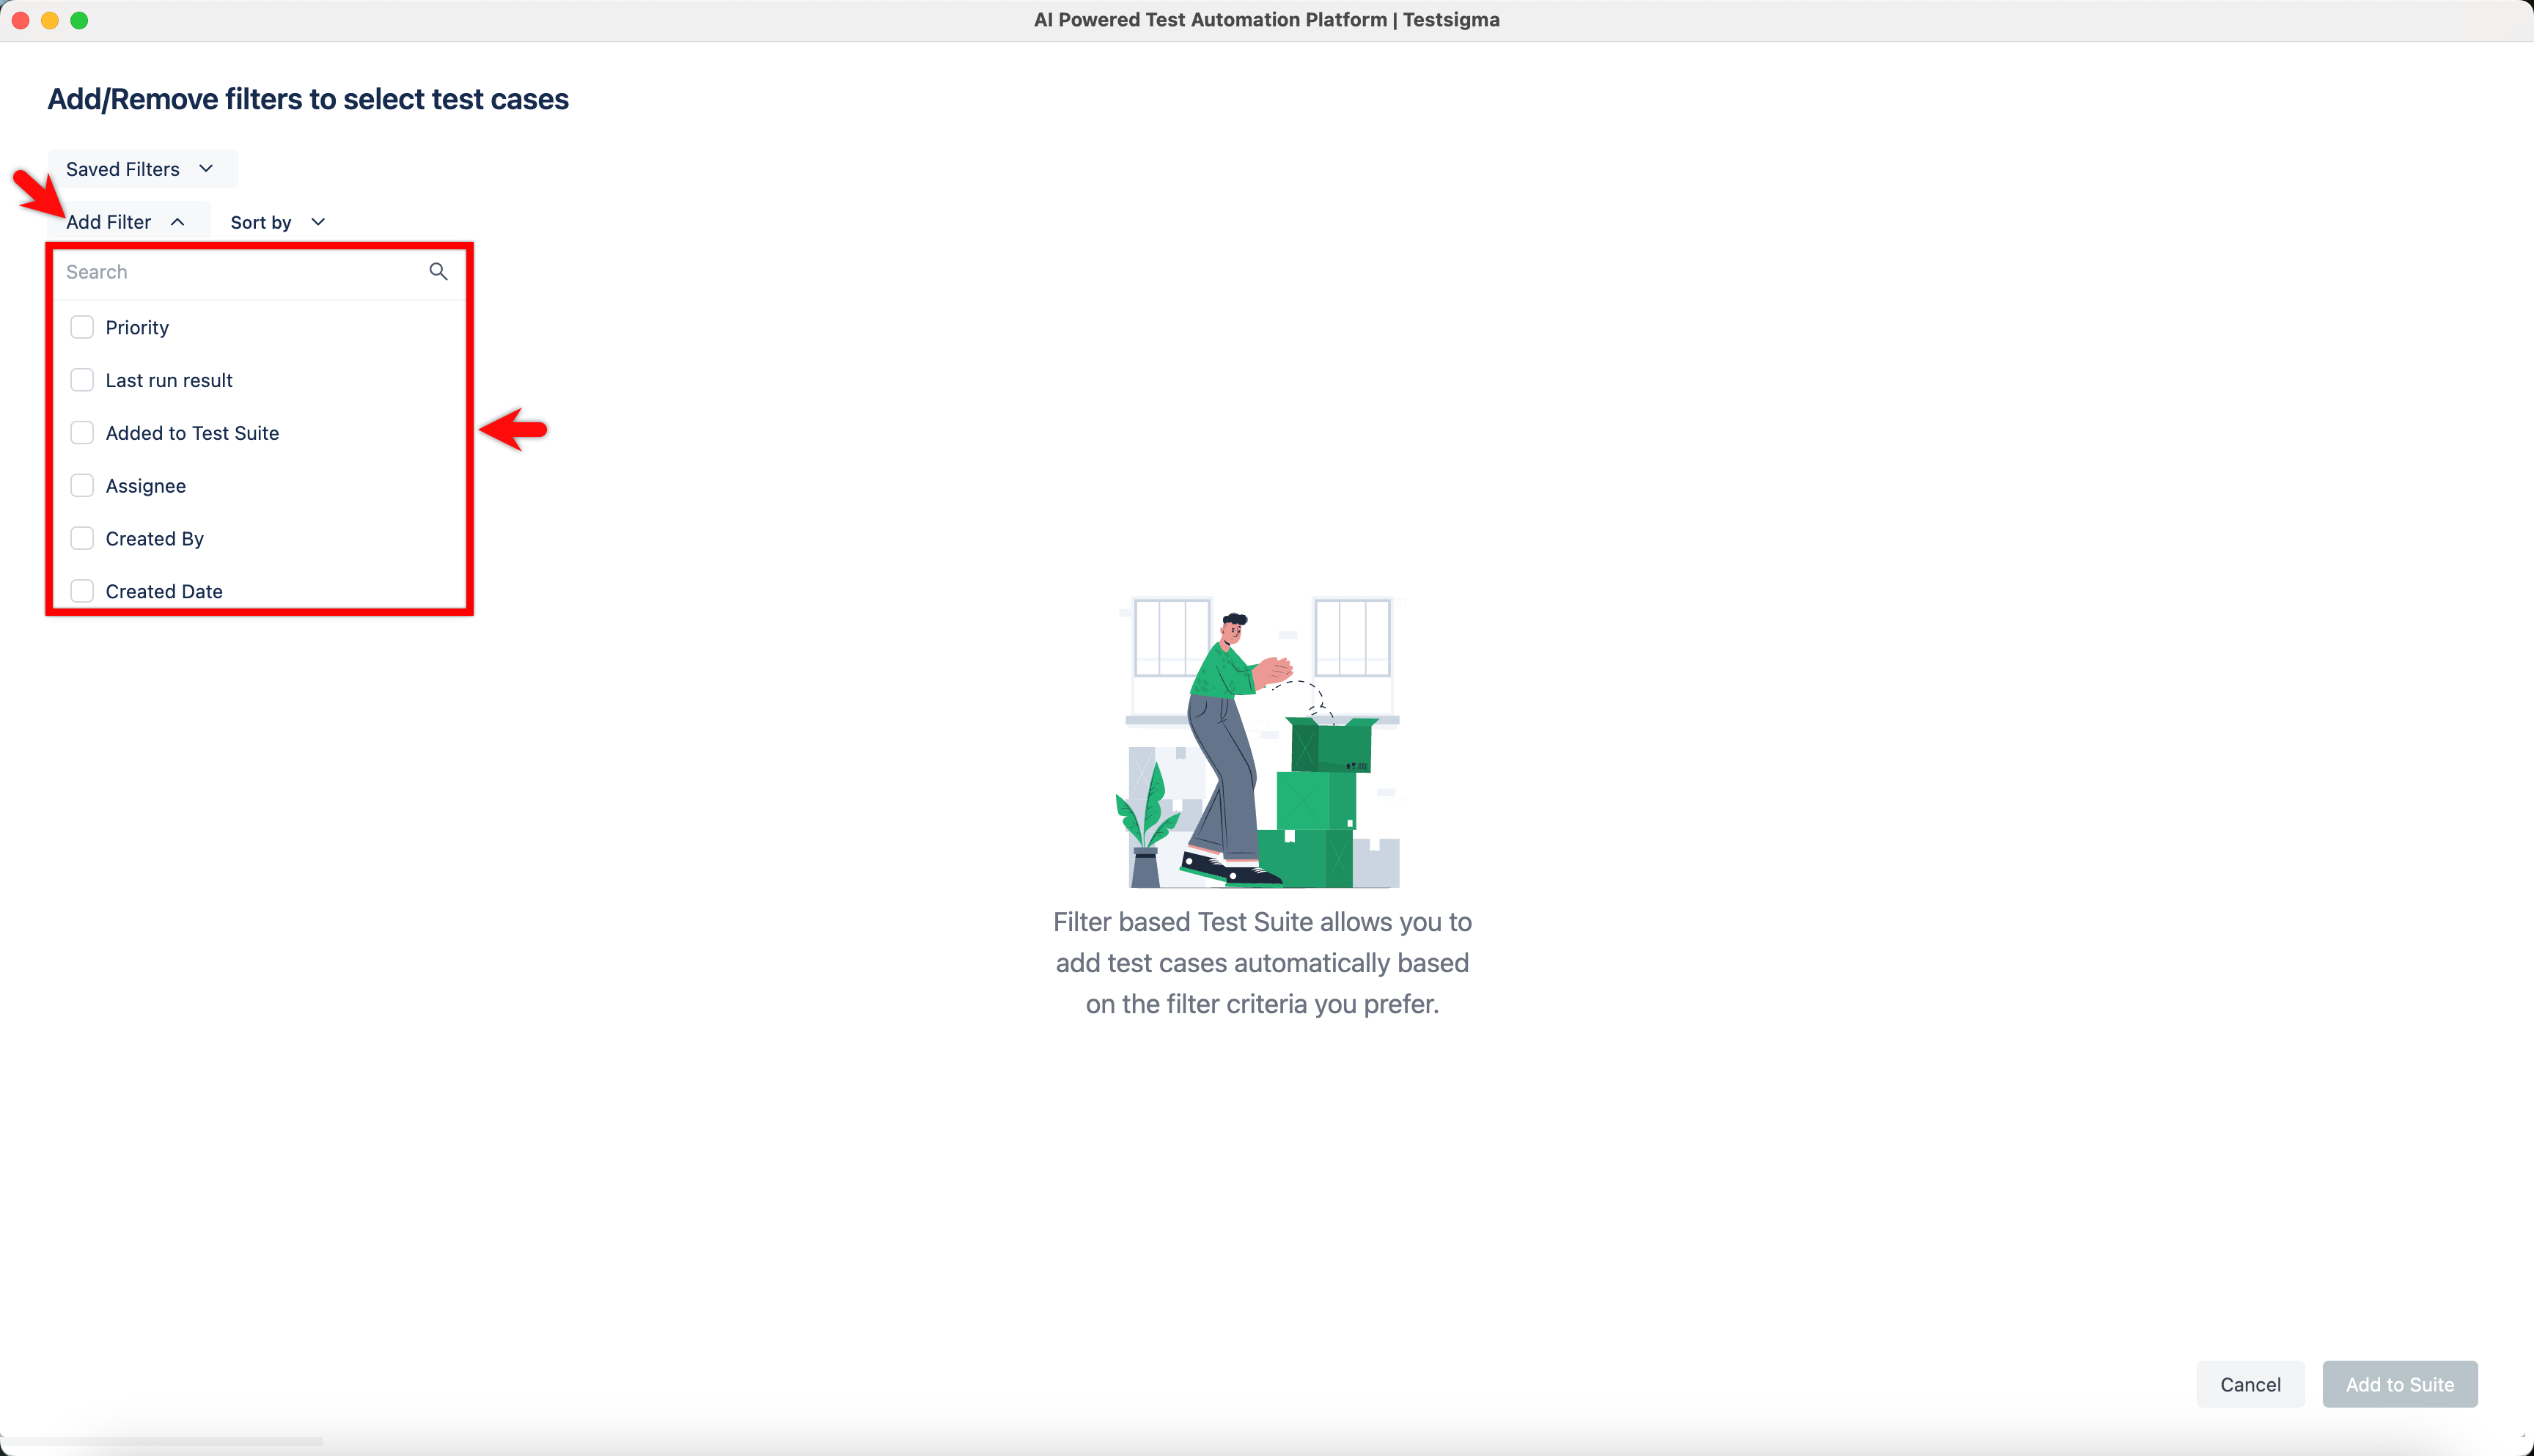
The system automatically selects test cases based on the applied filters.
-
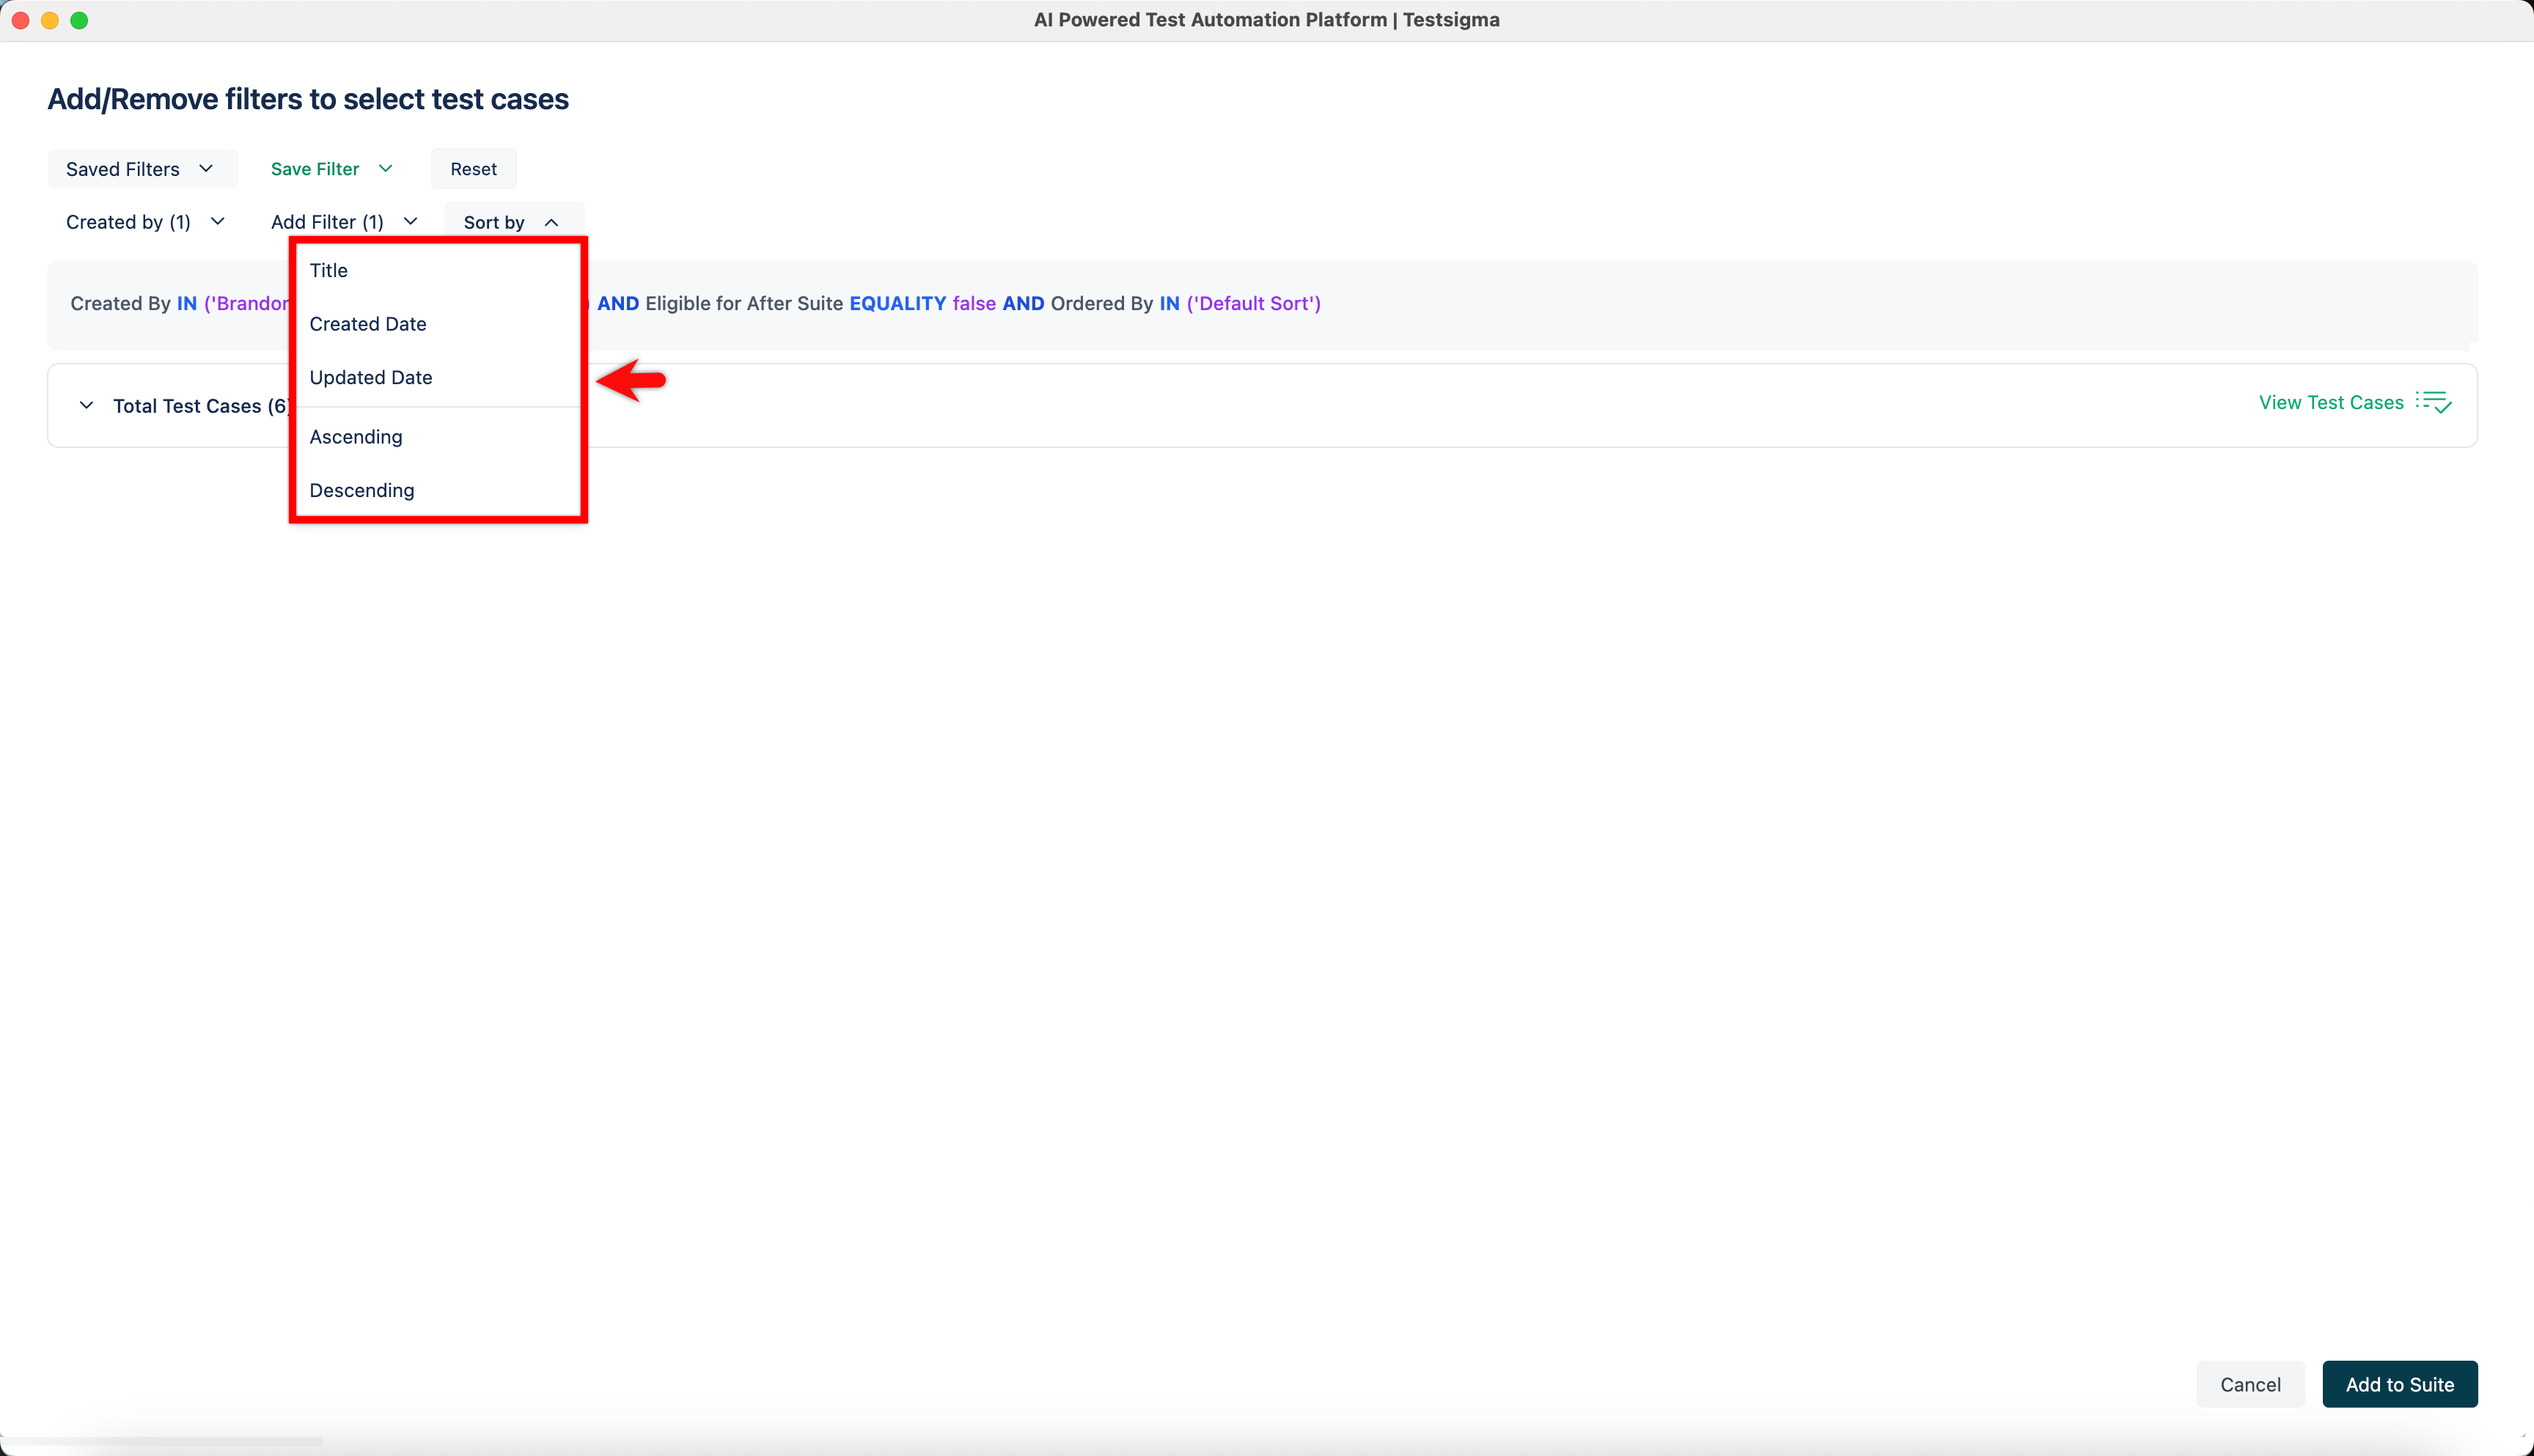
Once the test cases are filtered, expand Sort by to arrange them as needed.
-
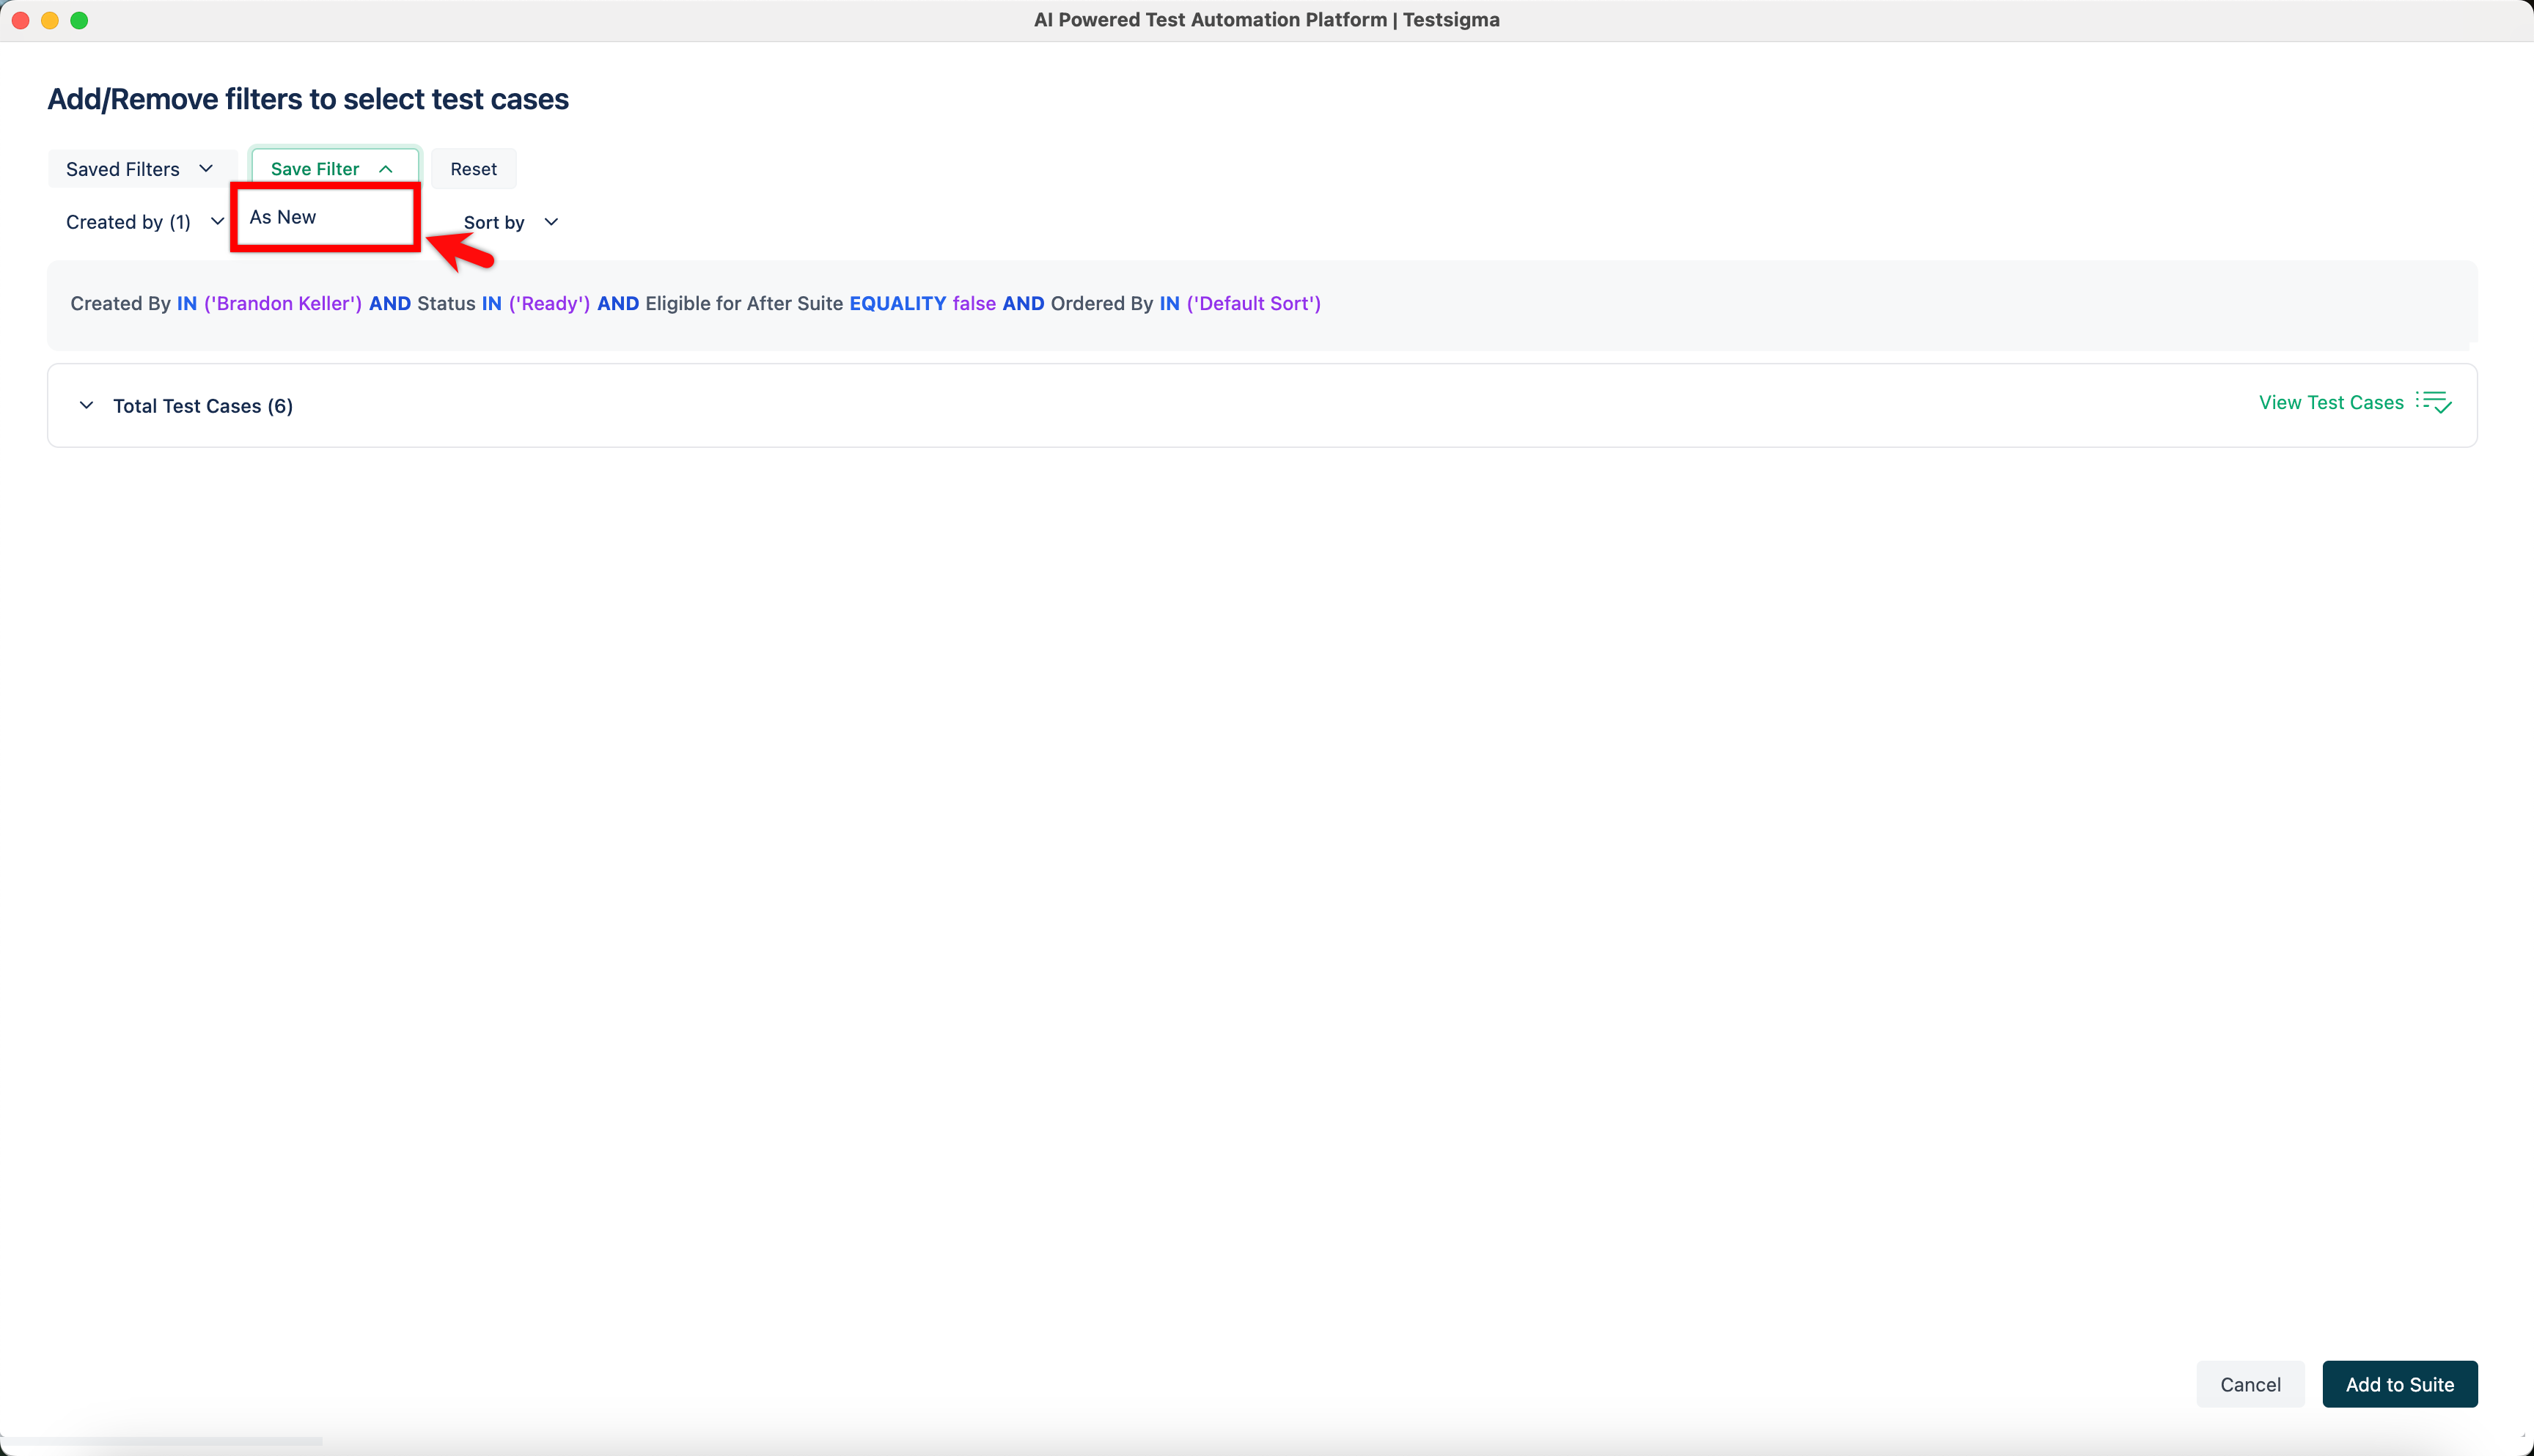
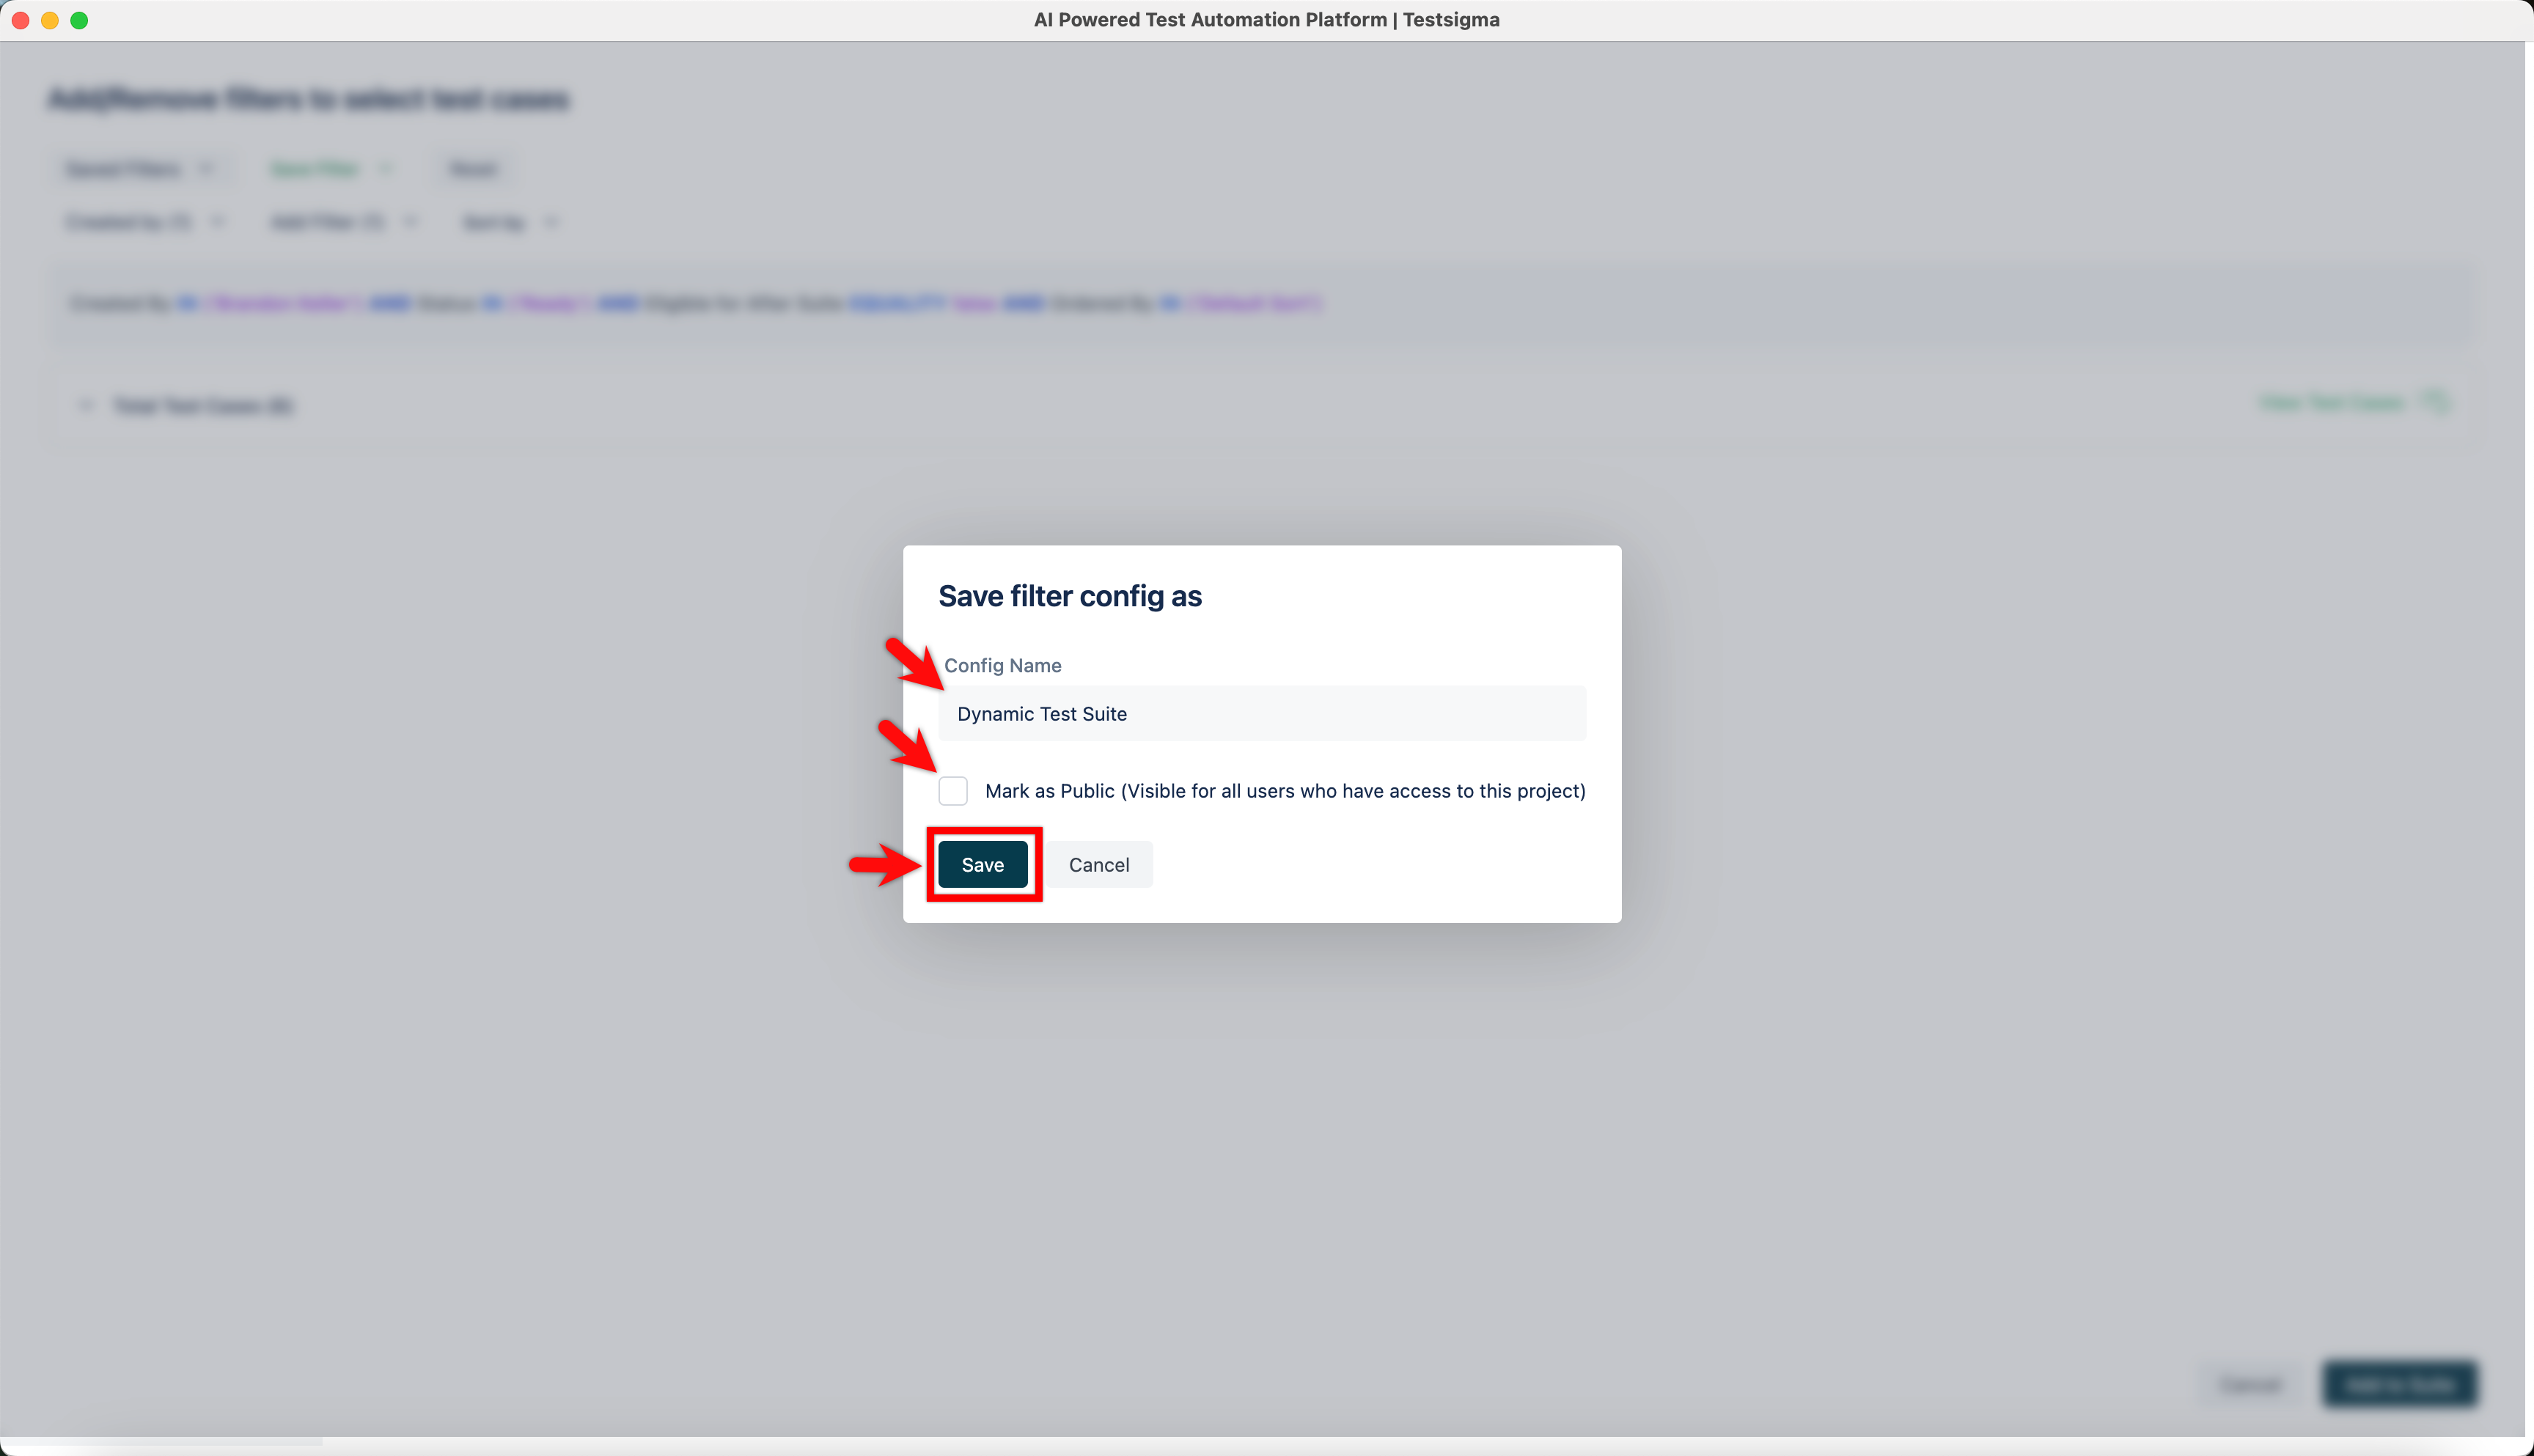
After filtering and sorting the test cases, expand Save Filter and select As New.
-
In the Save filter config as dialog, enter the name for the filter, select the Mark as Public checkbox if required, and click Save.
- Click Add to Suite.
- Click Create.
Edit a Dynamic Test Suite
Section titled “Edit a Dynamic Test Suite”-
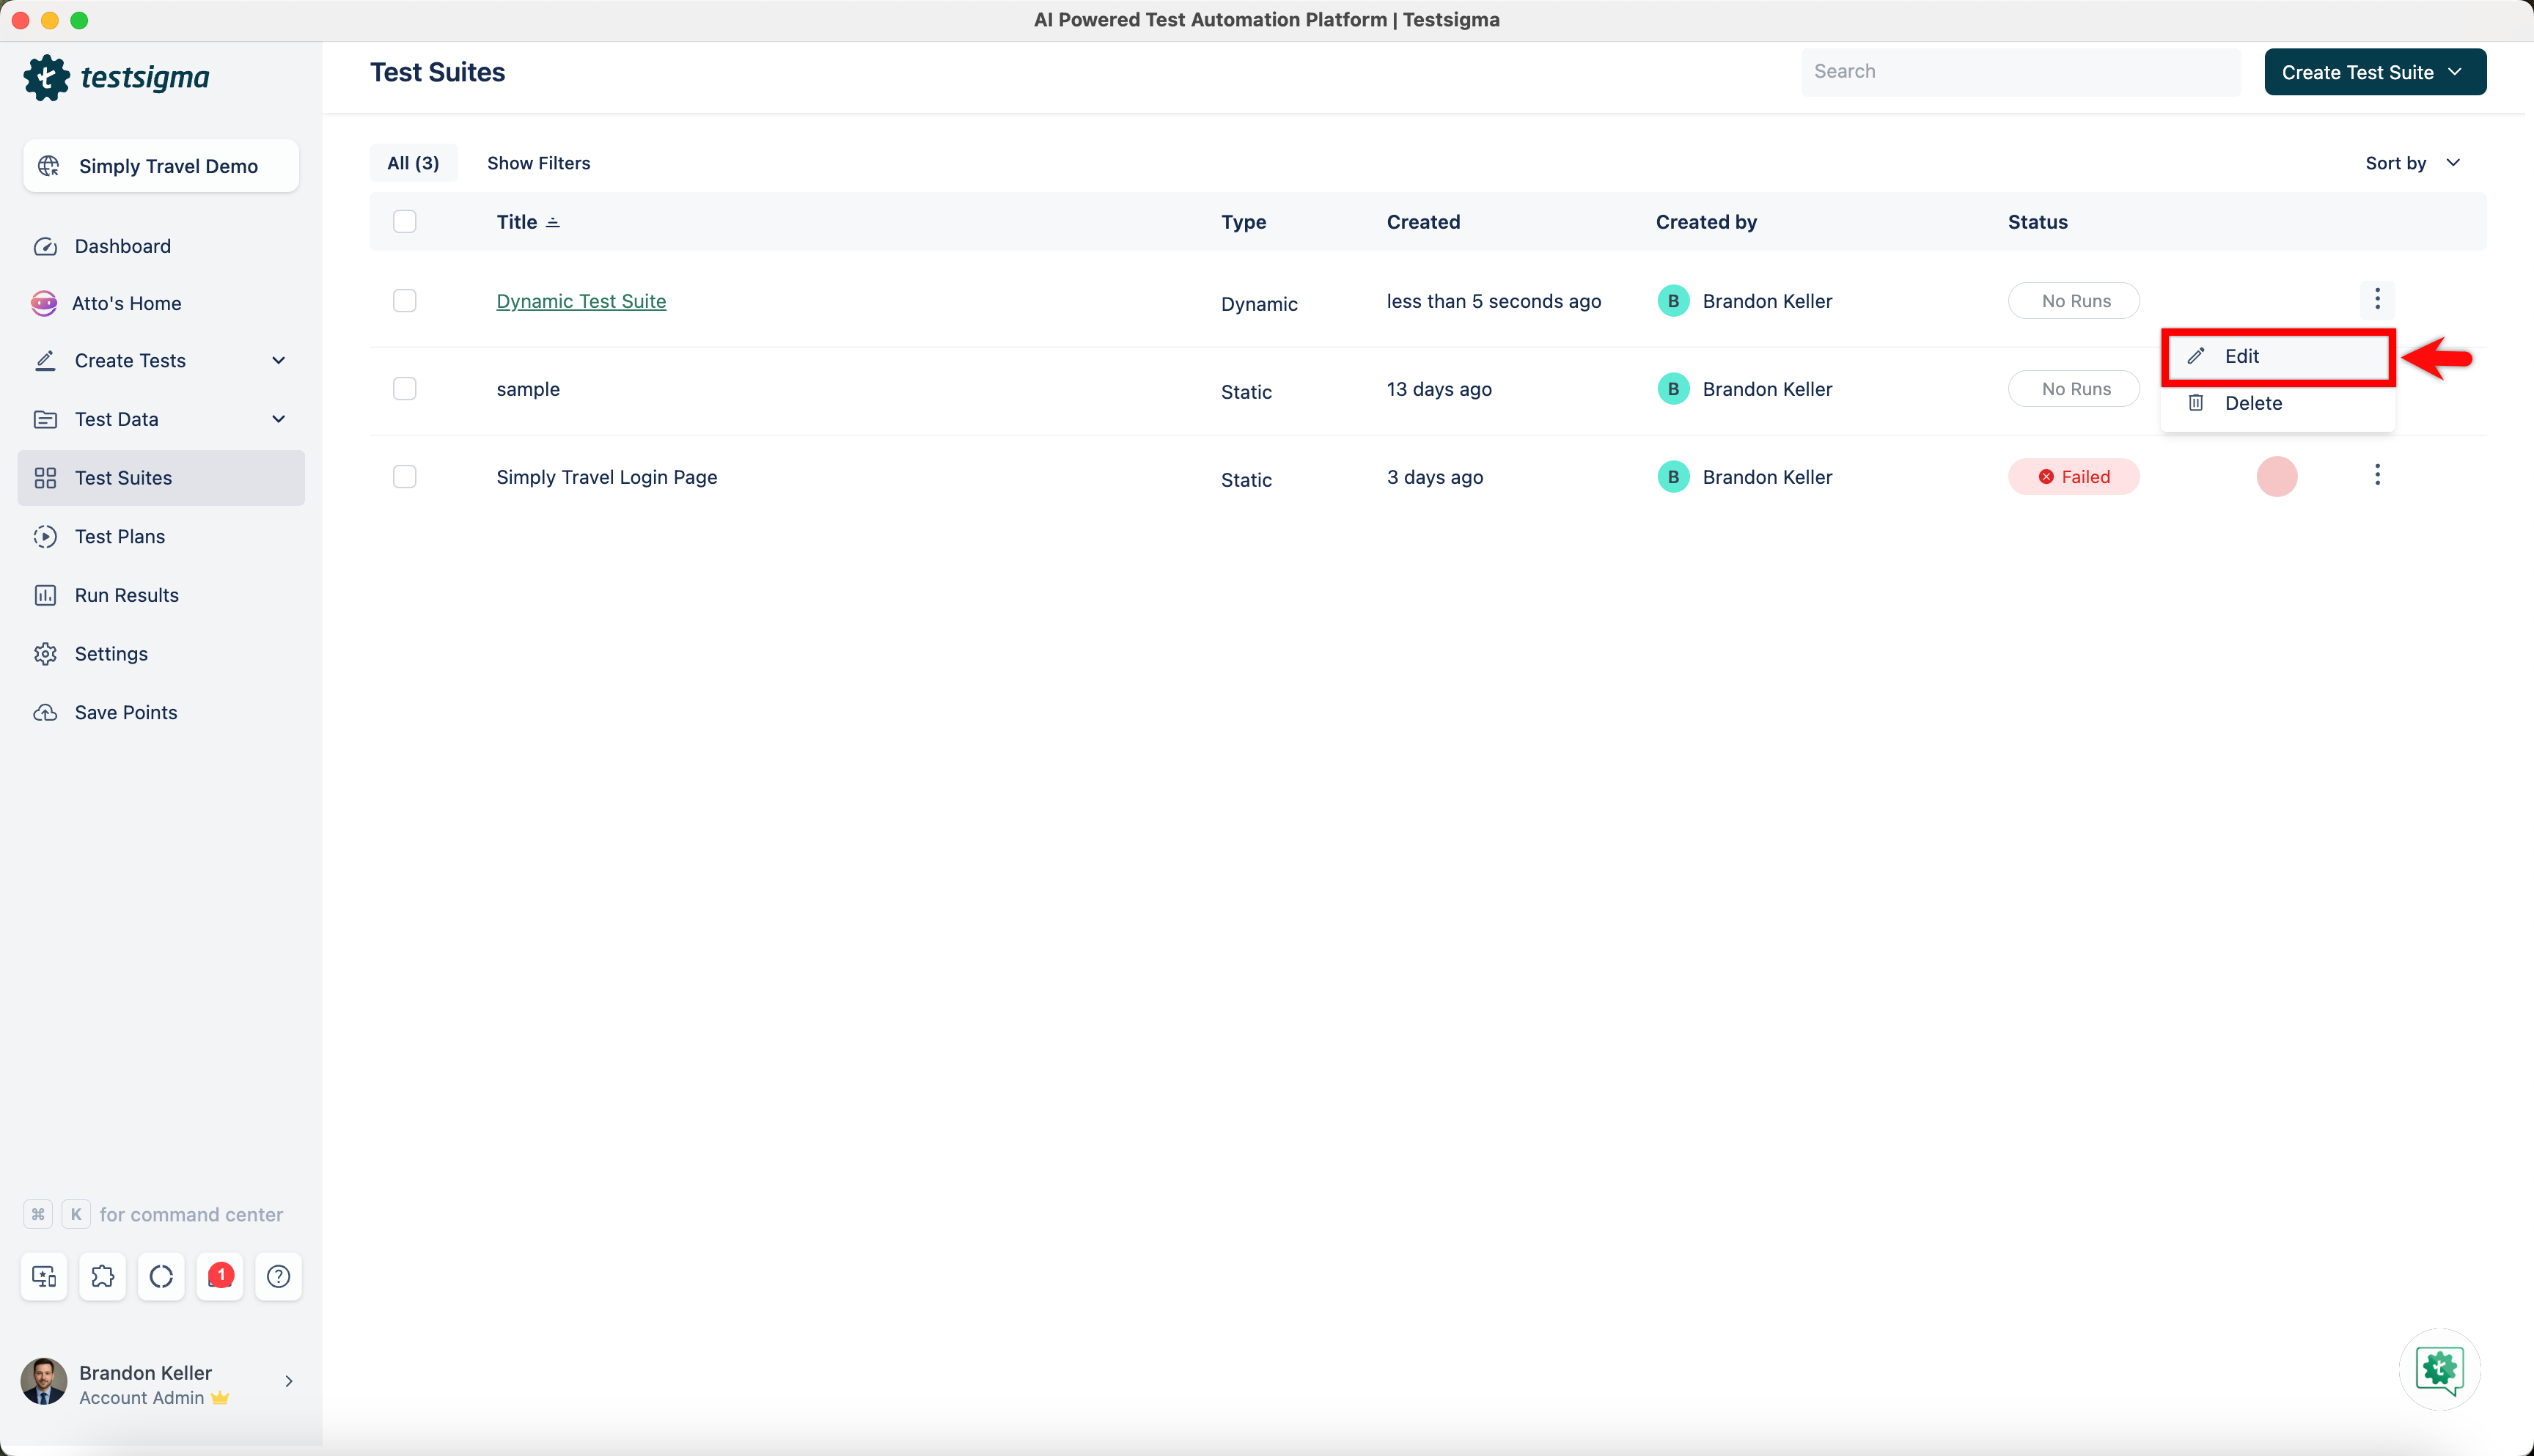
From the left navigation bar, navigate to Test Suites.
-
In the Test Suites screen, locate the dynamic test suite you want to edit.
-
Click the ellipsis icon next to the test suite and select Edit.
-
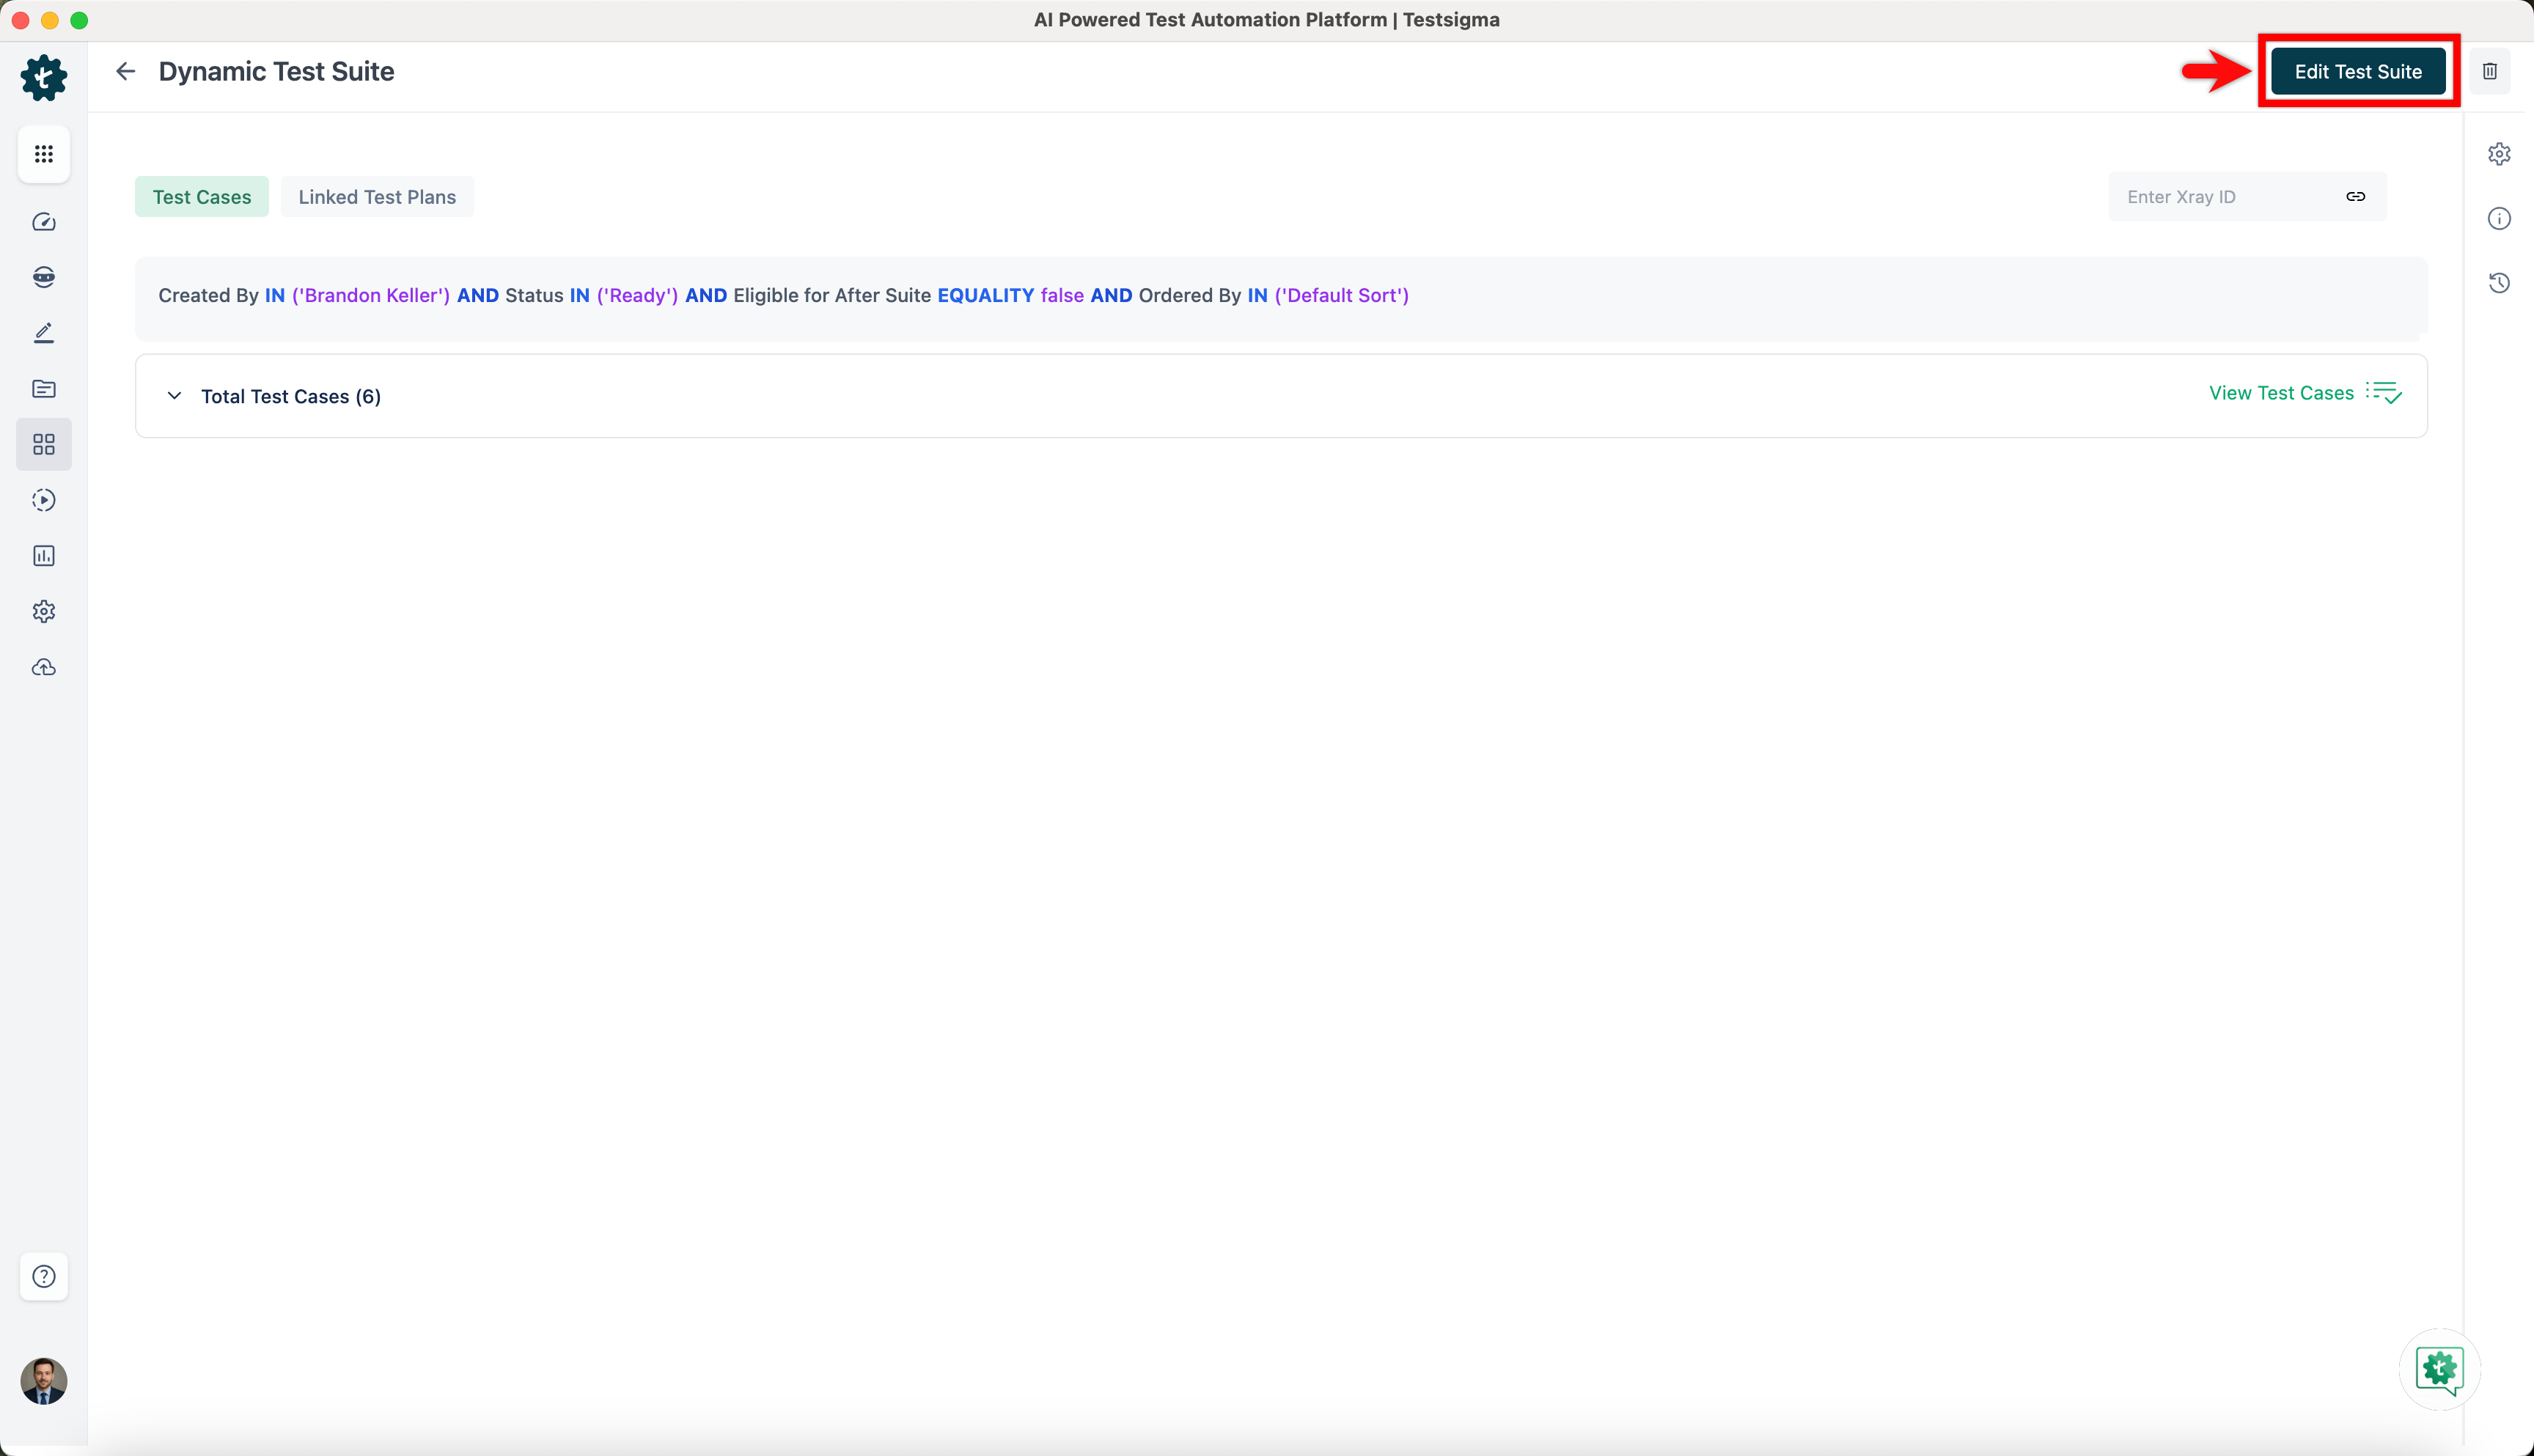
Click Edit Test Suite.
-
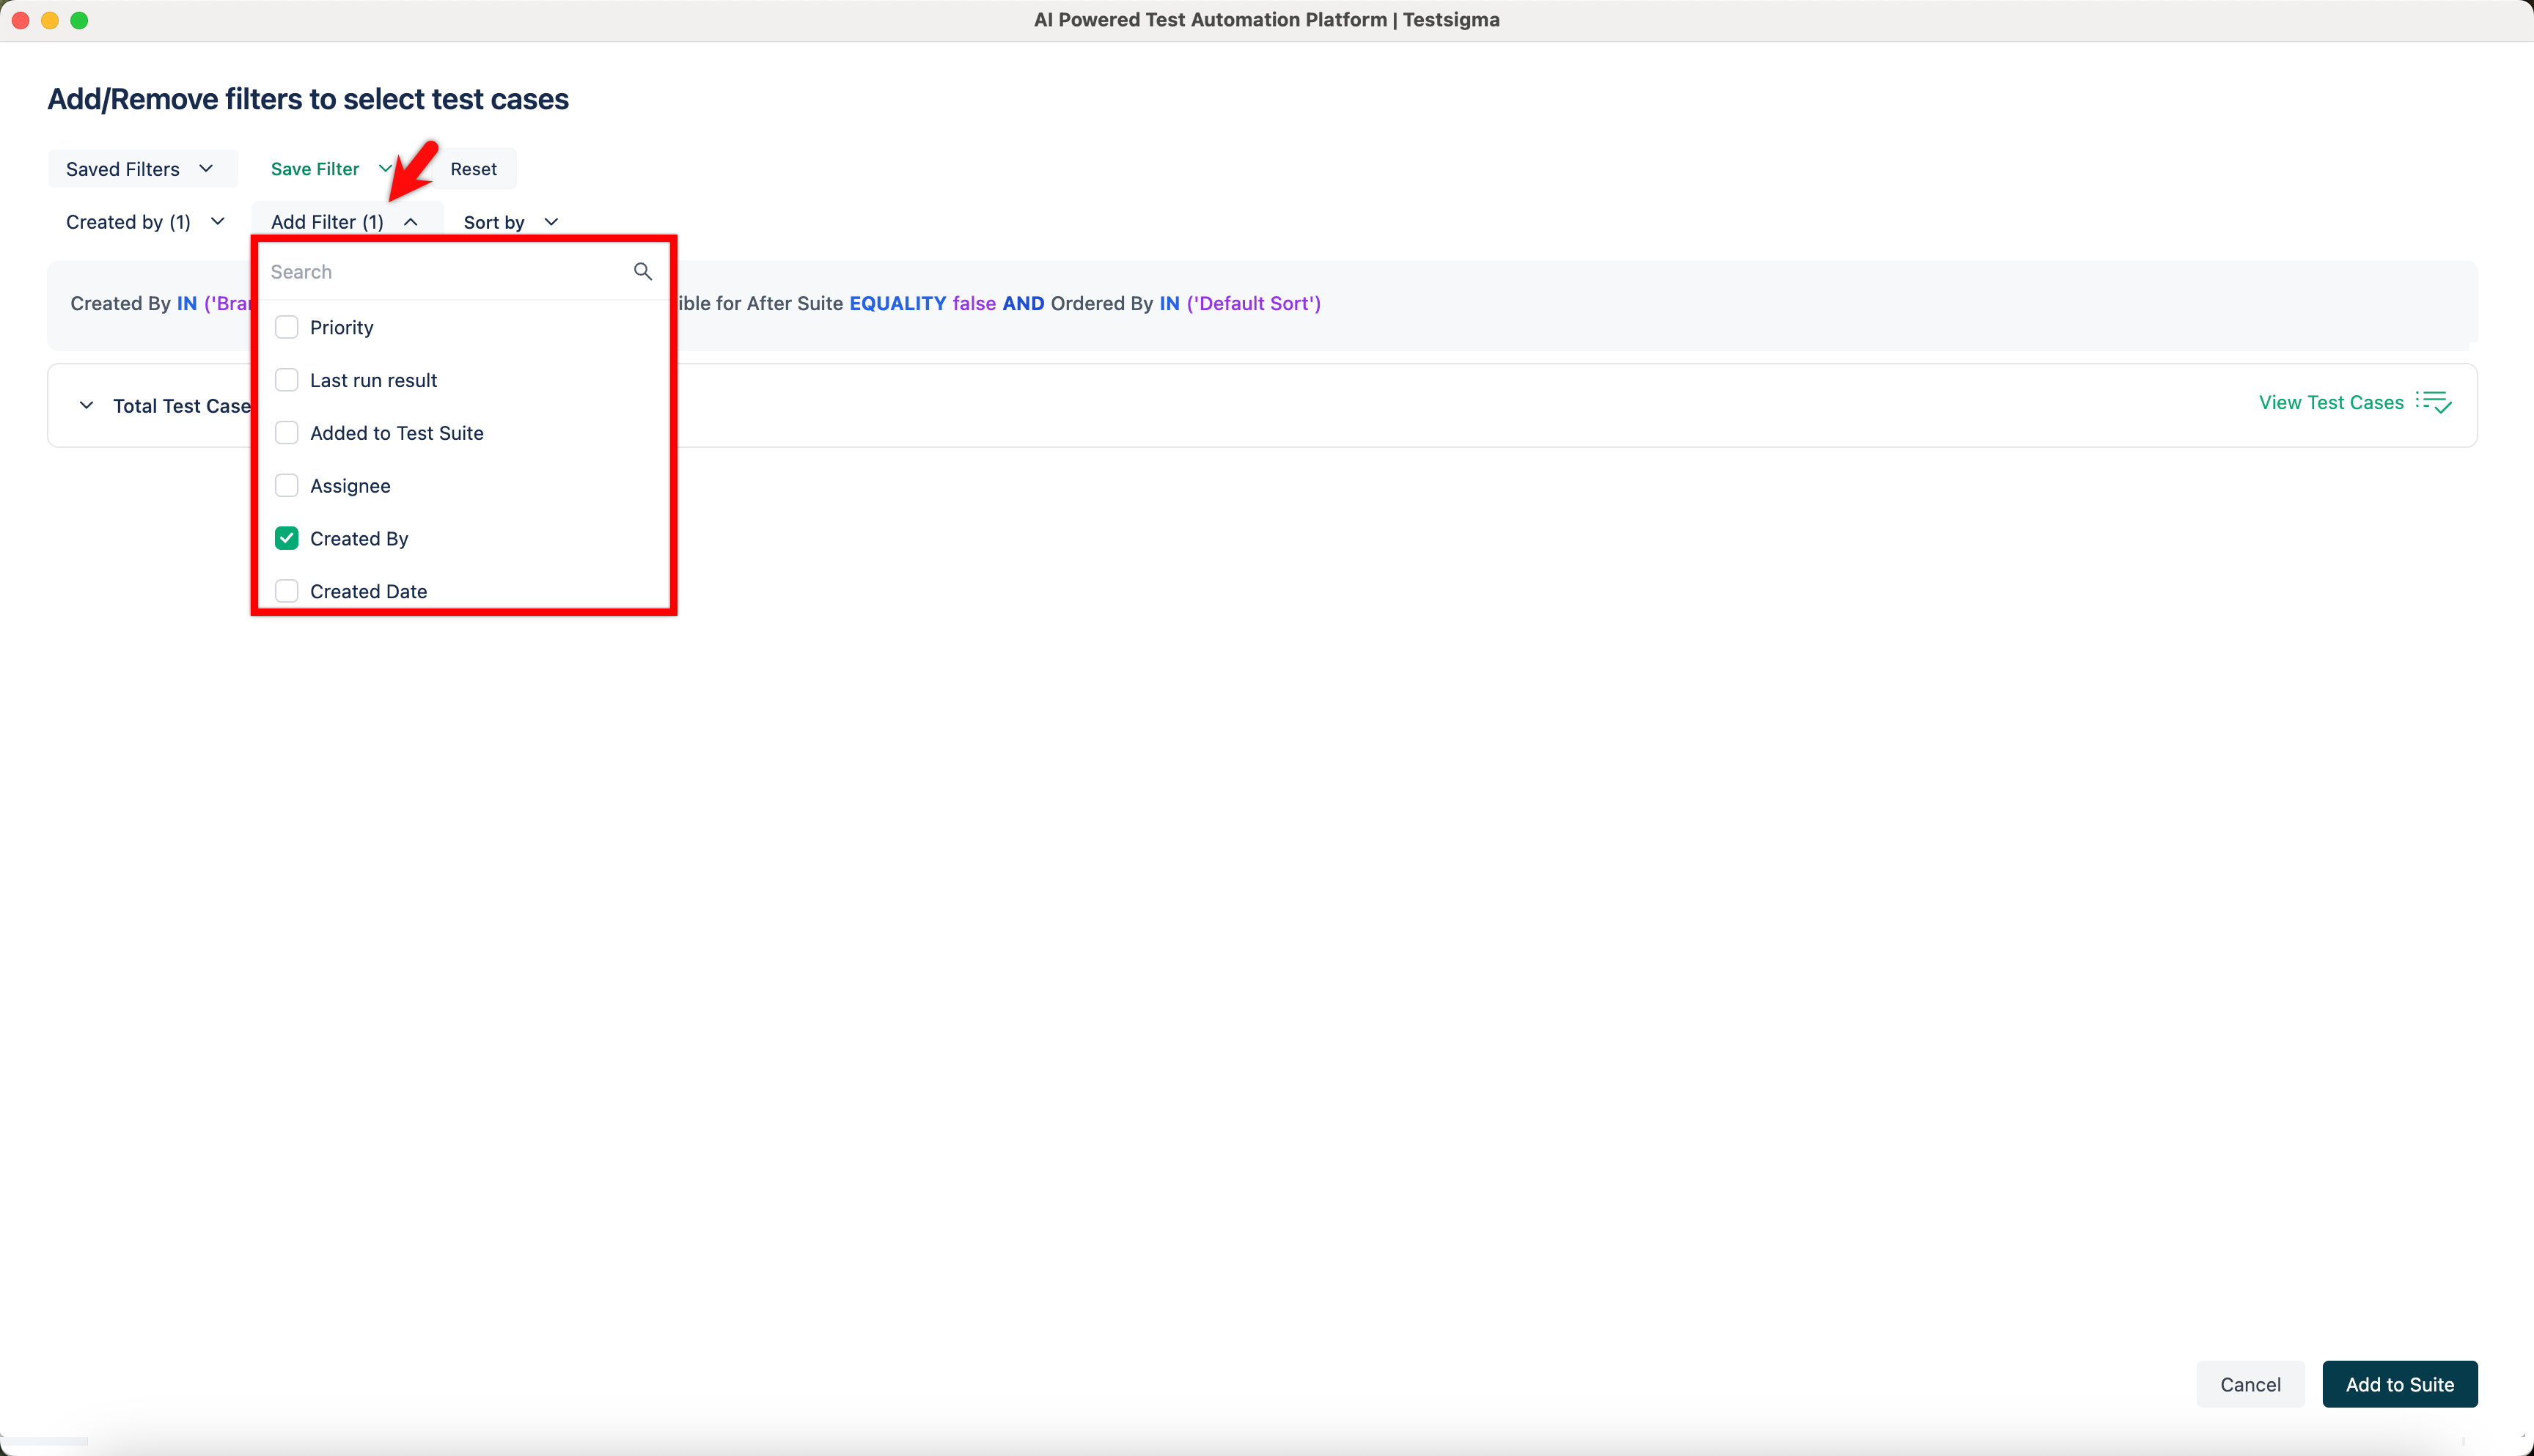
In the Add/Remove filters to select test cases screen, expand Add filters and select the required filters.
-
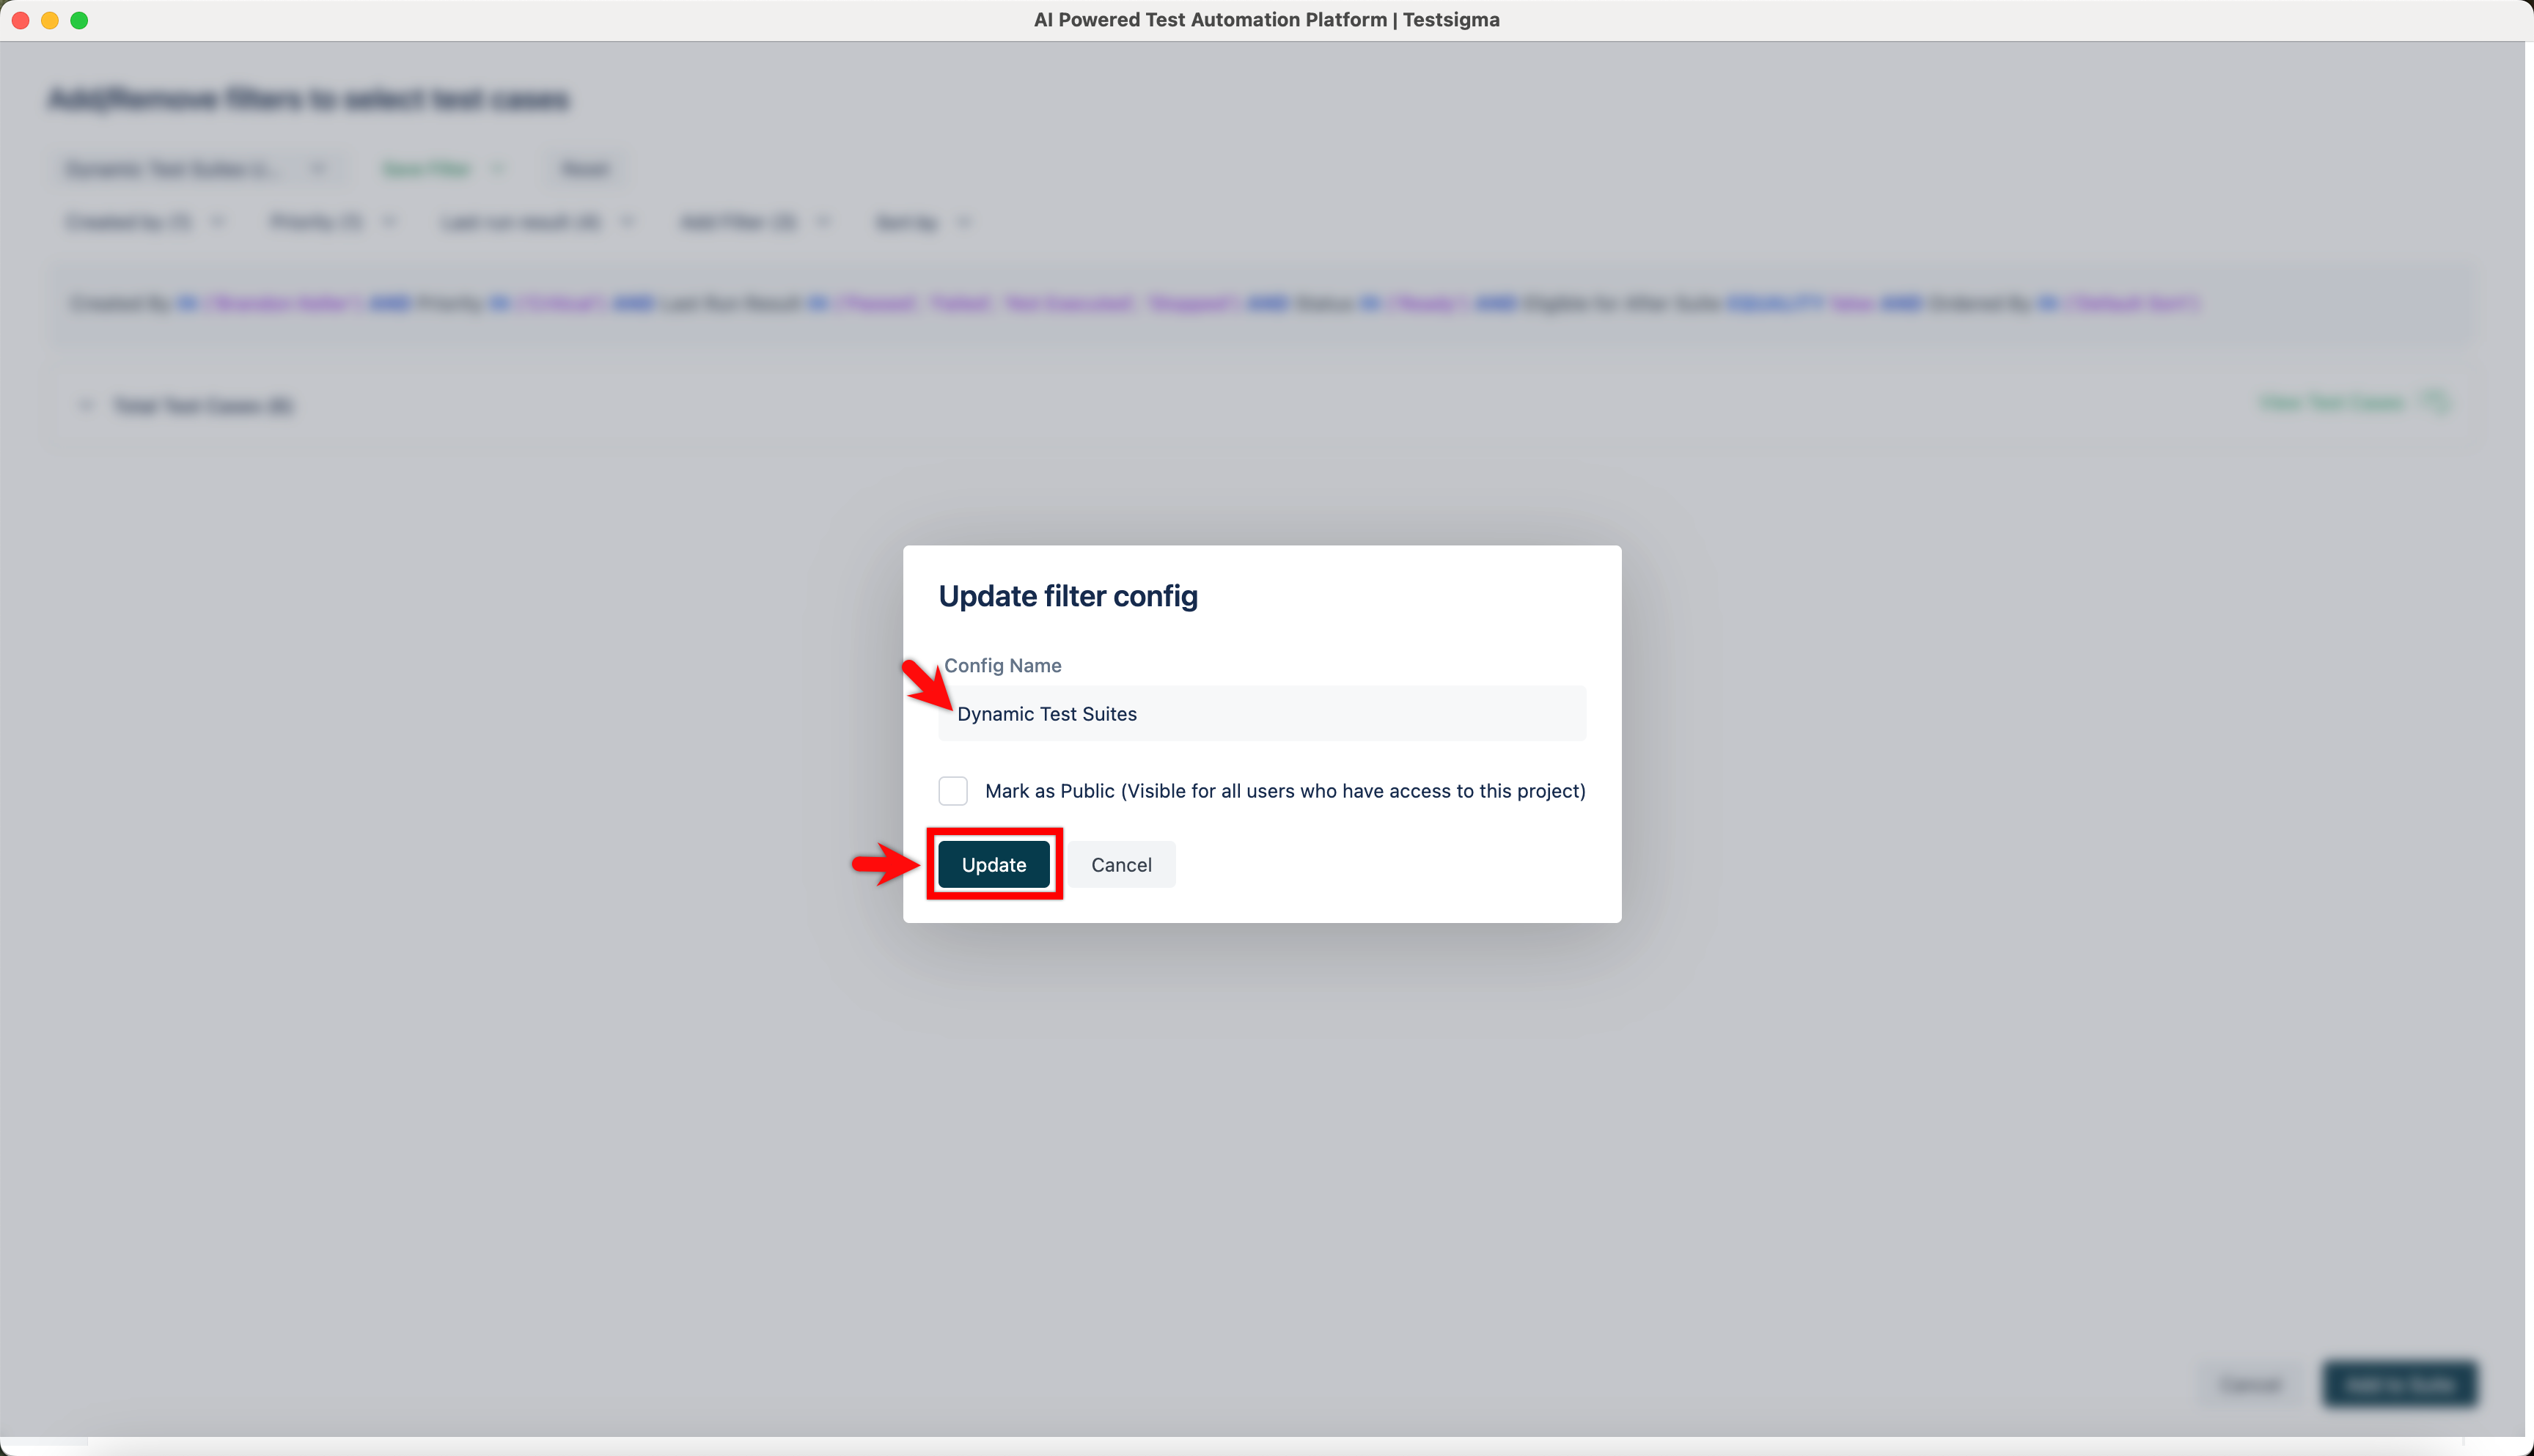
After modifying the filters, expand Save Filter and choose one of the following:
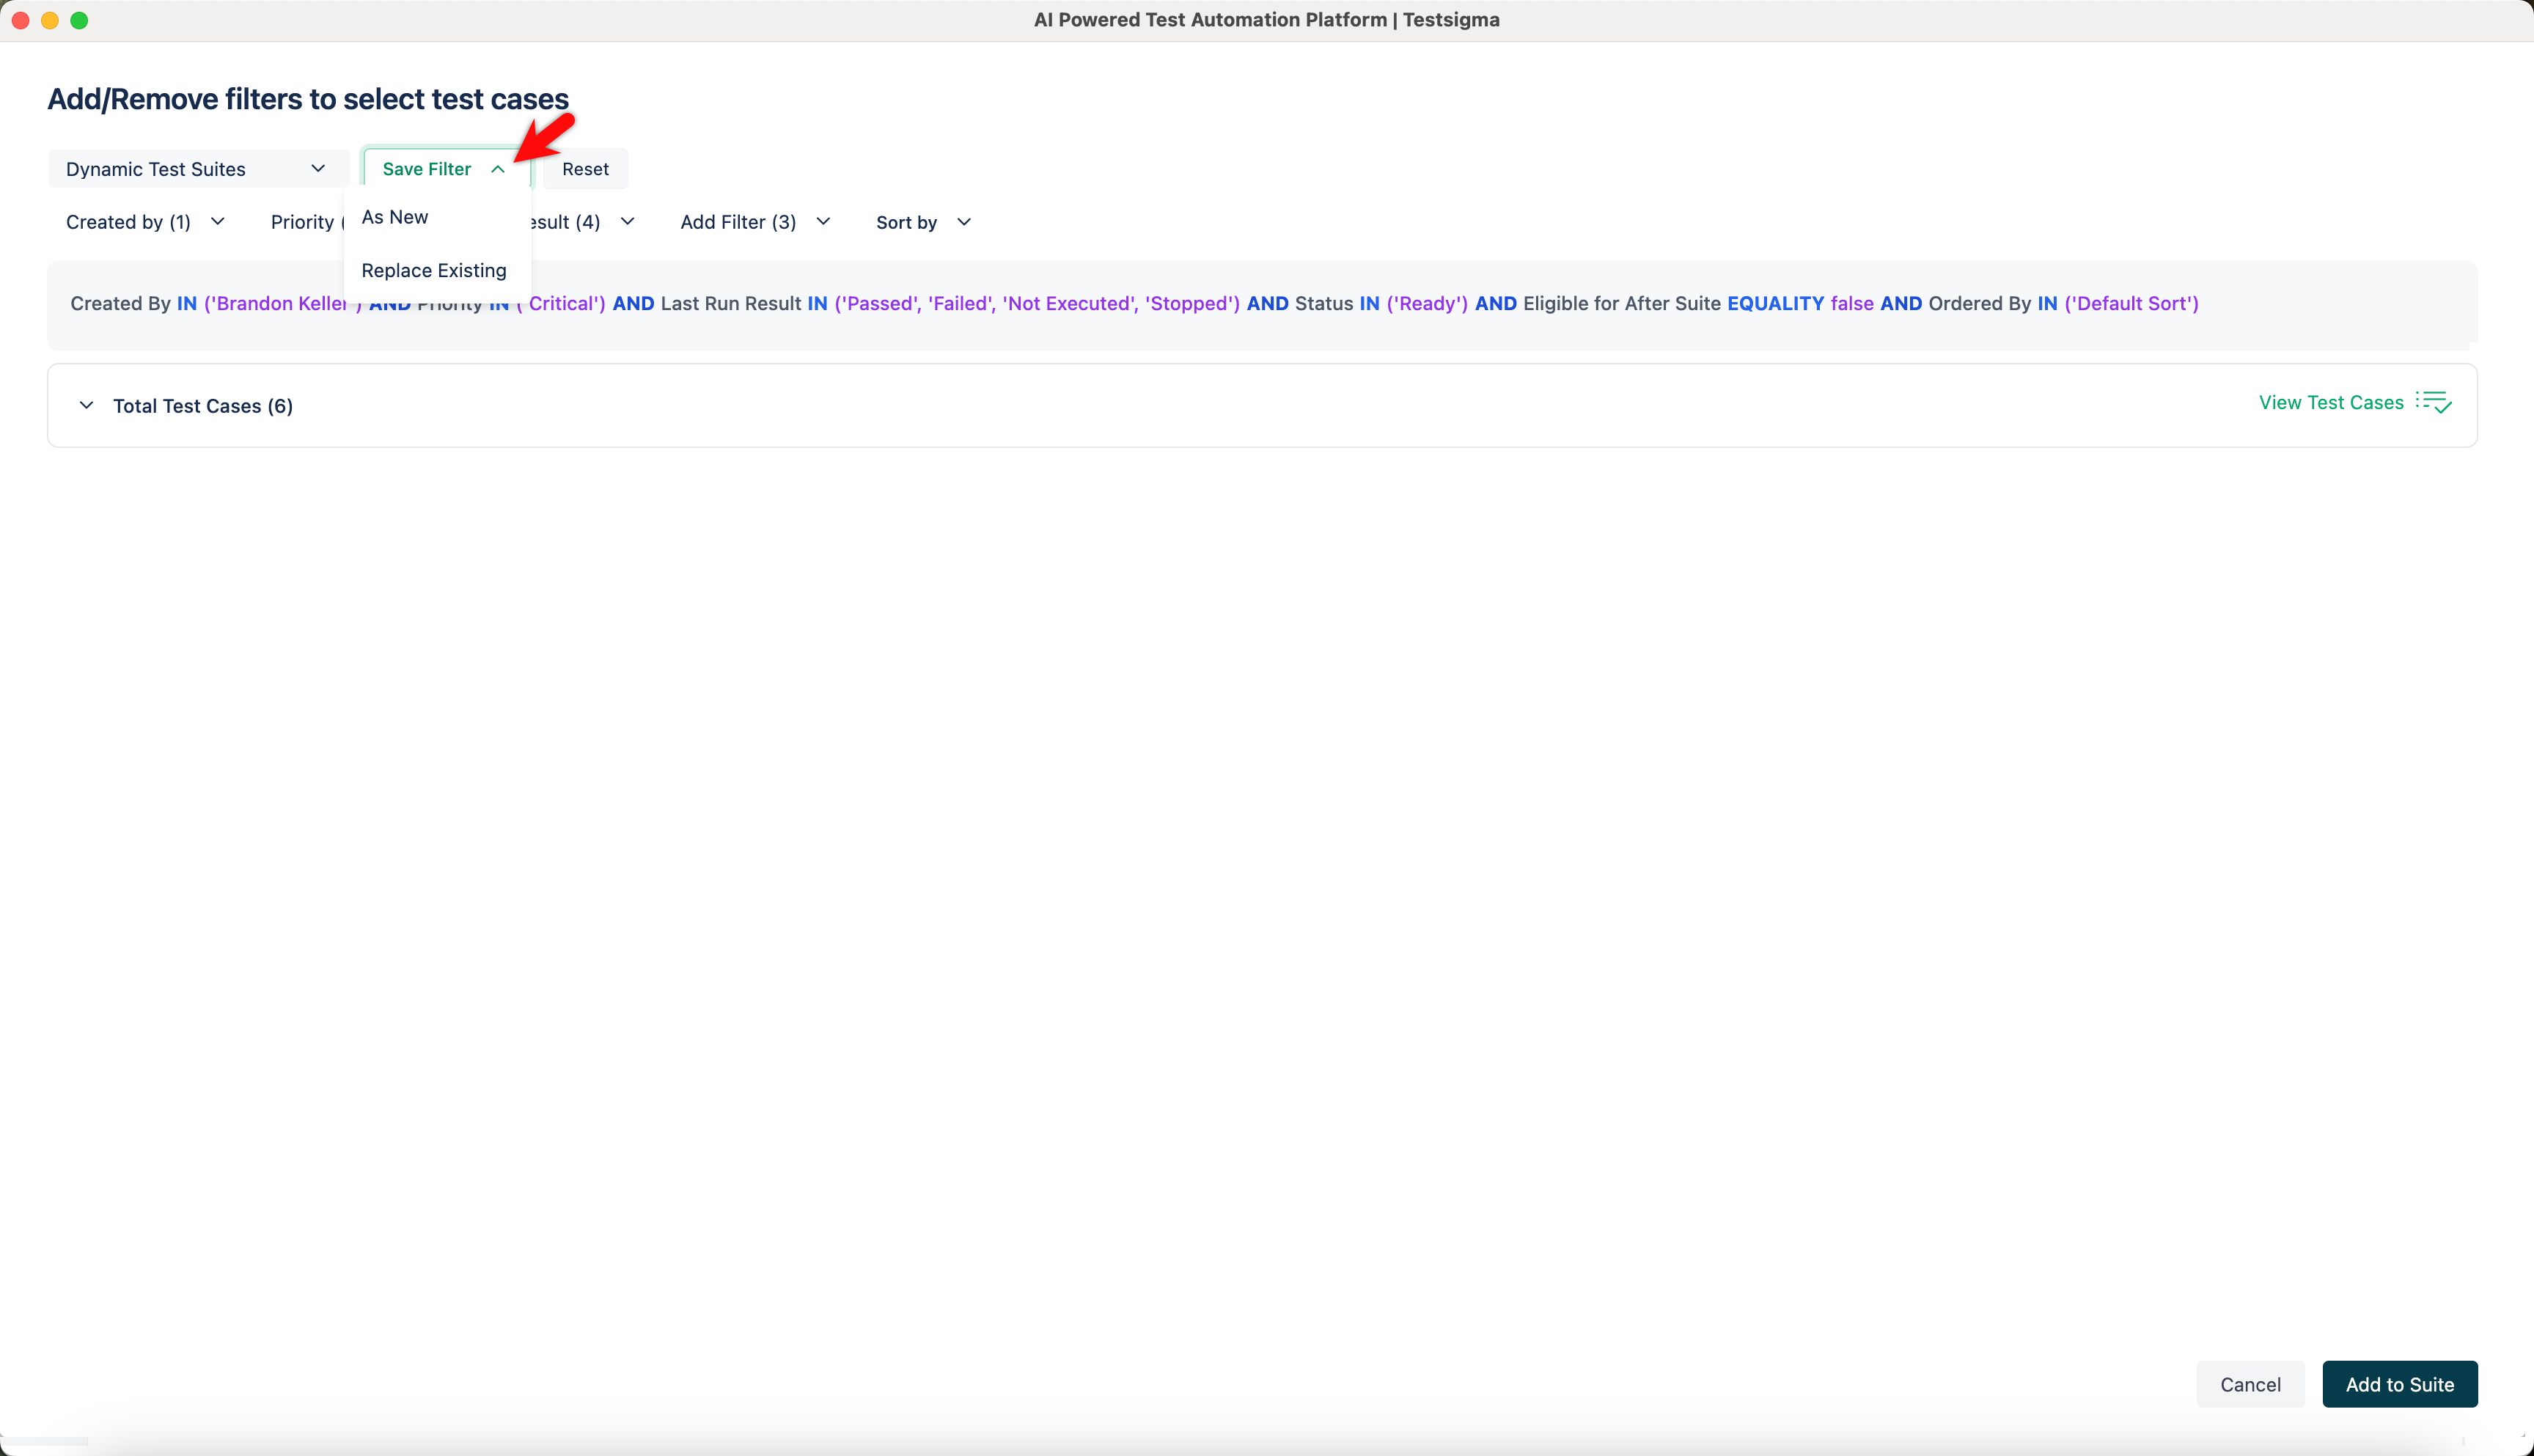
As New: Opens the Save filter Config as dialog. Enter a name for the new filter and click Save.

Replace Existing: Opens the Update filter config dialog. Edit the name if needed and click Save
-
Click Add to Suite.
Delete a Dynamic Test Suite
Section titled “Delete a Dynamic Test Suite”-
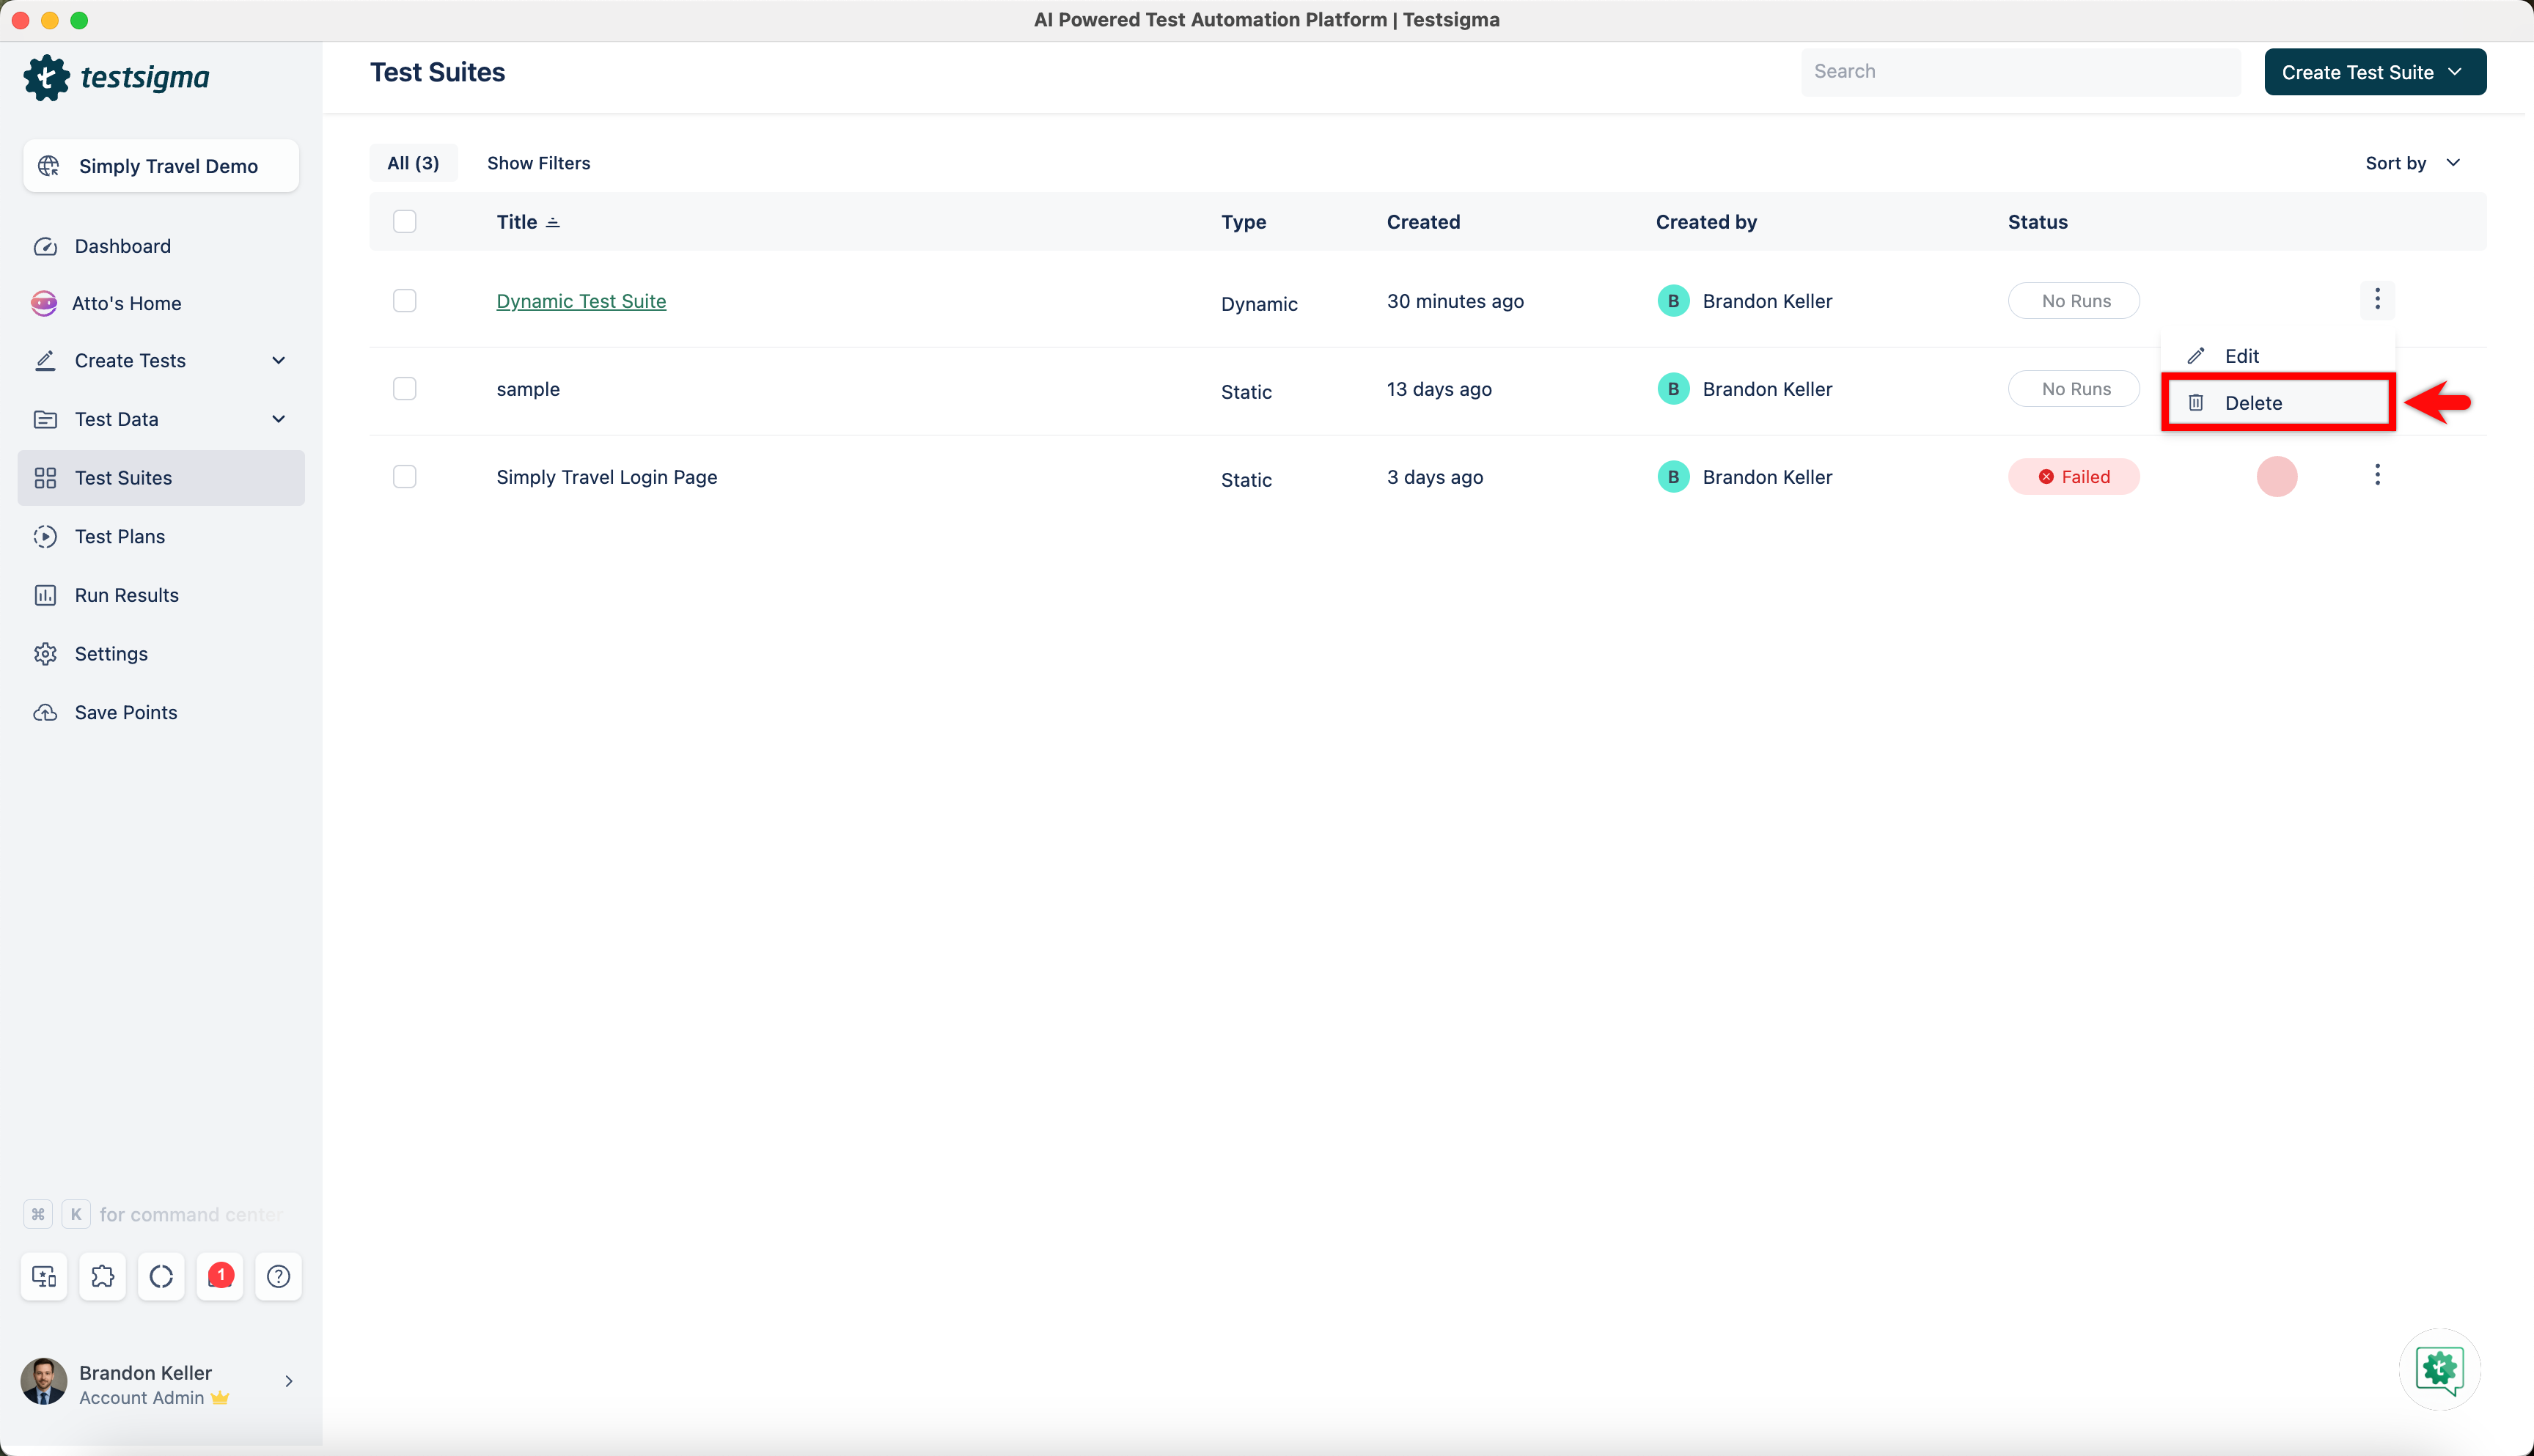
From the left navigation bar, navigate to Test Suites.
-
In the Test Suites screen, locate the dynamic test suite you want to edit.
-
Click the ellipsis icon next to the test suite and select Delete.
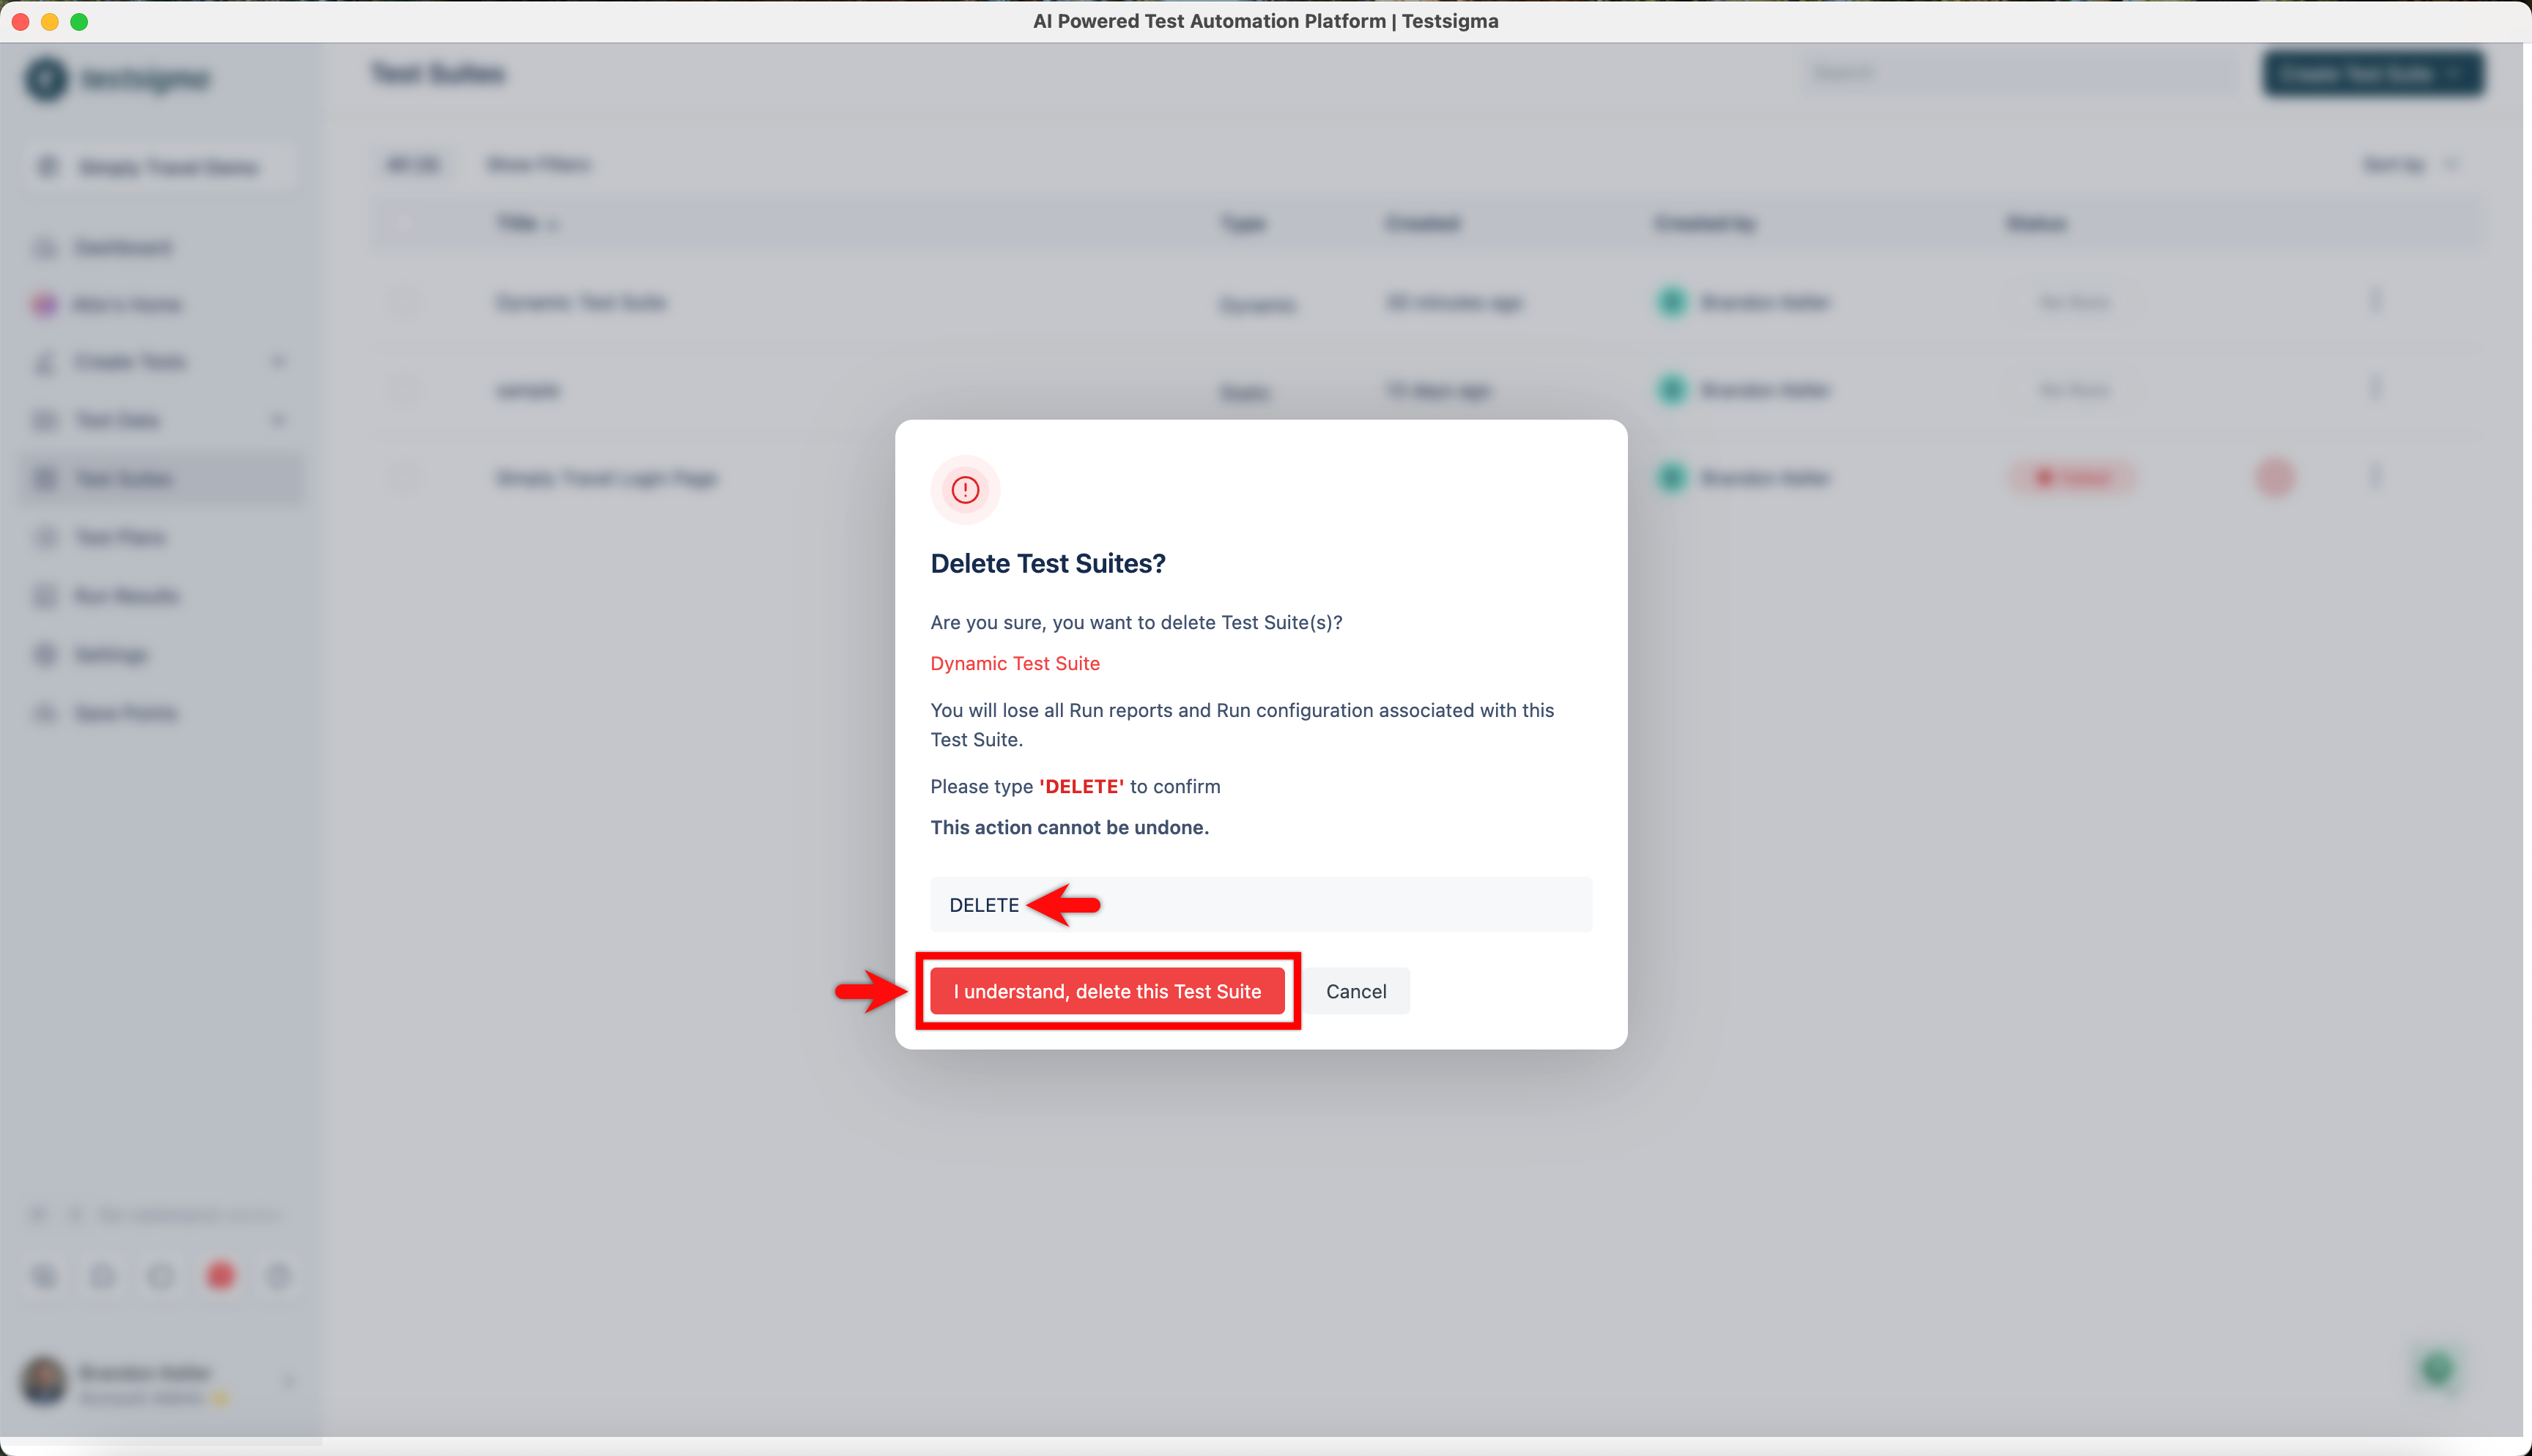
- In the Delete Test Suites dialog, enter DELETE to confirm the deletion and then click on I understand, delete this Test Suite.
Add a Dynamic Test Suite to a Test Plan
Section titled “Add a Dynamic Test Suite to a Test Plan”-
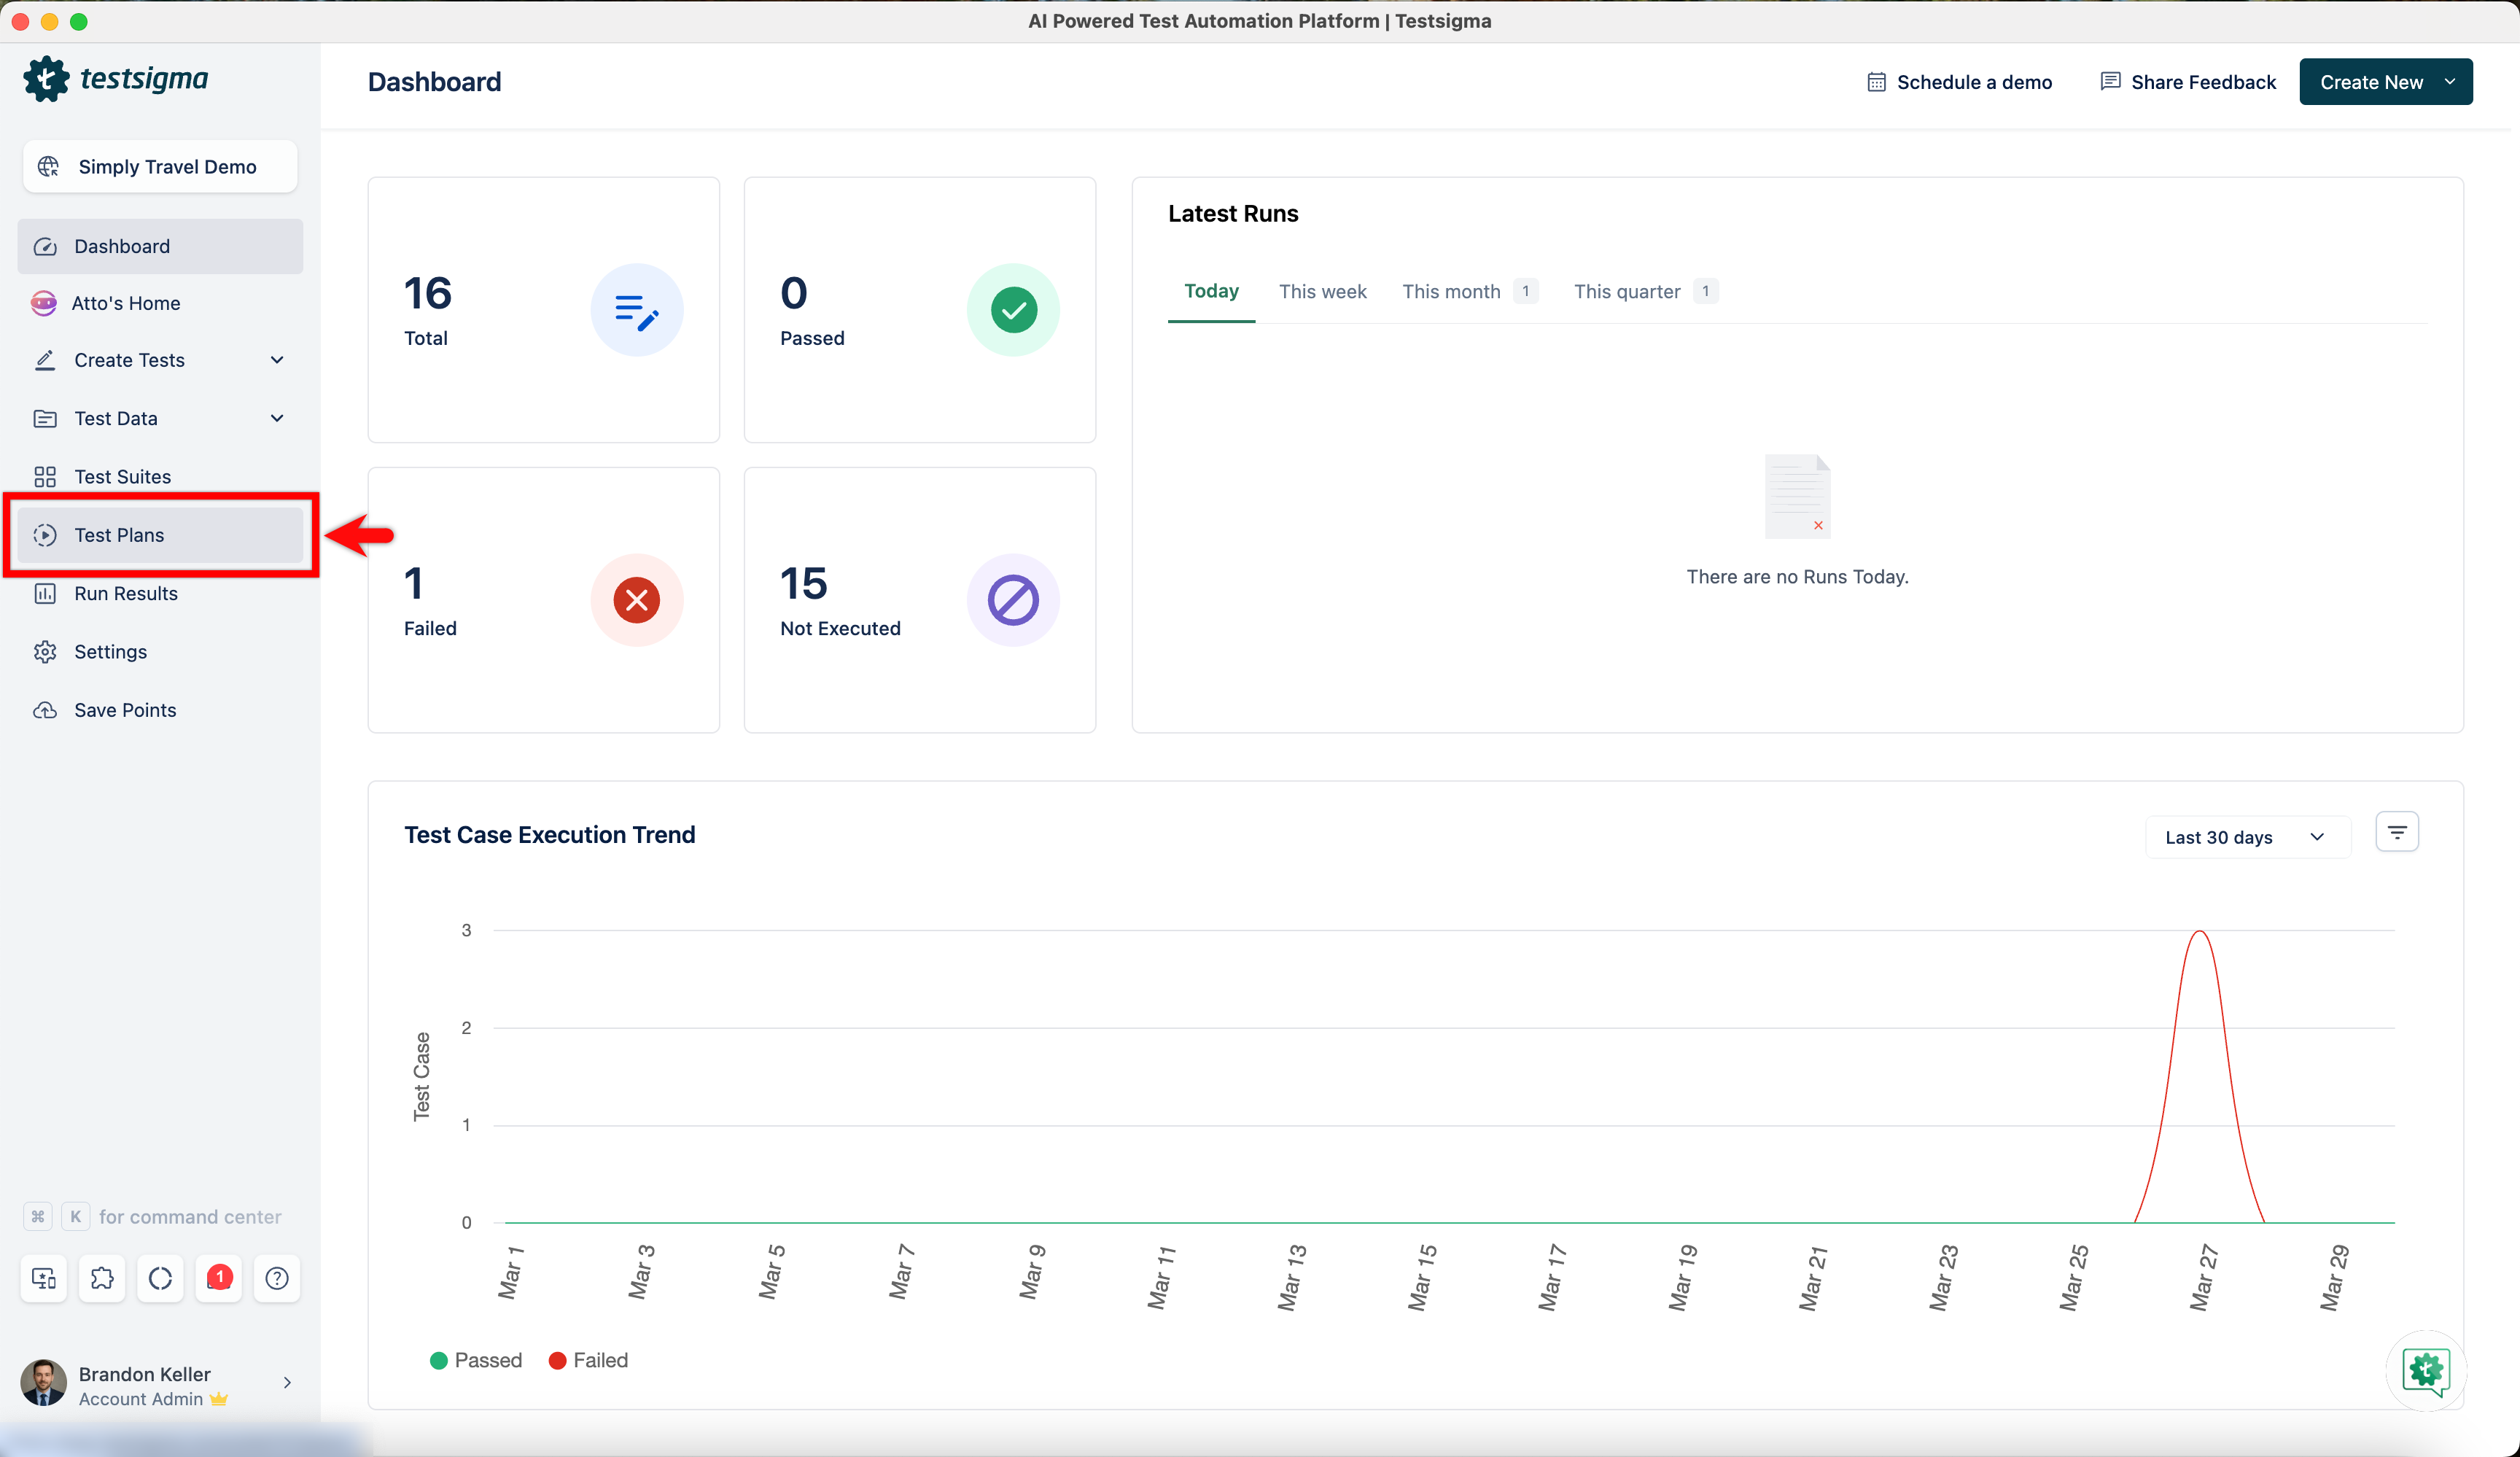
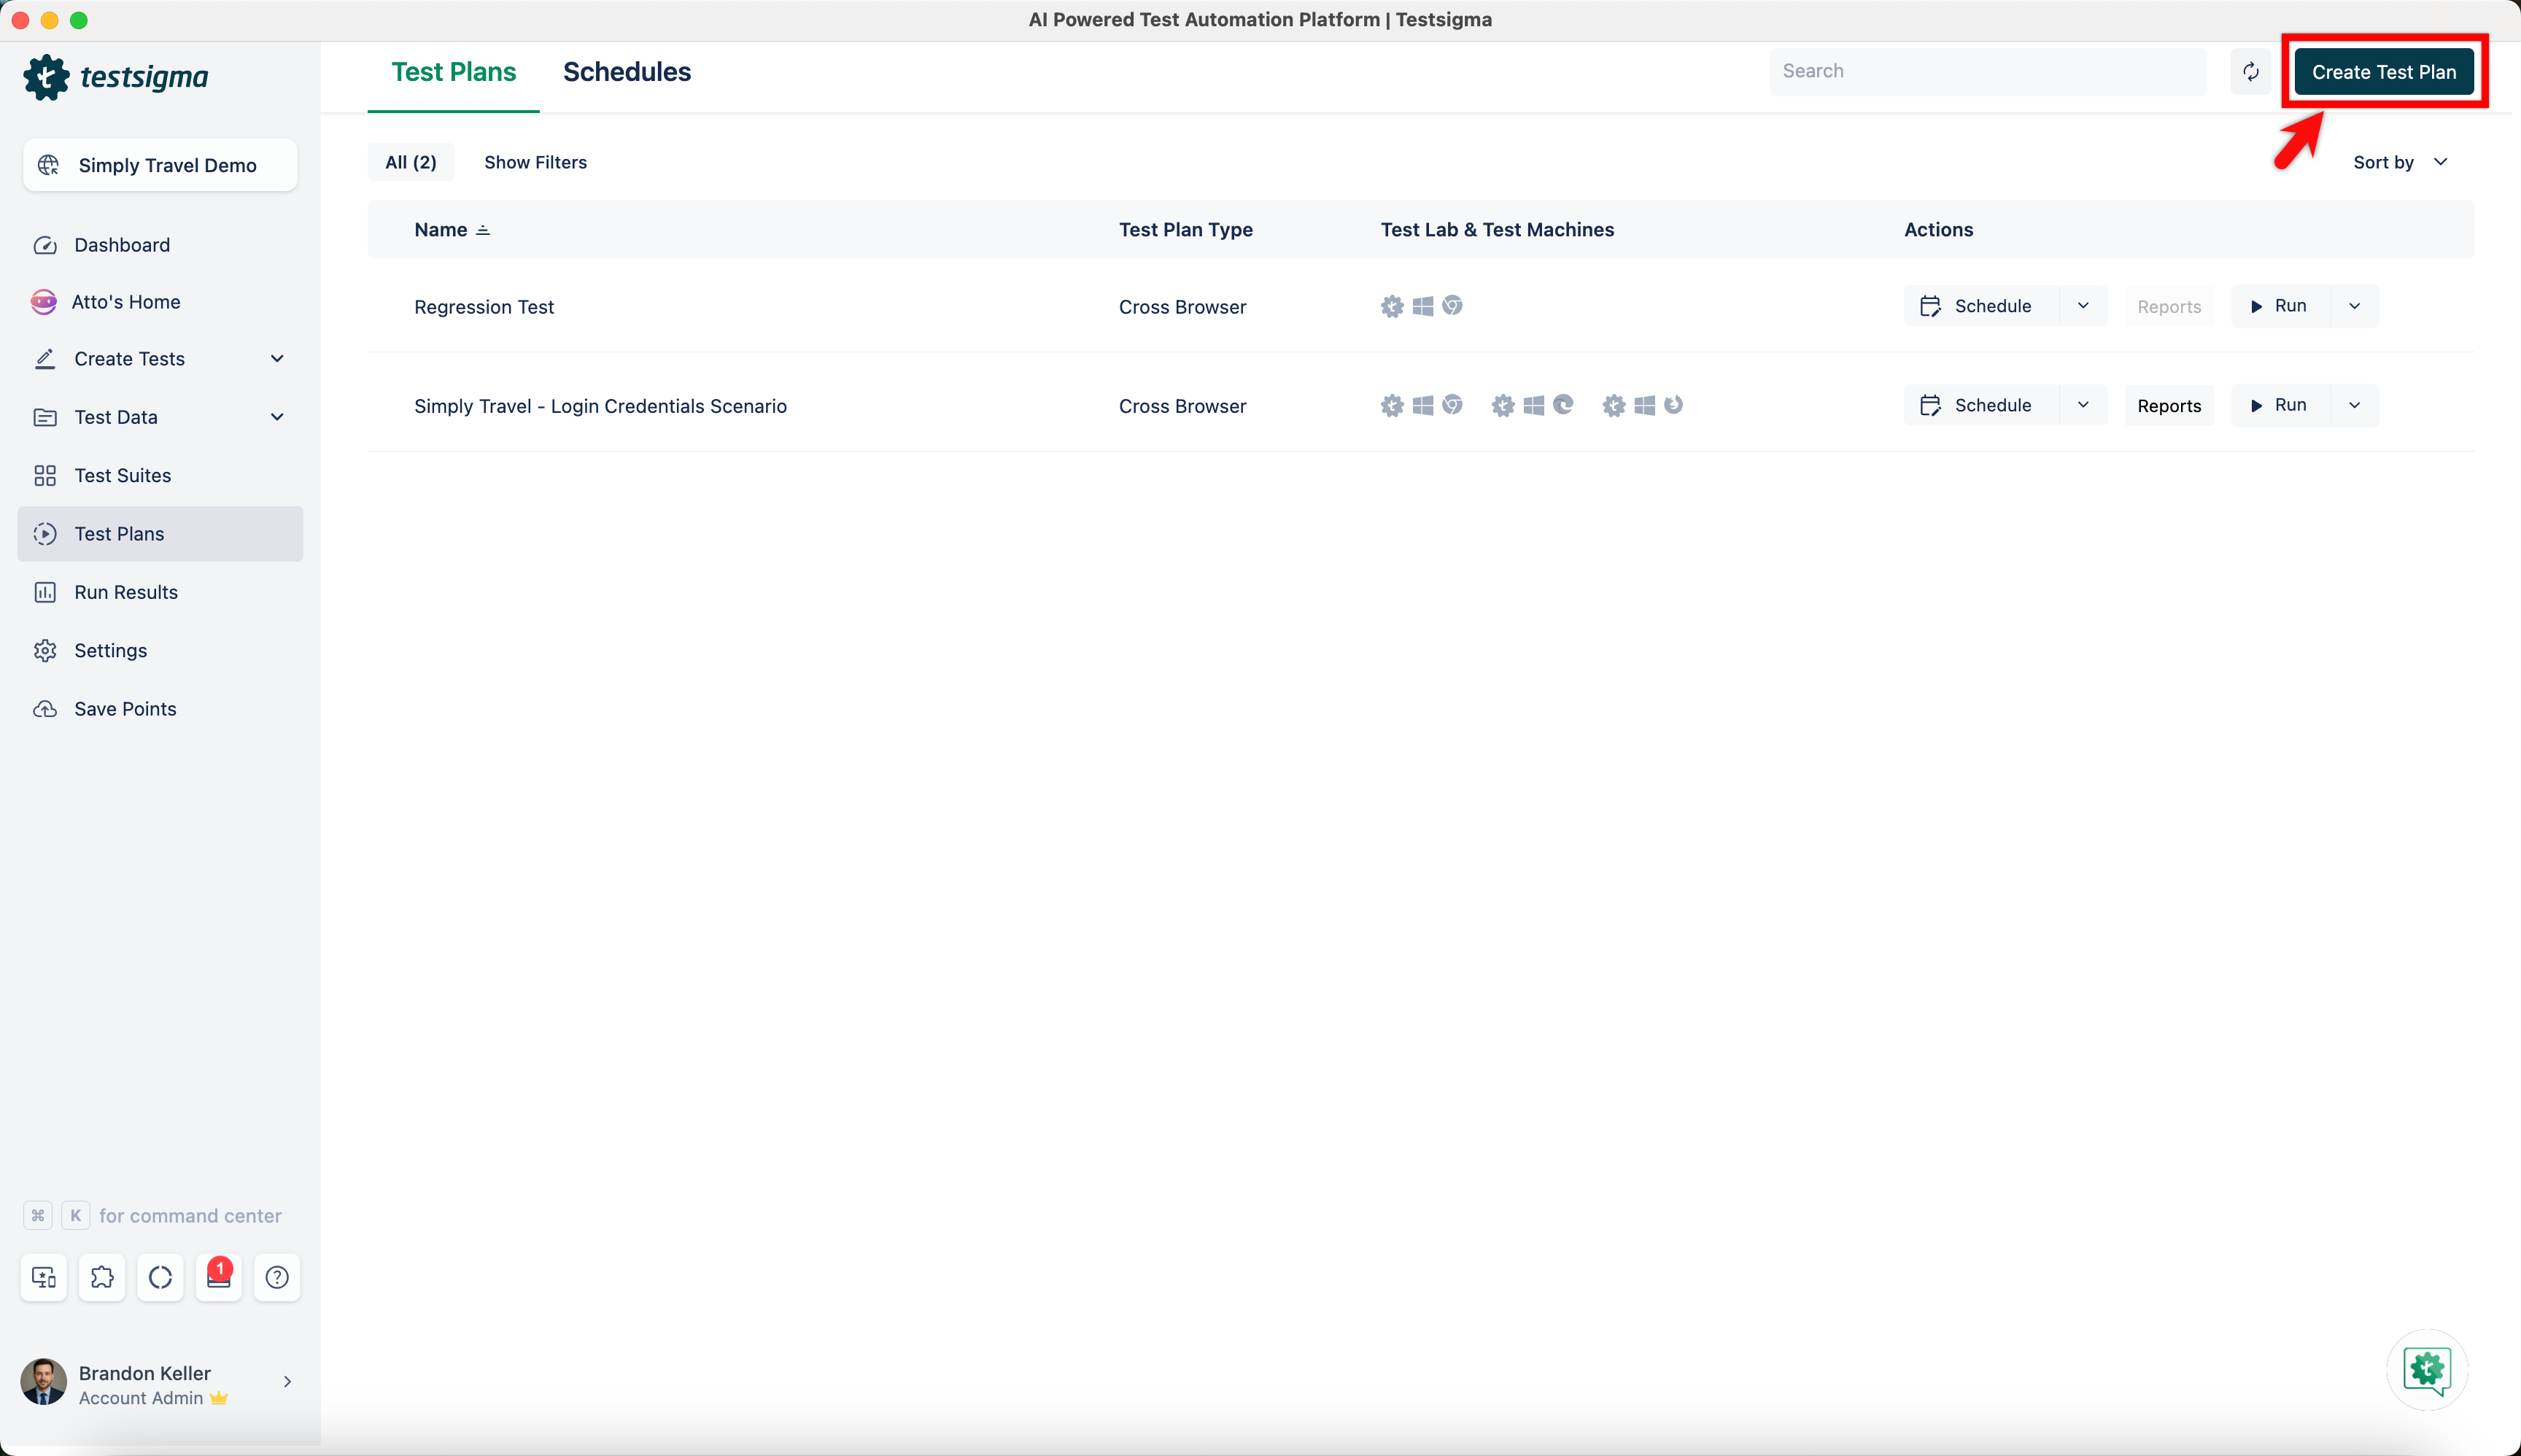
From the left navigation bar, navigate to Test Plans.
-
Click Create Test Plan.
-
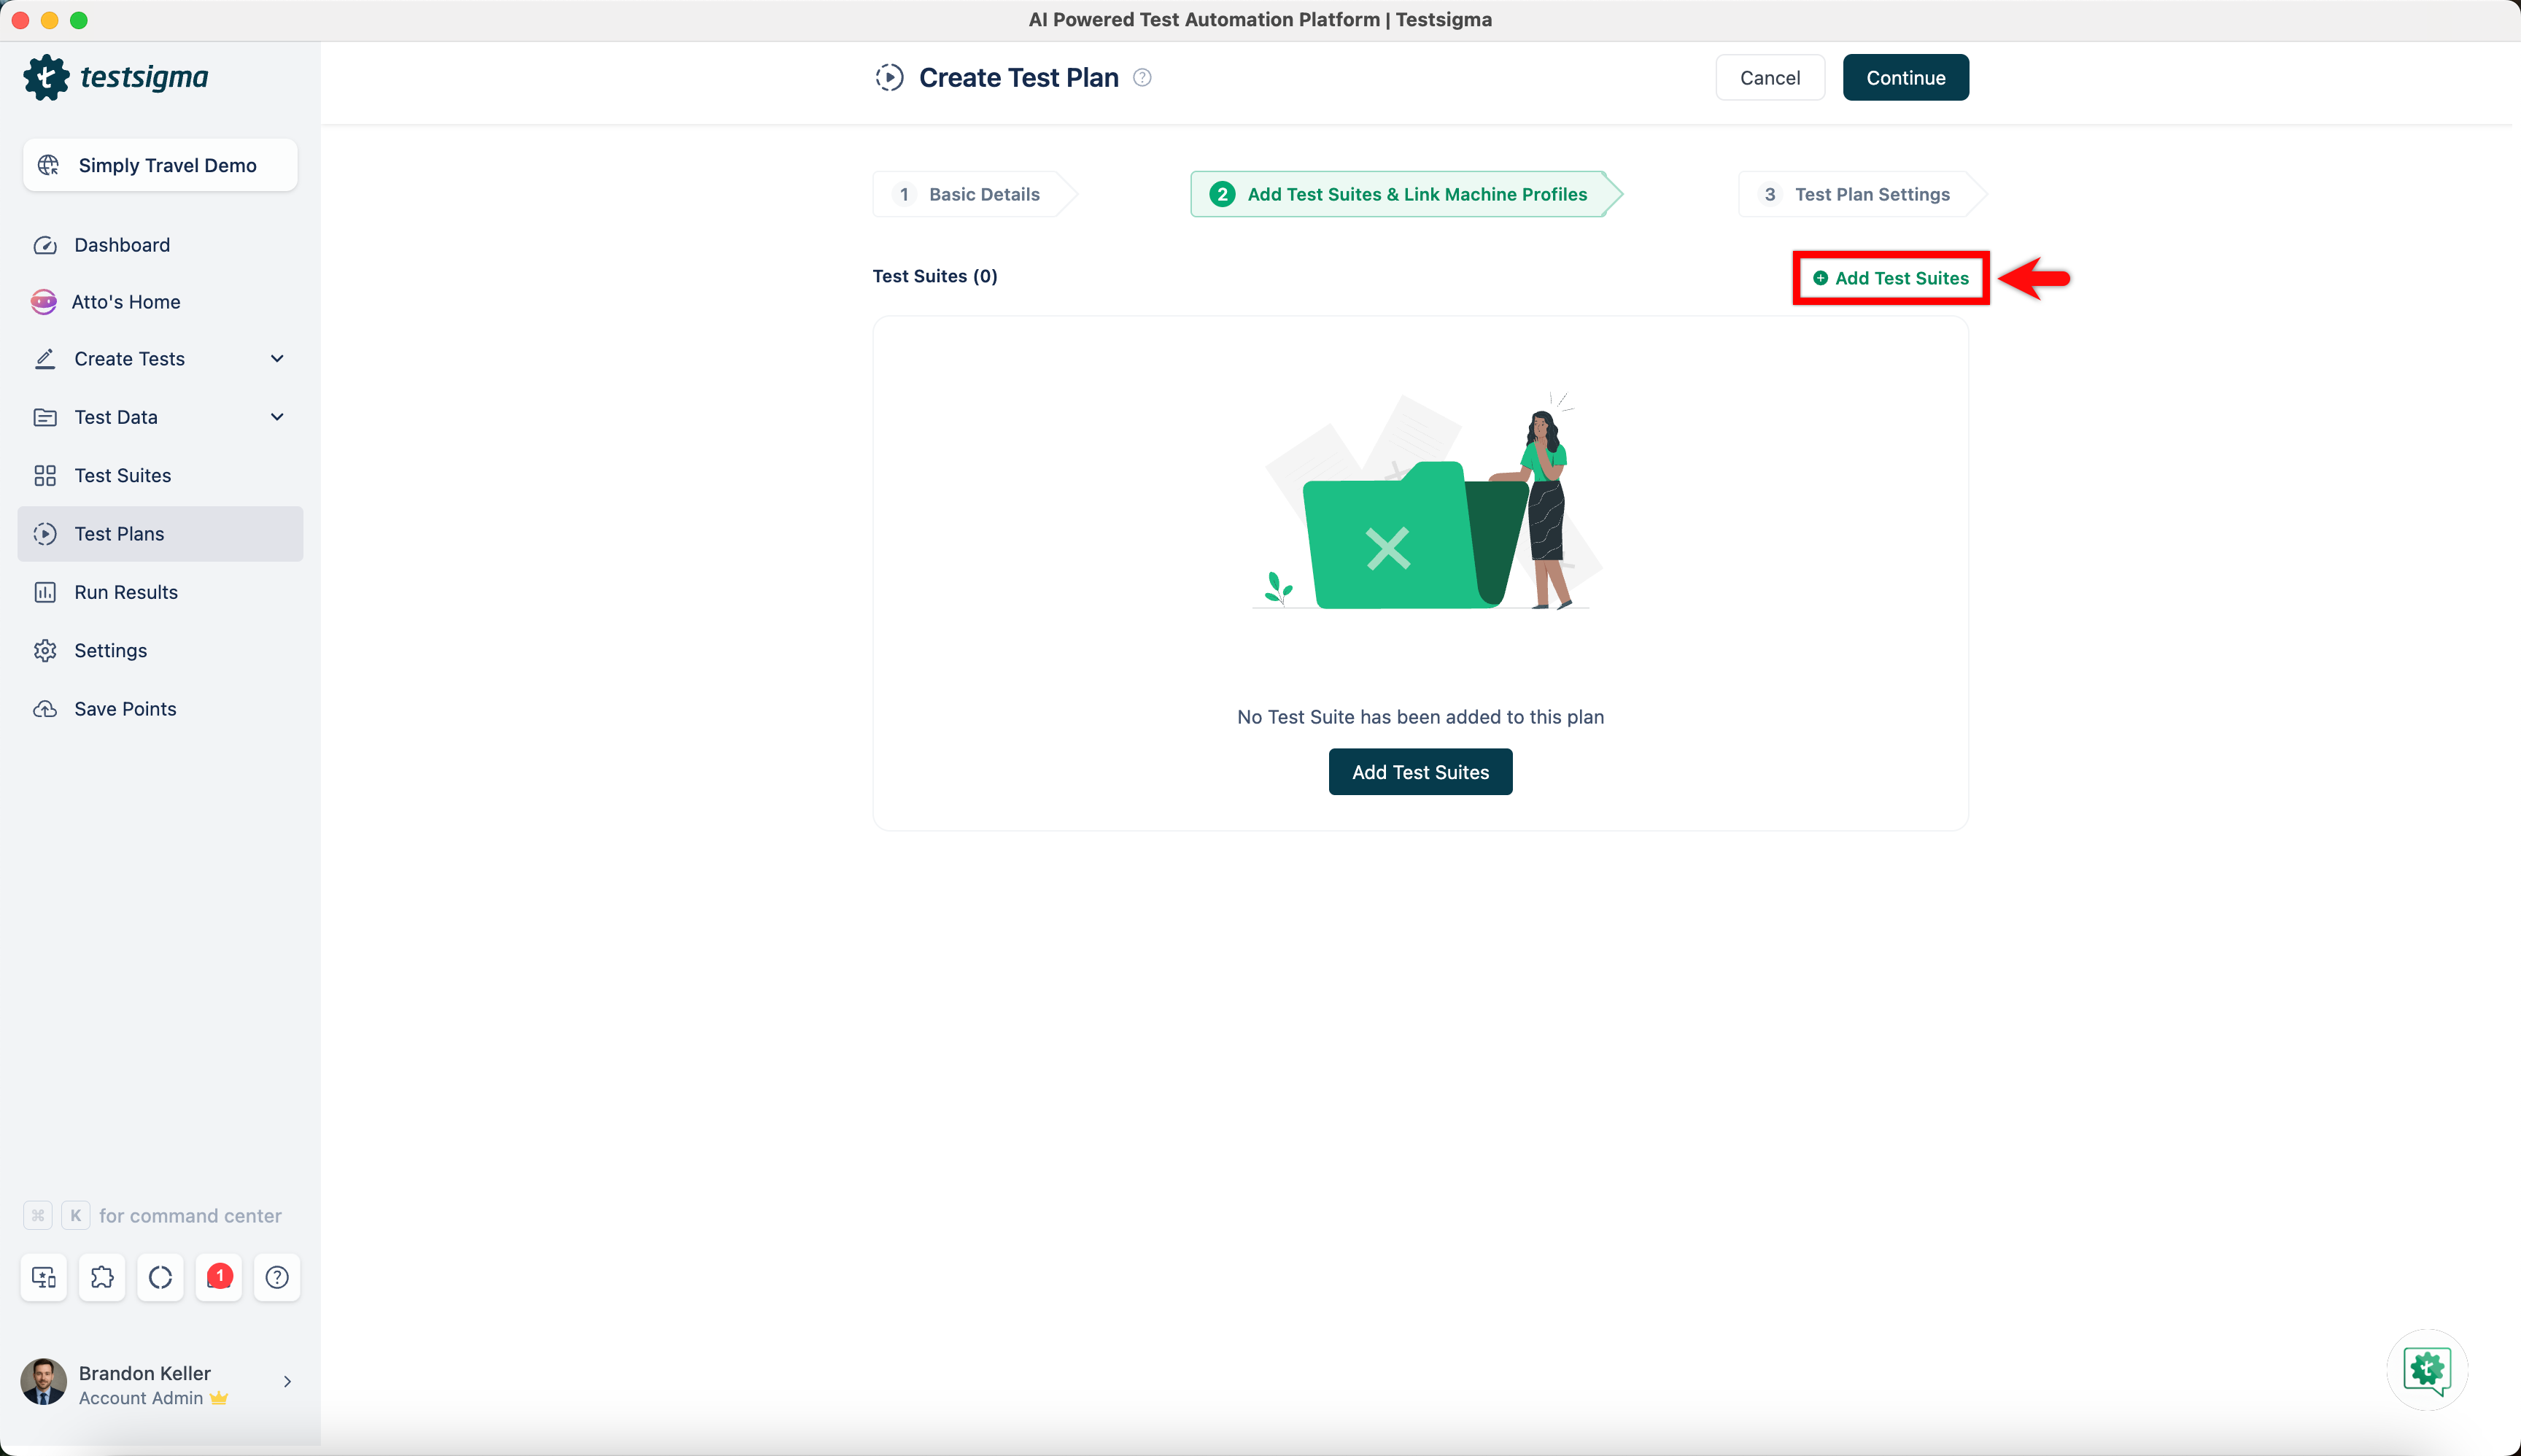
In the Basic Details tab, enter the required name for the test plan and click Continue.

-
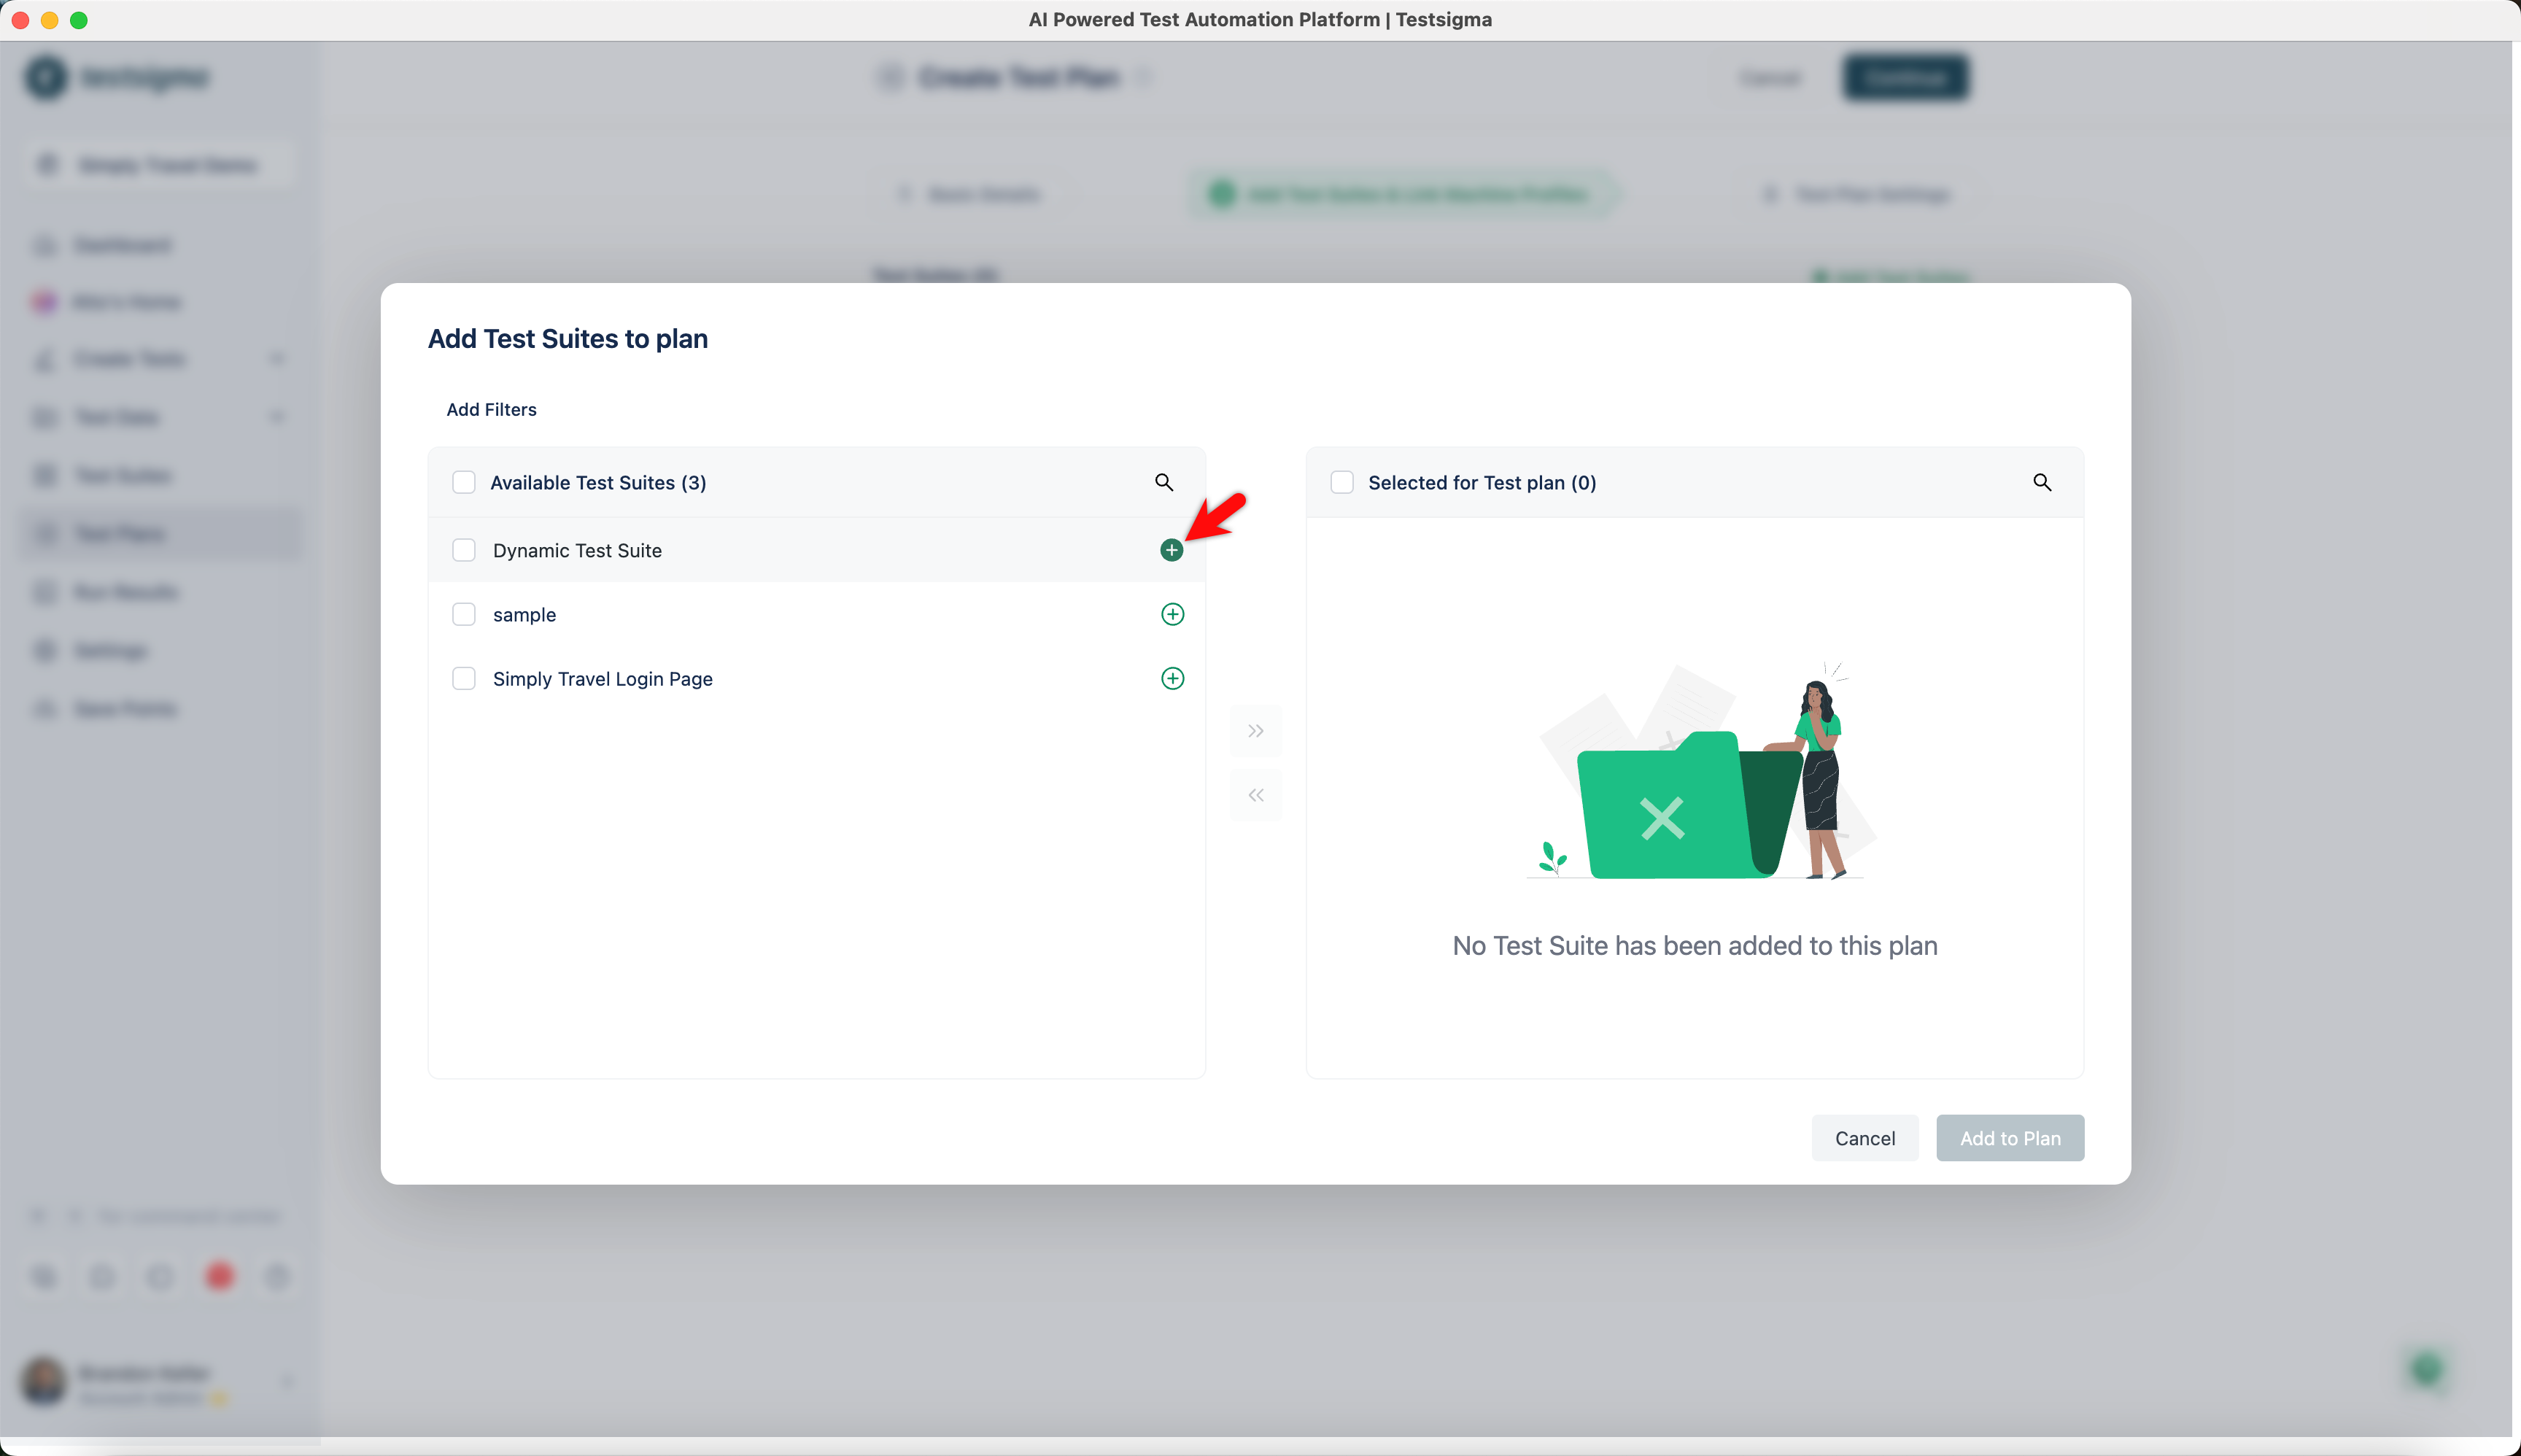
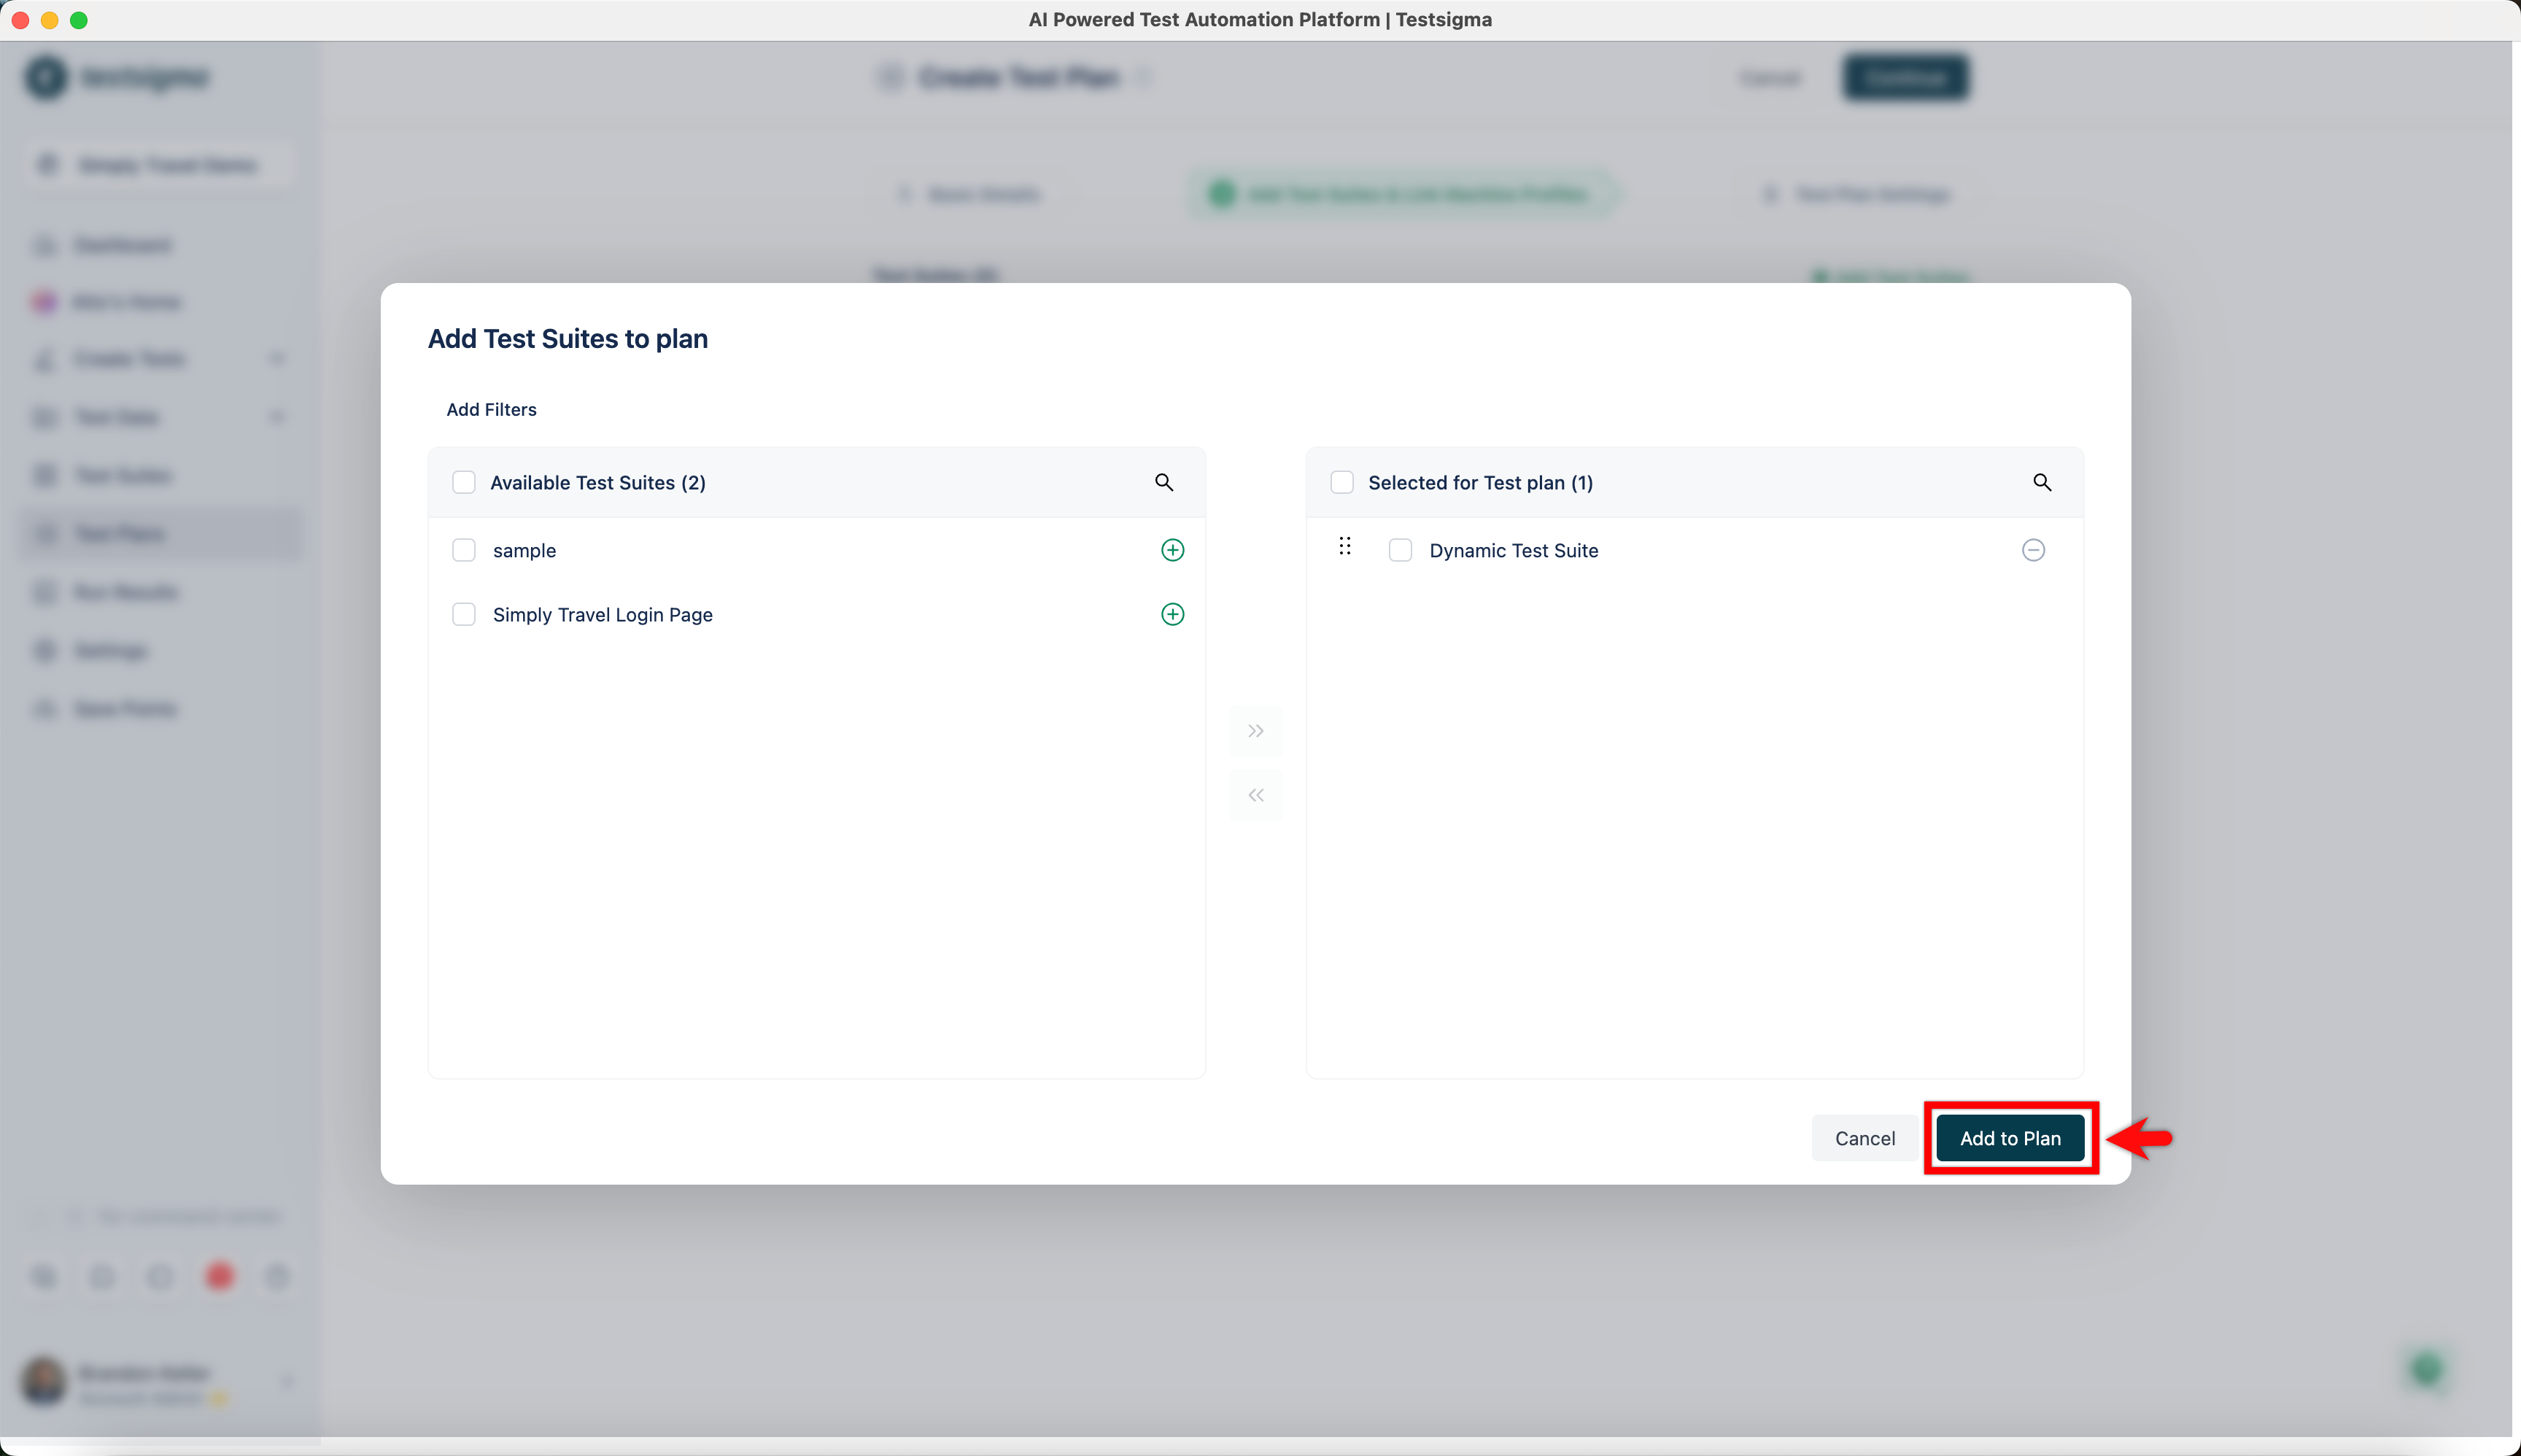
In the Add Test Suites & Link Machine Profiles tab, click + Add Test Suites.
-
Click the + icon next to the newly created dynamic test case along with other required test cases.
-
Click Add to Plan.
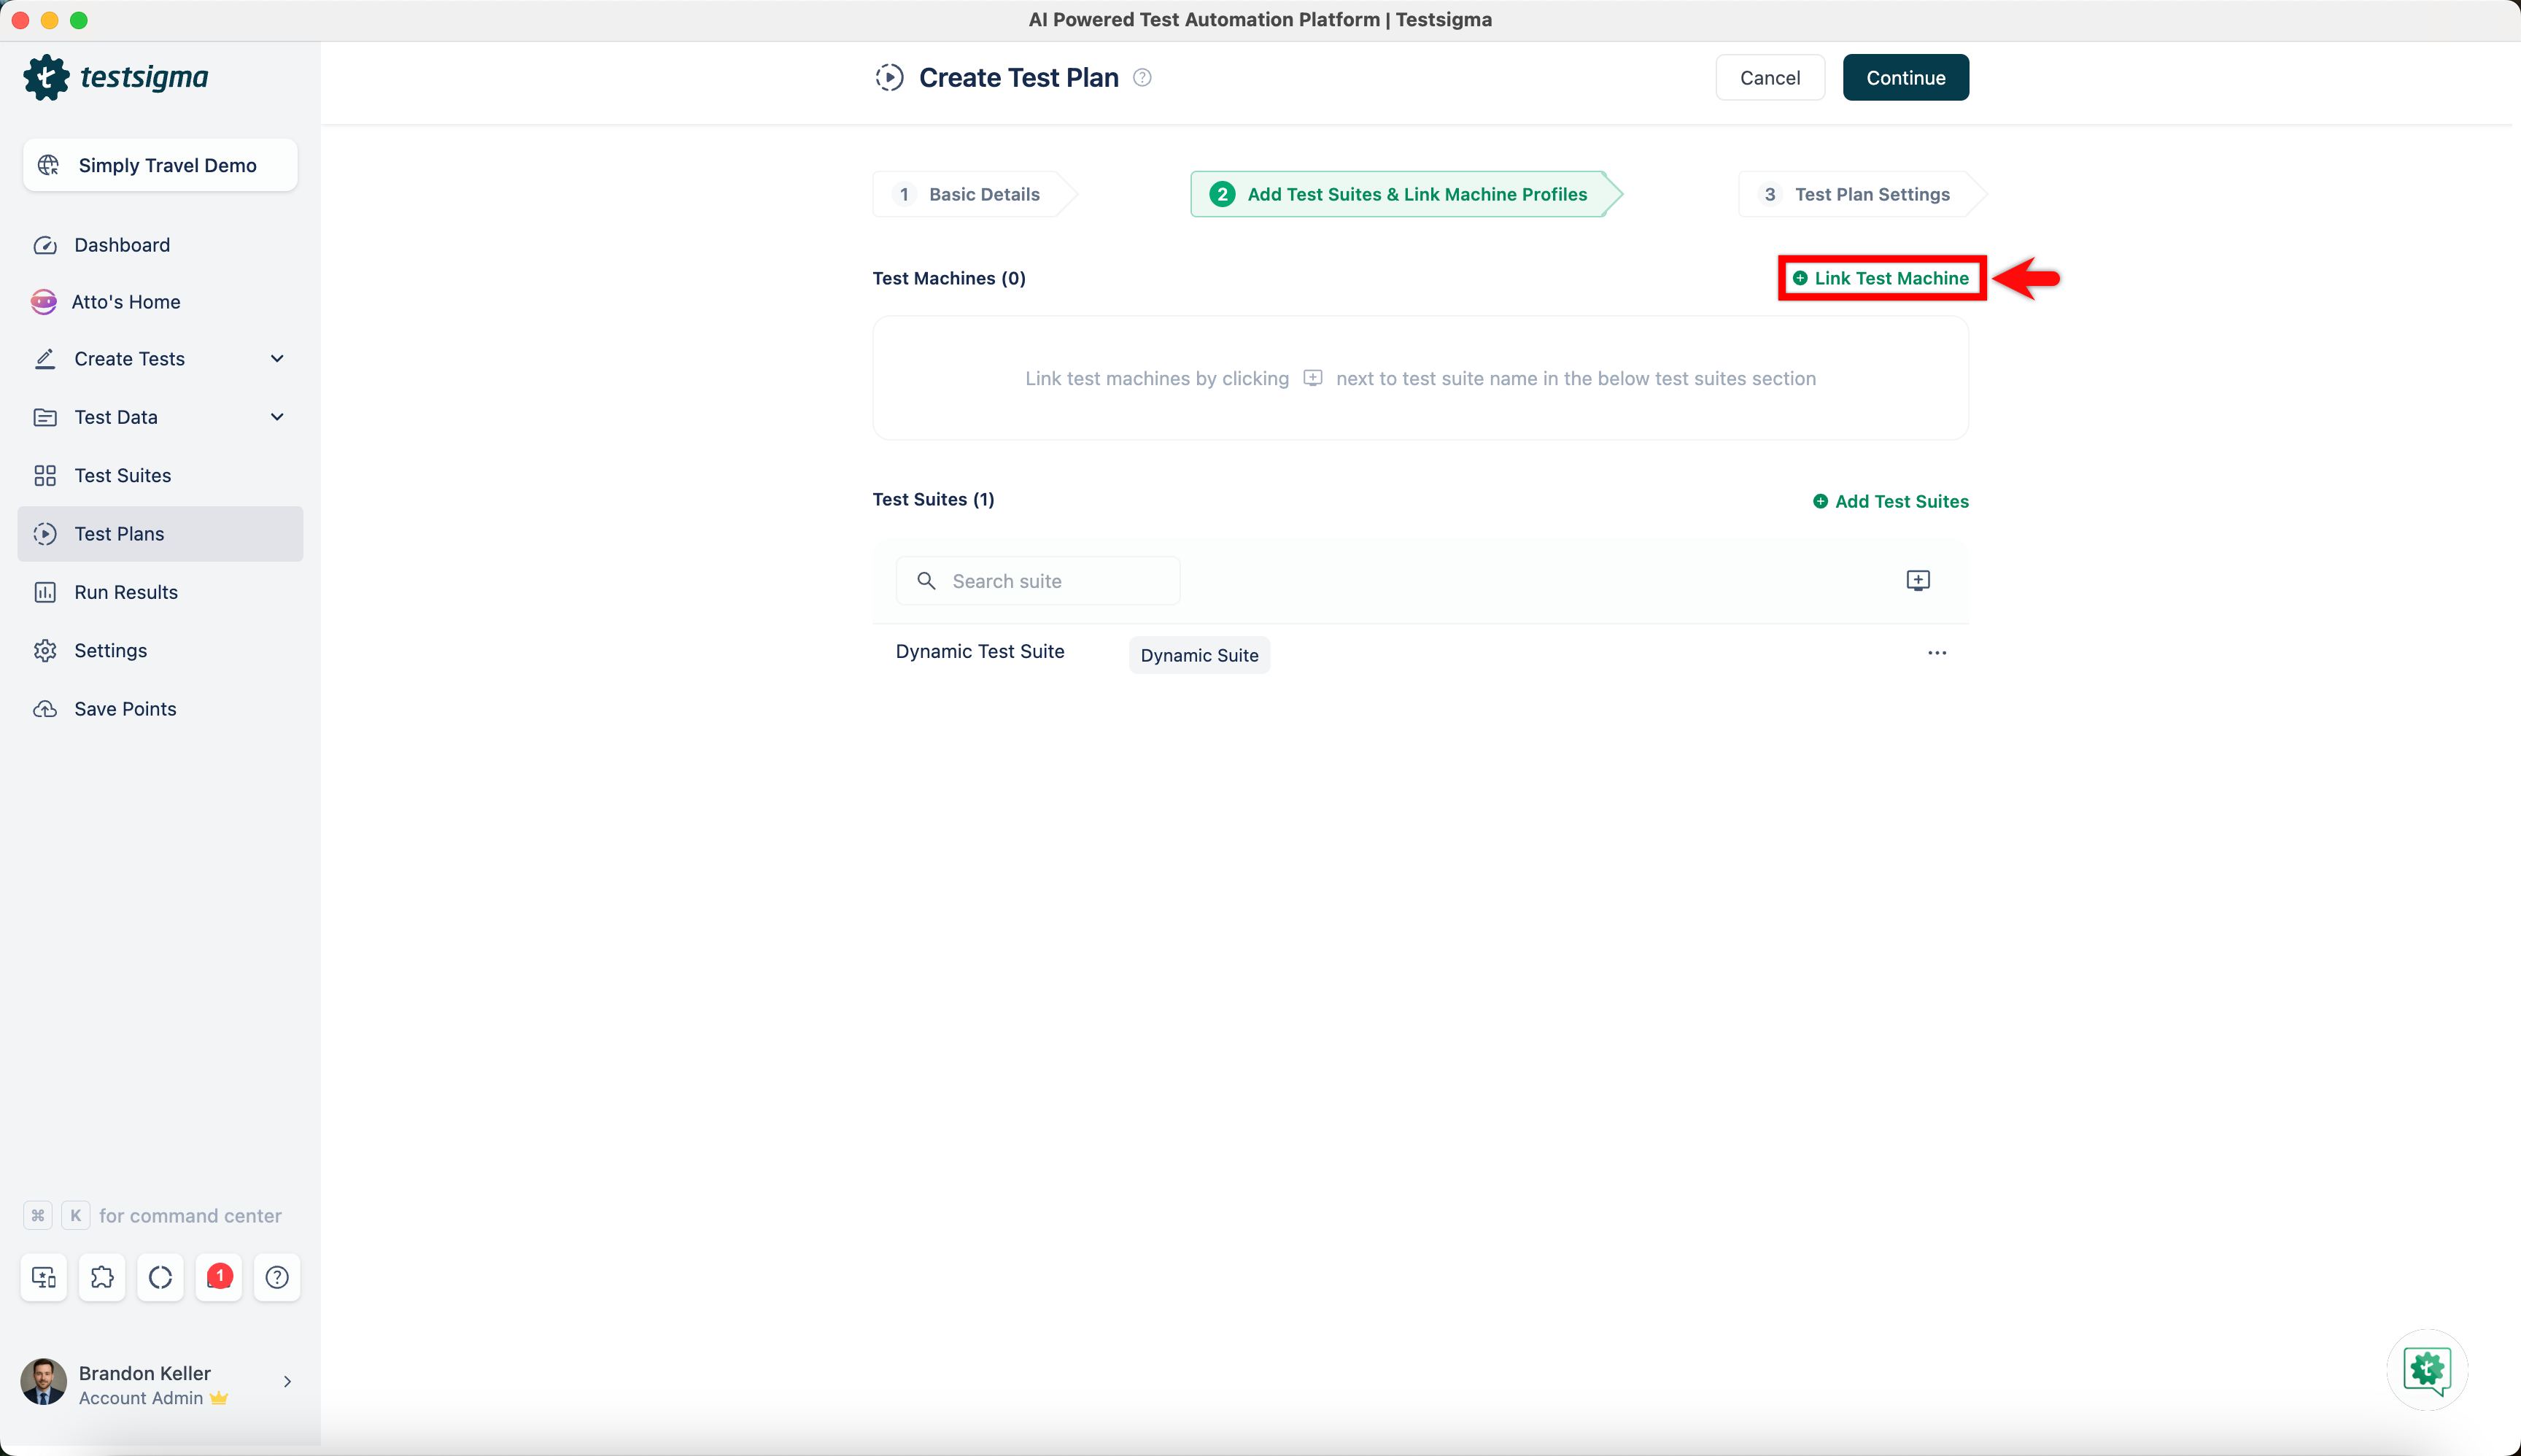
-
Click + Link Test Machine.
-
In the Select test machine profiles overlay, select the required test machines and click Save selections.
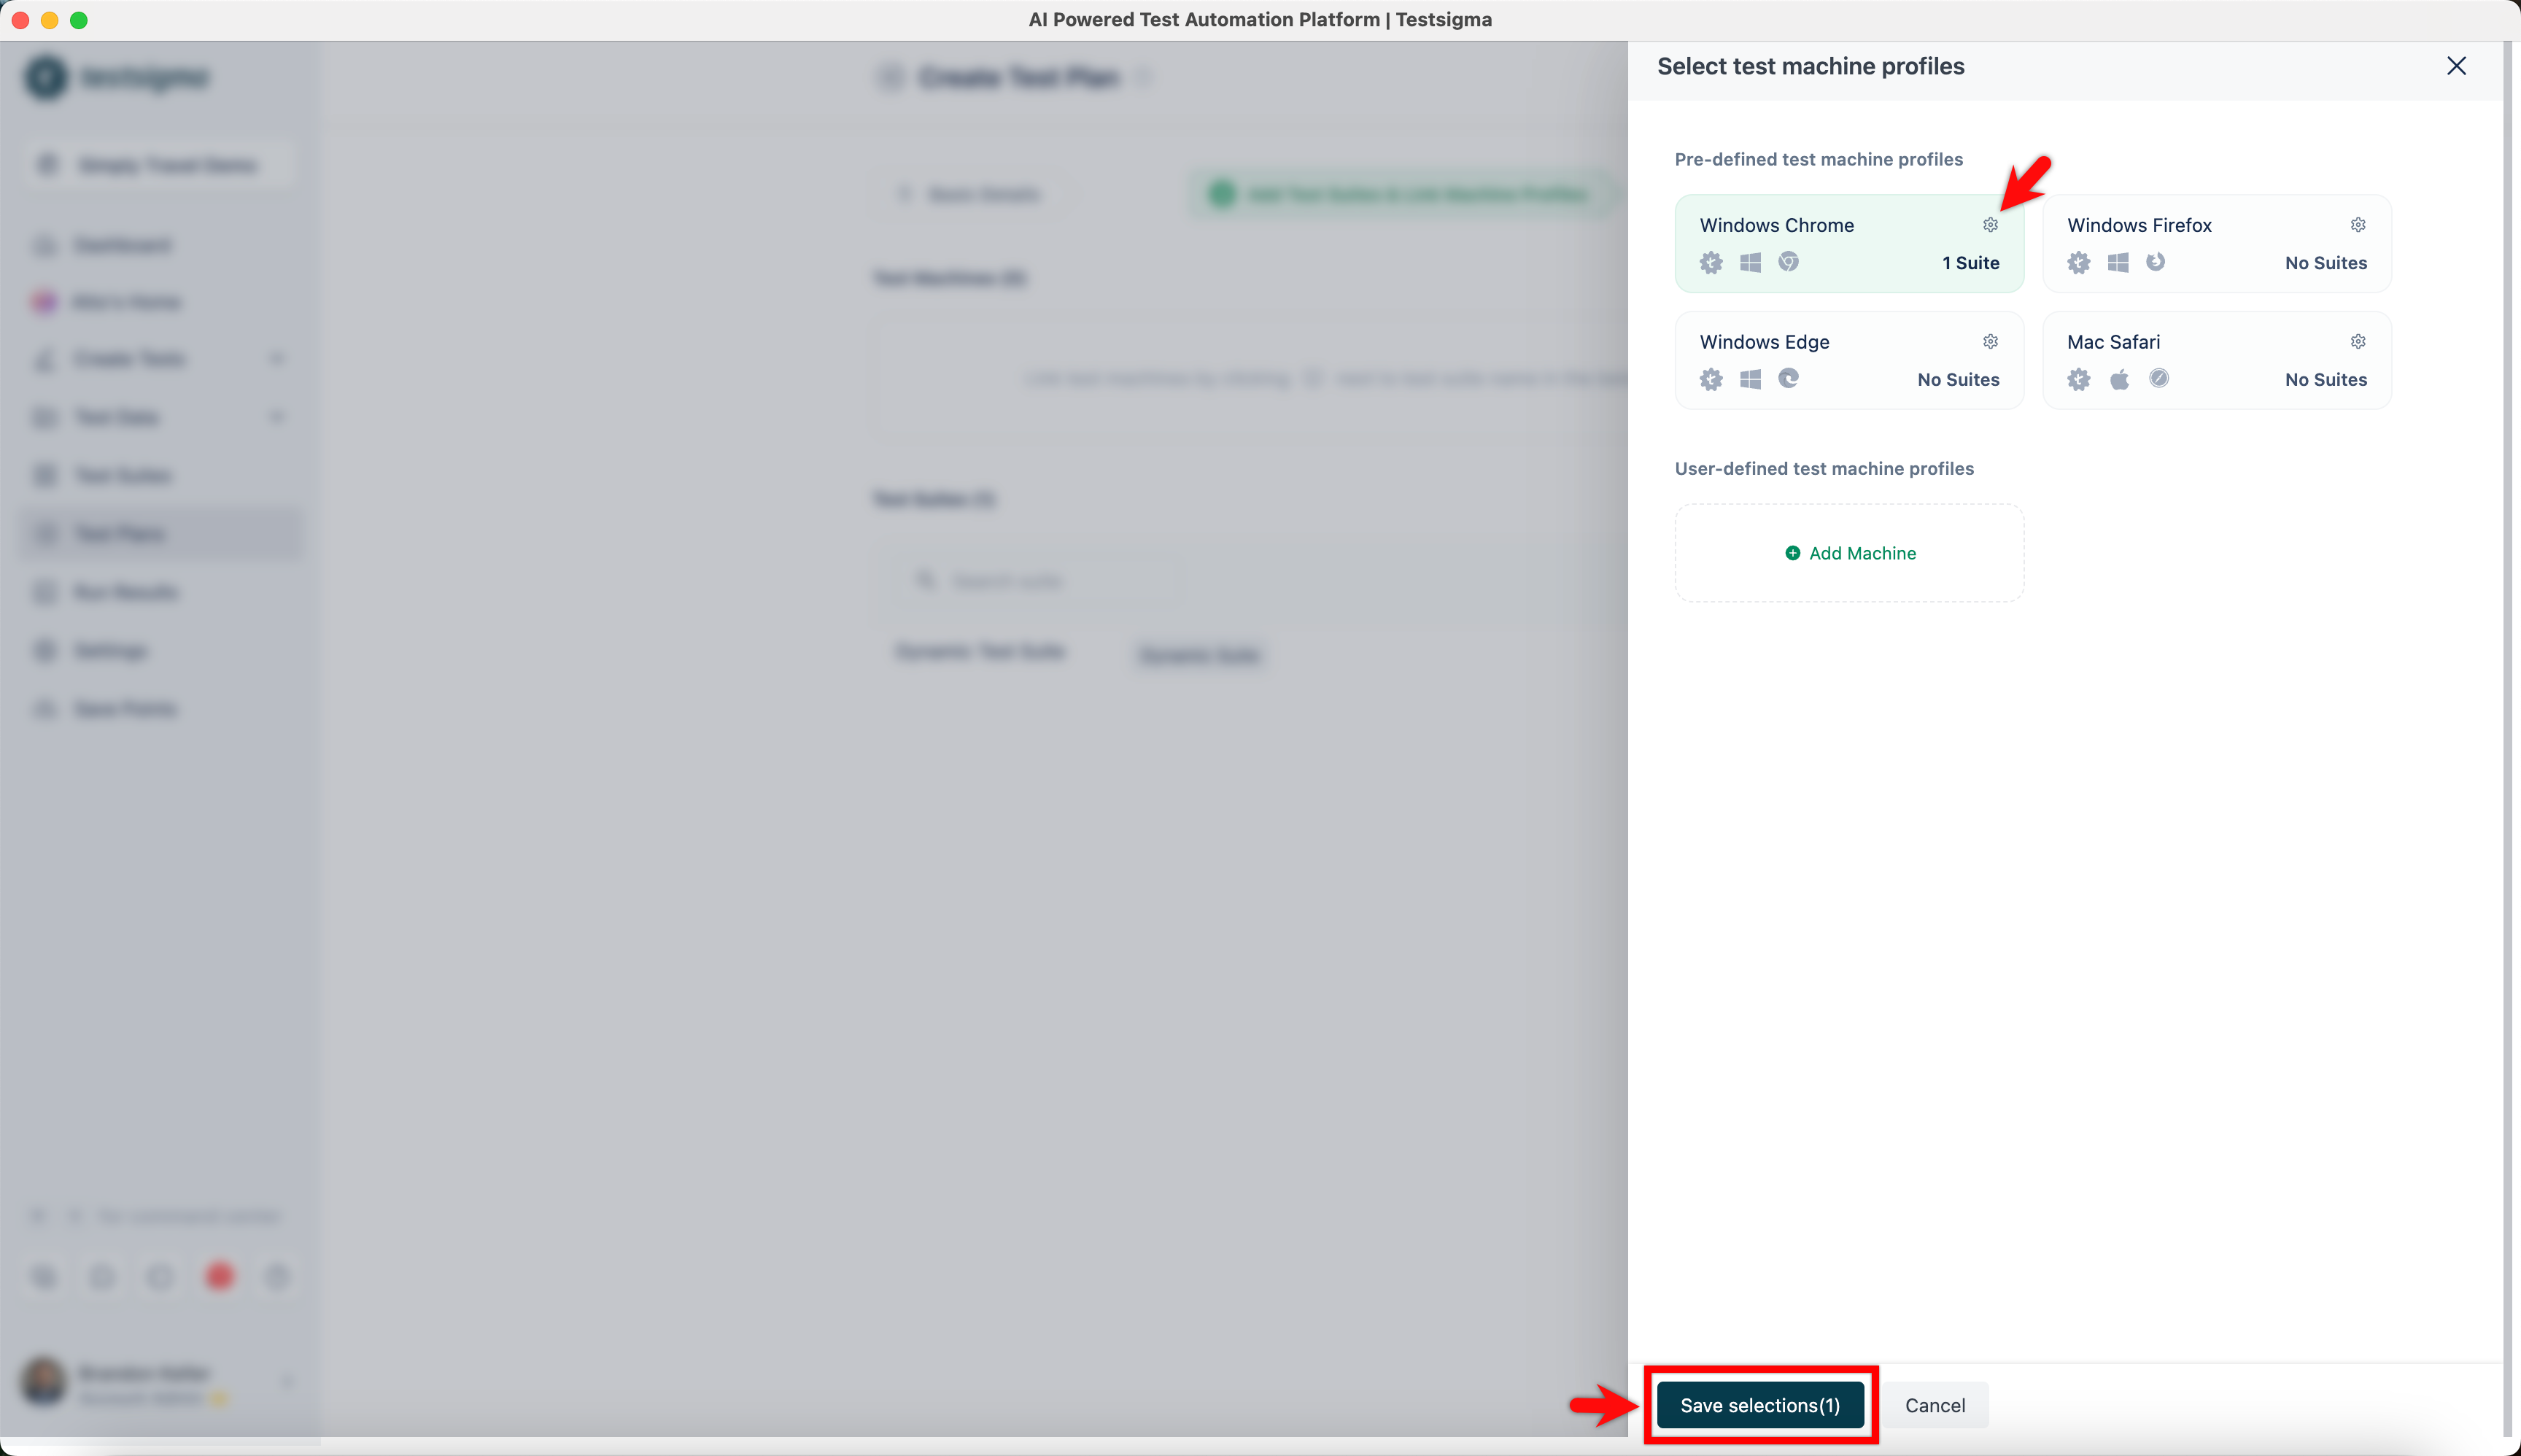
-
Click Continue.
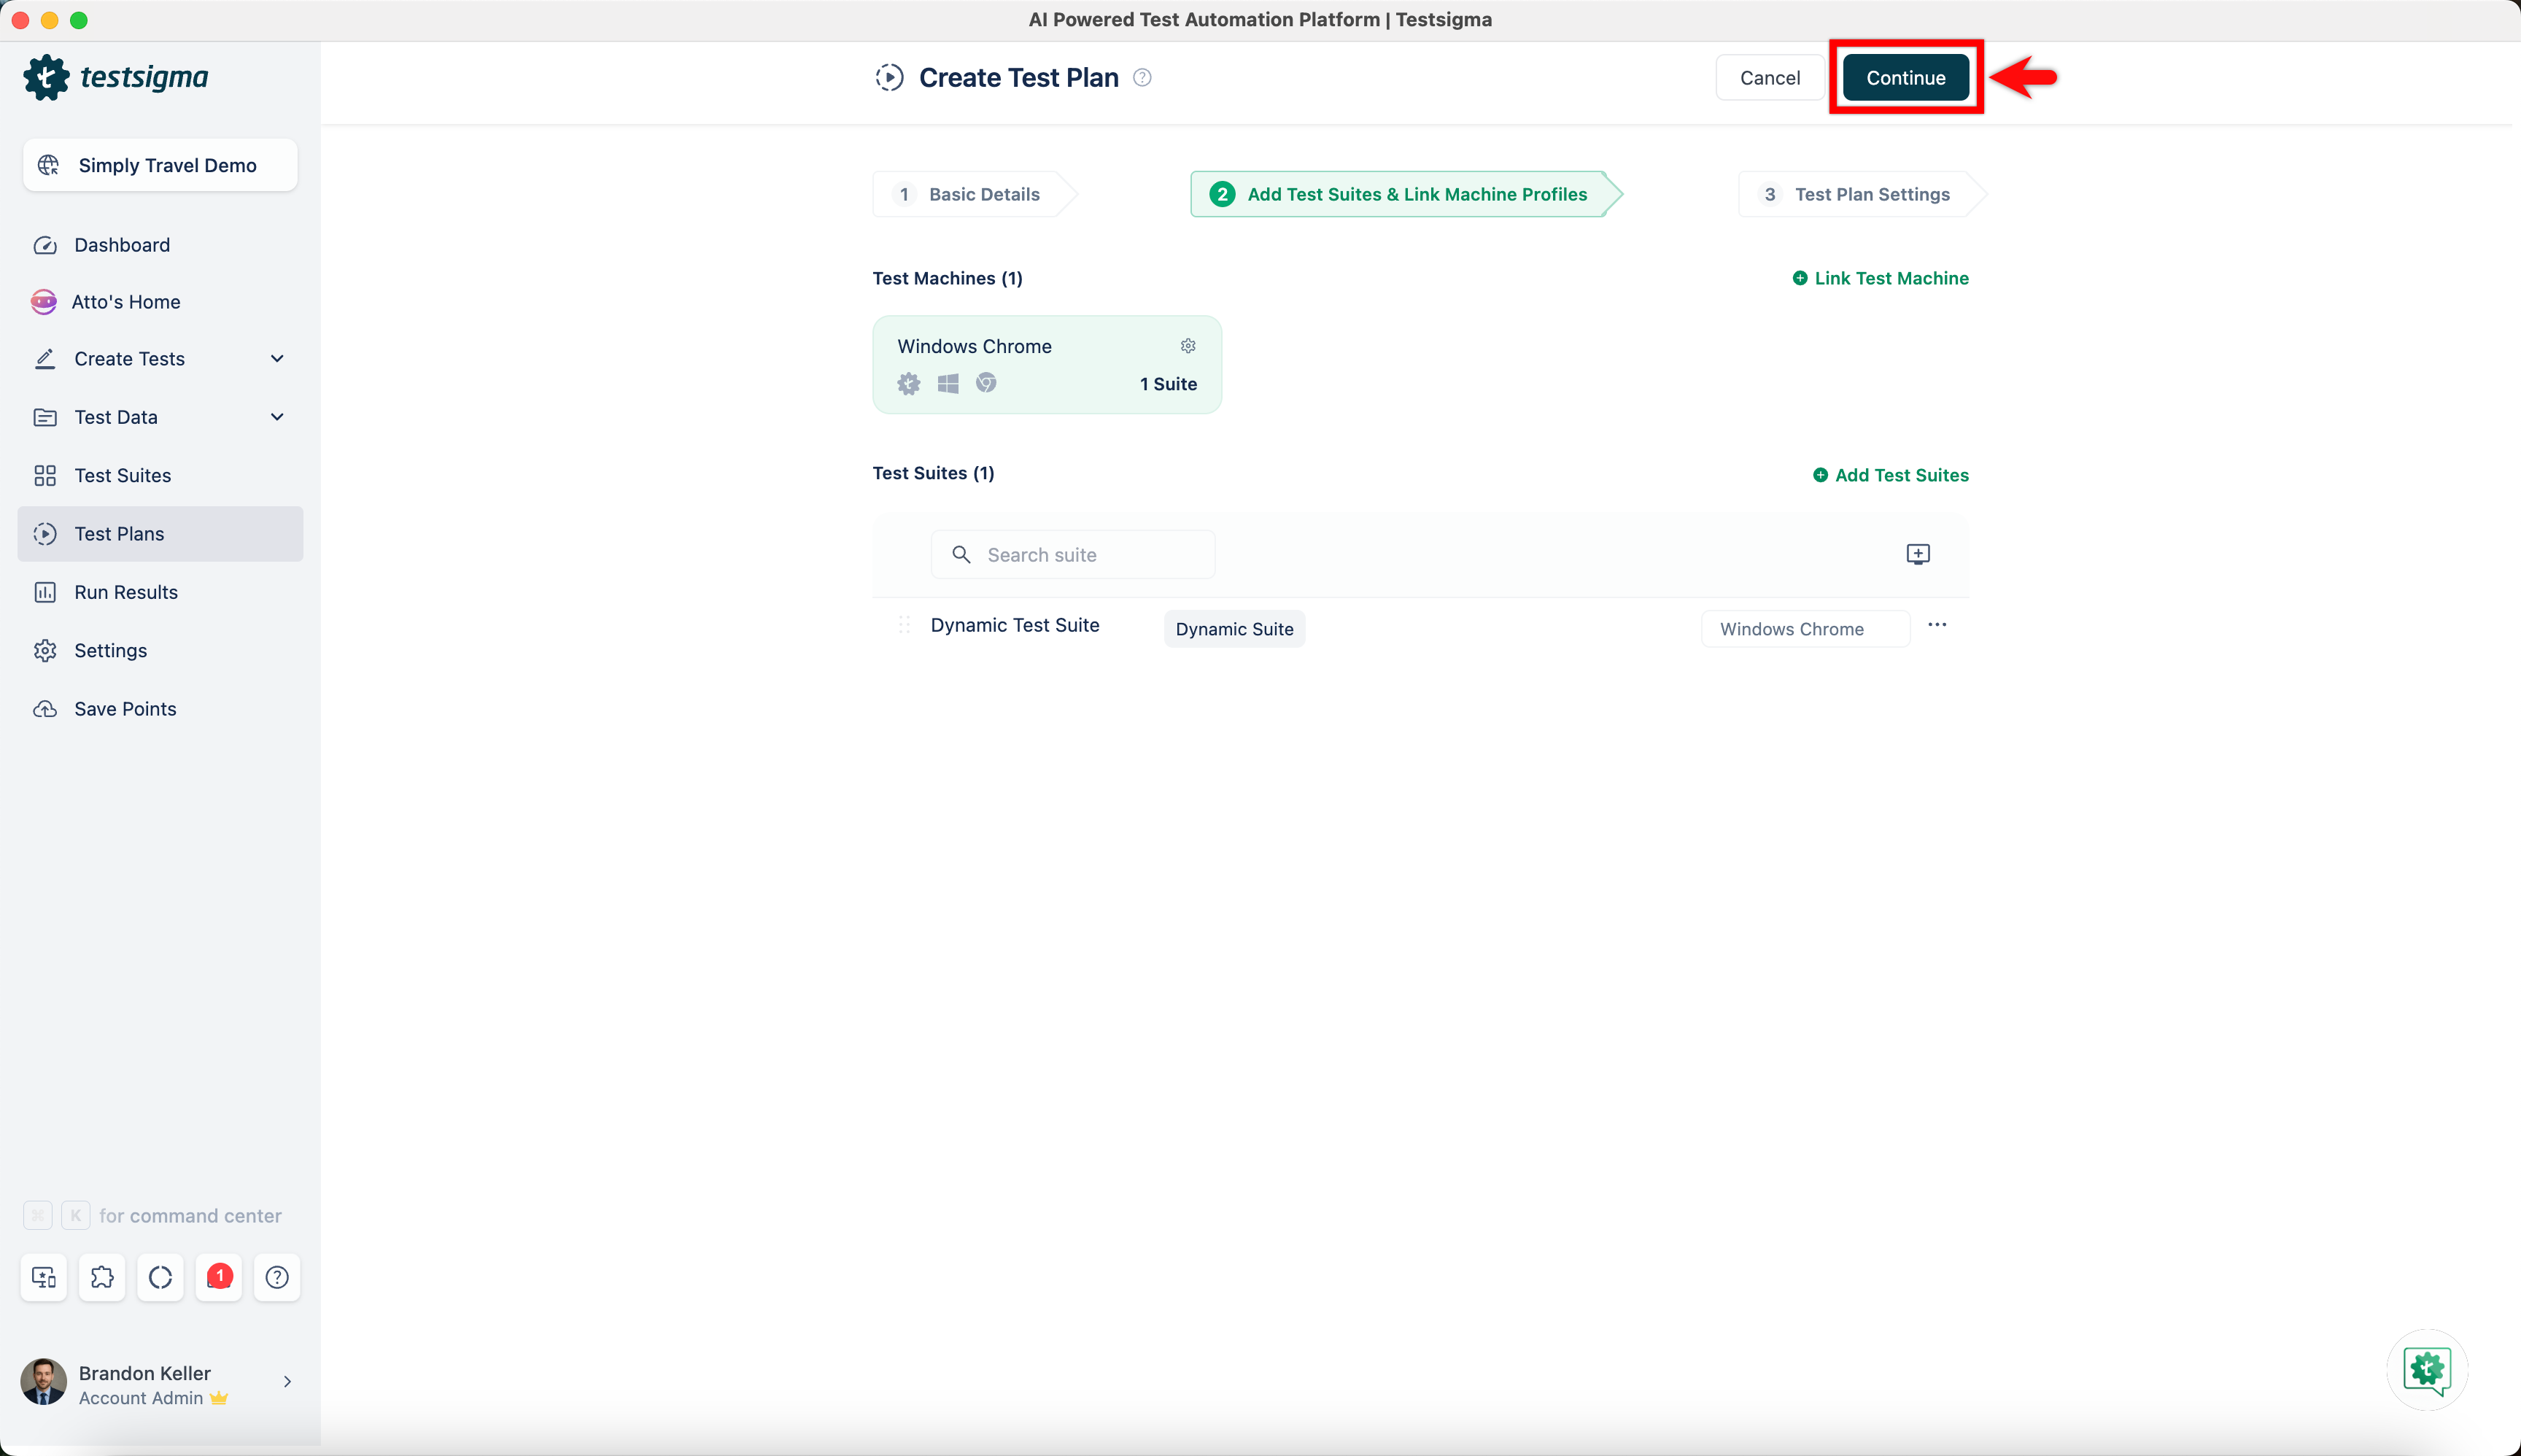
-
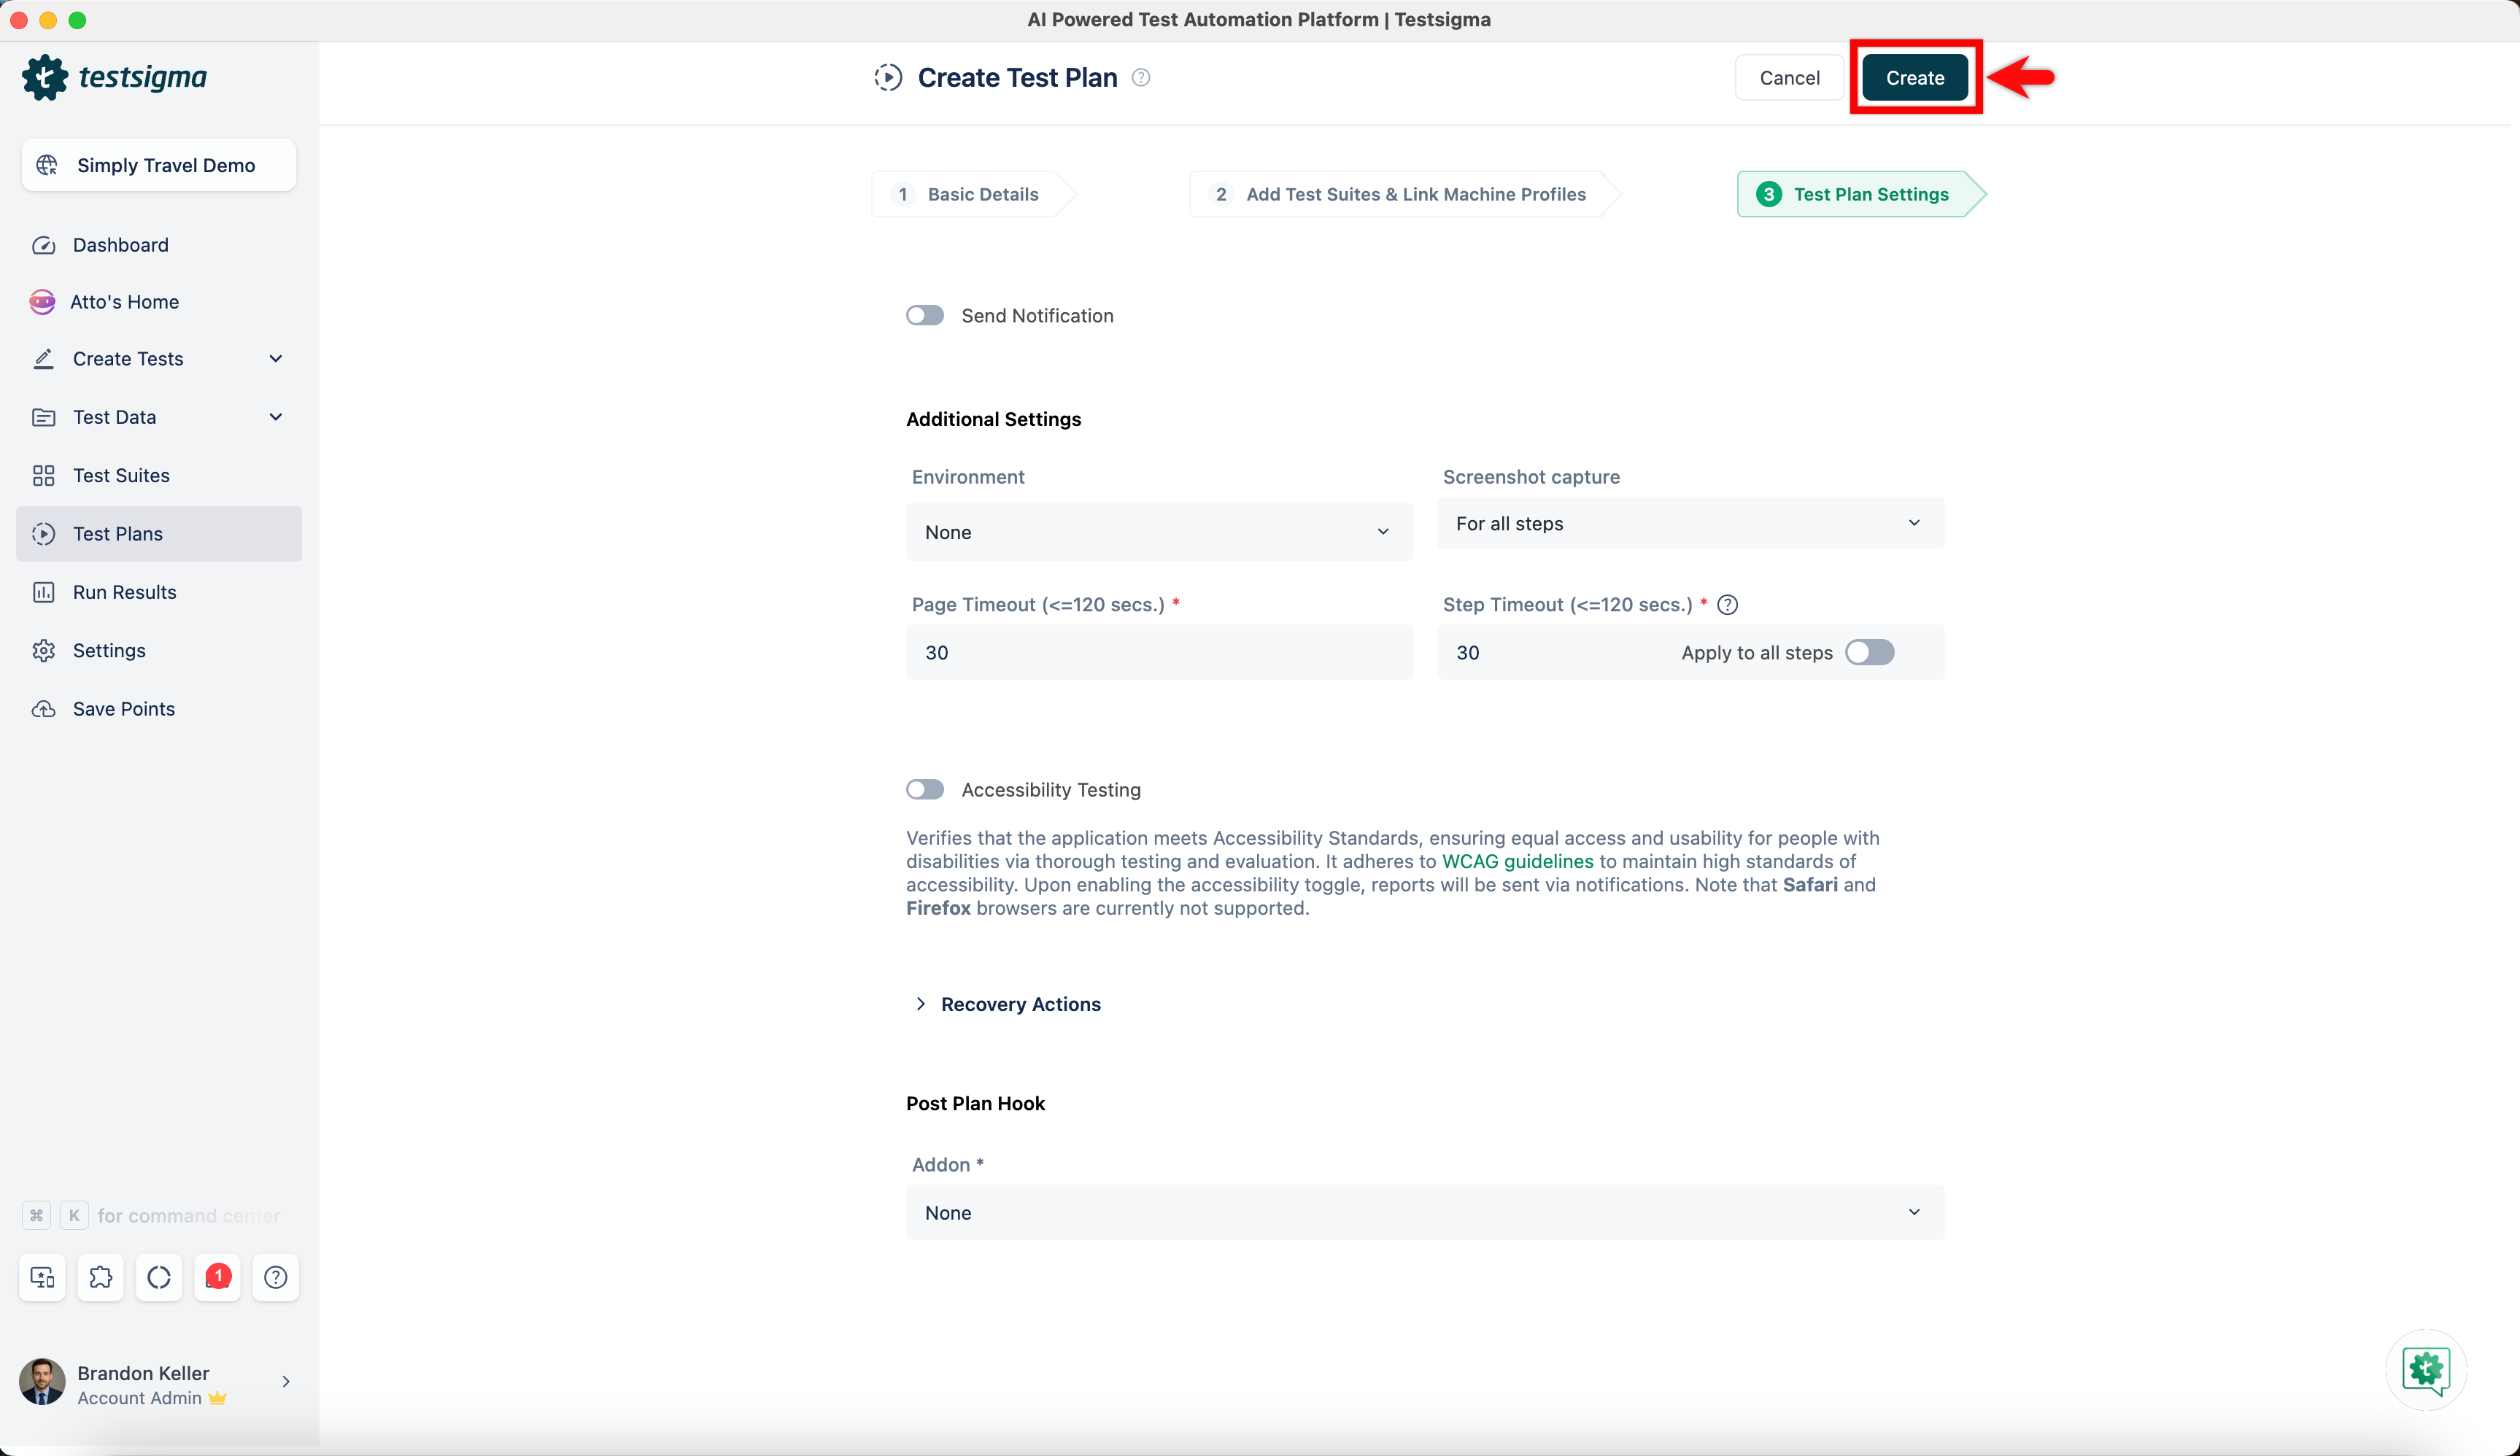
In the Test Plan Settings tab, configure the required fields and click Create.
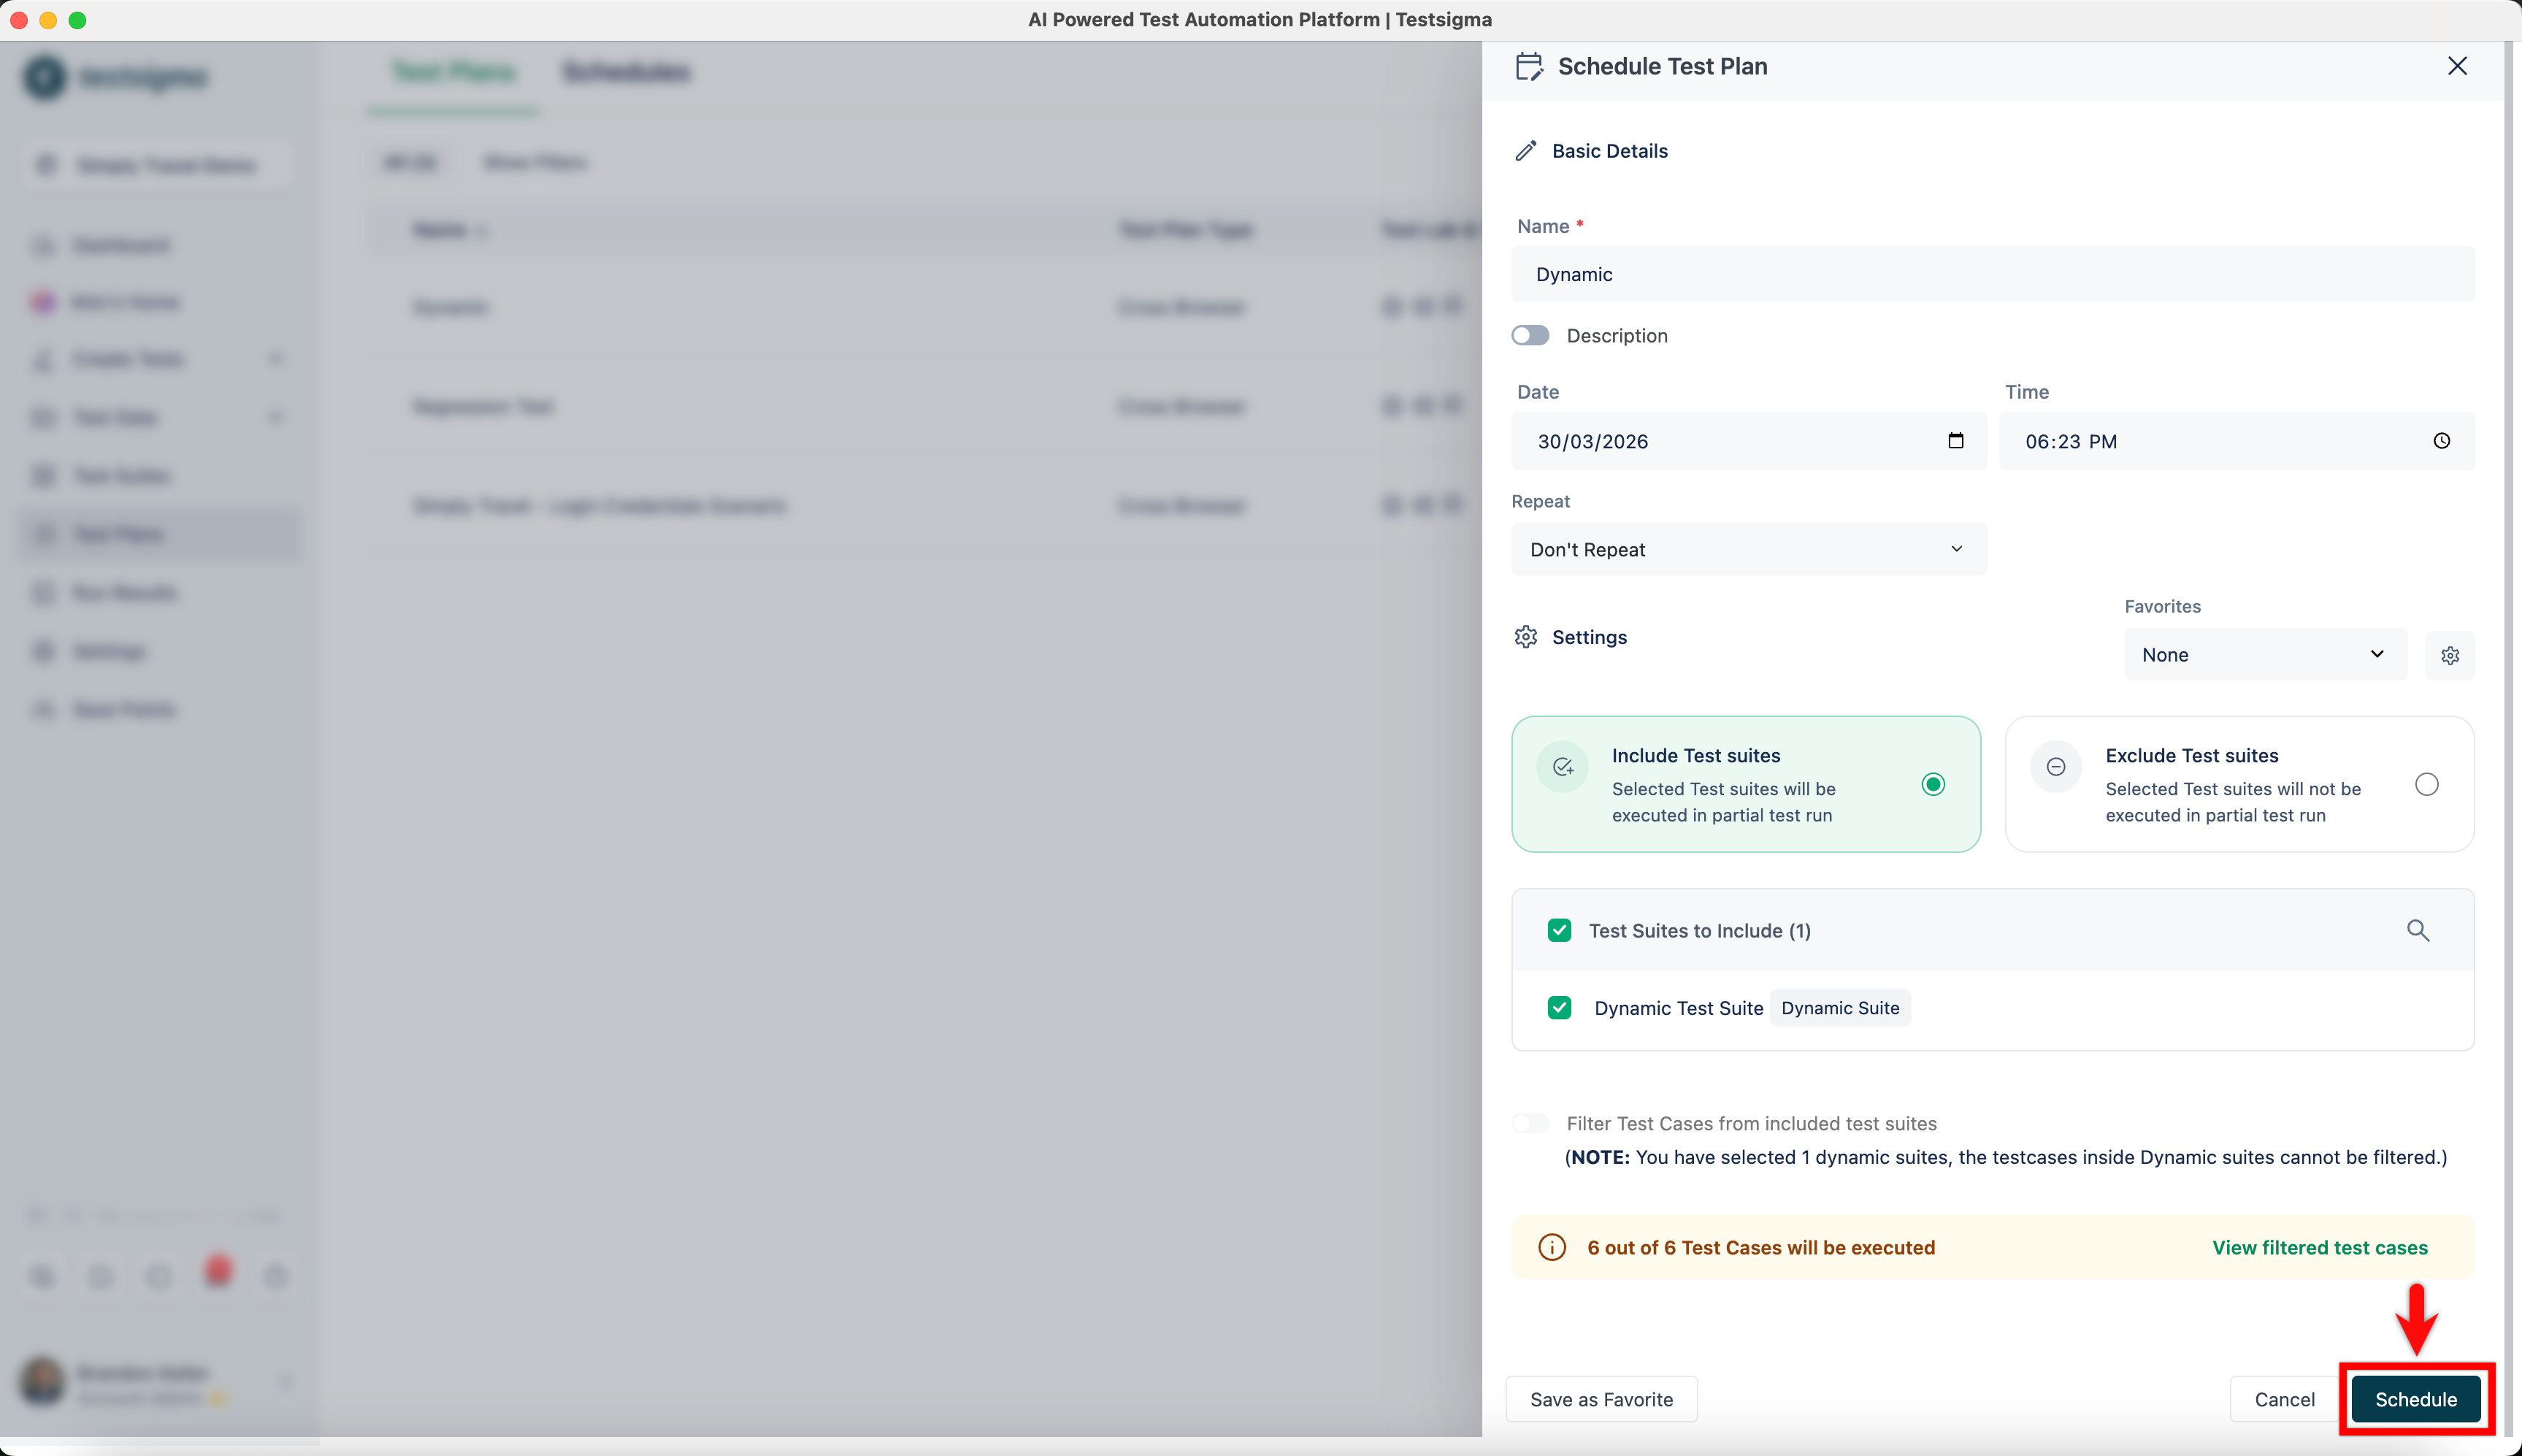
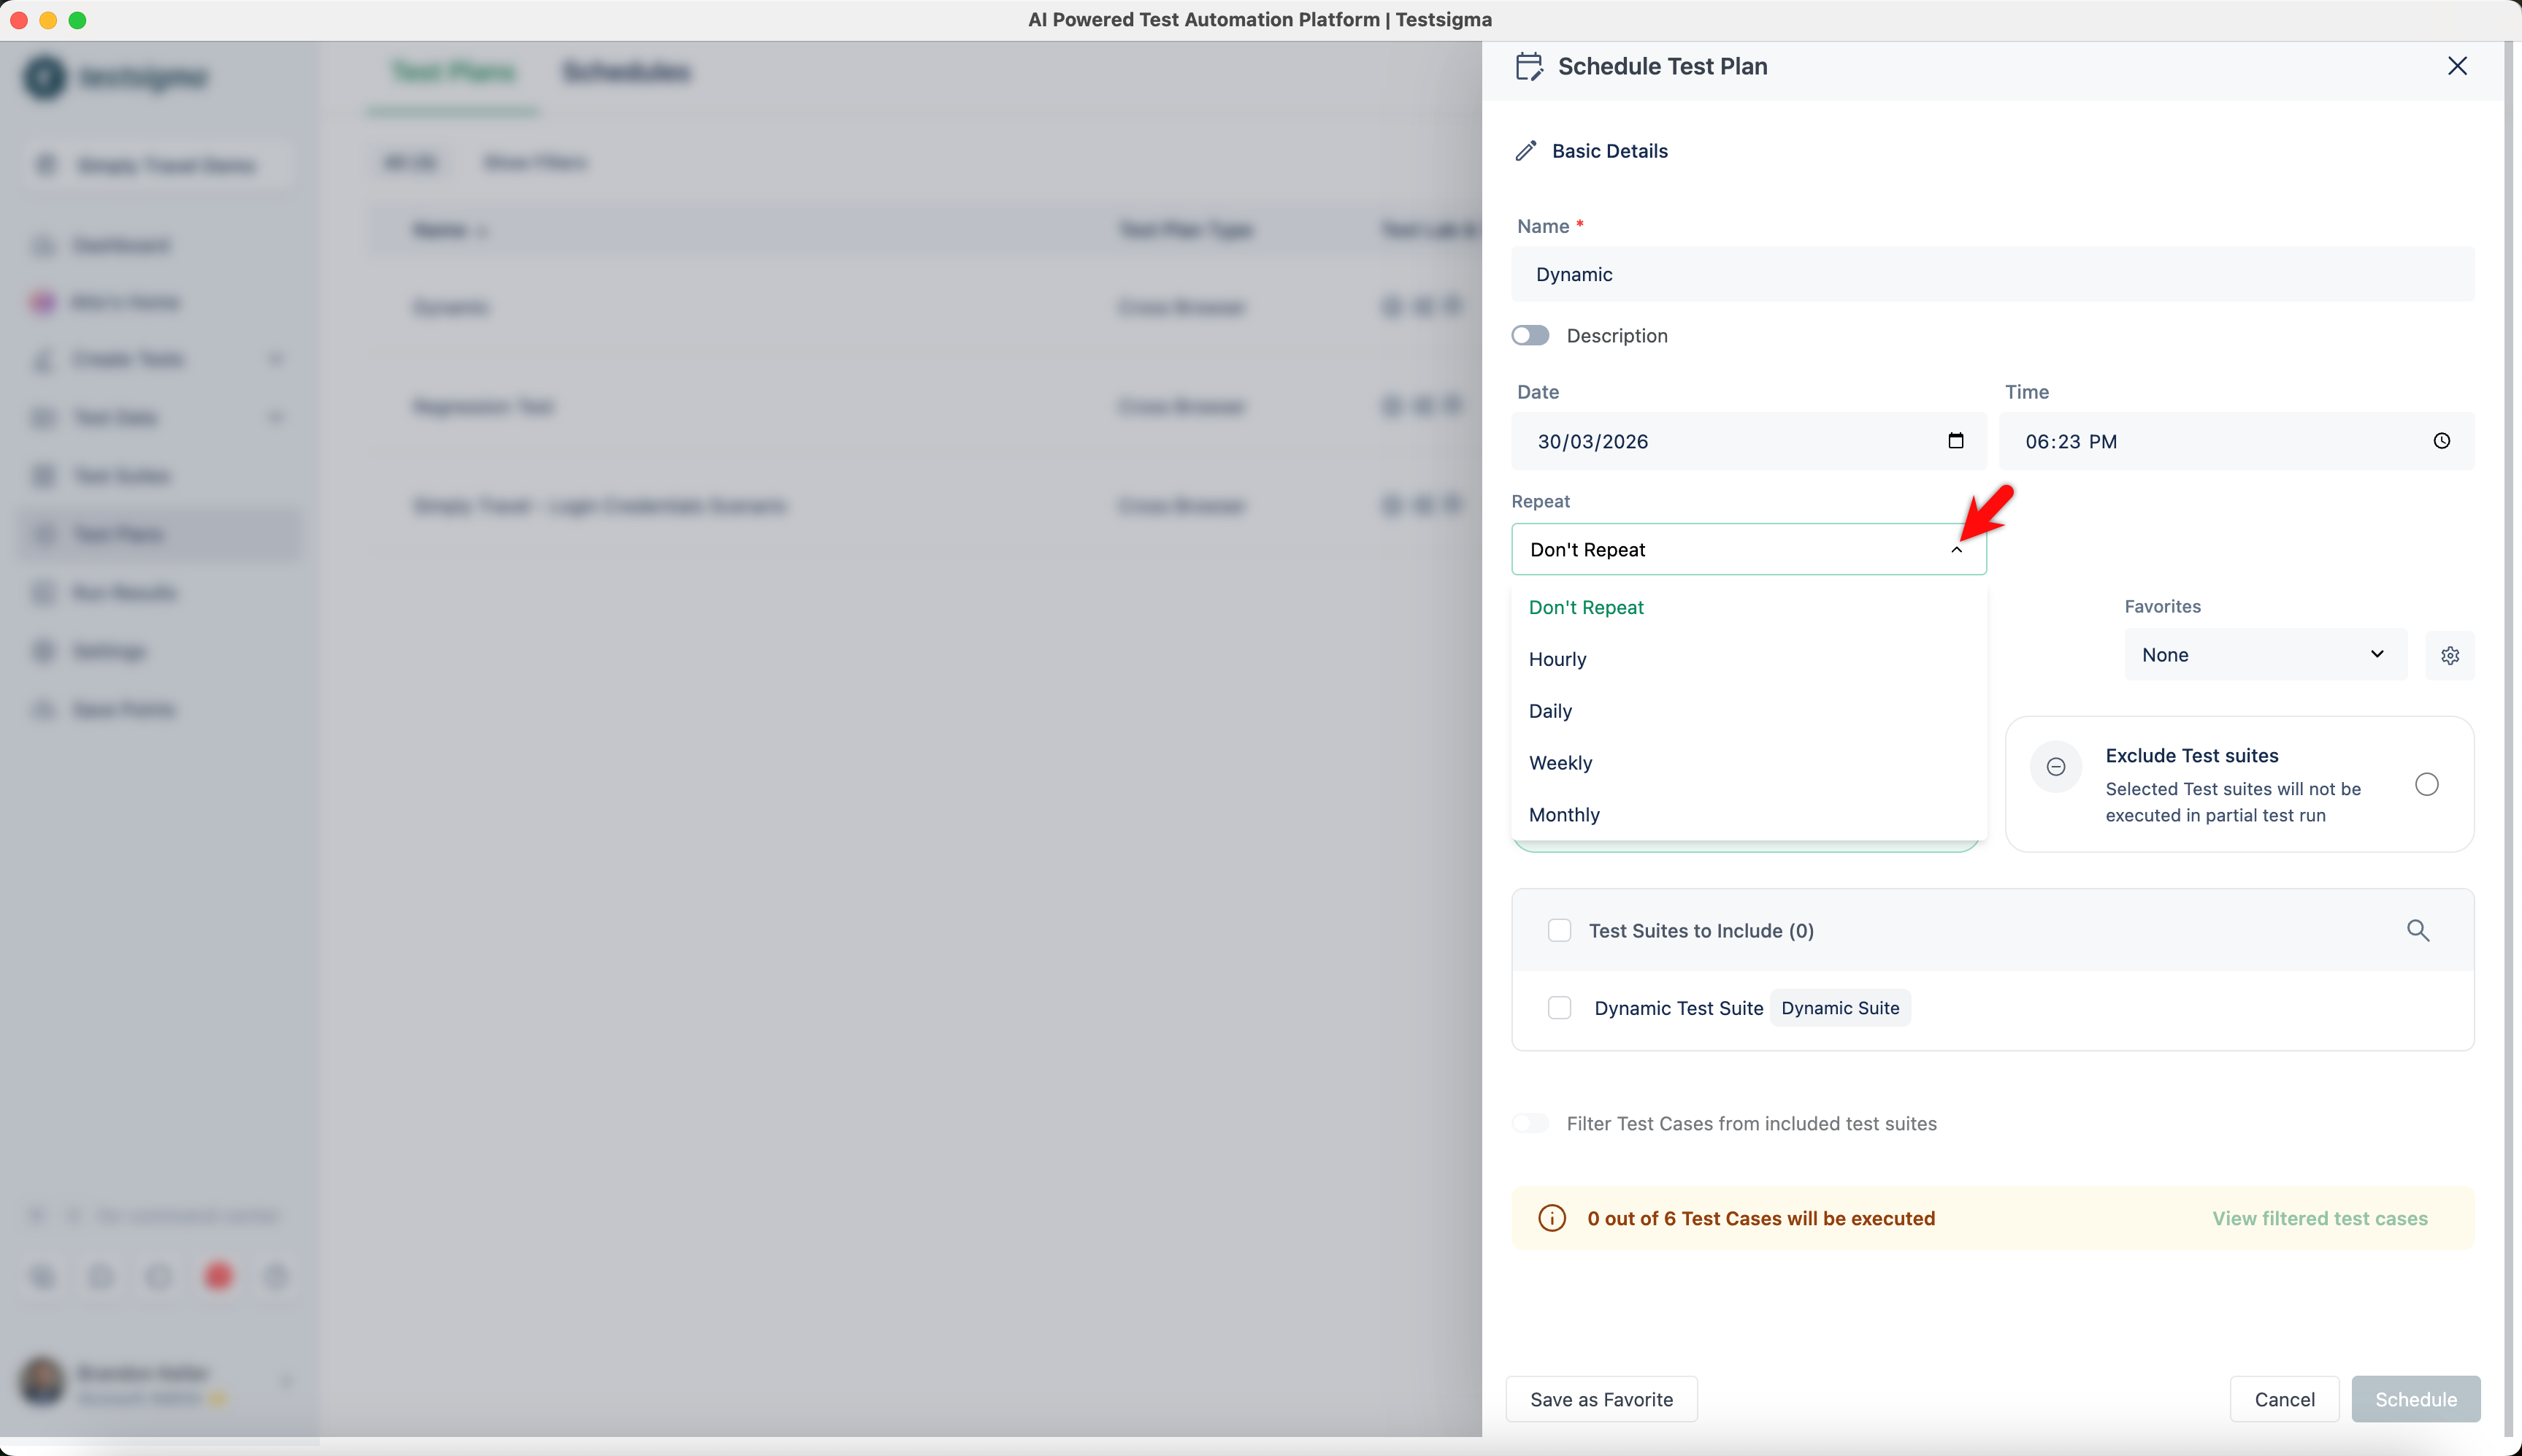
Add a Dynamic Test Suite to a Scheduled Test Plan
Section titled “Add a Dynamic Test Suite to a Scheduled Test Plan”-
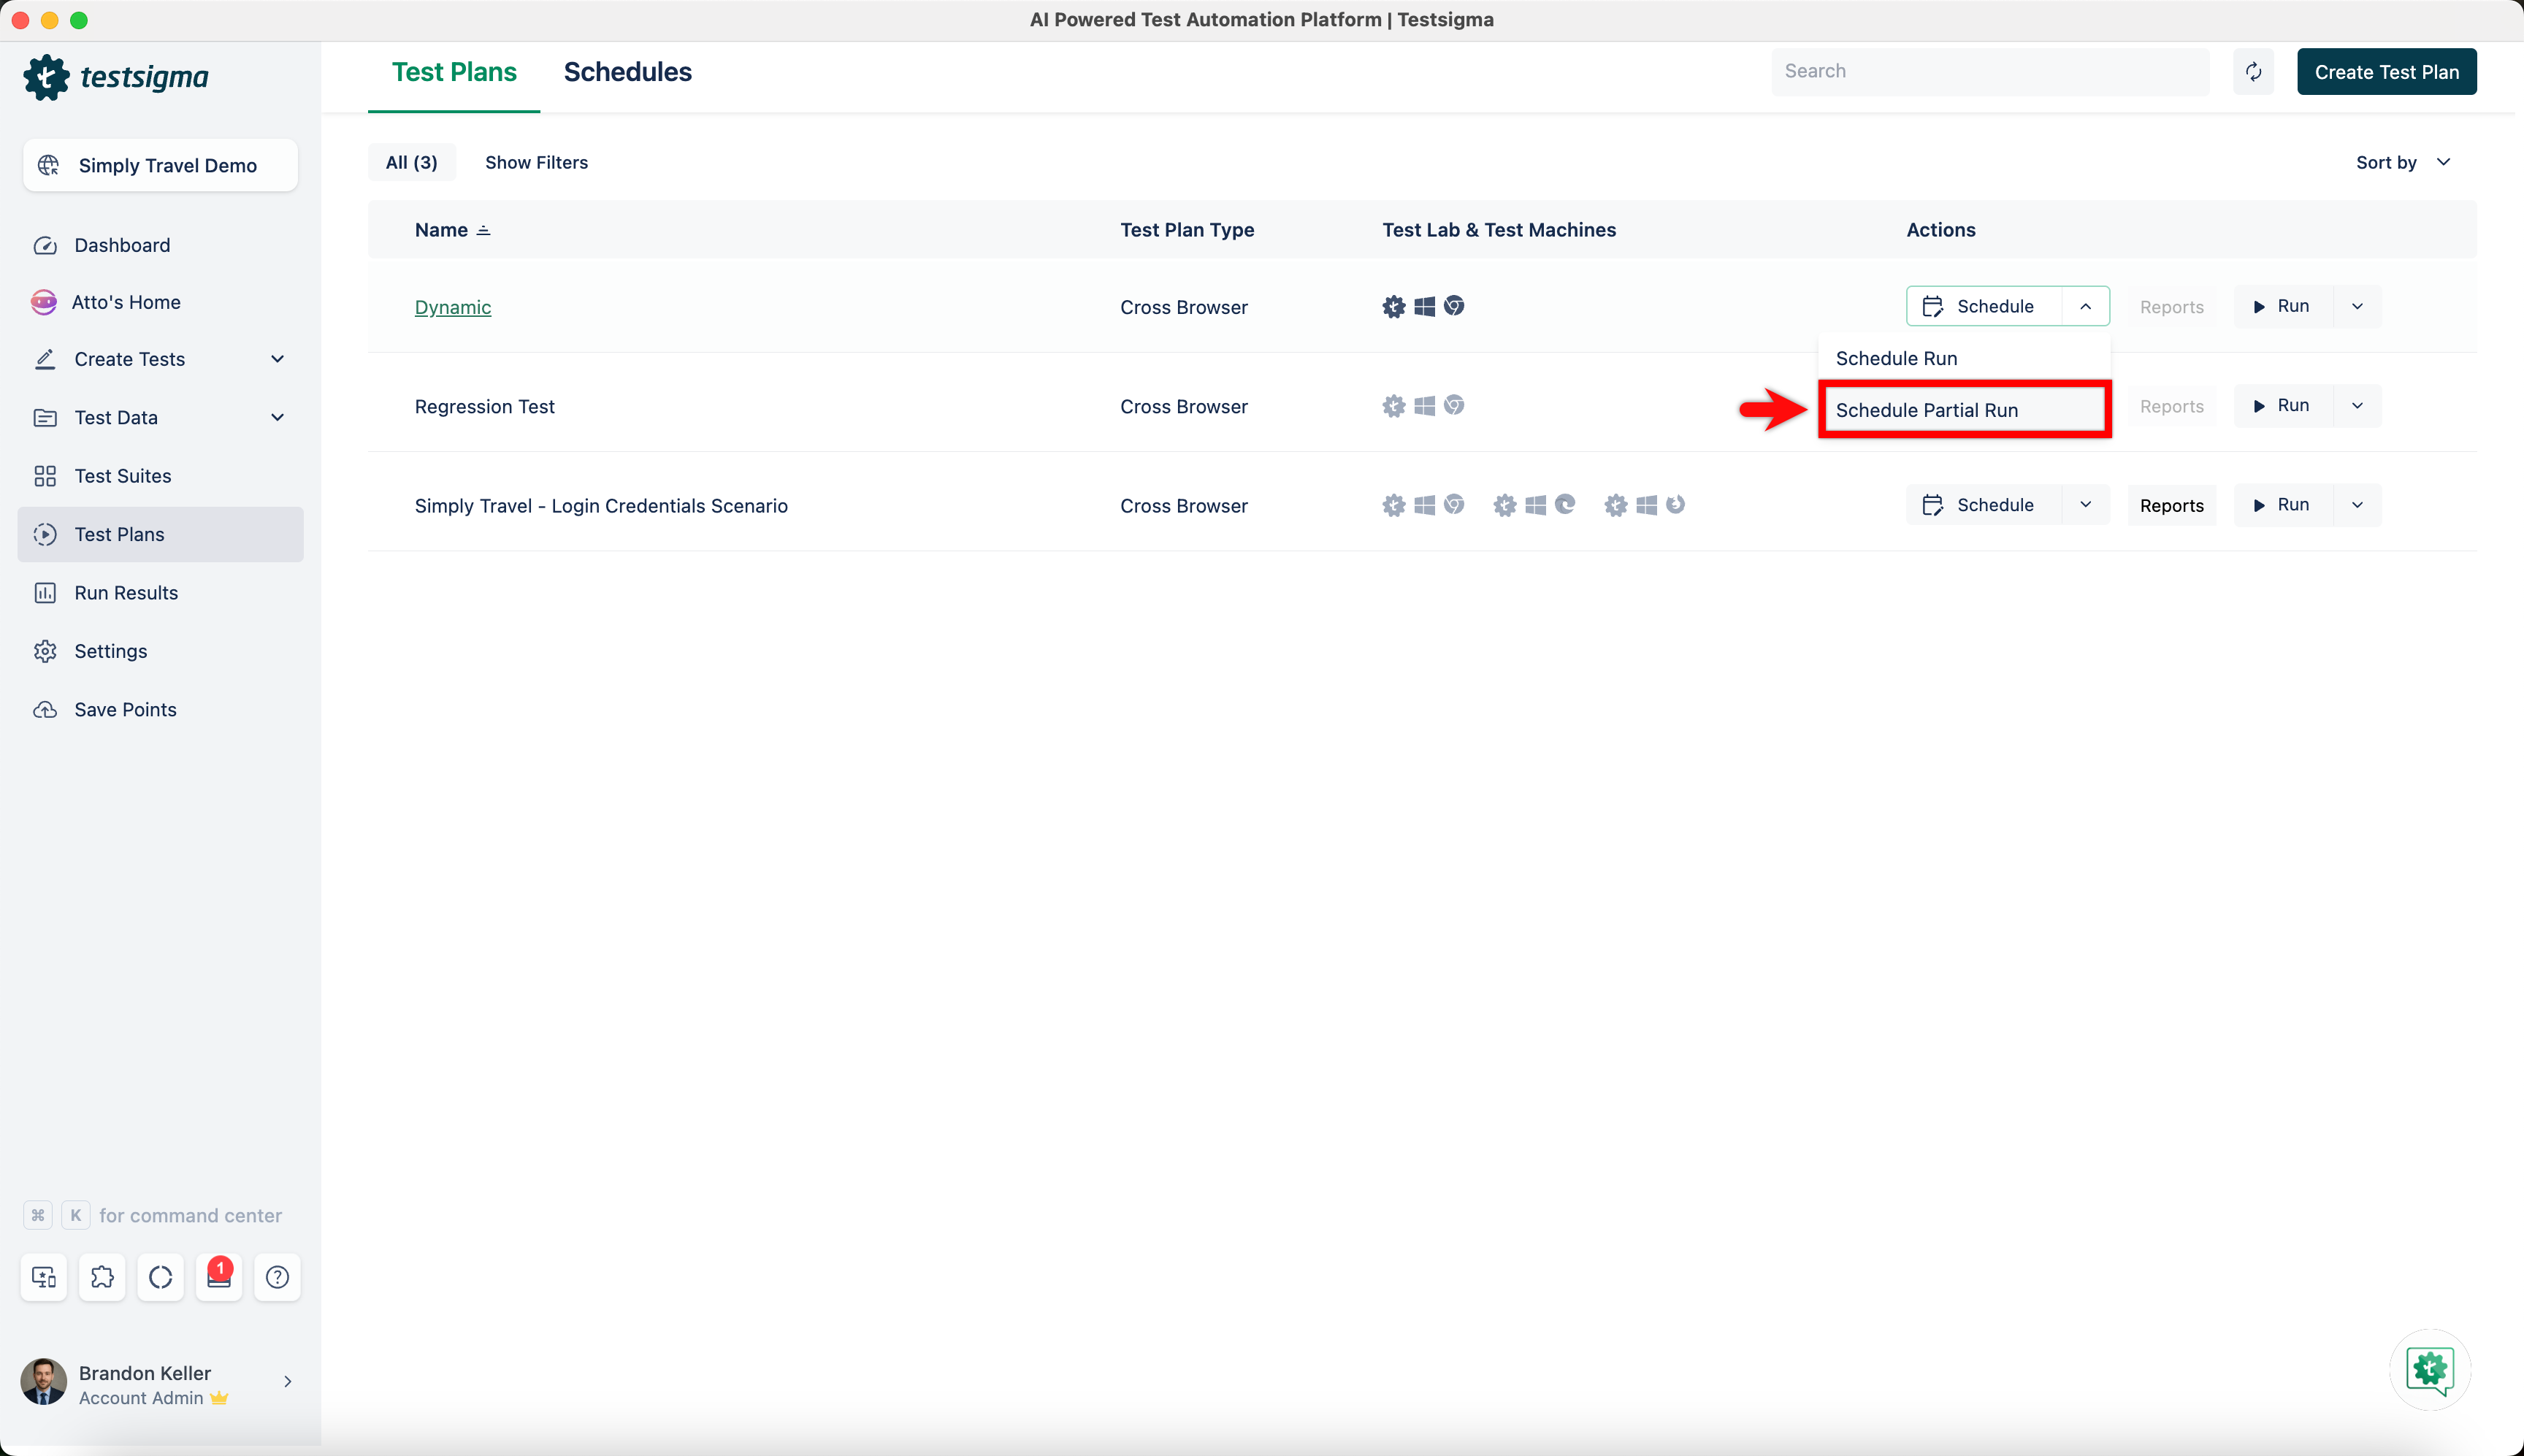
From the left navigation bar, navigate to Test Plans.
-
Expand Schedule for the dynamic test suite and click Schedule Partial Run.
-
In the Schedule Partial Test Plan overlay, enter the required name in the Name field.
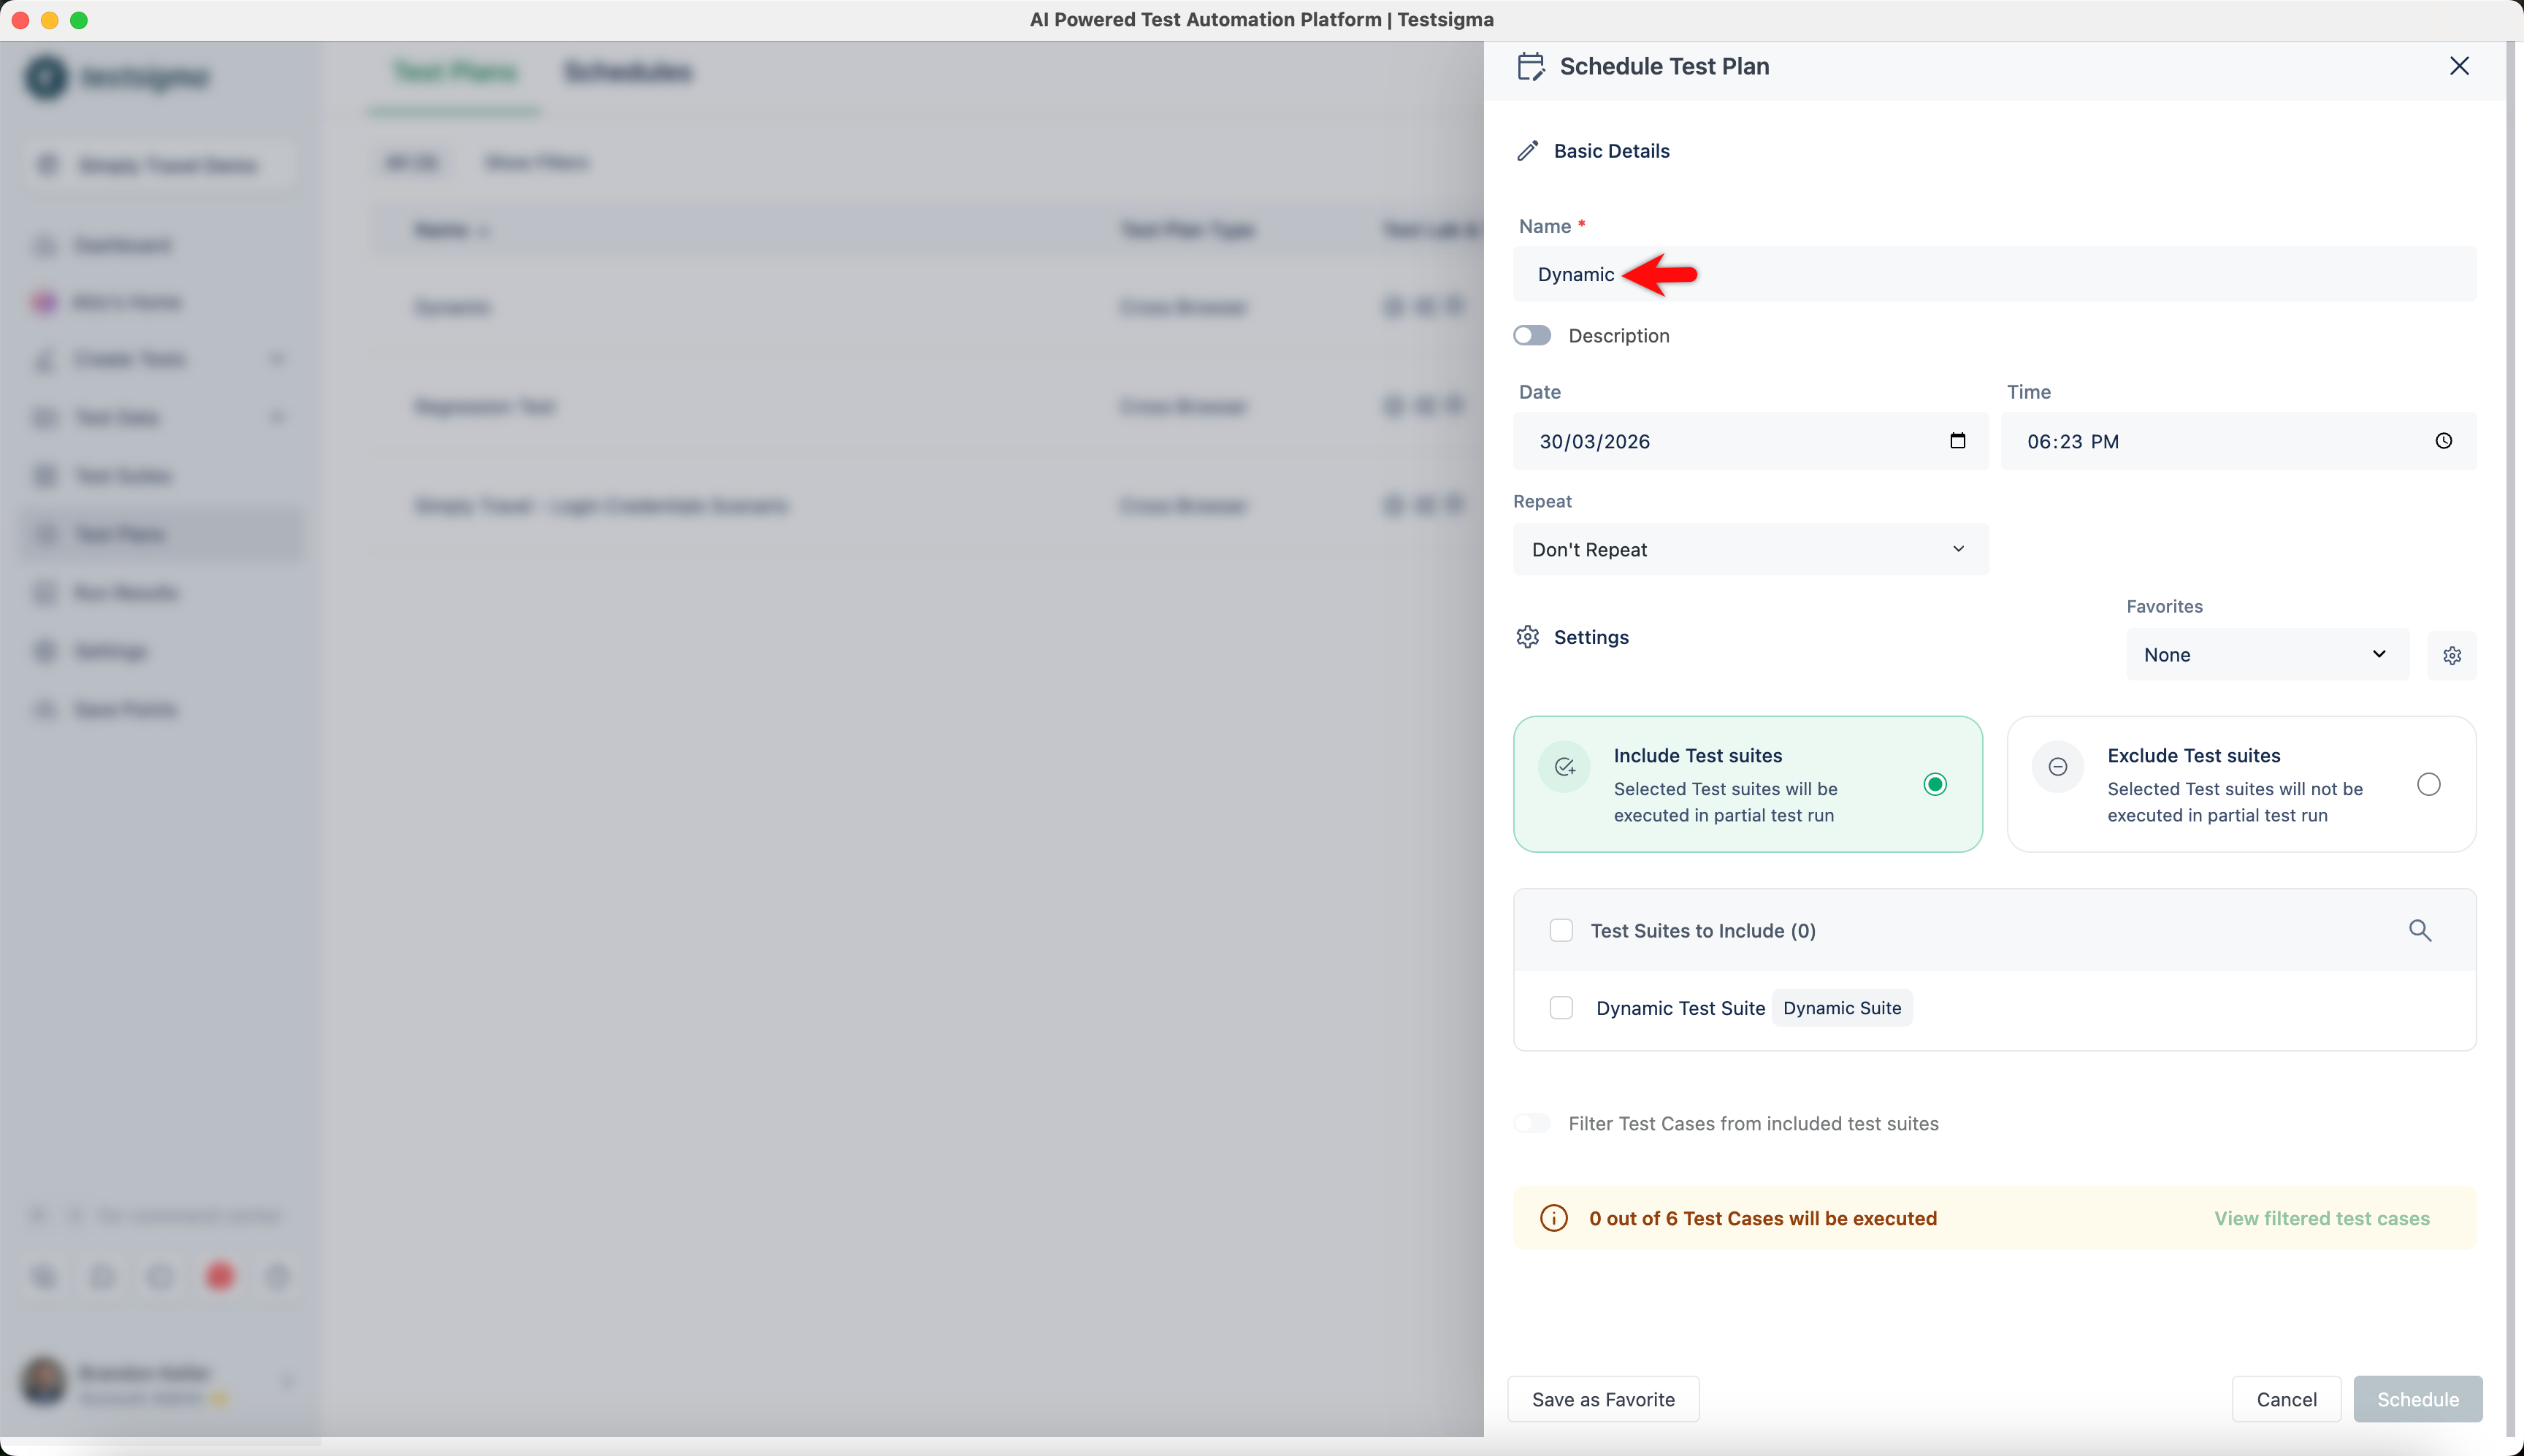
-
Click the calendar icon in the Date field and select the required date.

-
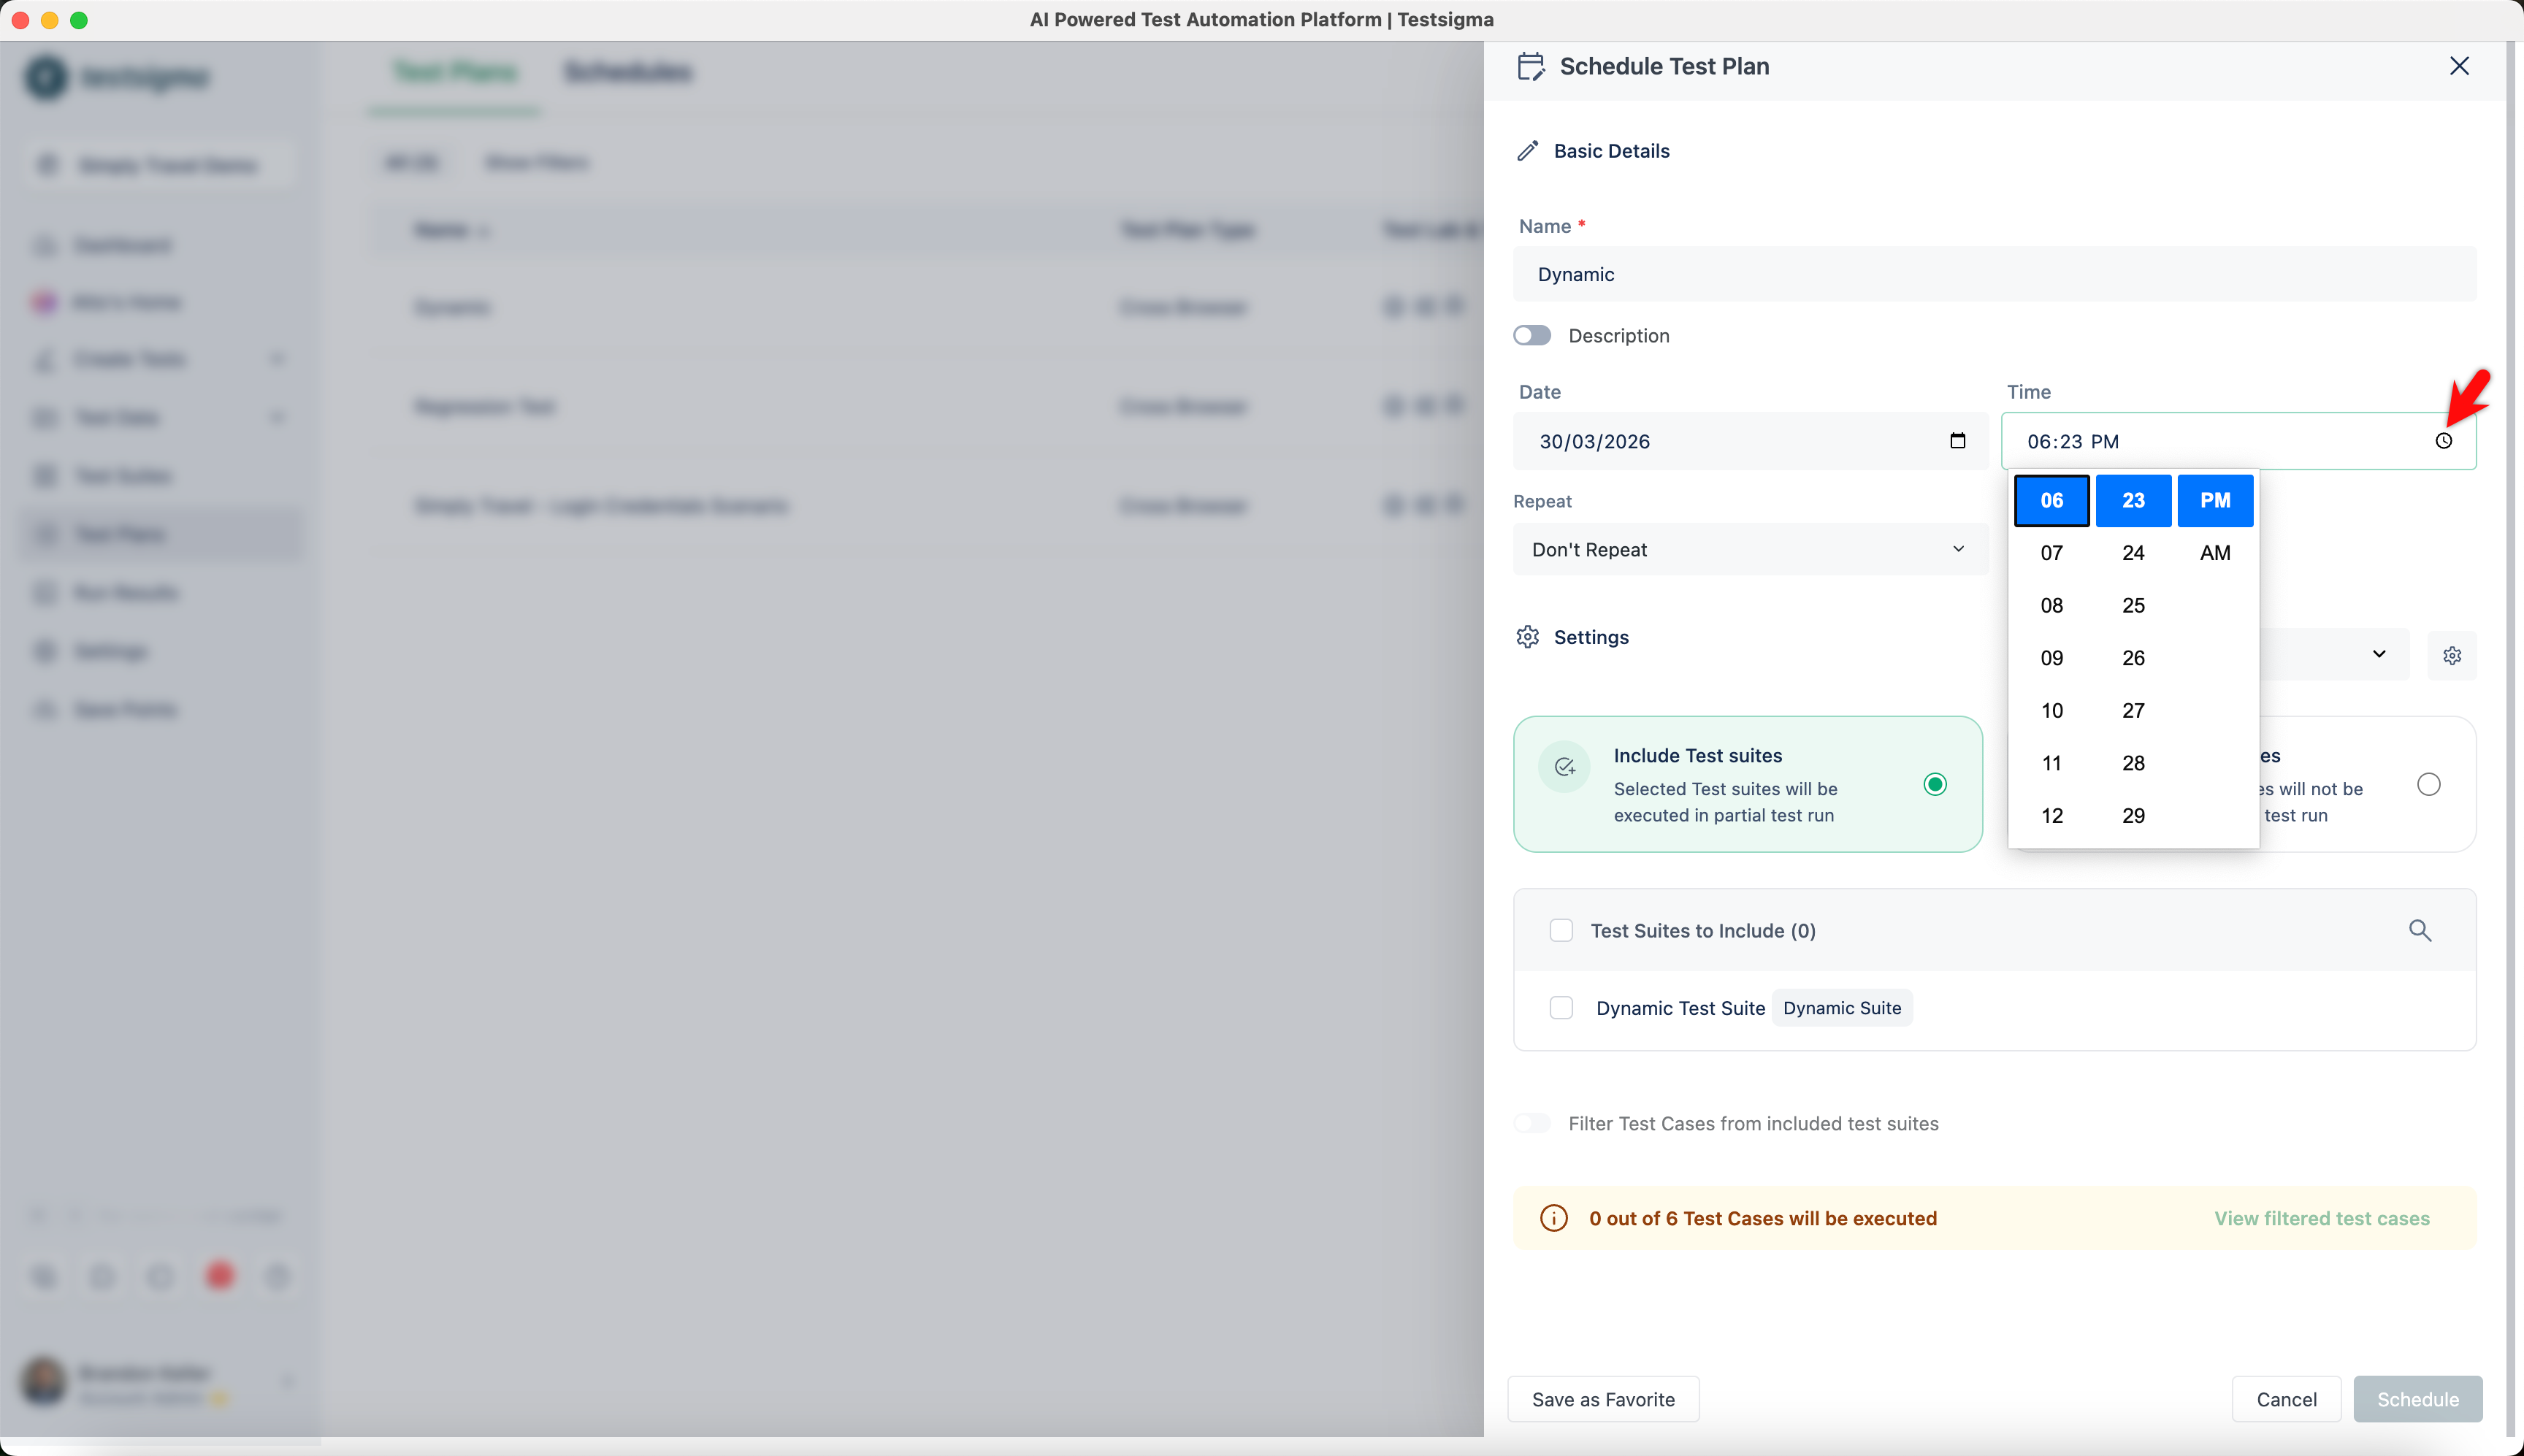
Click the clock icon in the Time field and select the required time.
-
In the Repeat section, expand Repeat and select the required option.
-
In the Test Suites to Include section, select the required test suites.
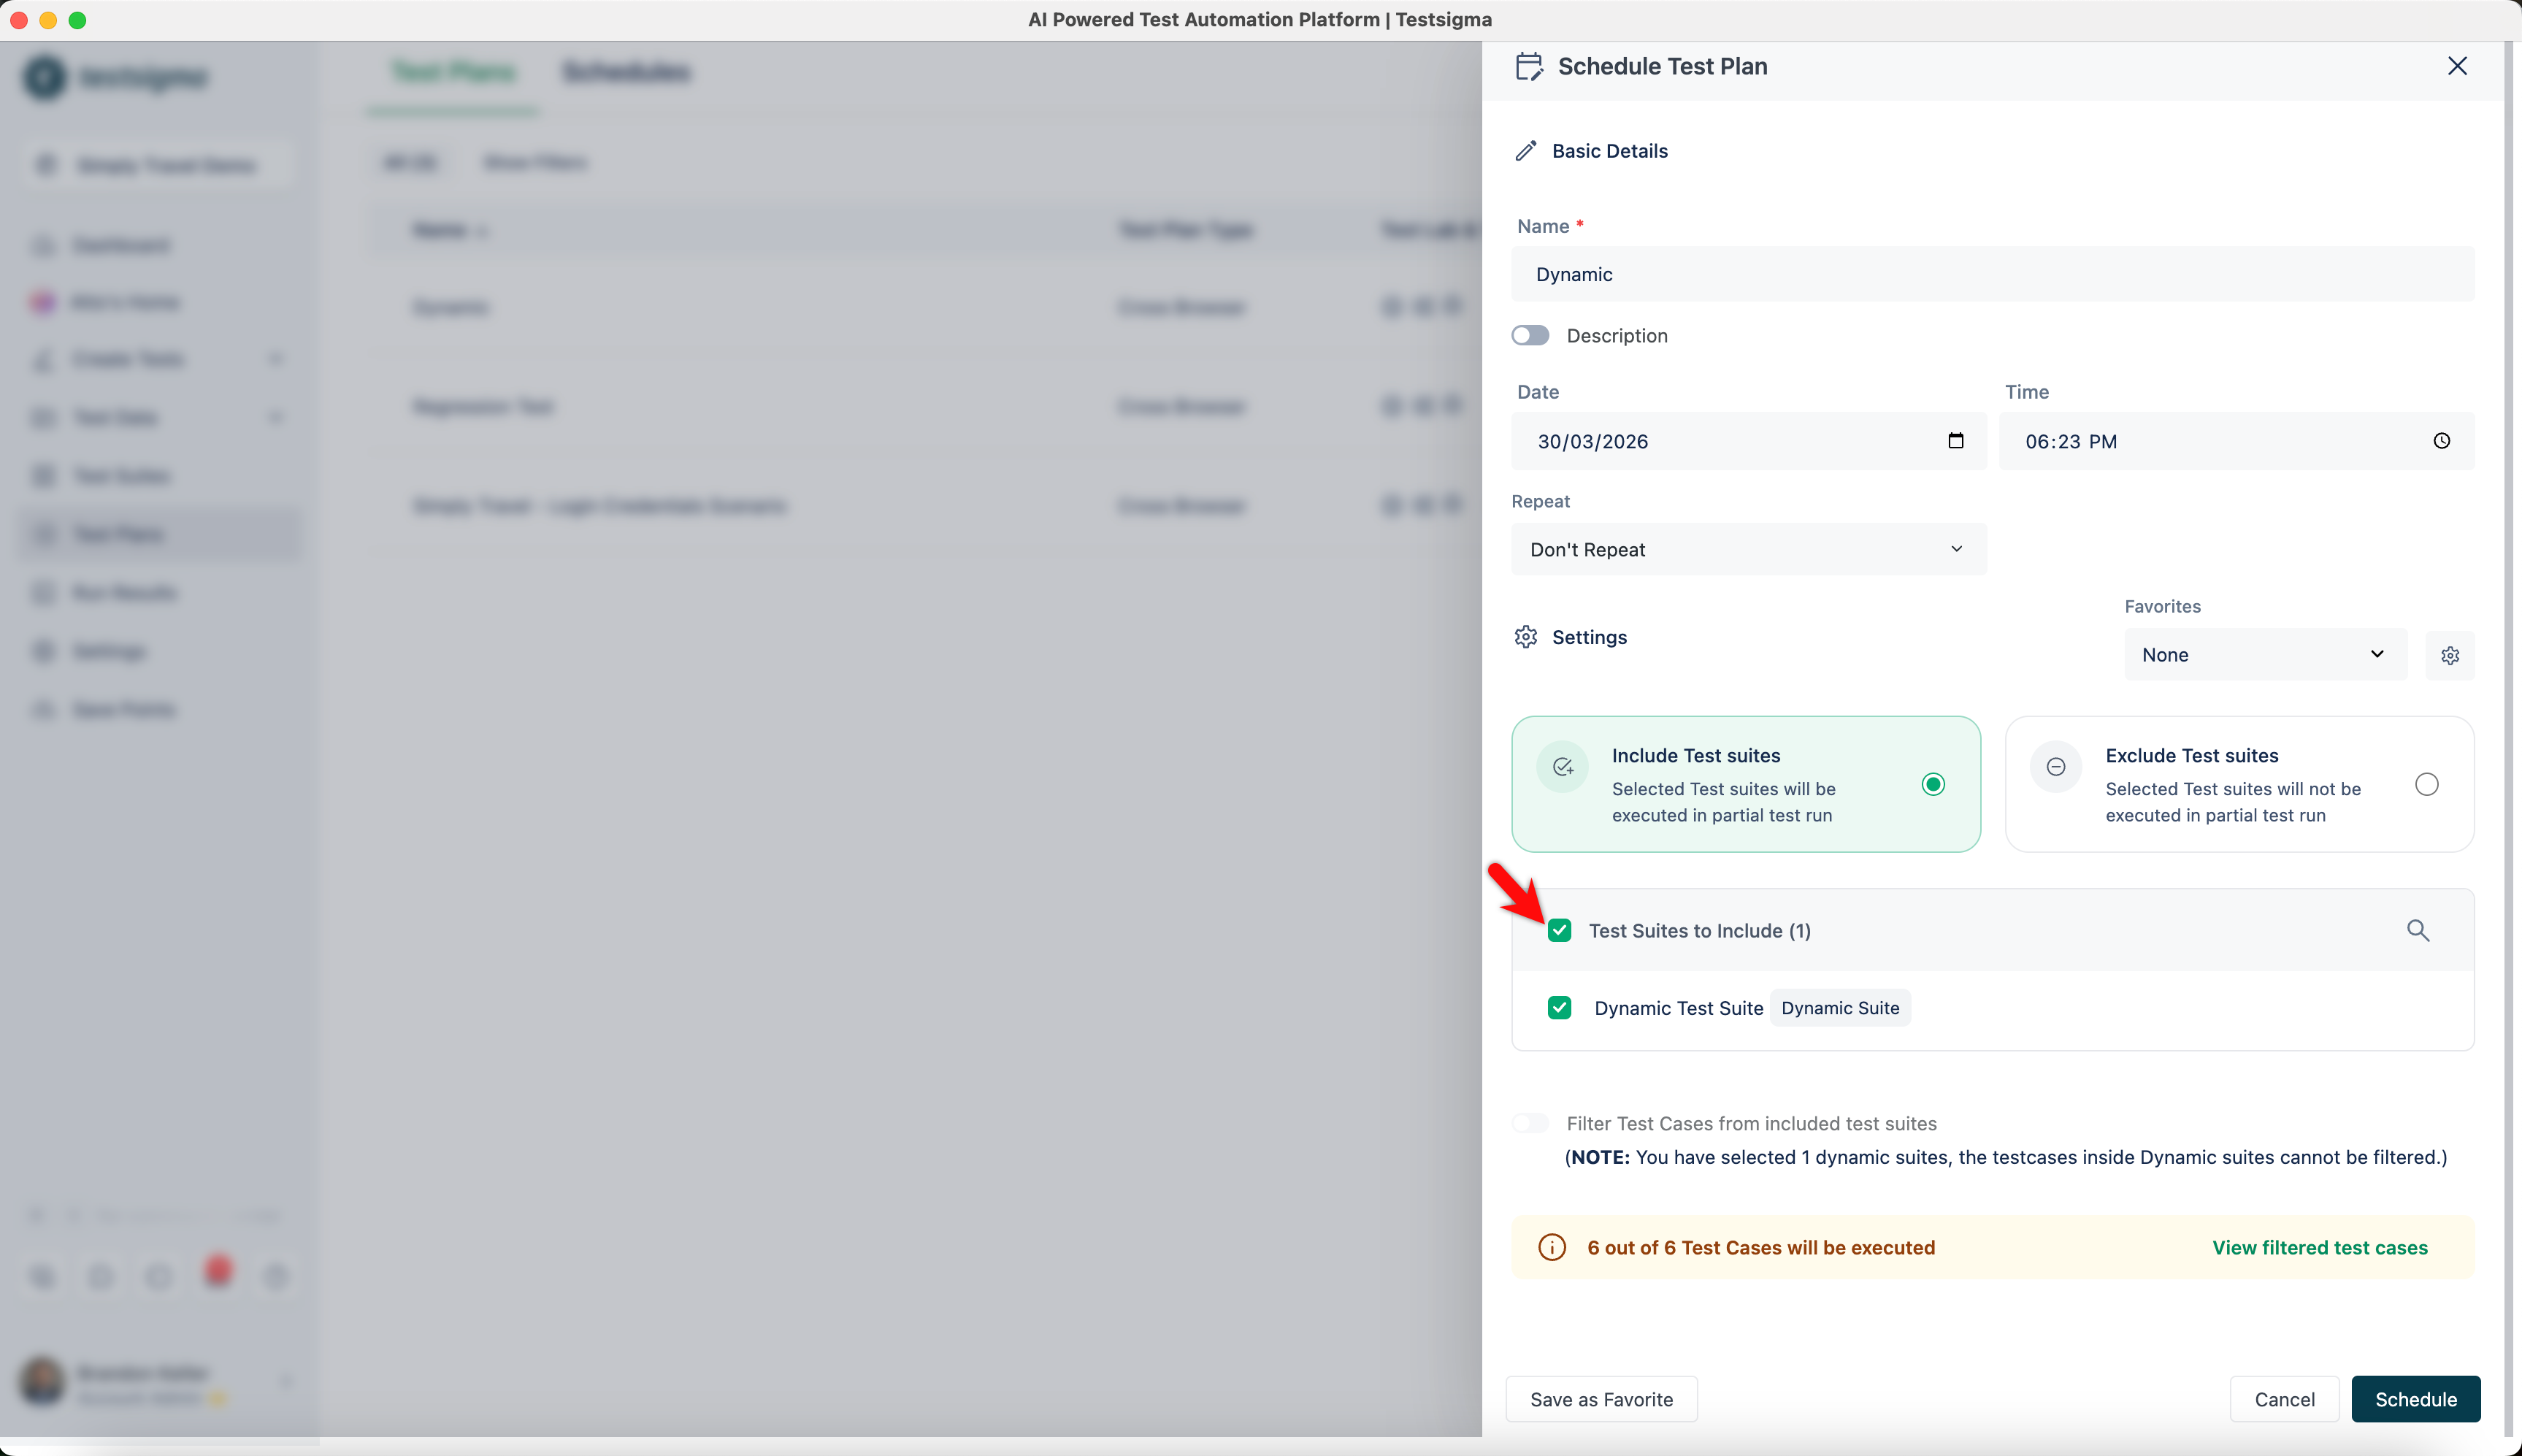
- Click Schedule.