Test Cases
Test Step Options
In Testsigma, you can customize recorded test steps within a test case using test step options. These options allow you to control and customize various aspects of test execution, such as data inputs, assertions, and behavior, enhancing the test scenario’s flexibility and accuracy. This article discusses all test step options available for recorded test steps in Testsigma.
Prerequisites
Before you begin, ensure that:
- You have installed the Testsigma’s test step recorder. For more information on installing Testsigma’s test step recorder, refer to the documentation on installing Testsigma’s step test recorder.
- You have referred to the documentation on creating a test case.
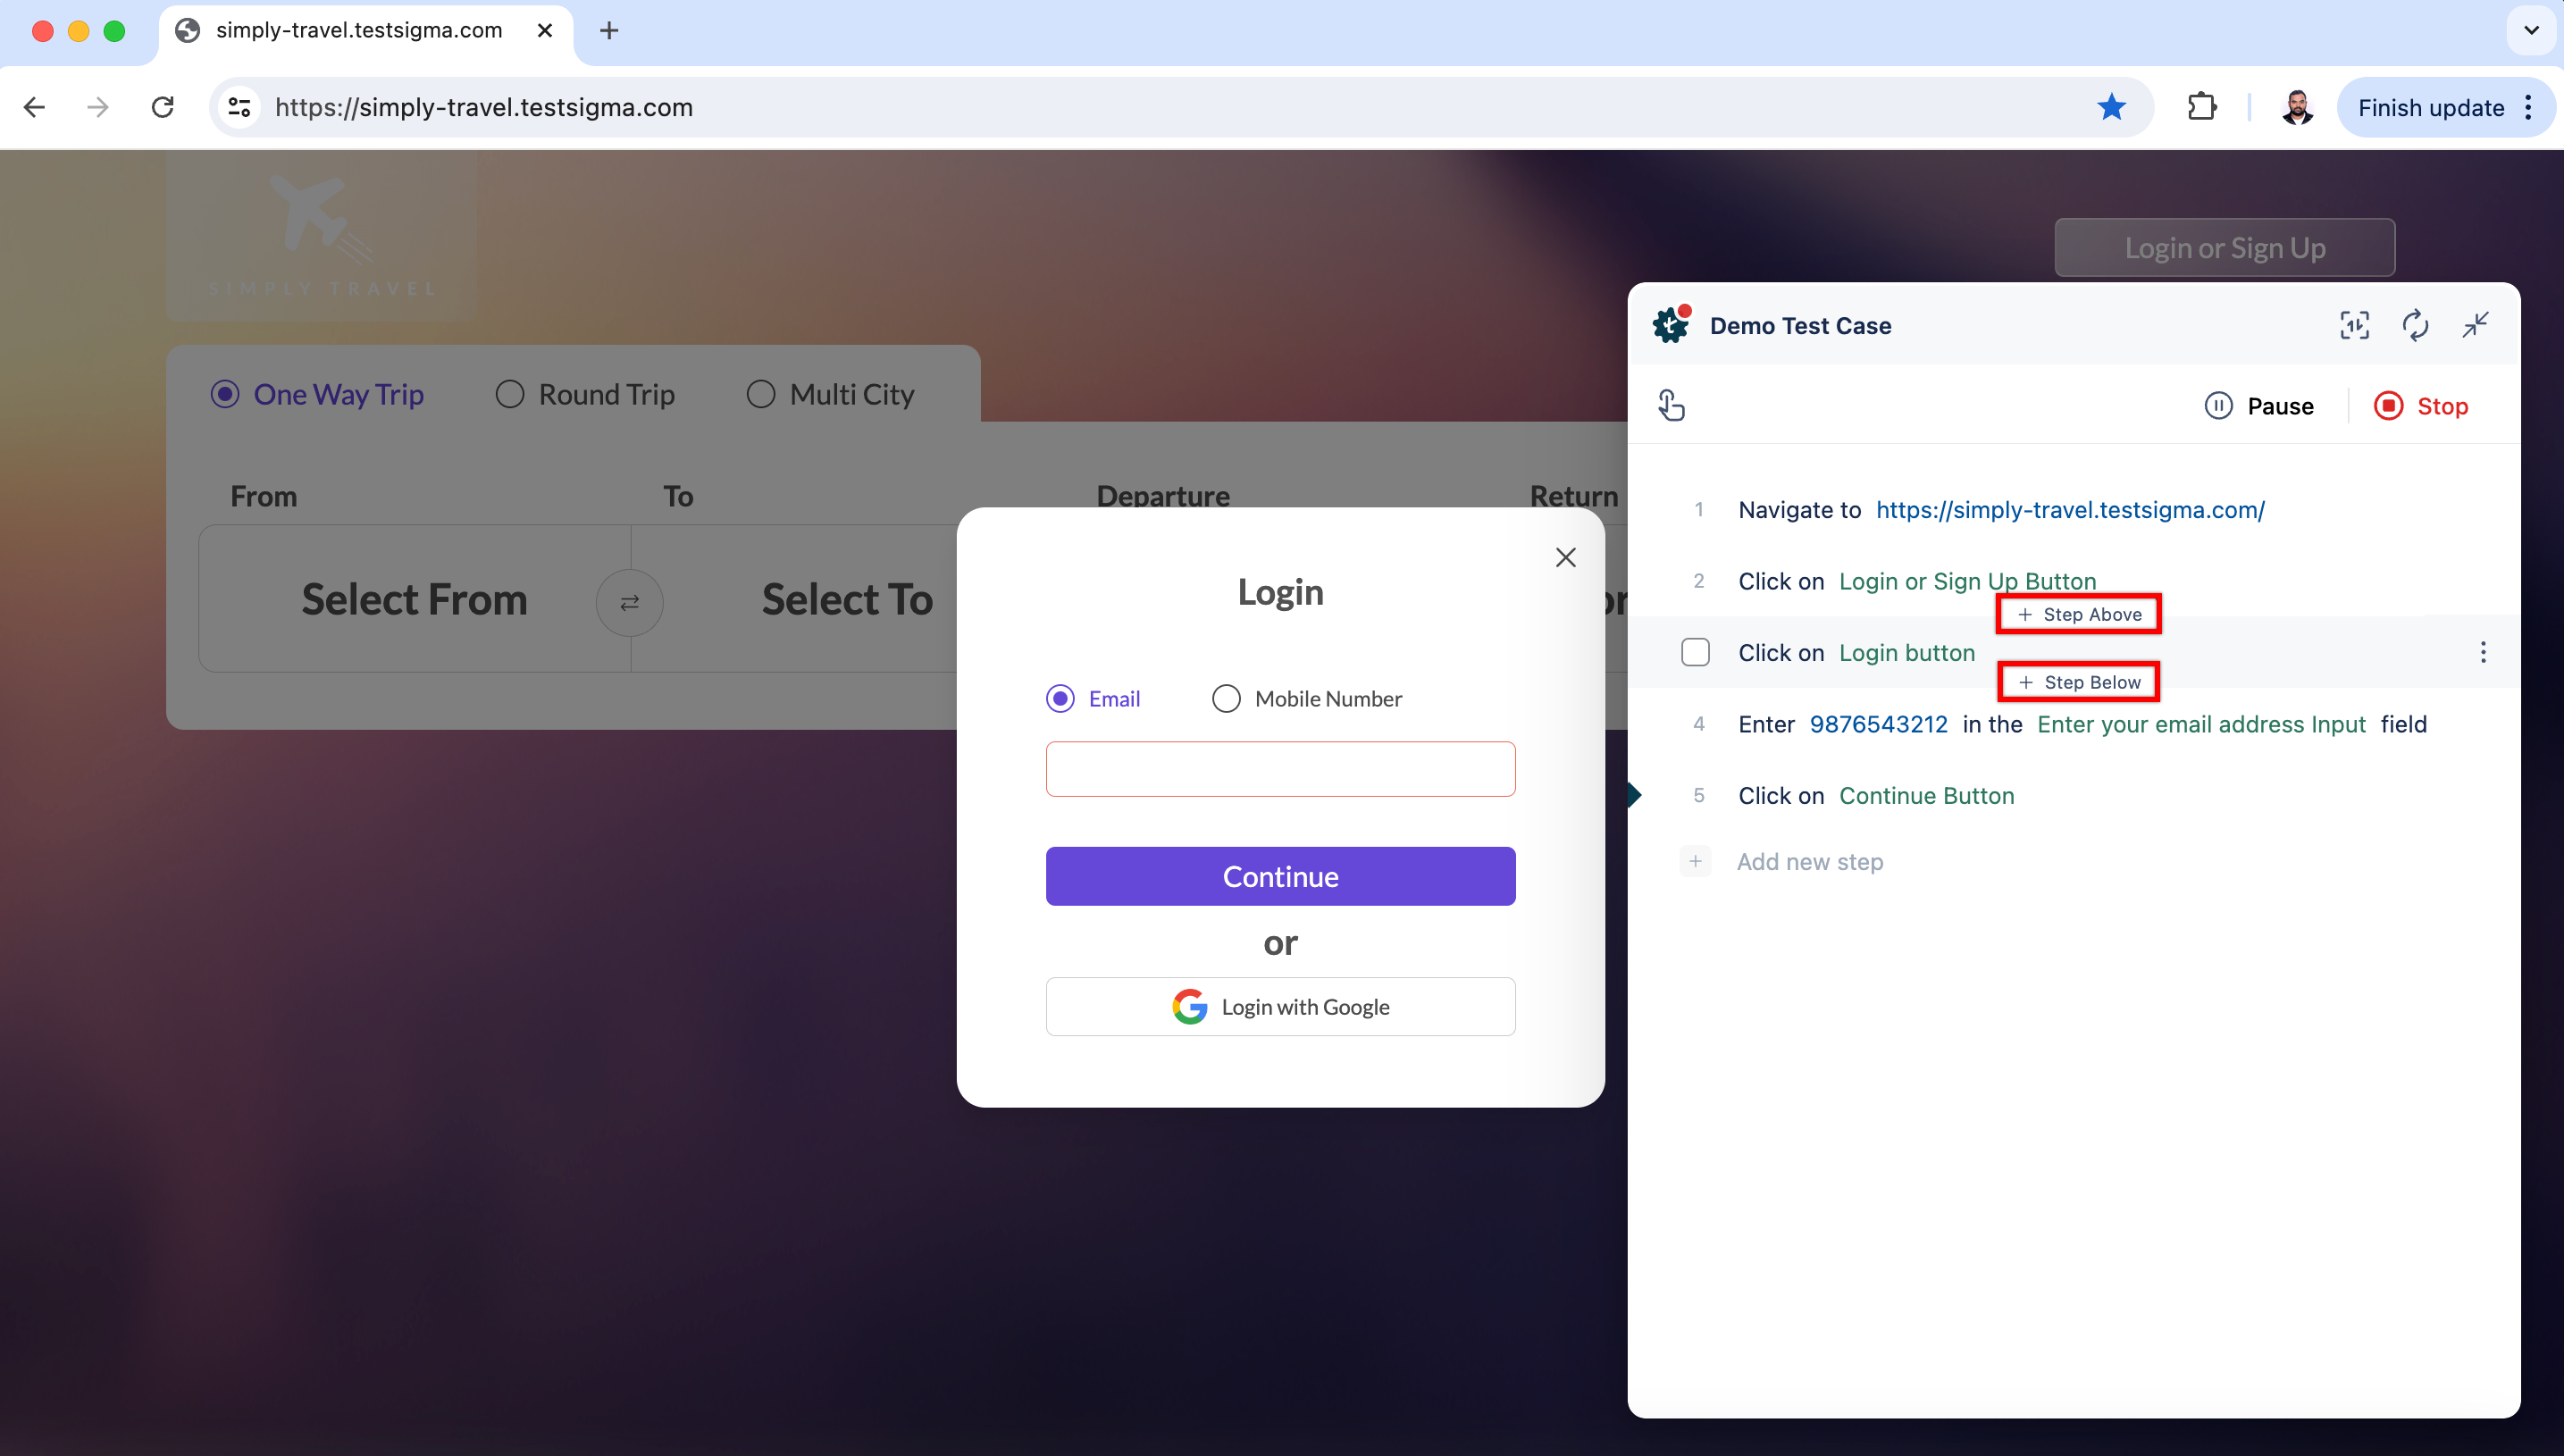
Steps Above and Below
Section titled “Steps Above and Below”Clicking the Steps Above button lets you add another step before the current step, and clicking the Steps Below button lets you add another step below the current step.
Edit/Change/Create Element
Section titled “Edit/Change/Create Element”You can click on any element on any test step to access these options.
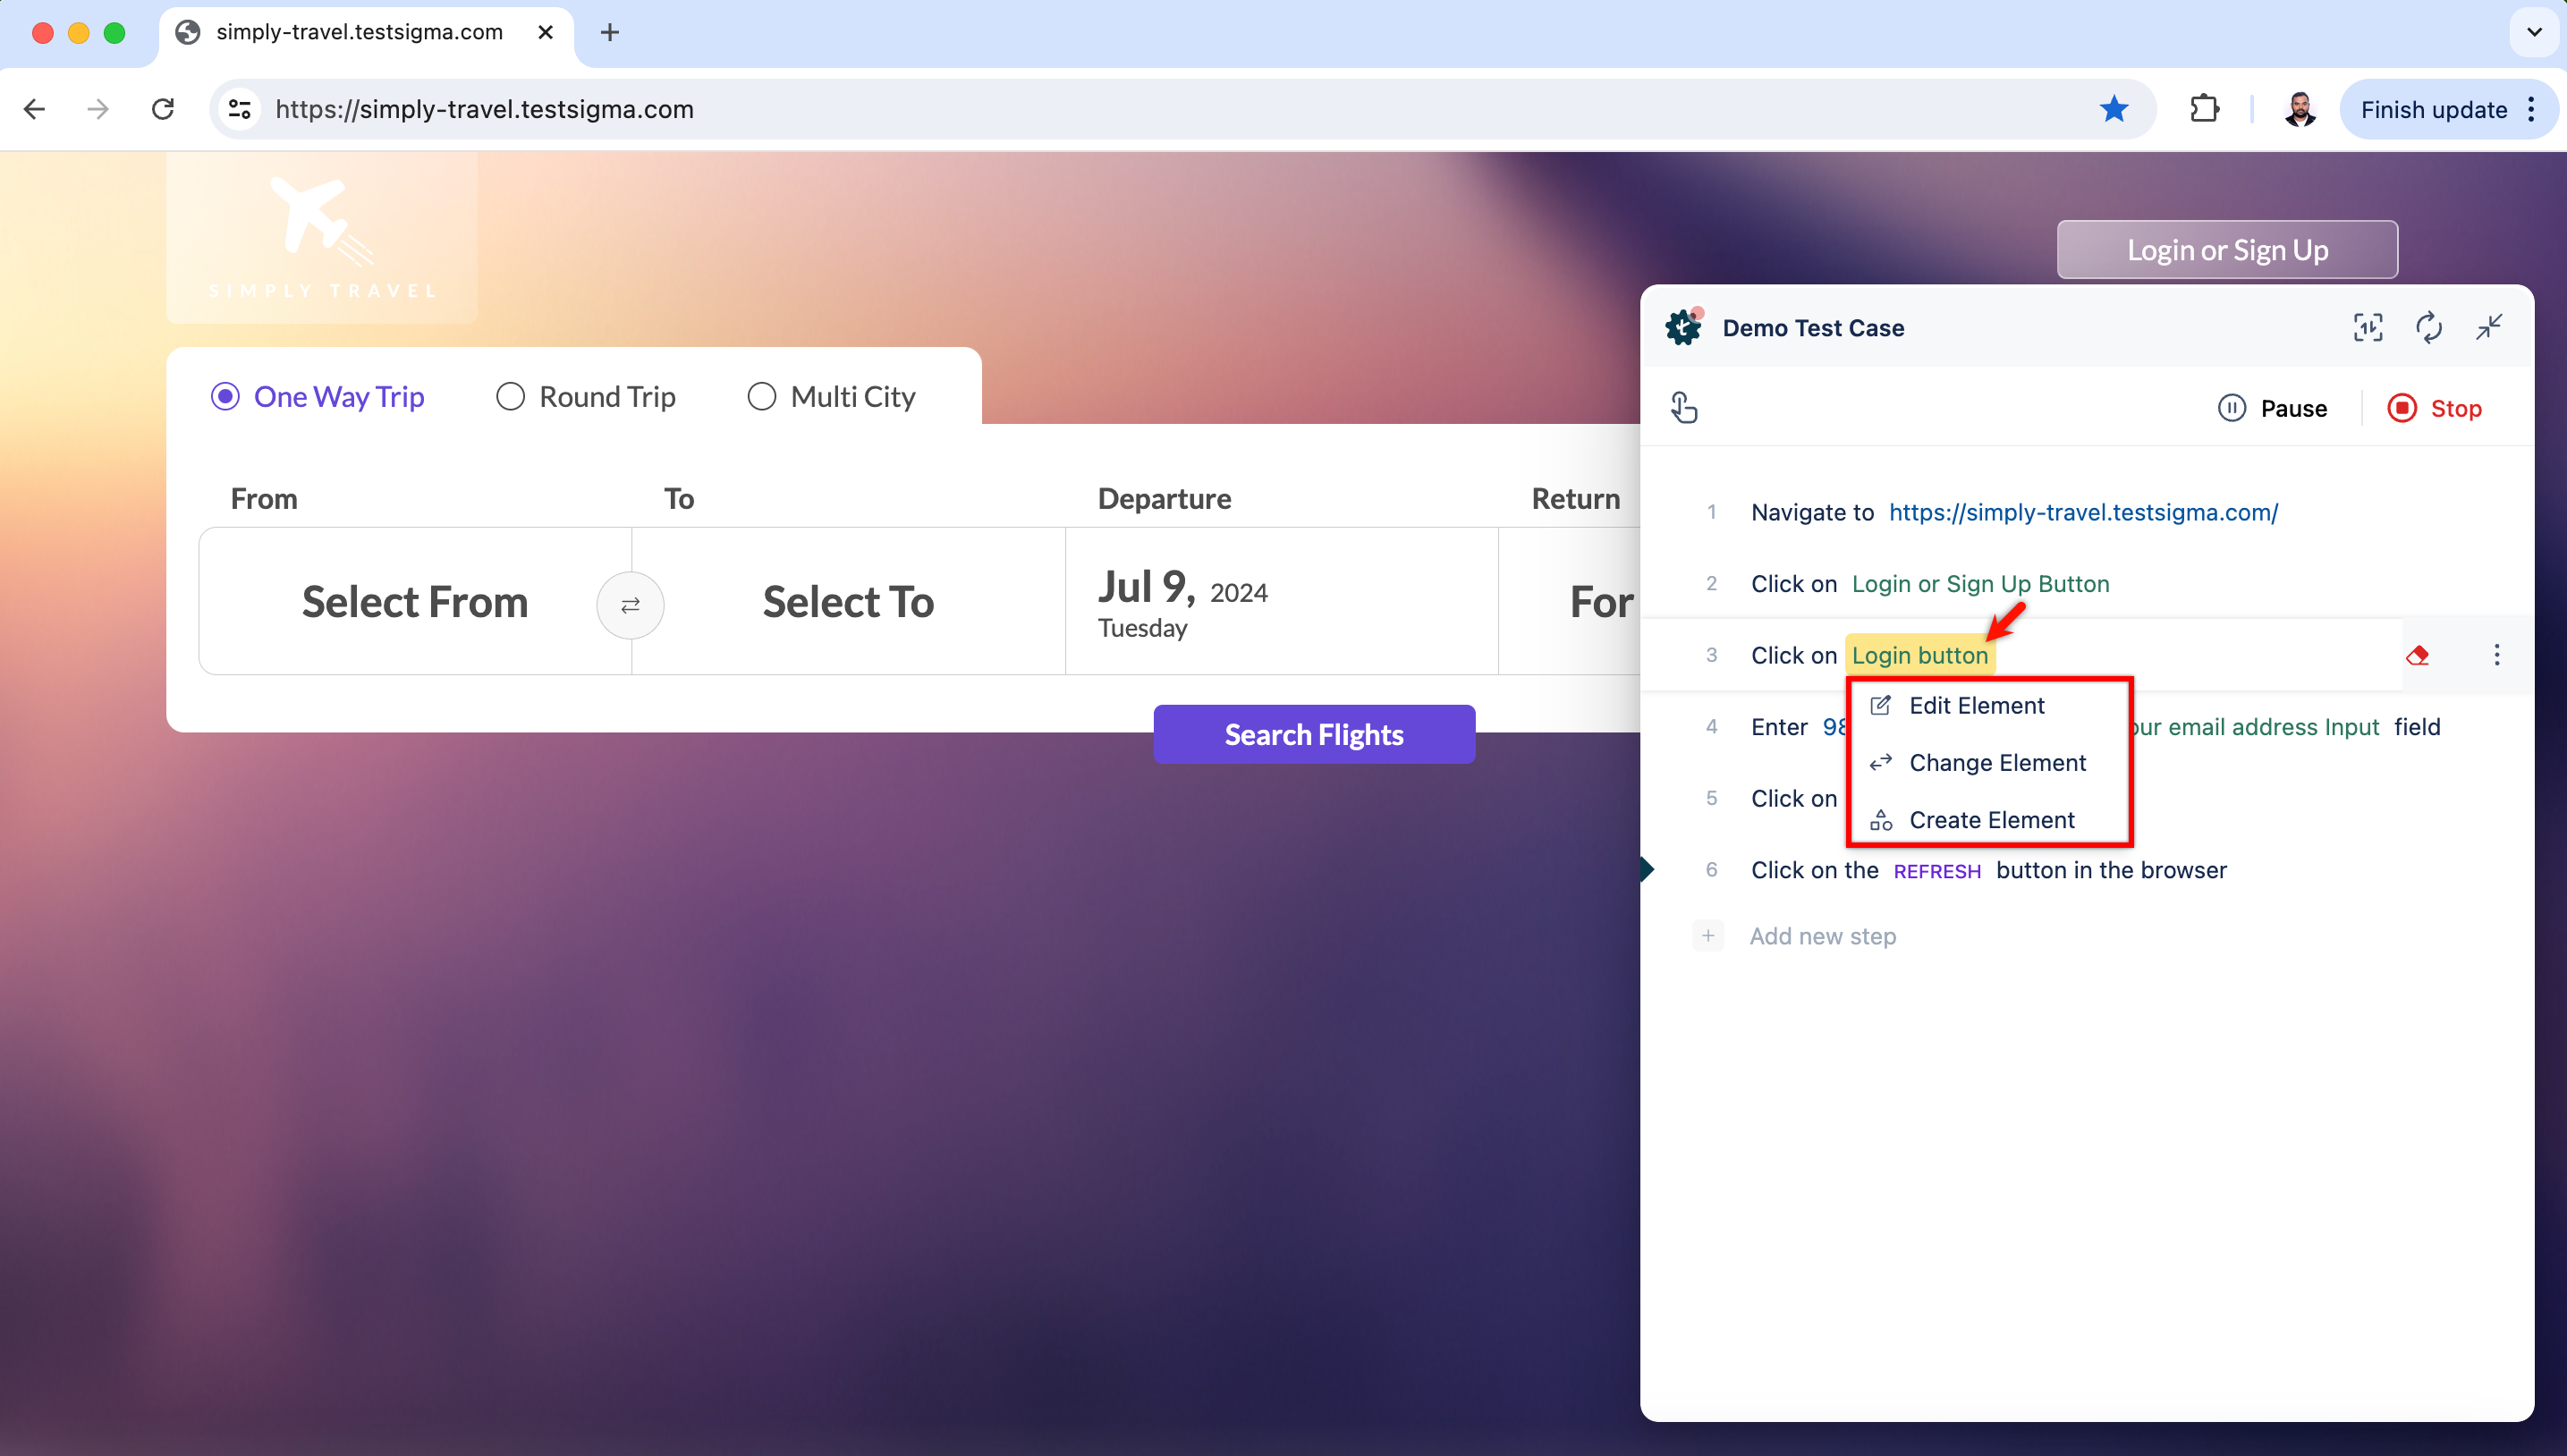
For more information on creating elements, refer to the documentation on creating elements.
Disable Step
Section titled “Disable Step”You can select this option and click Update Step to disable the test step. This will skip the test step while executing the test case.
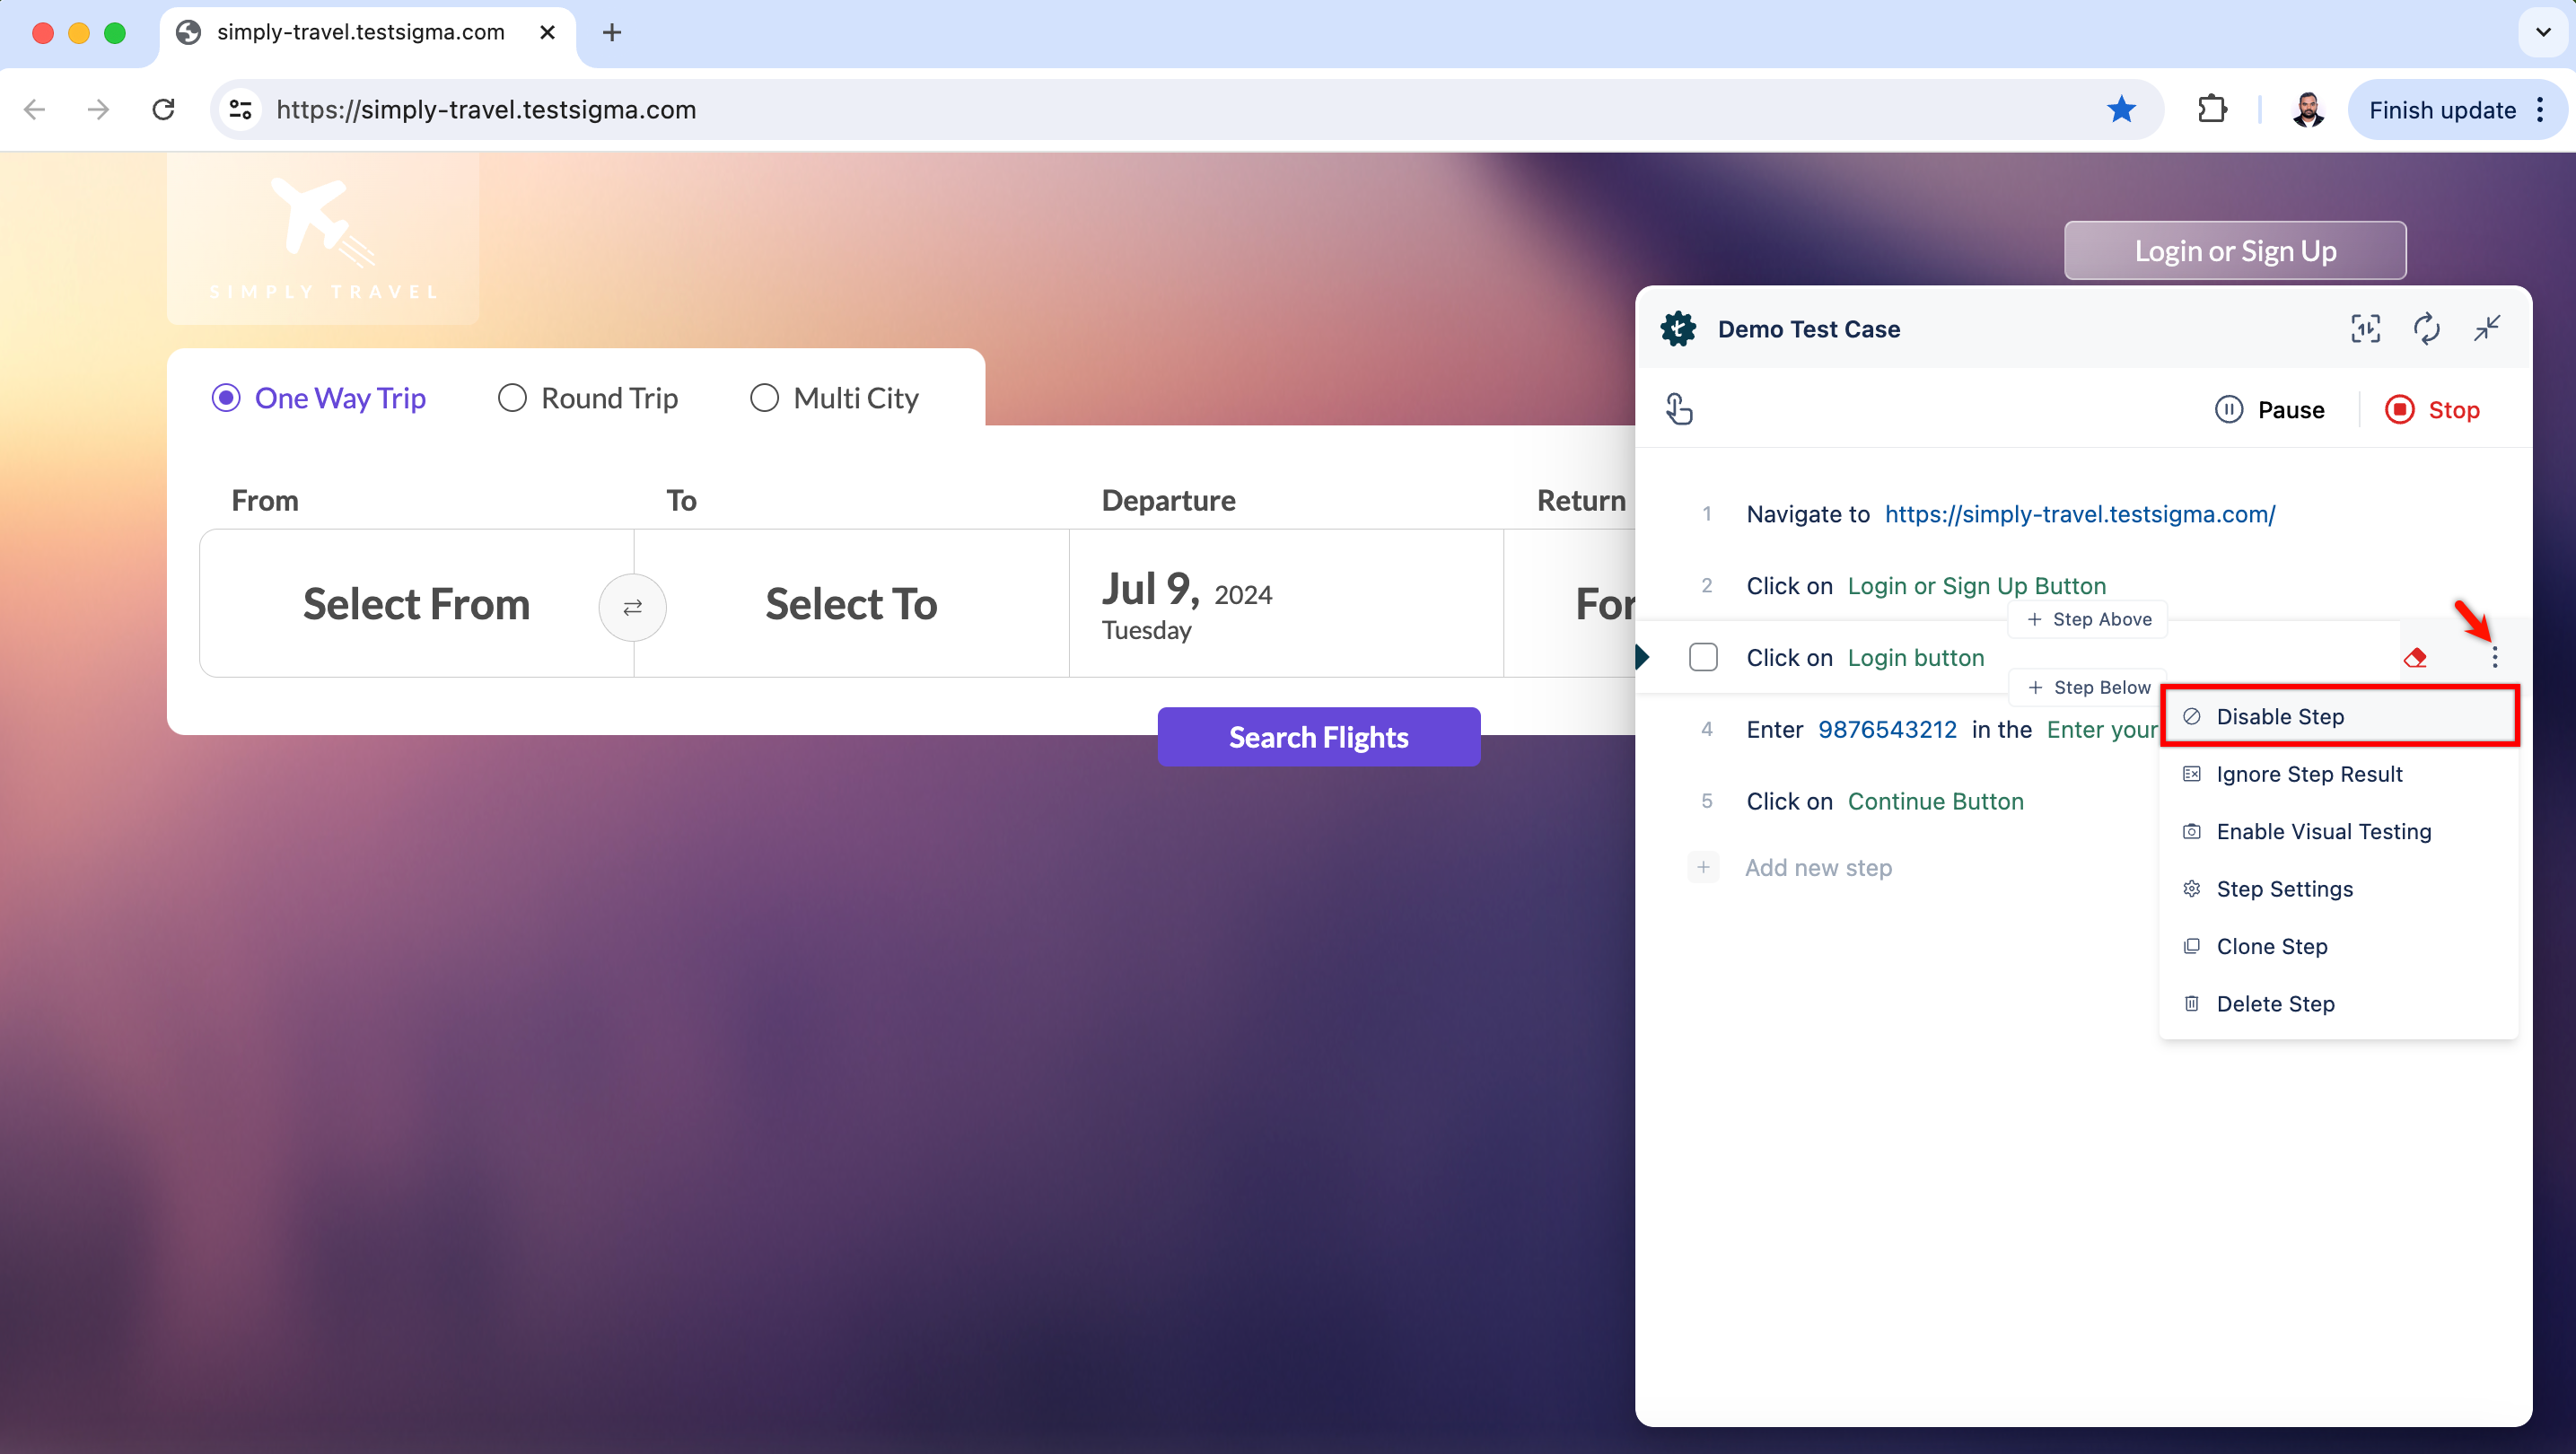
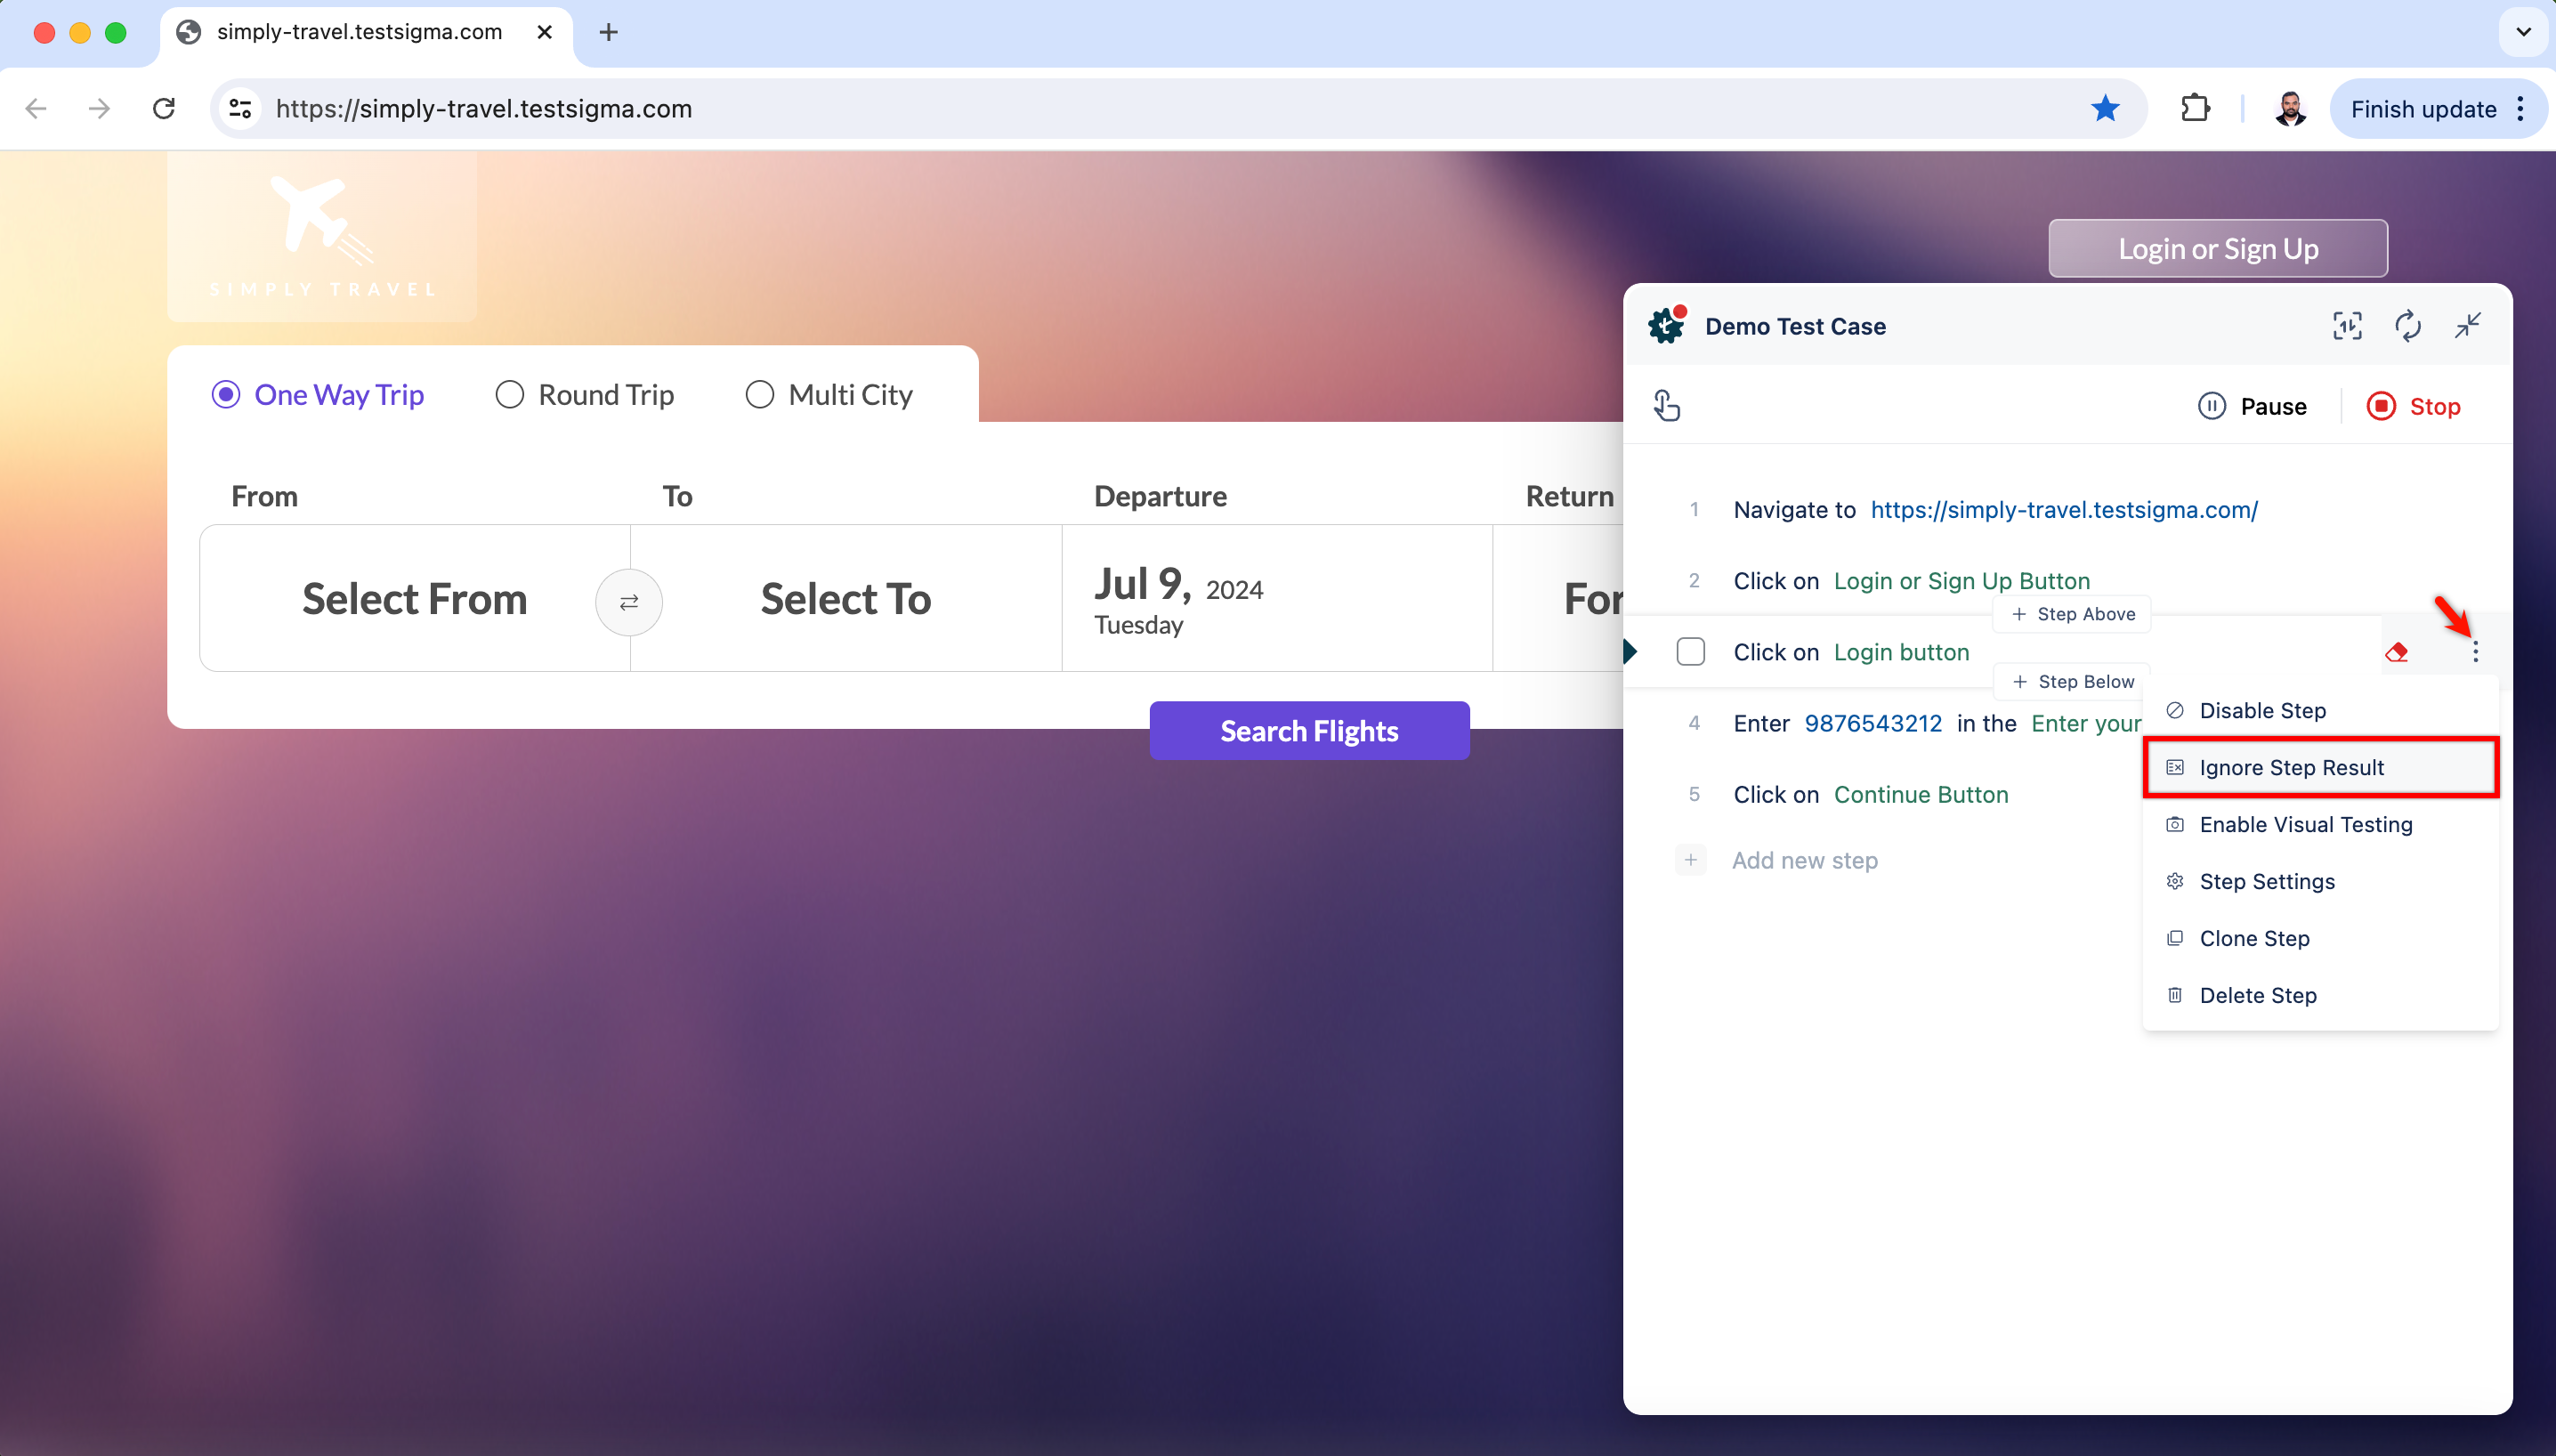
Ignore Step Result
Section titled “Ignore Step Result”You can select this option and click Update Step to ignore the step result. This will execute further test steps without being affected by the test step result.
Enable Visual Testing
Section titled “Enable Visual Testing”You can select this option and click Update Step to enable Visual Testing for the test step.

Step Settings
Section titled “Step Settings”You can check details of a test step by clicking on the option Step Settings.
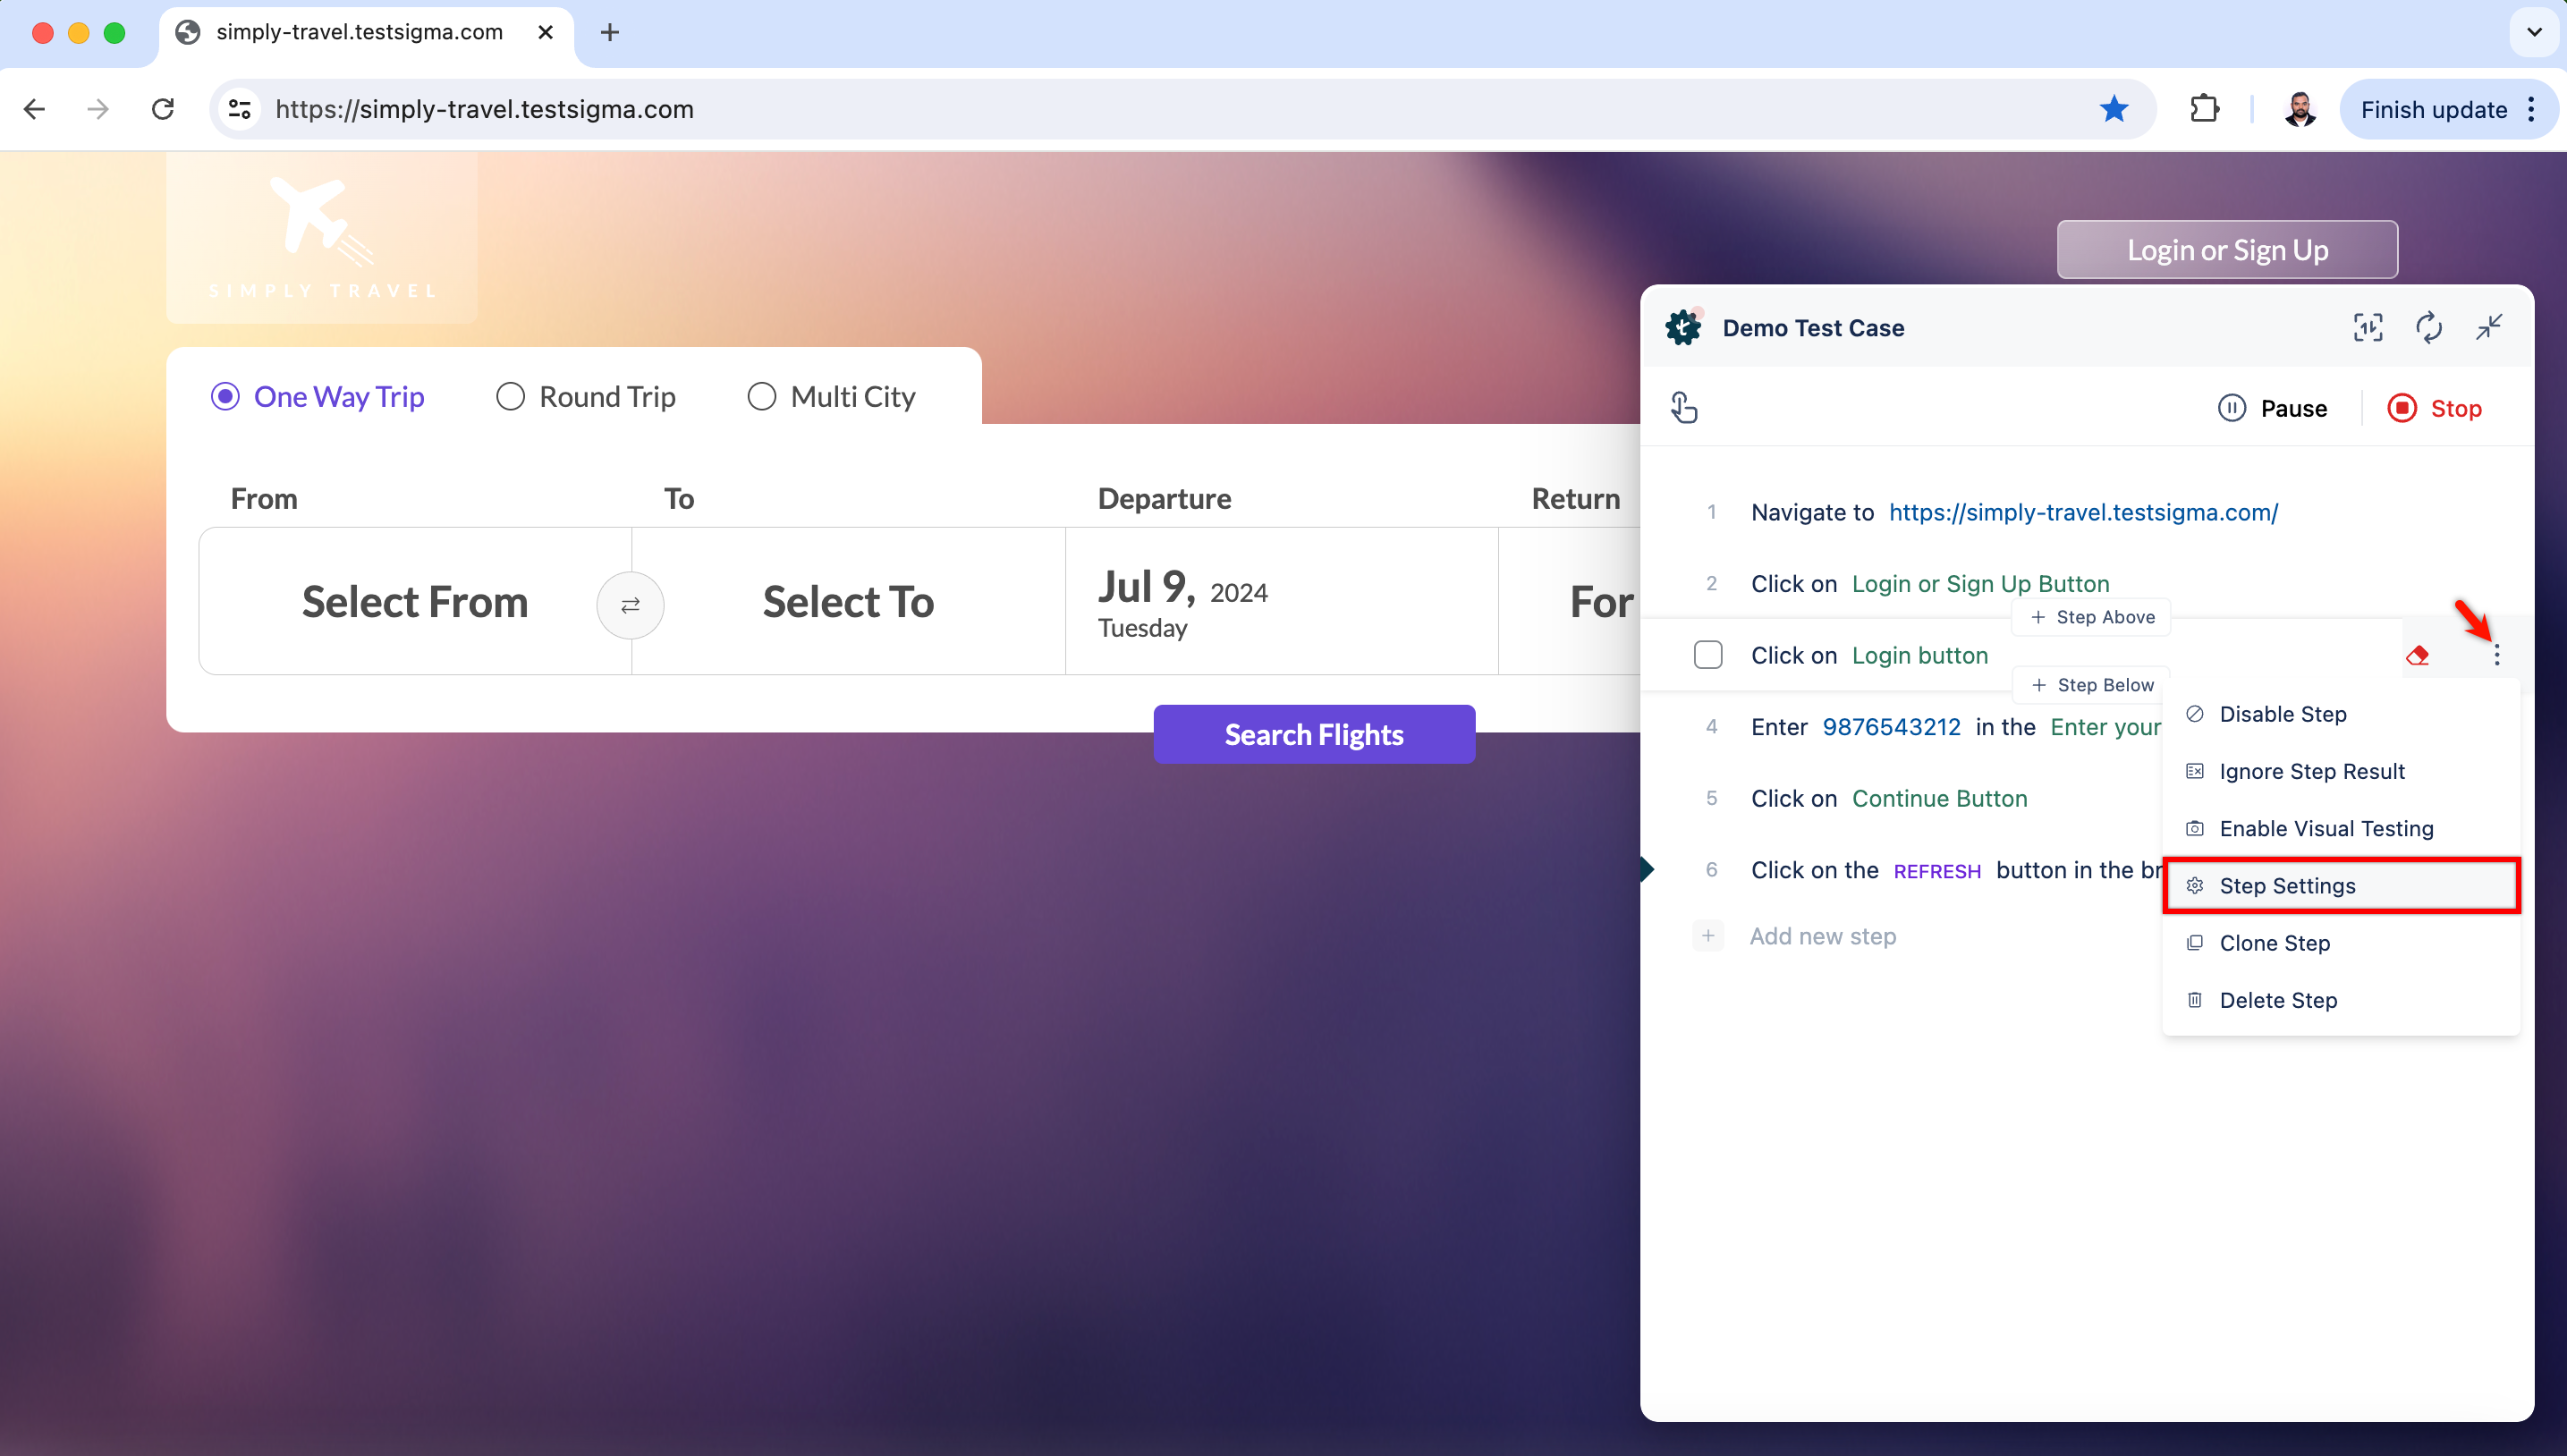
For more information on configuring test step settings, refer to the documentation on configuring test step settings.
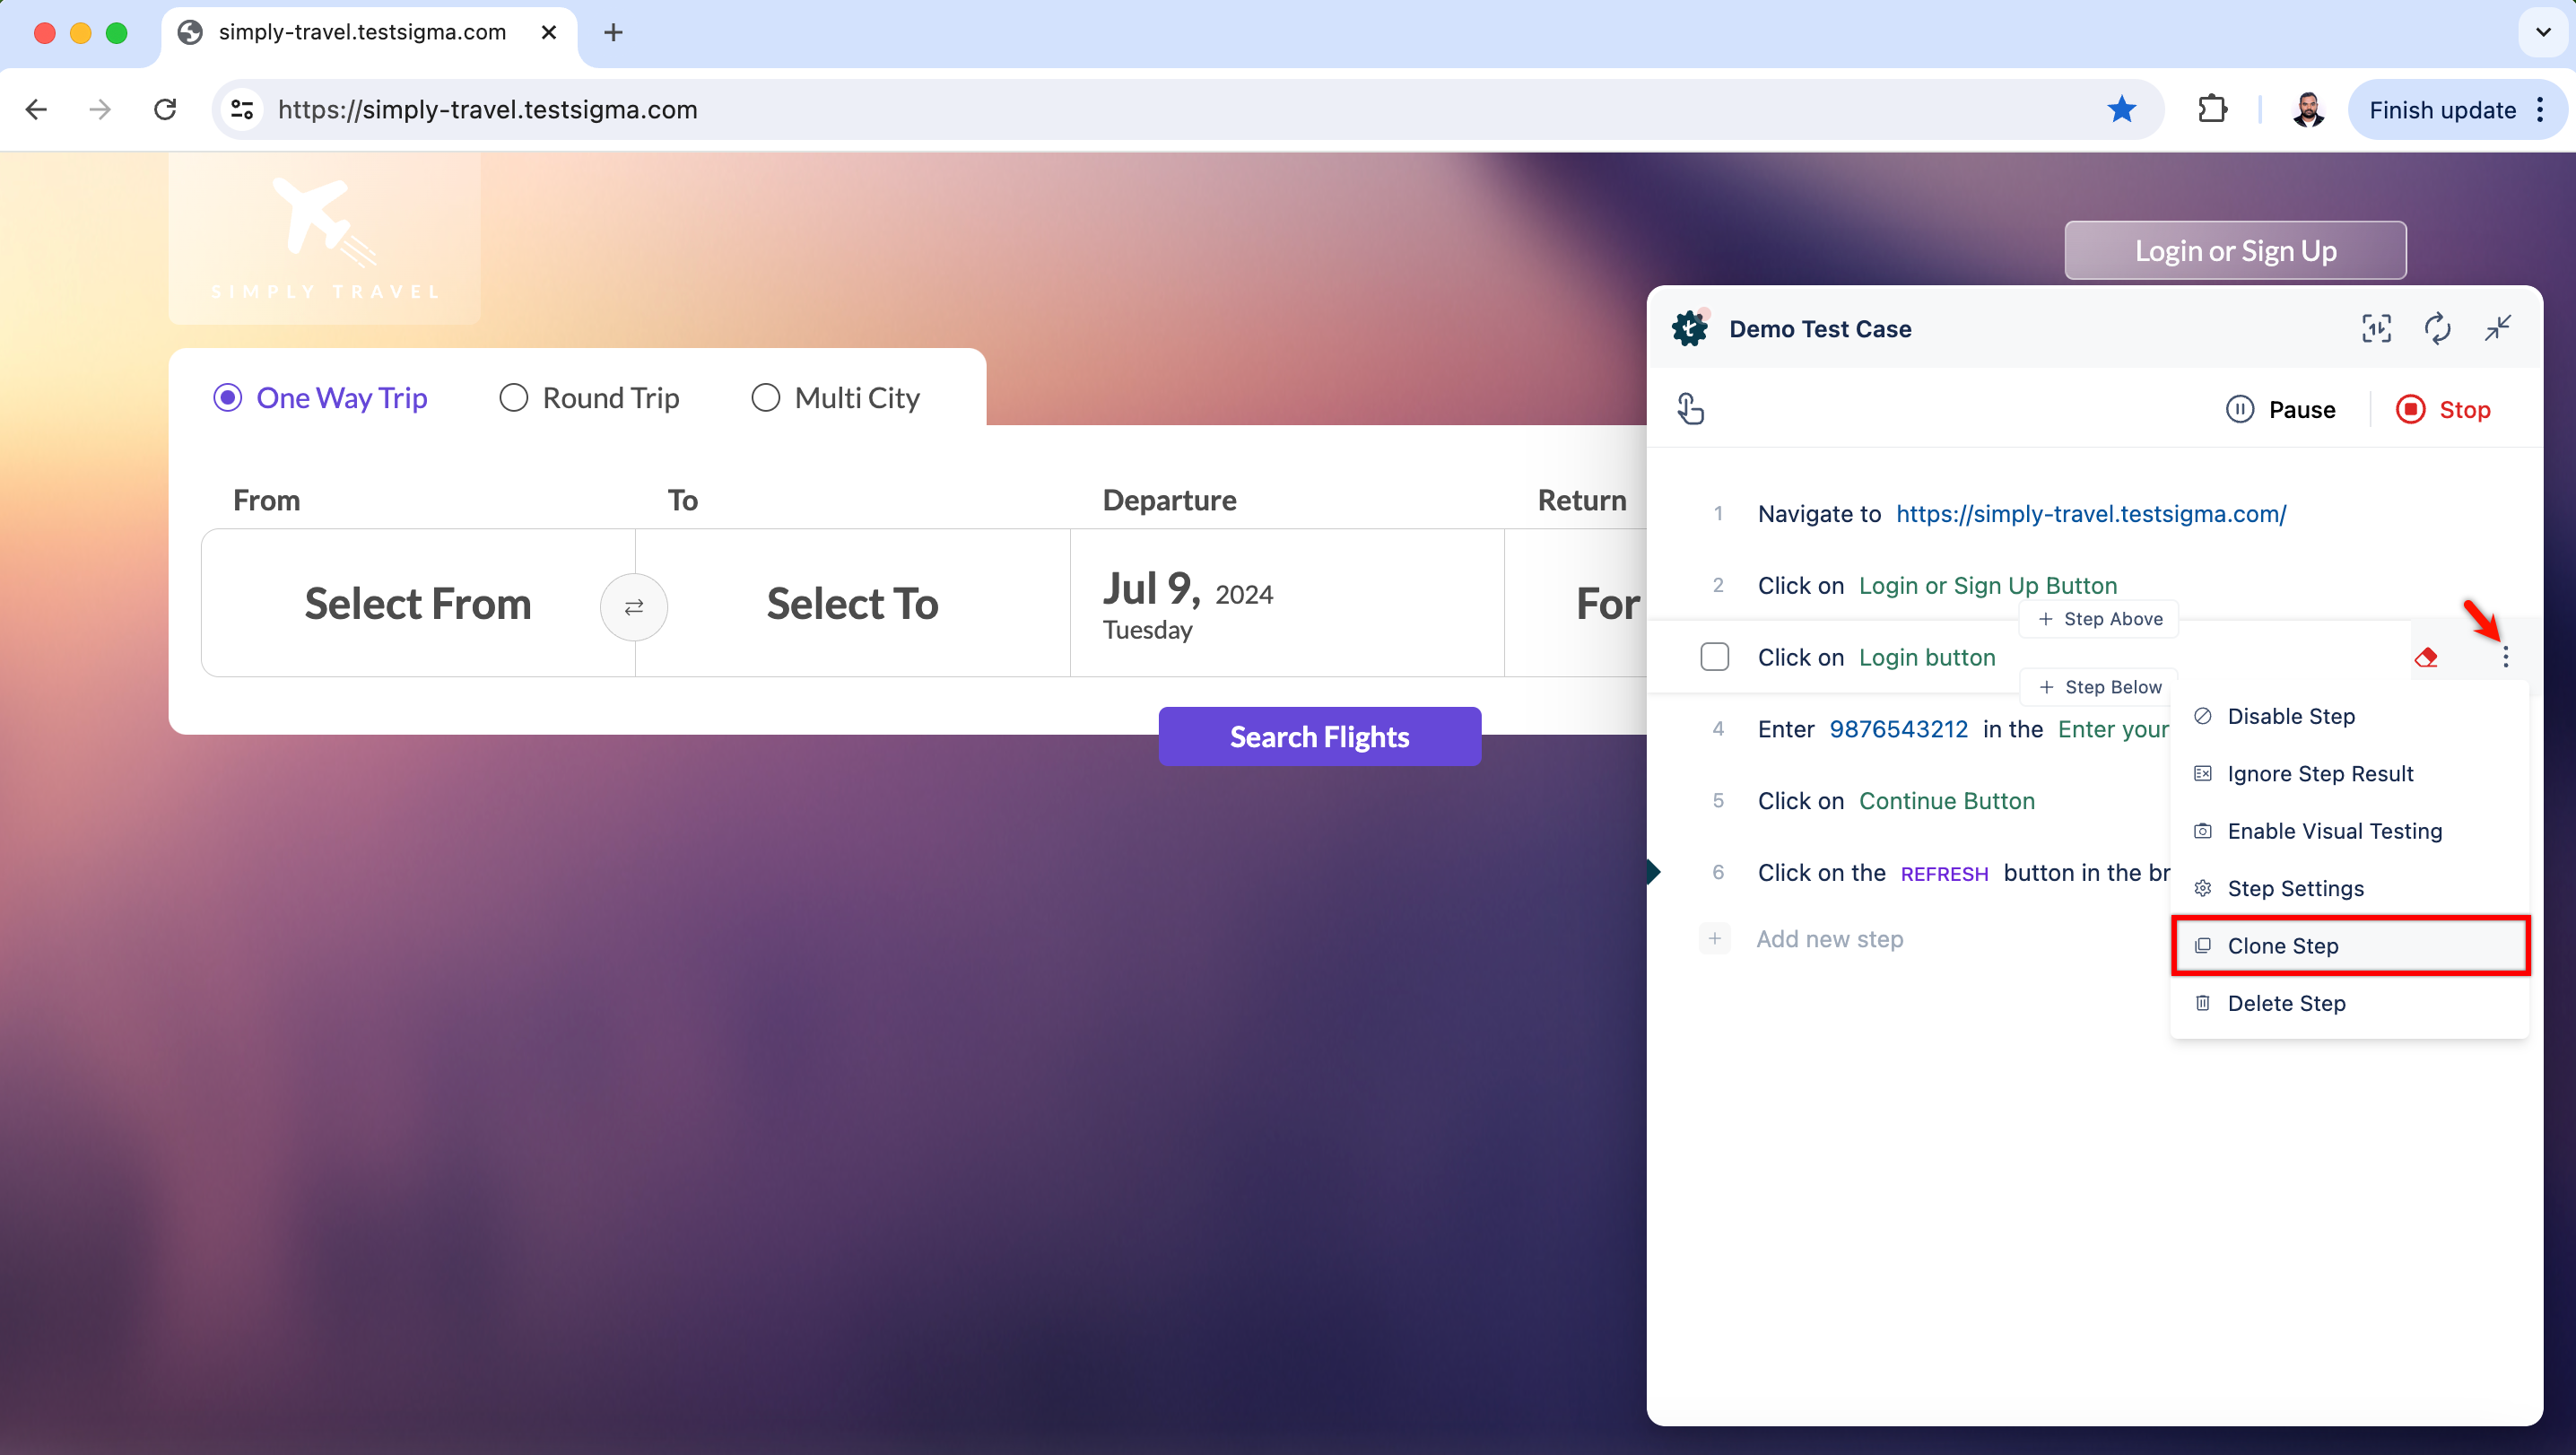
Clone Step
Section titled “Clone Step”Clicking on Clone Step will create an identical copy of the selected step, which saves time when you need multiple similar steps within the same test case.
Delete Step
Section titled “Delete Step”You can use this option to delete the test step.

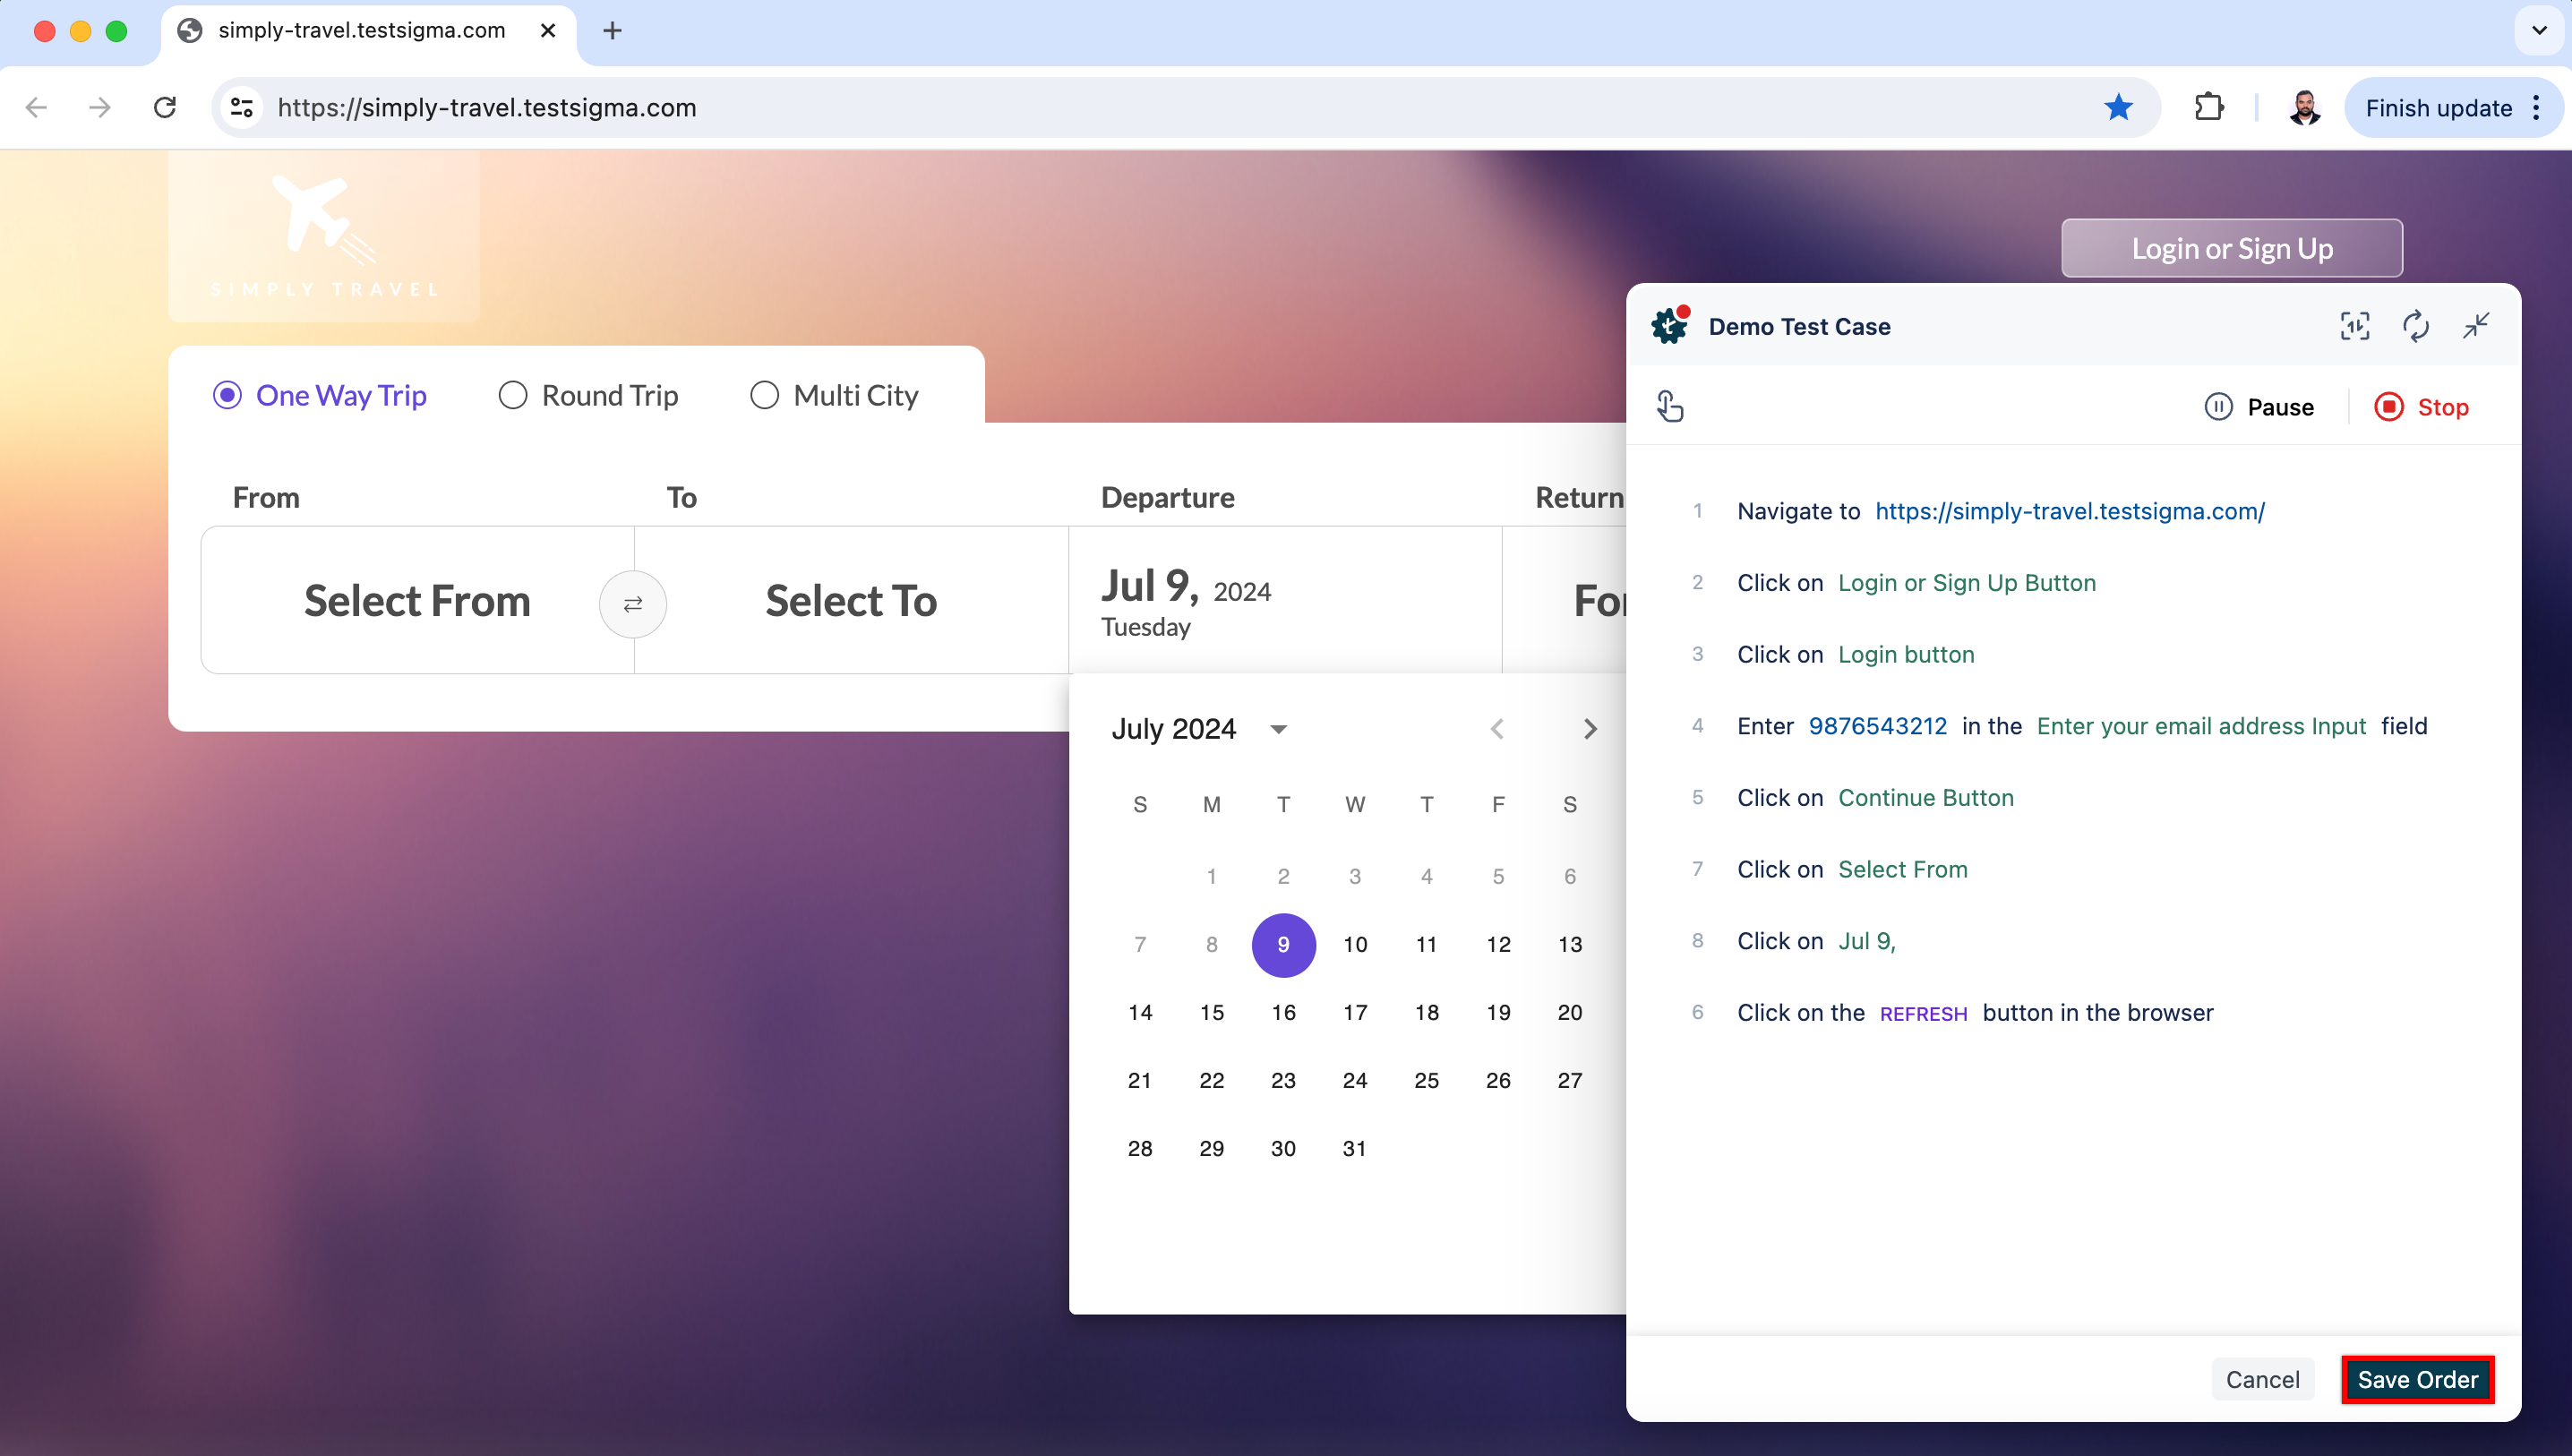
Reorder Test Steps
Section titled “Reorder Test Steps”You can click, hold, and drag the test step to reorder it. Click on Save Order to save the changes.
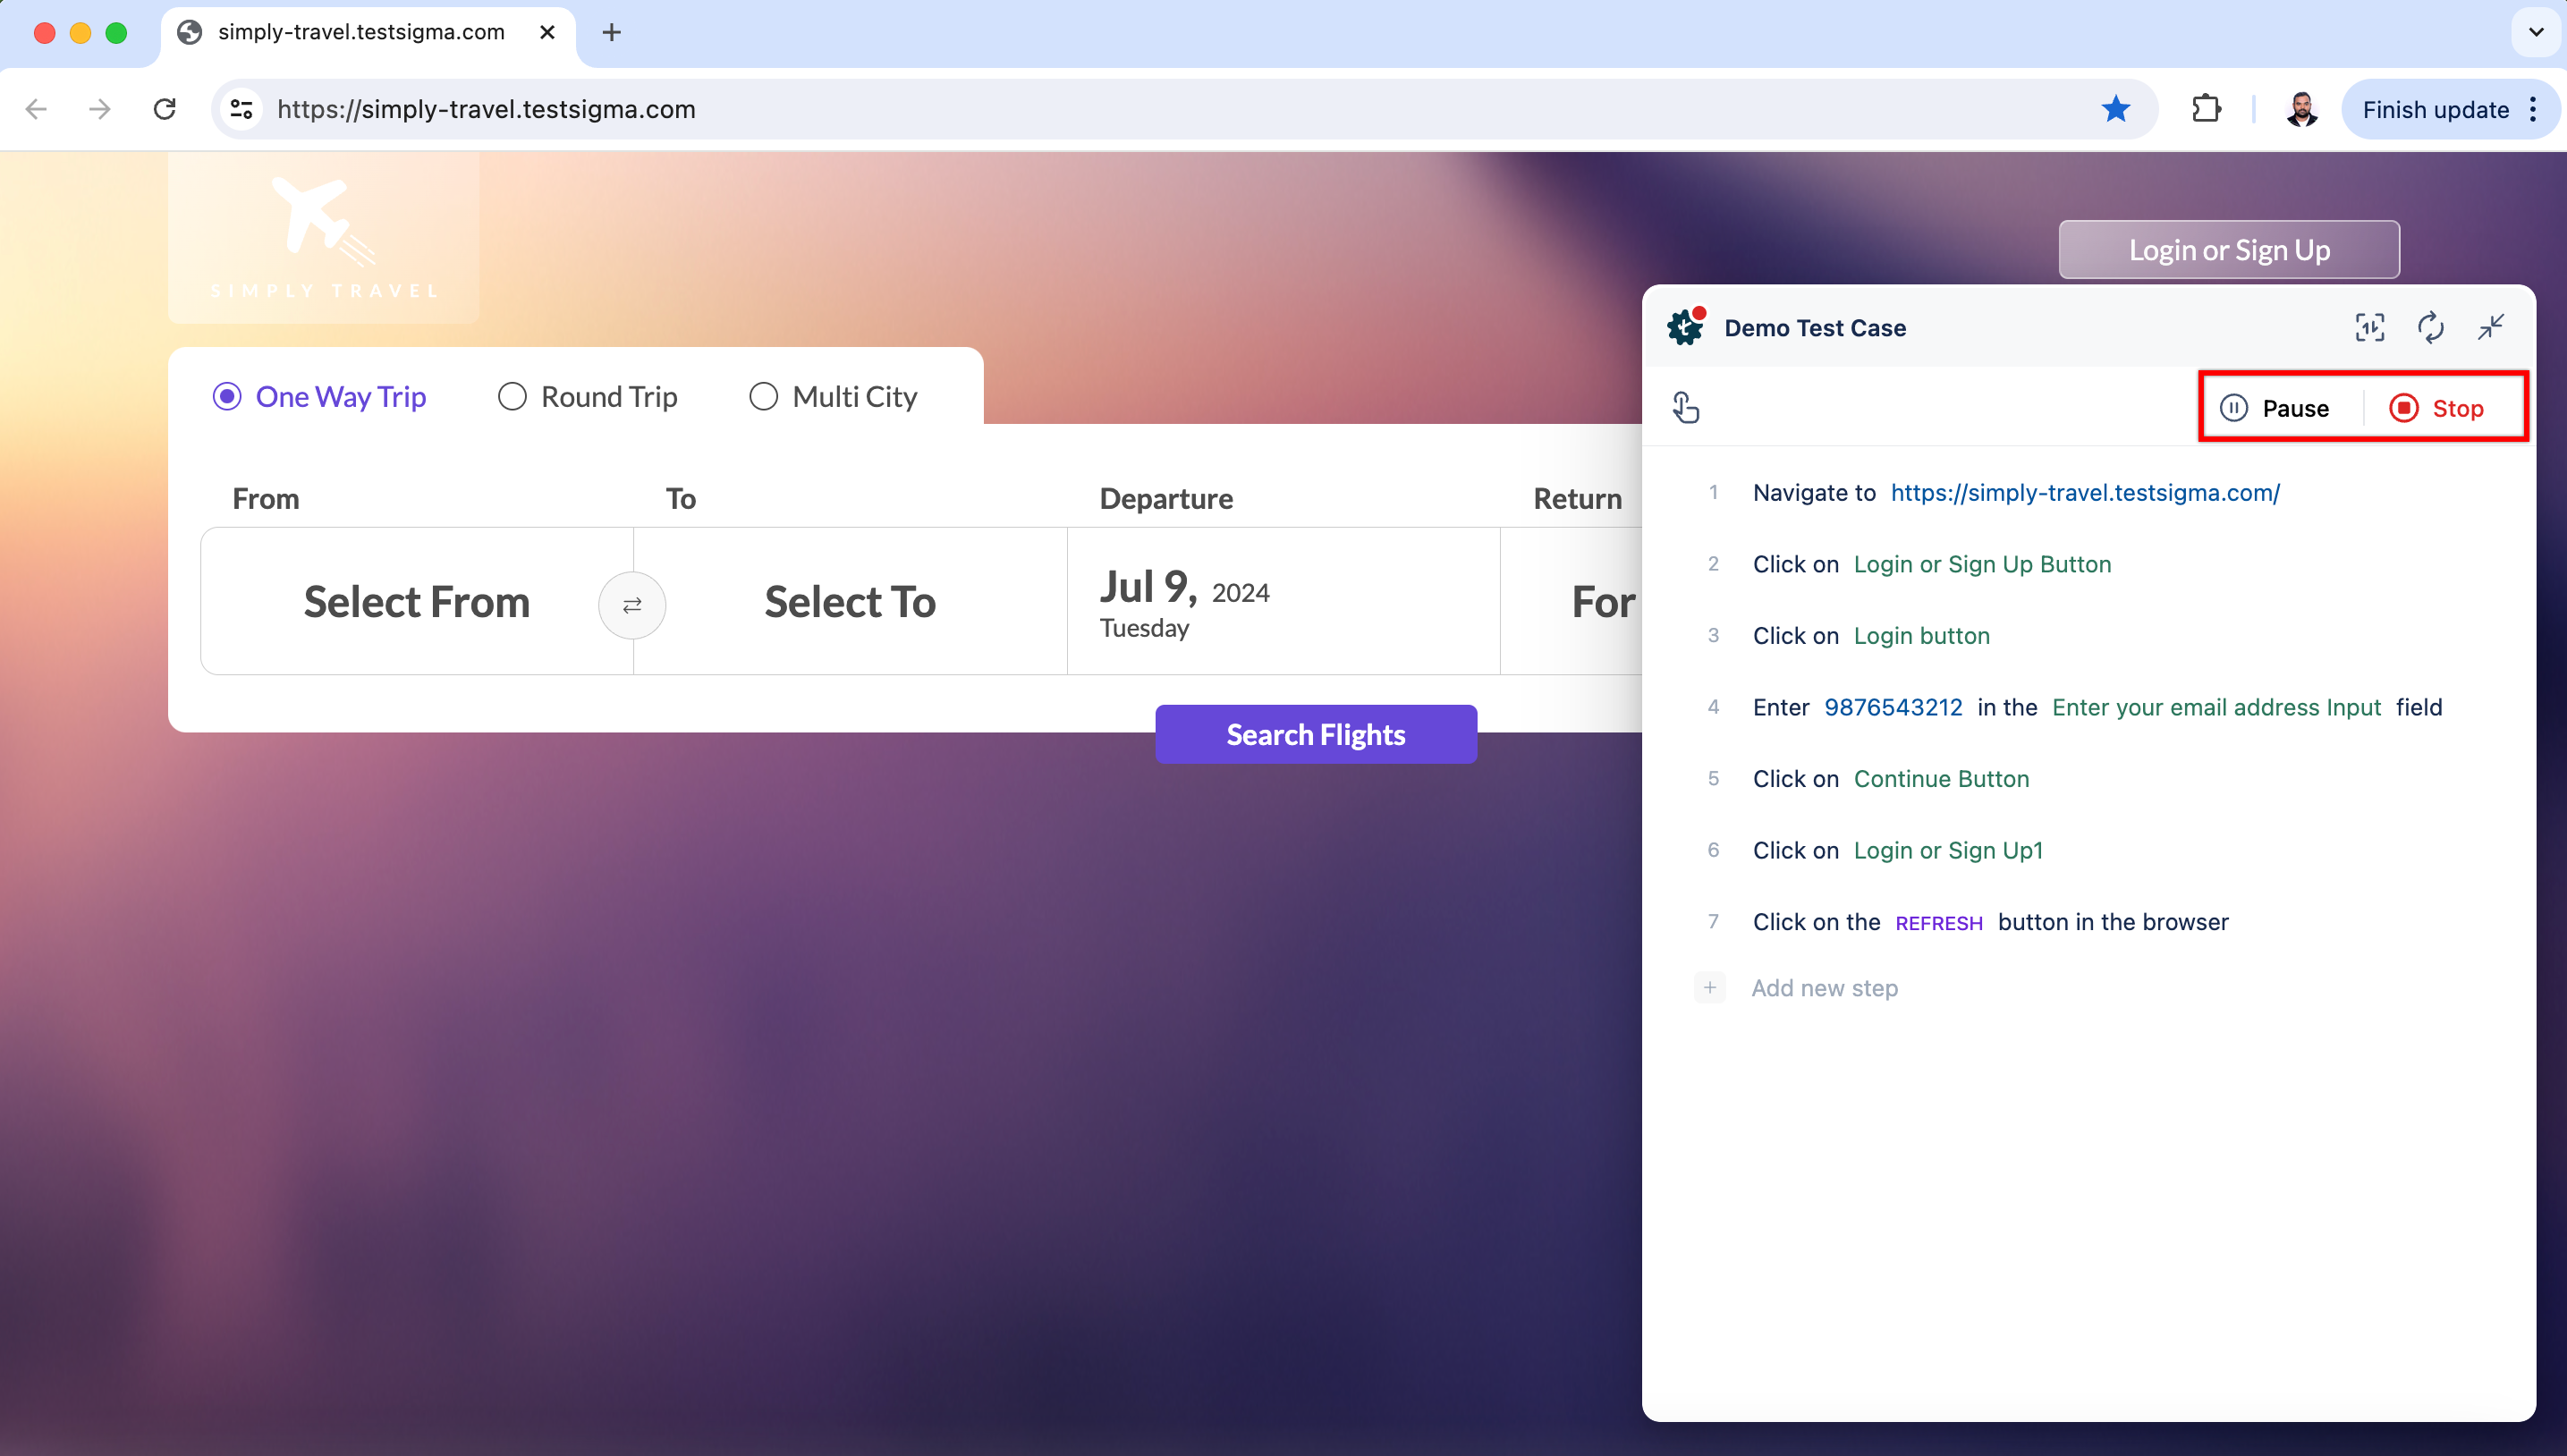
Pause/Stop
Section titled “Pause/Stop”- Click Pause to pause recording the test steps.
- Click Stop to go to the test case details page with the recorded steps.