Projects
Manage Applications
The Applications tab within the Project settings > Edit Project menu provides details about all the Applications that are available in the current project.
Once the Applications tab is enabled, you will be able to see all the applications created under the specific project.
Add Application
Section titled “Add Application”-
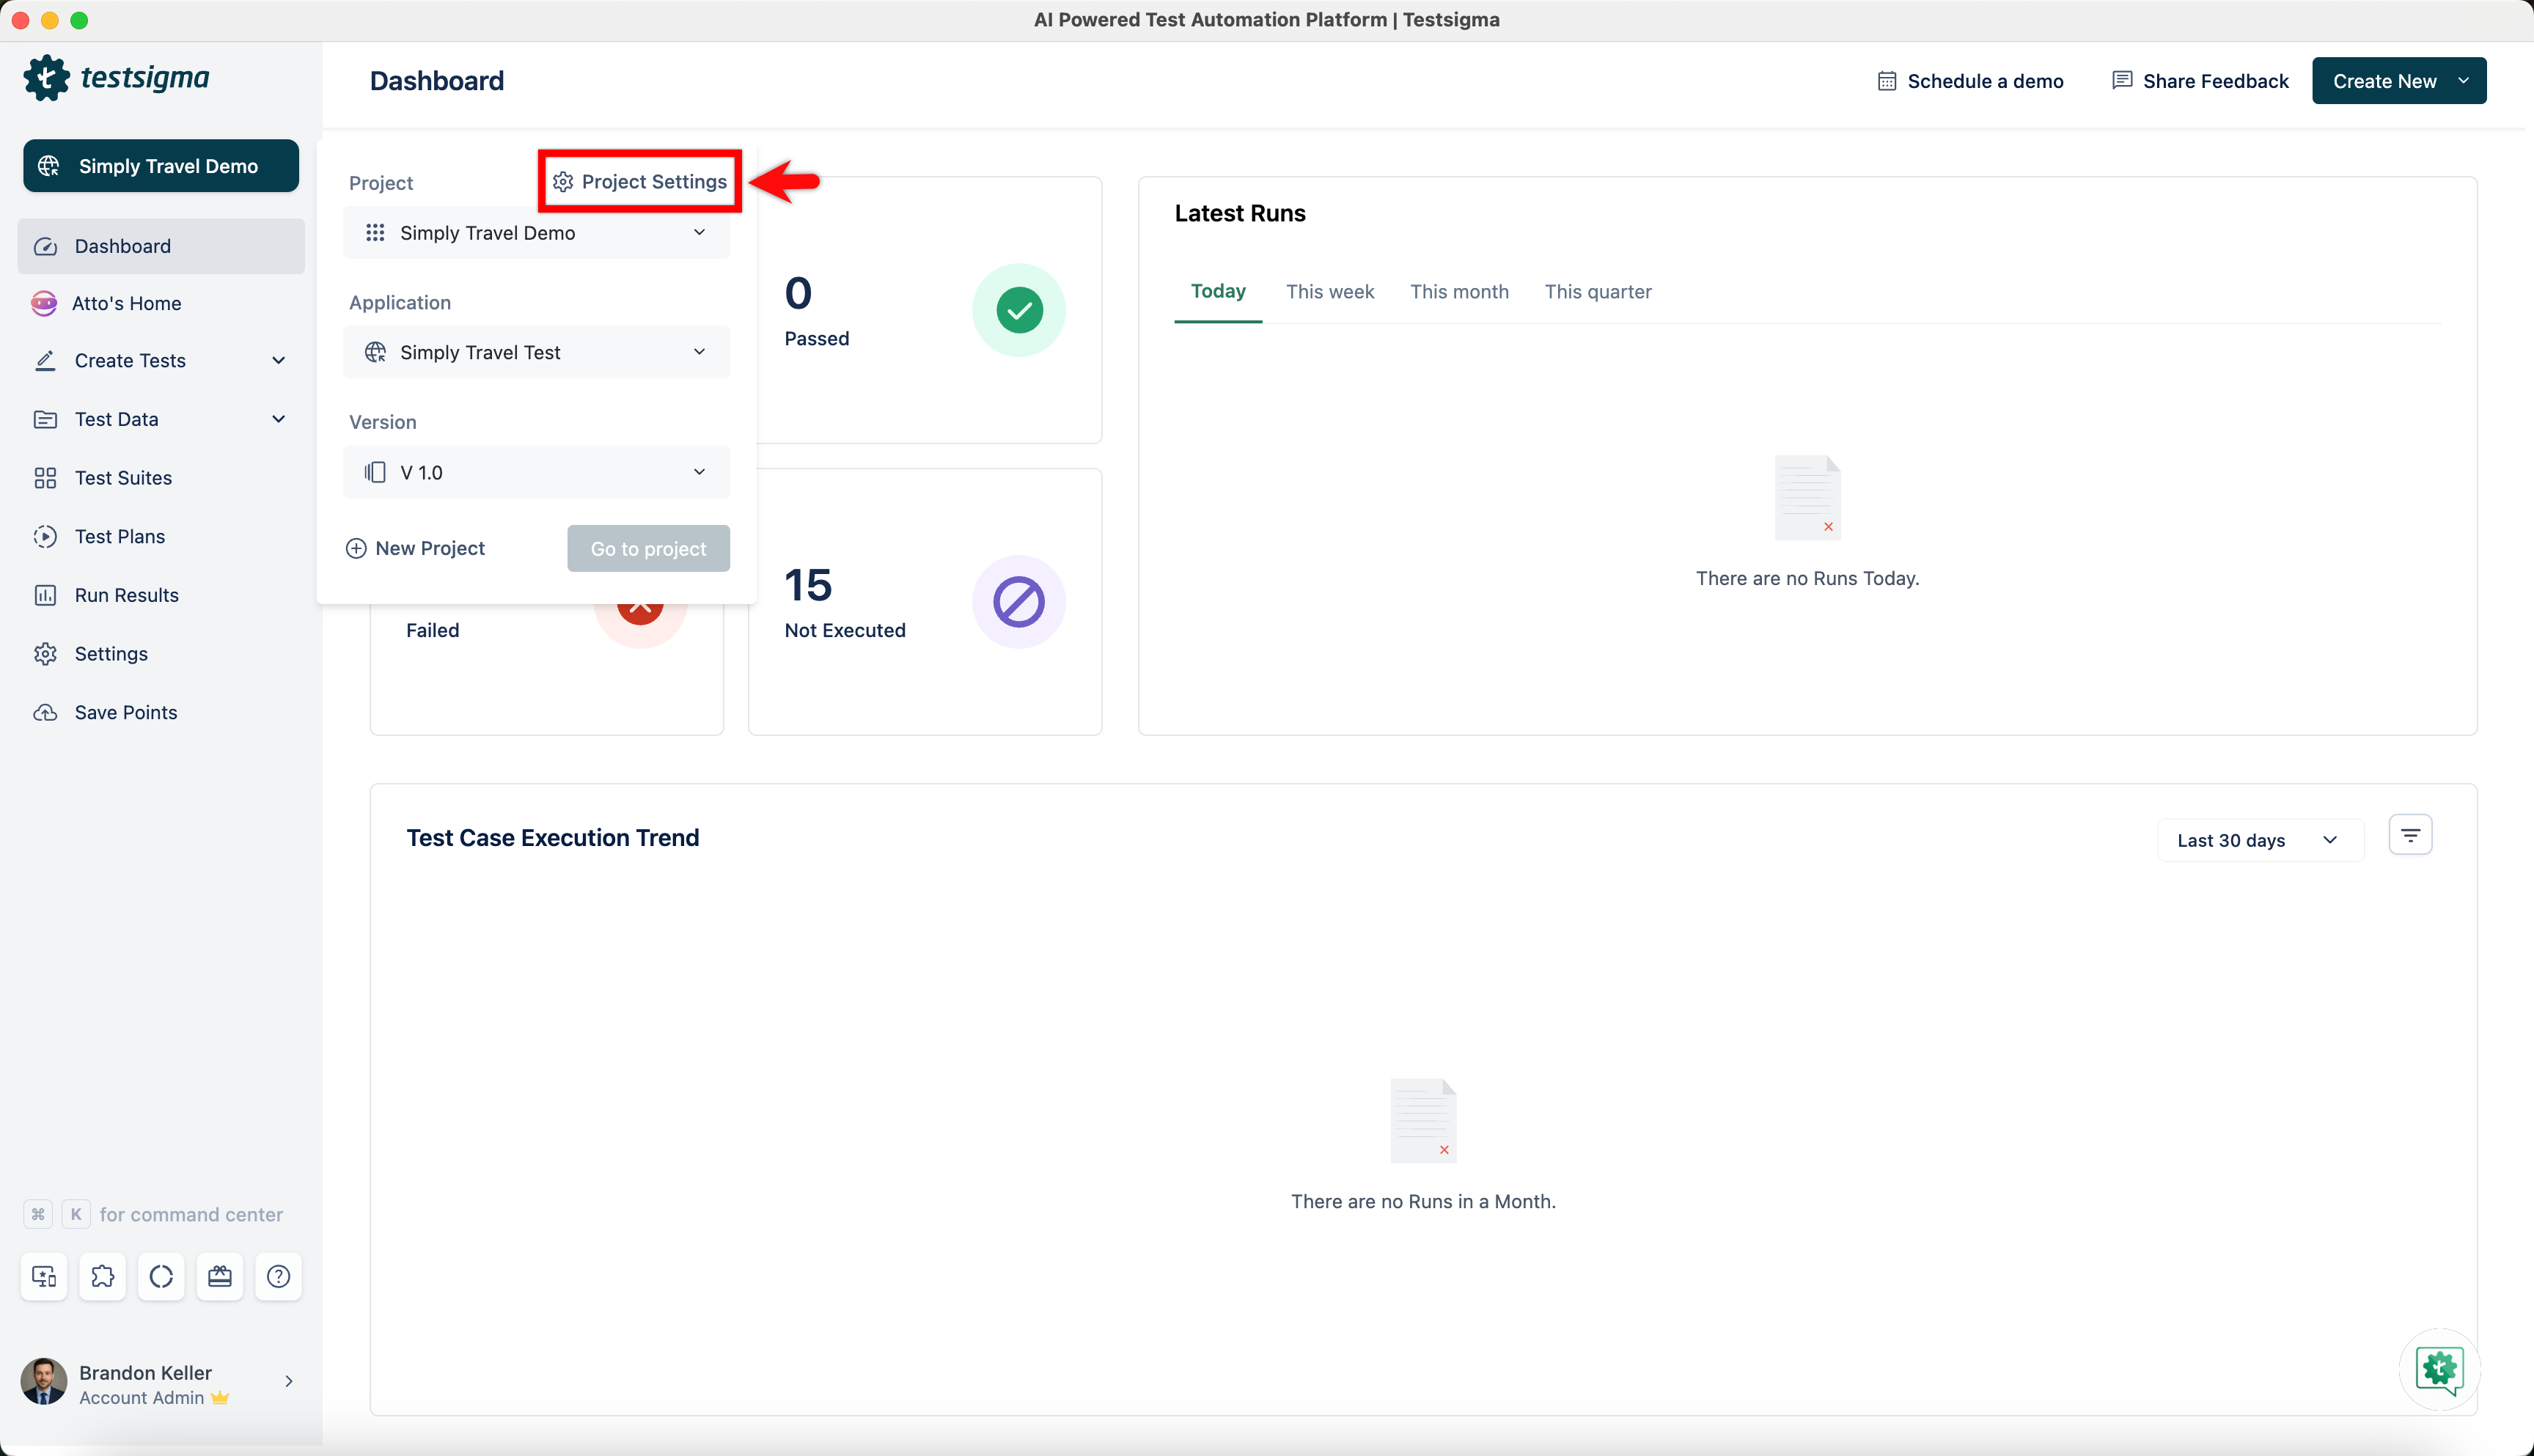
Navigate to Project Settings.
-
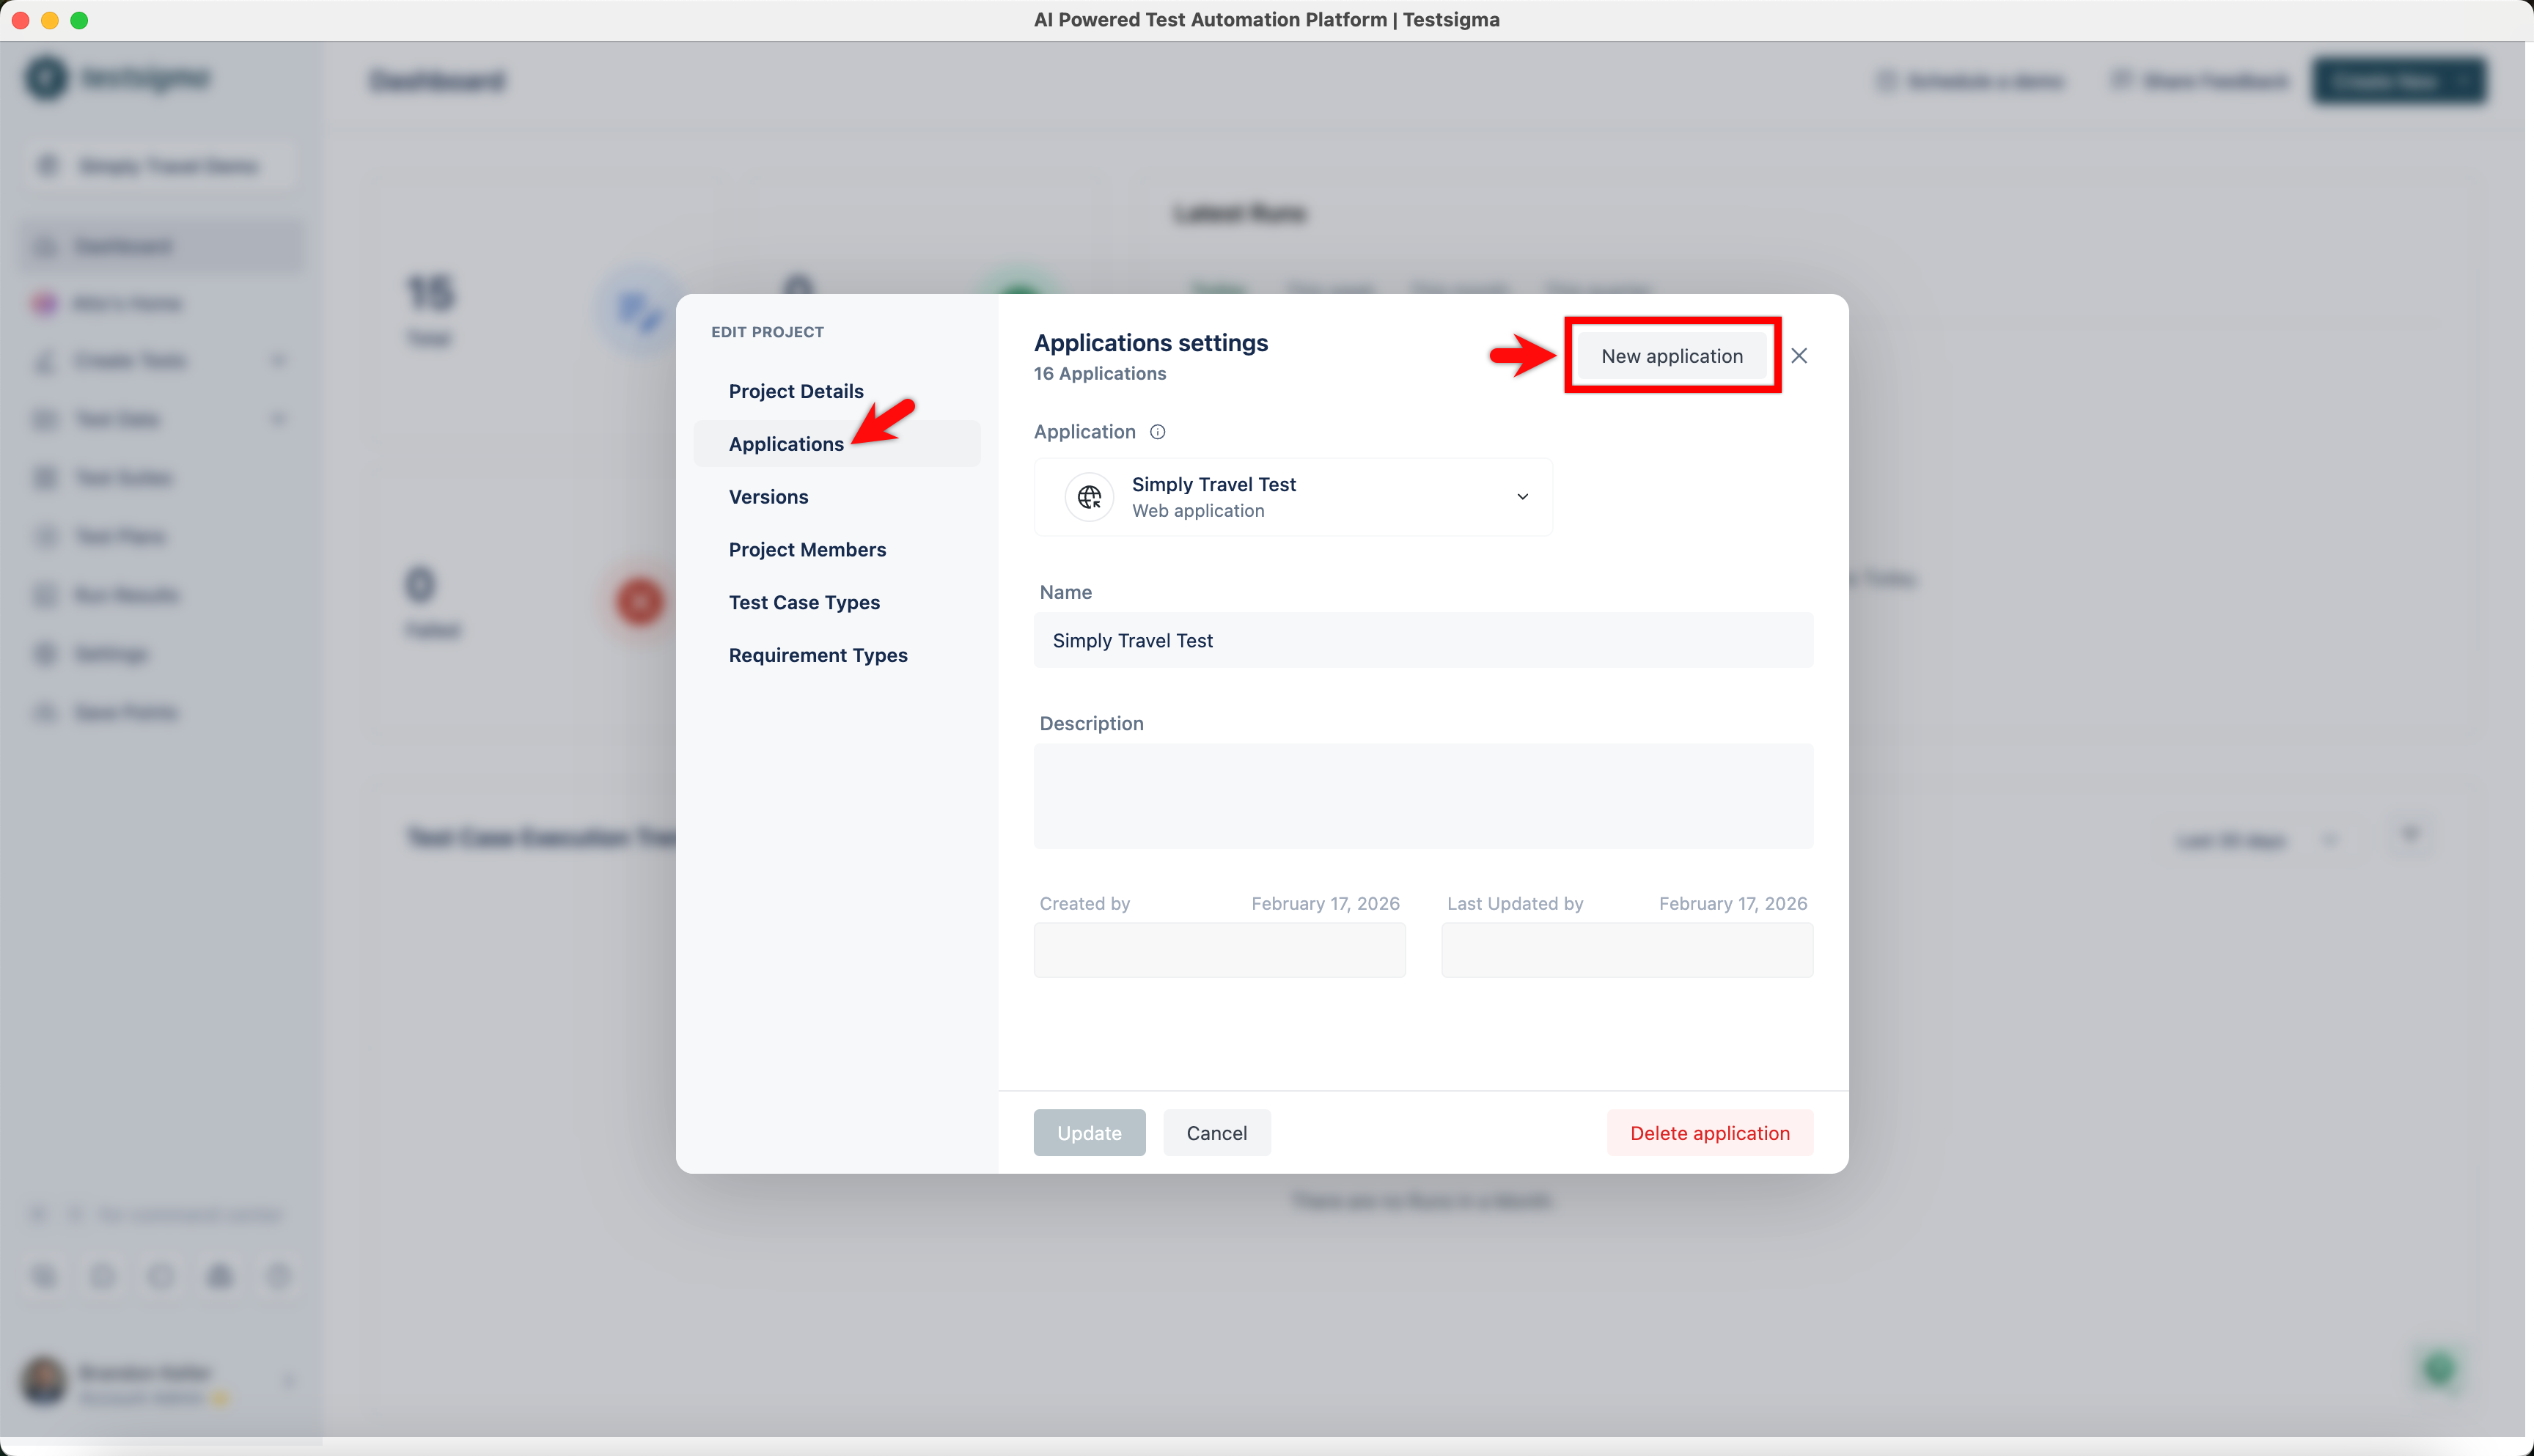
In the EDIT PROJECT dialog, click Applications on the left menu and click New Application.
-
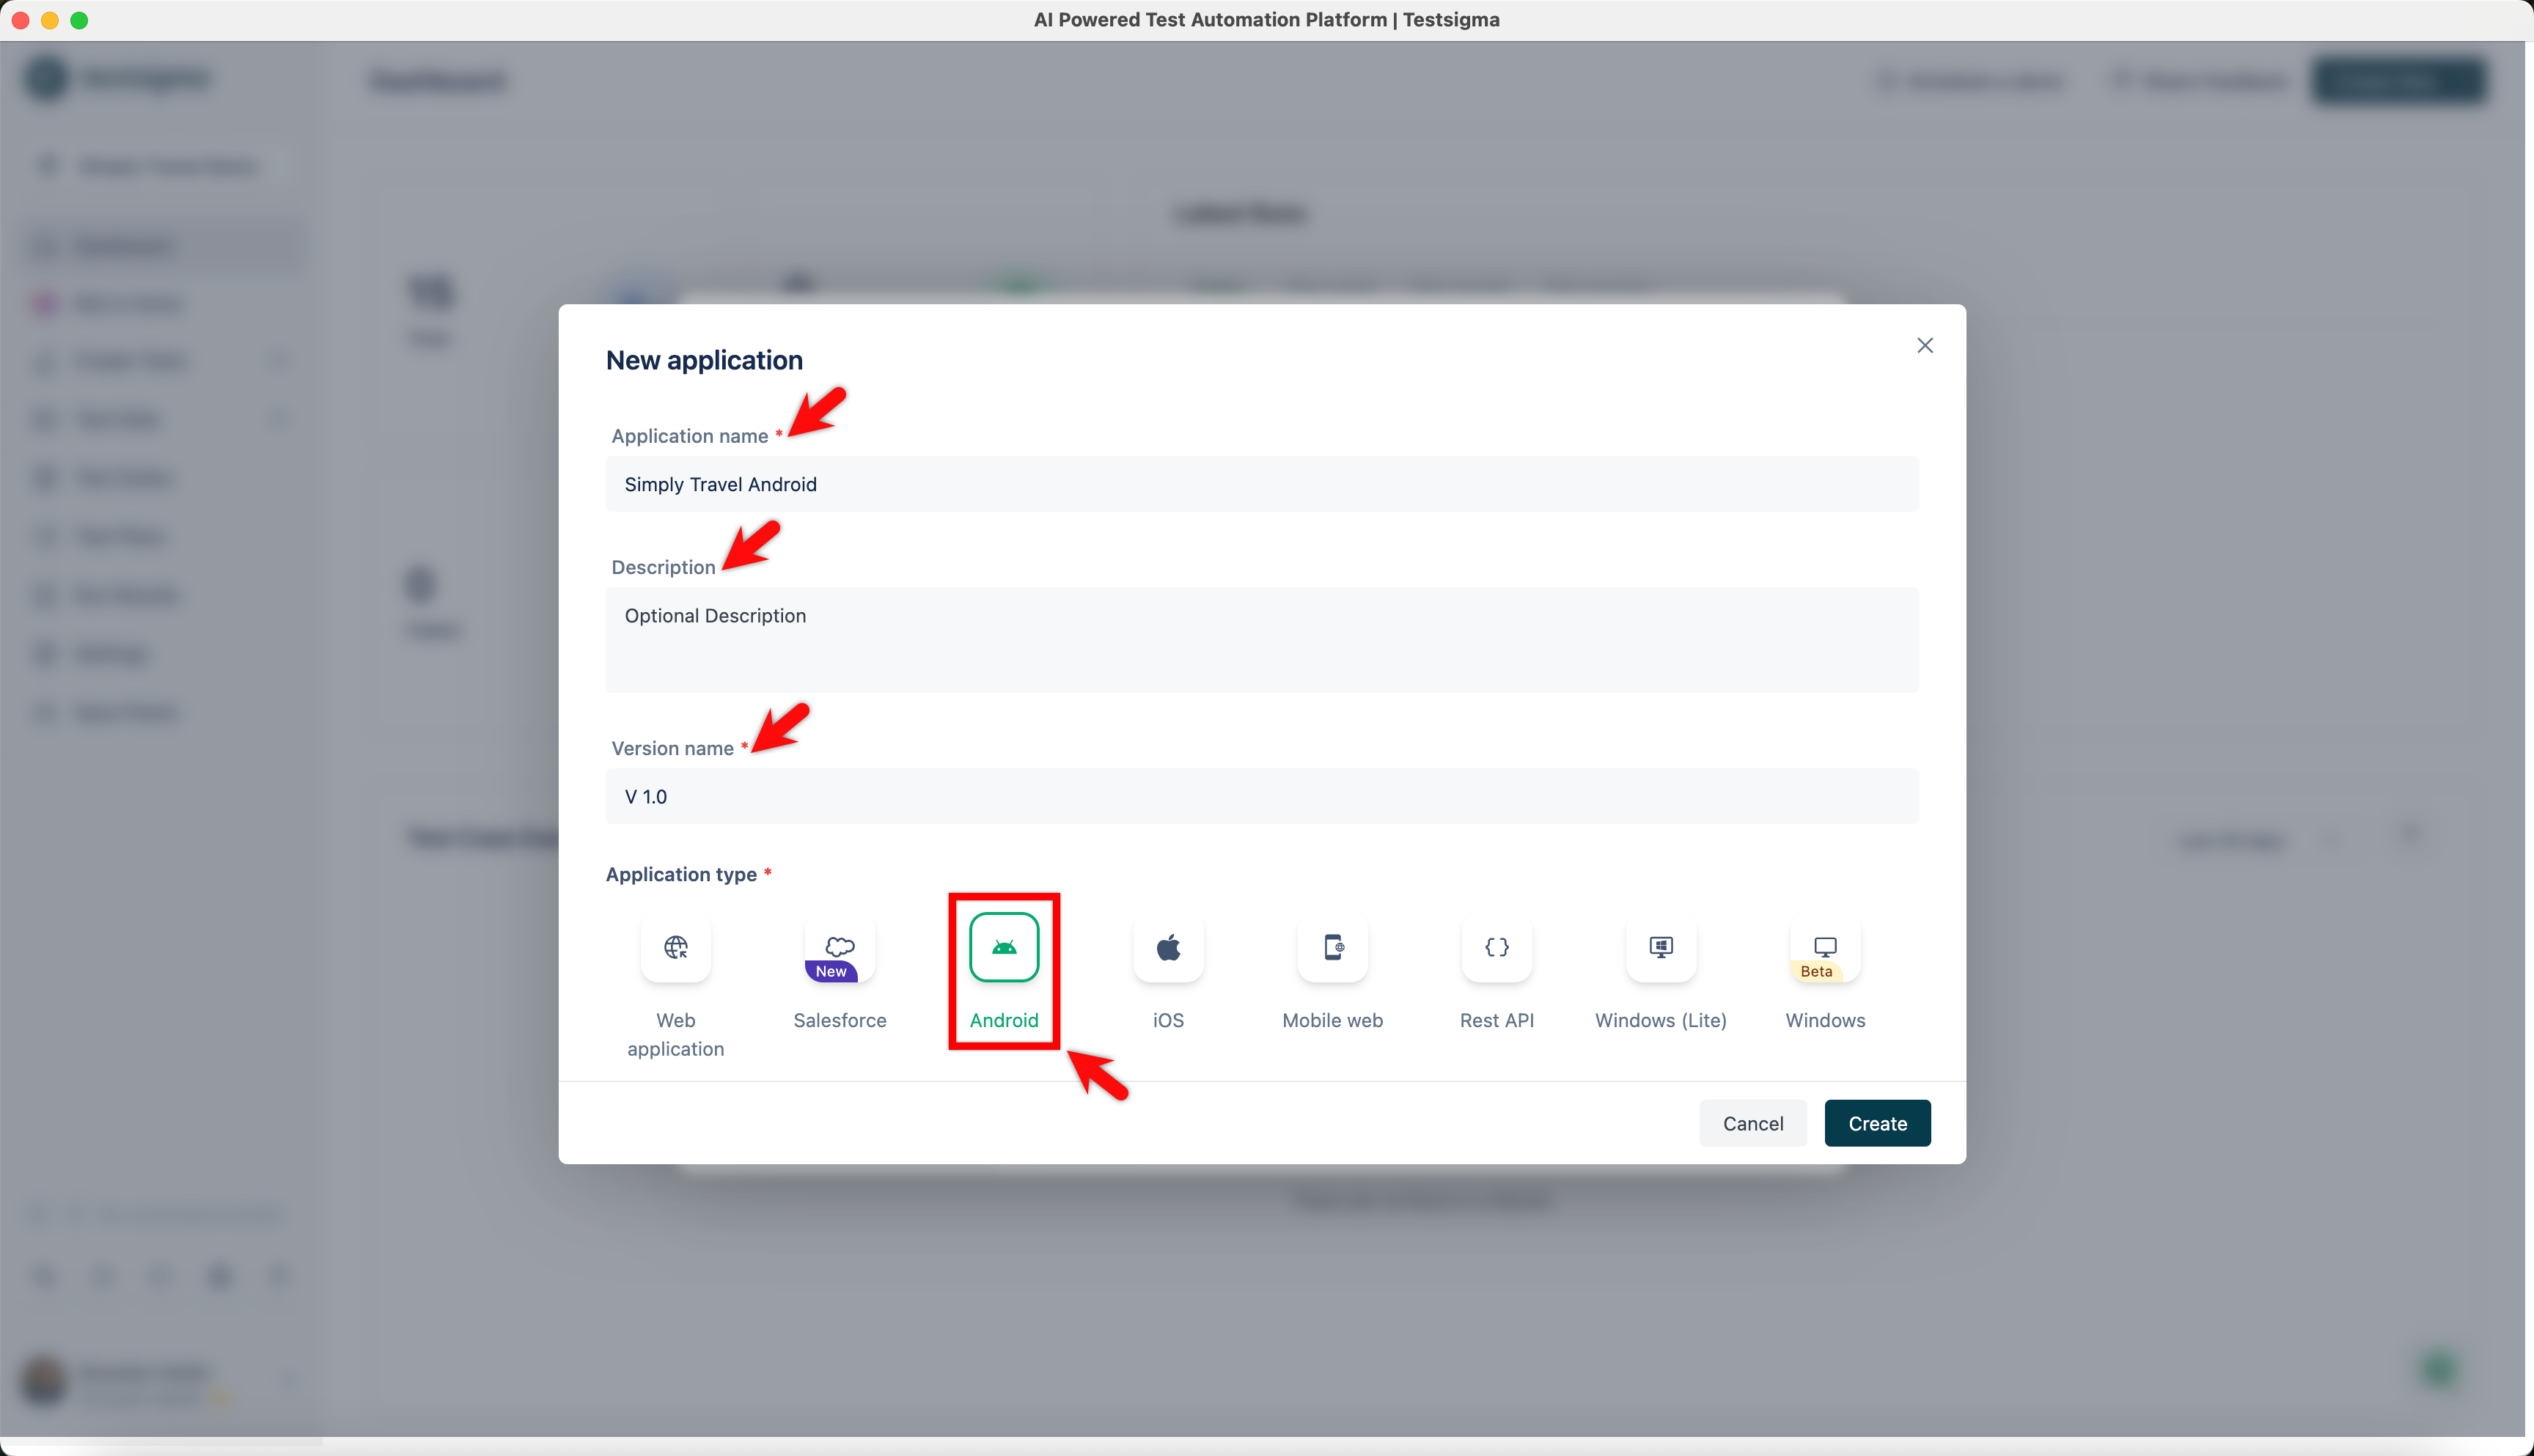
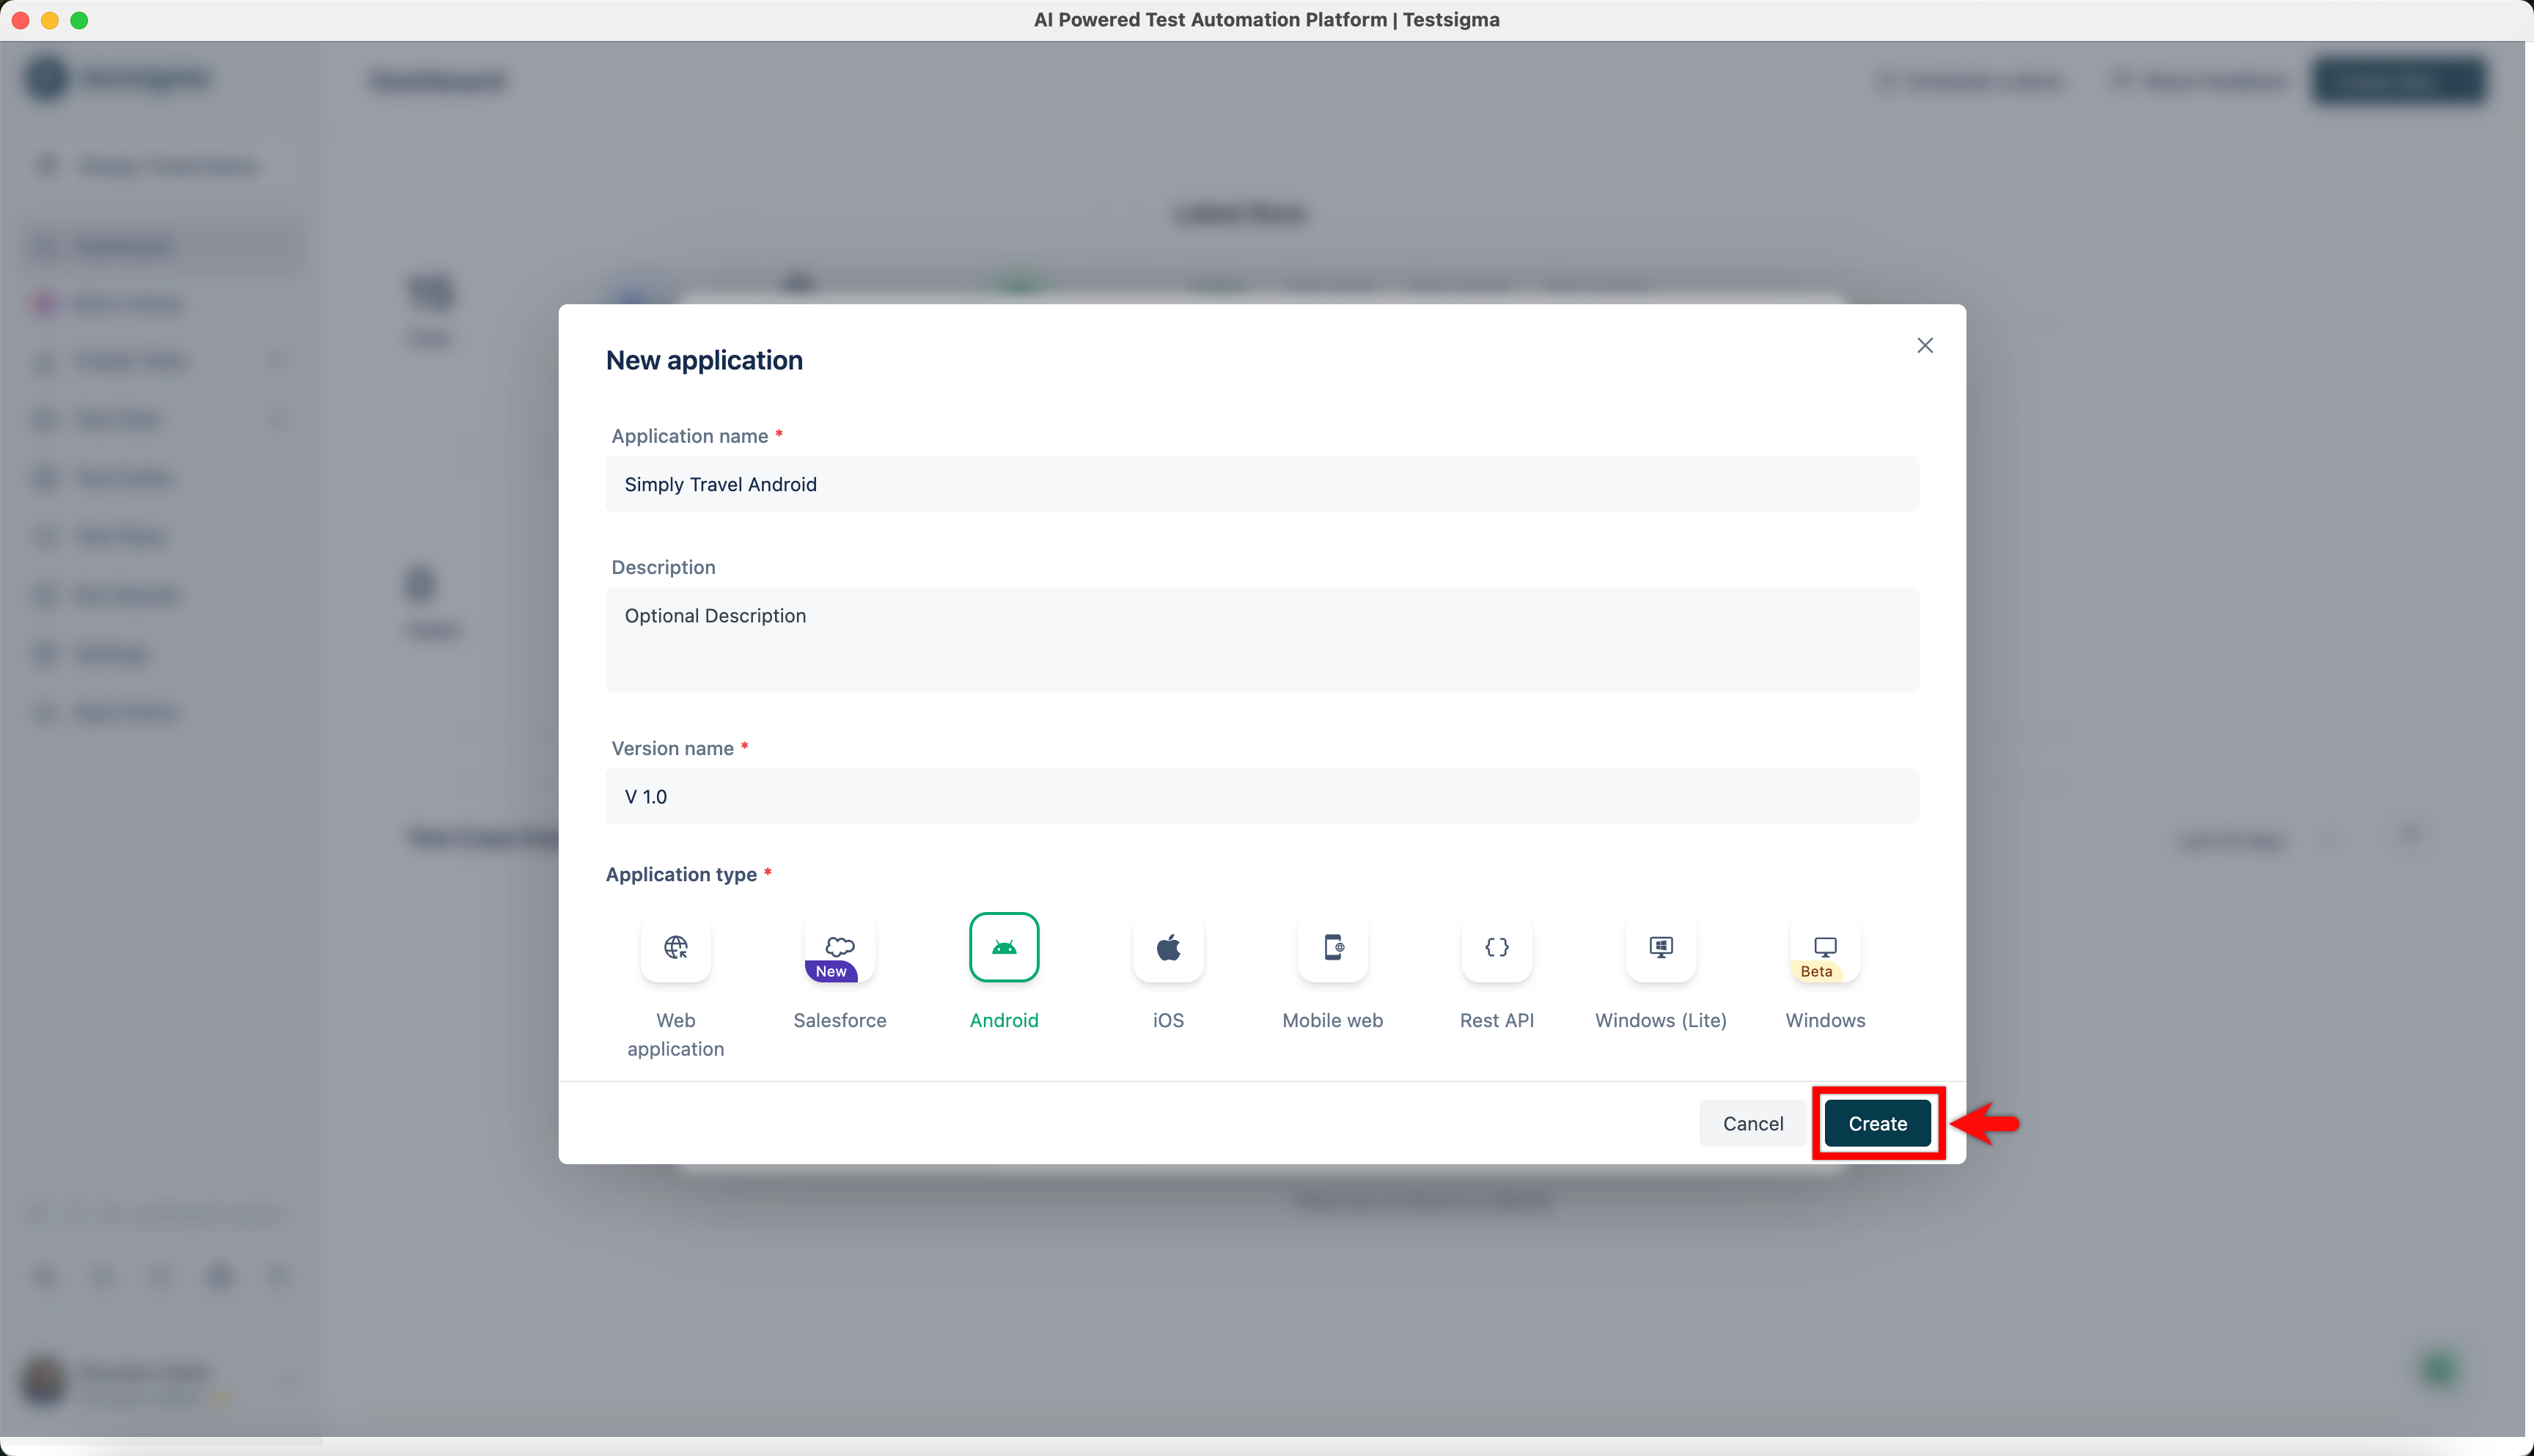
On New application dialog, enter Application name, Description, Version name, and select Application type.
-
Click on Create.
Edit Application
Section titled “Edit Application”-
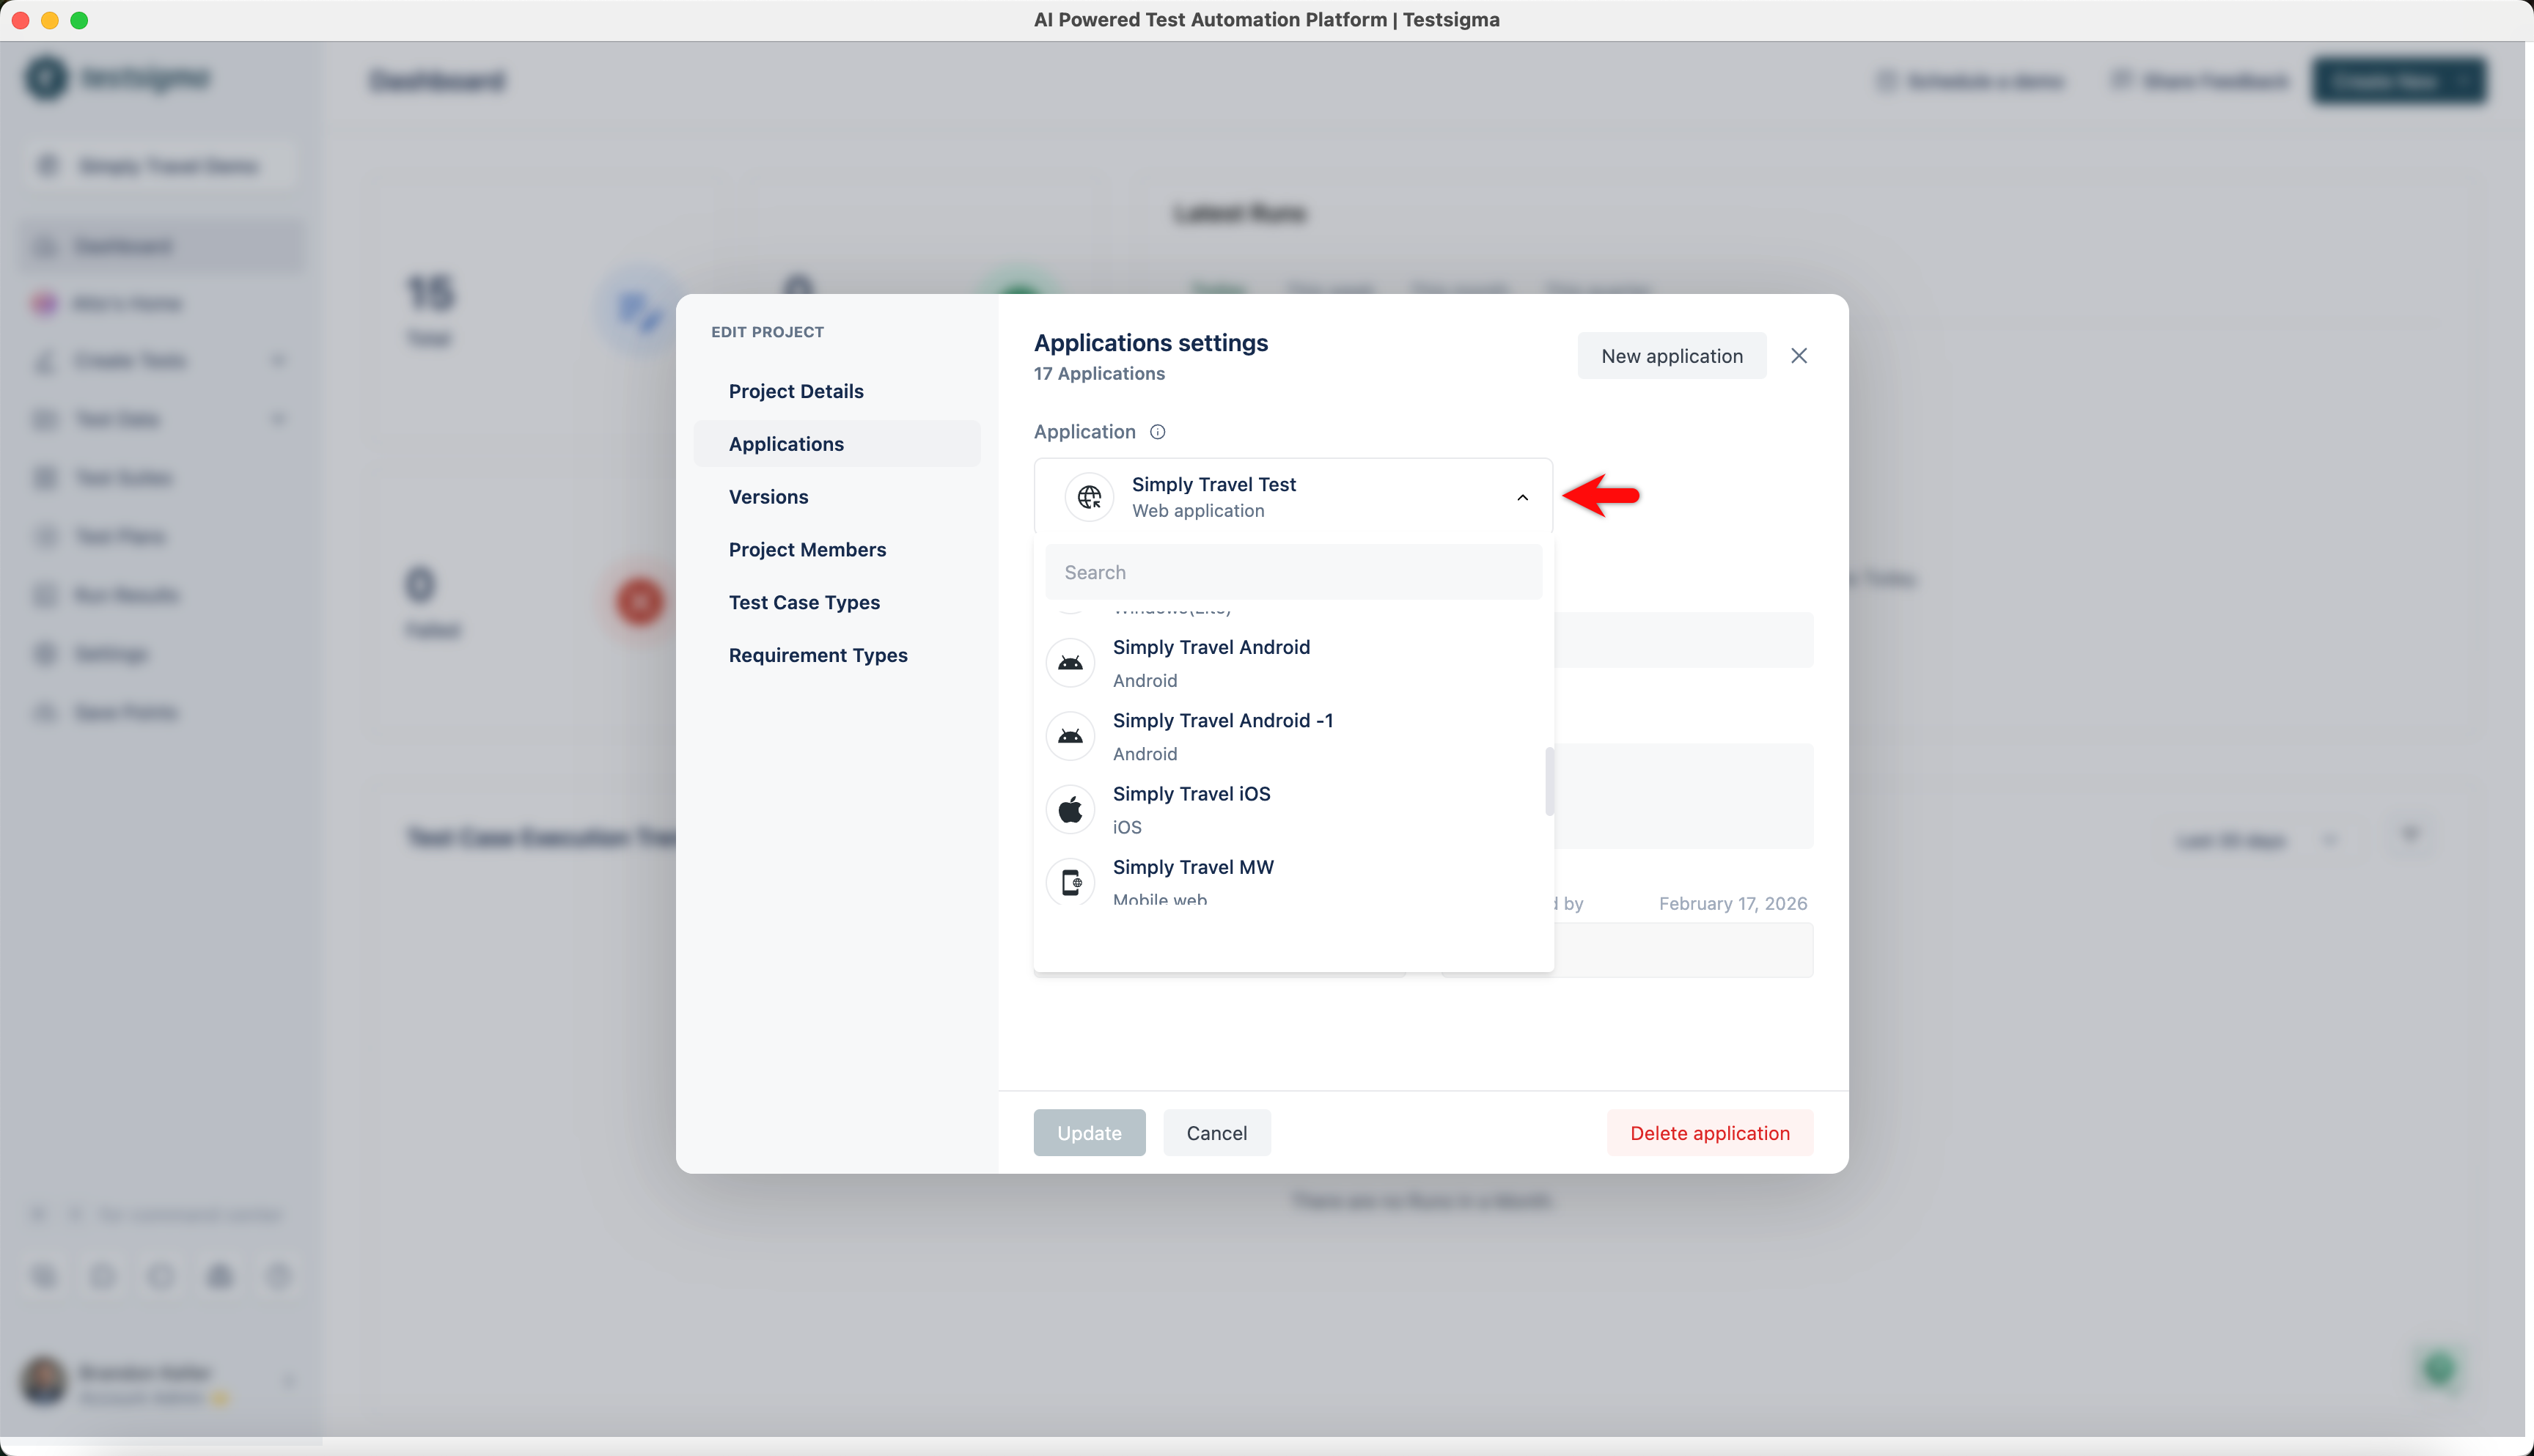
Navigate to Project Settings > Edit Project > Applications, and select application you want to edit from the dropdown.
-
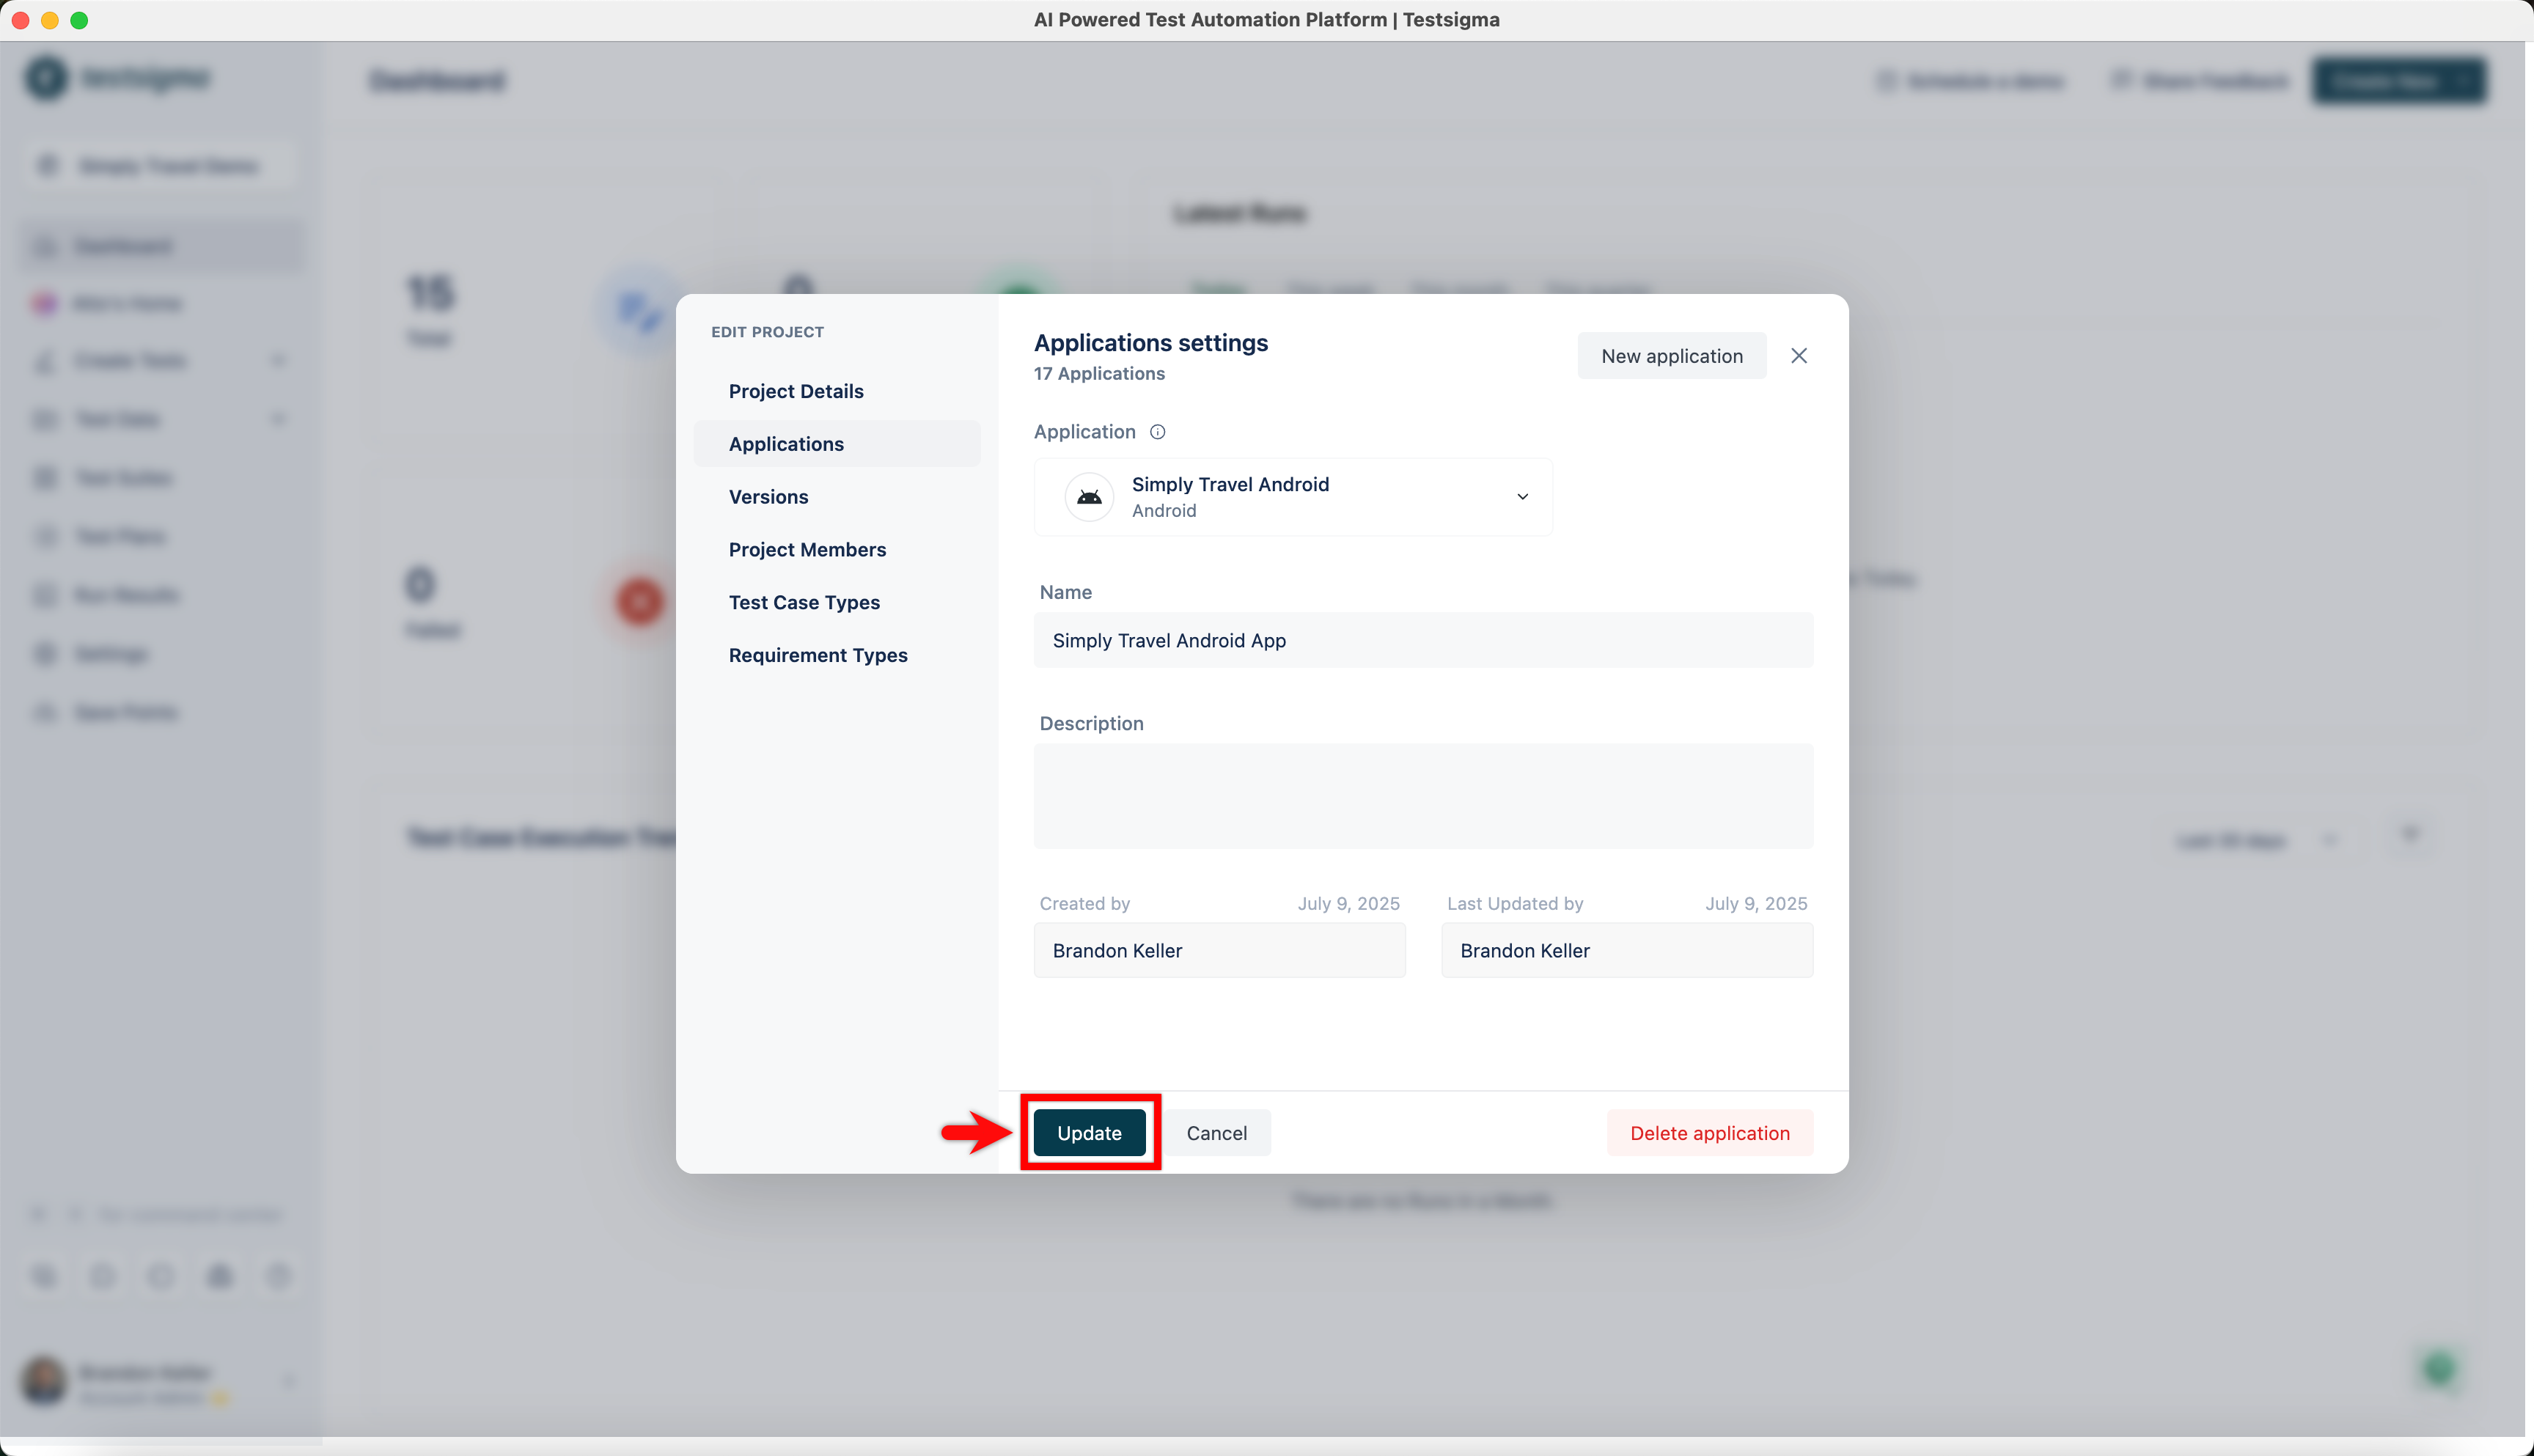
Make the required changes and click on the Update to save the changes.
Delete Application
Section titled “Delete Application”-
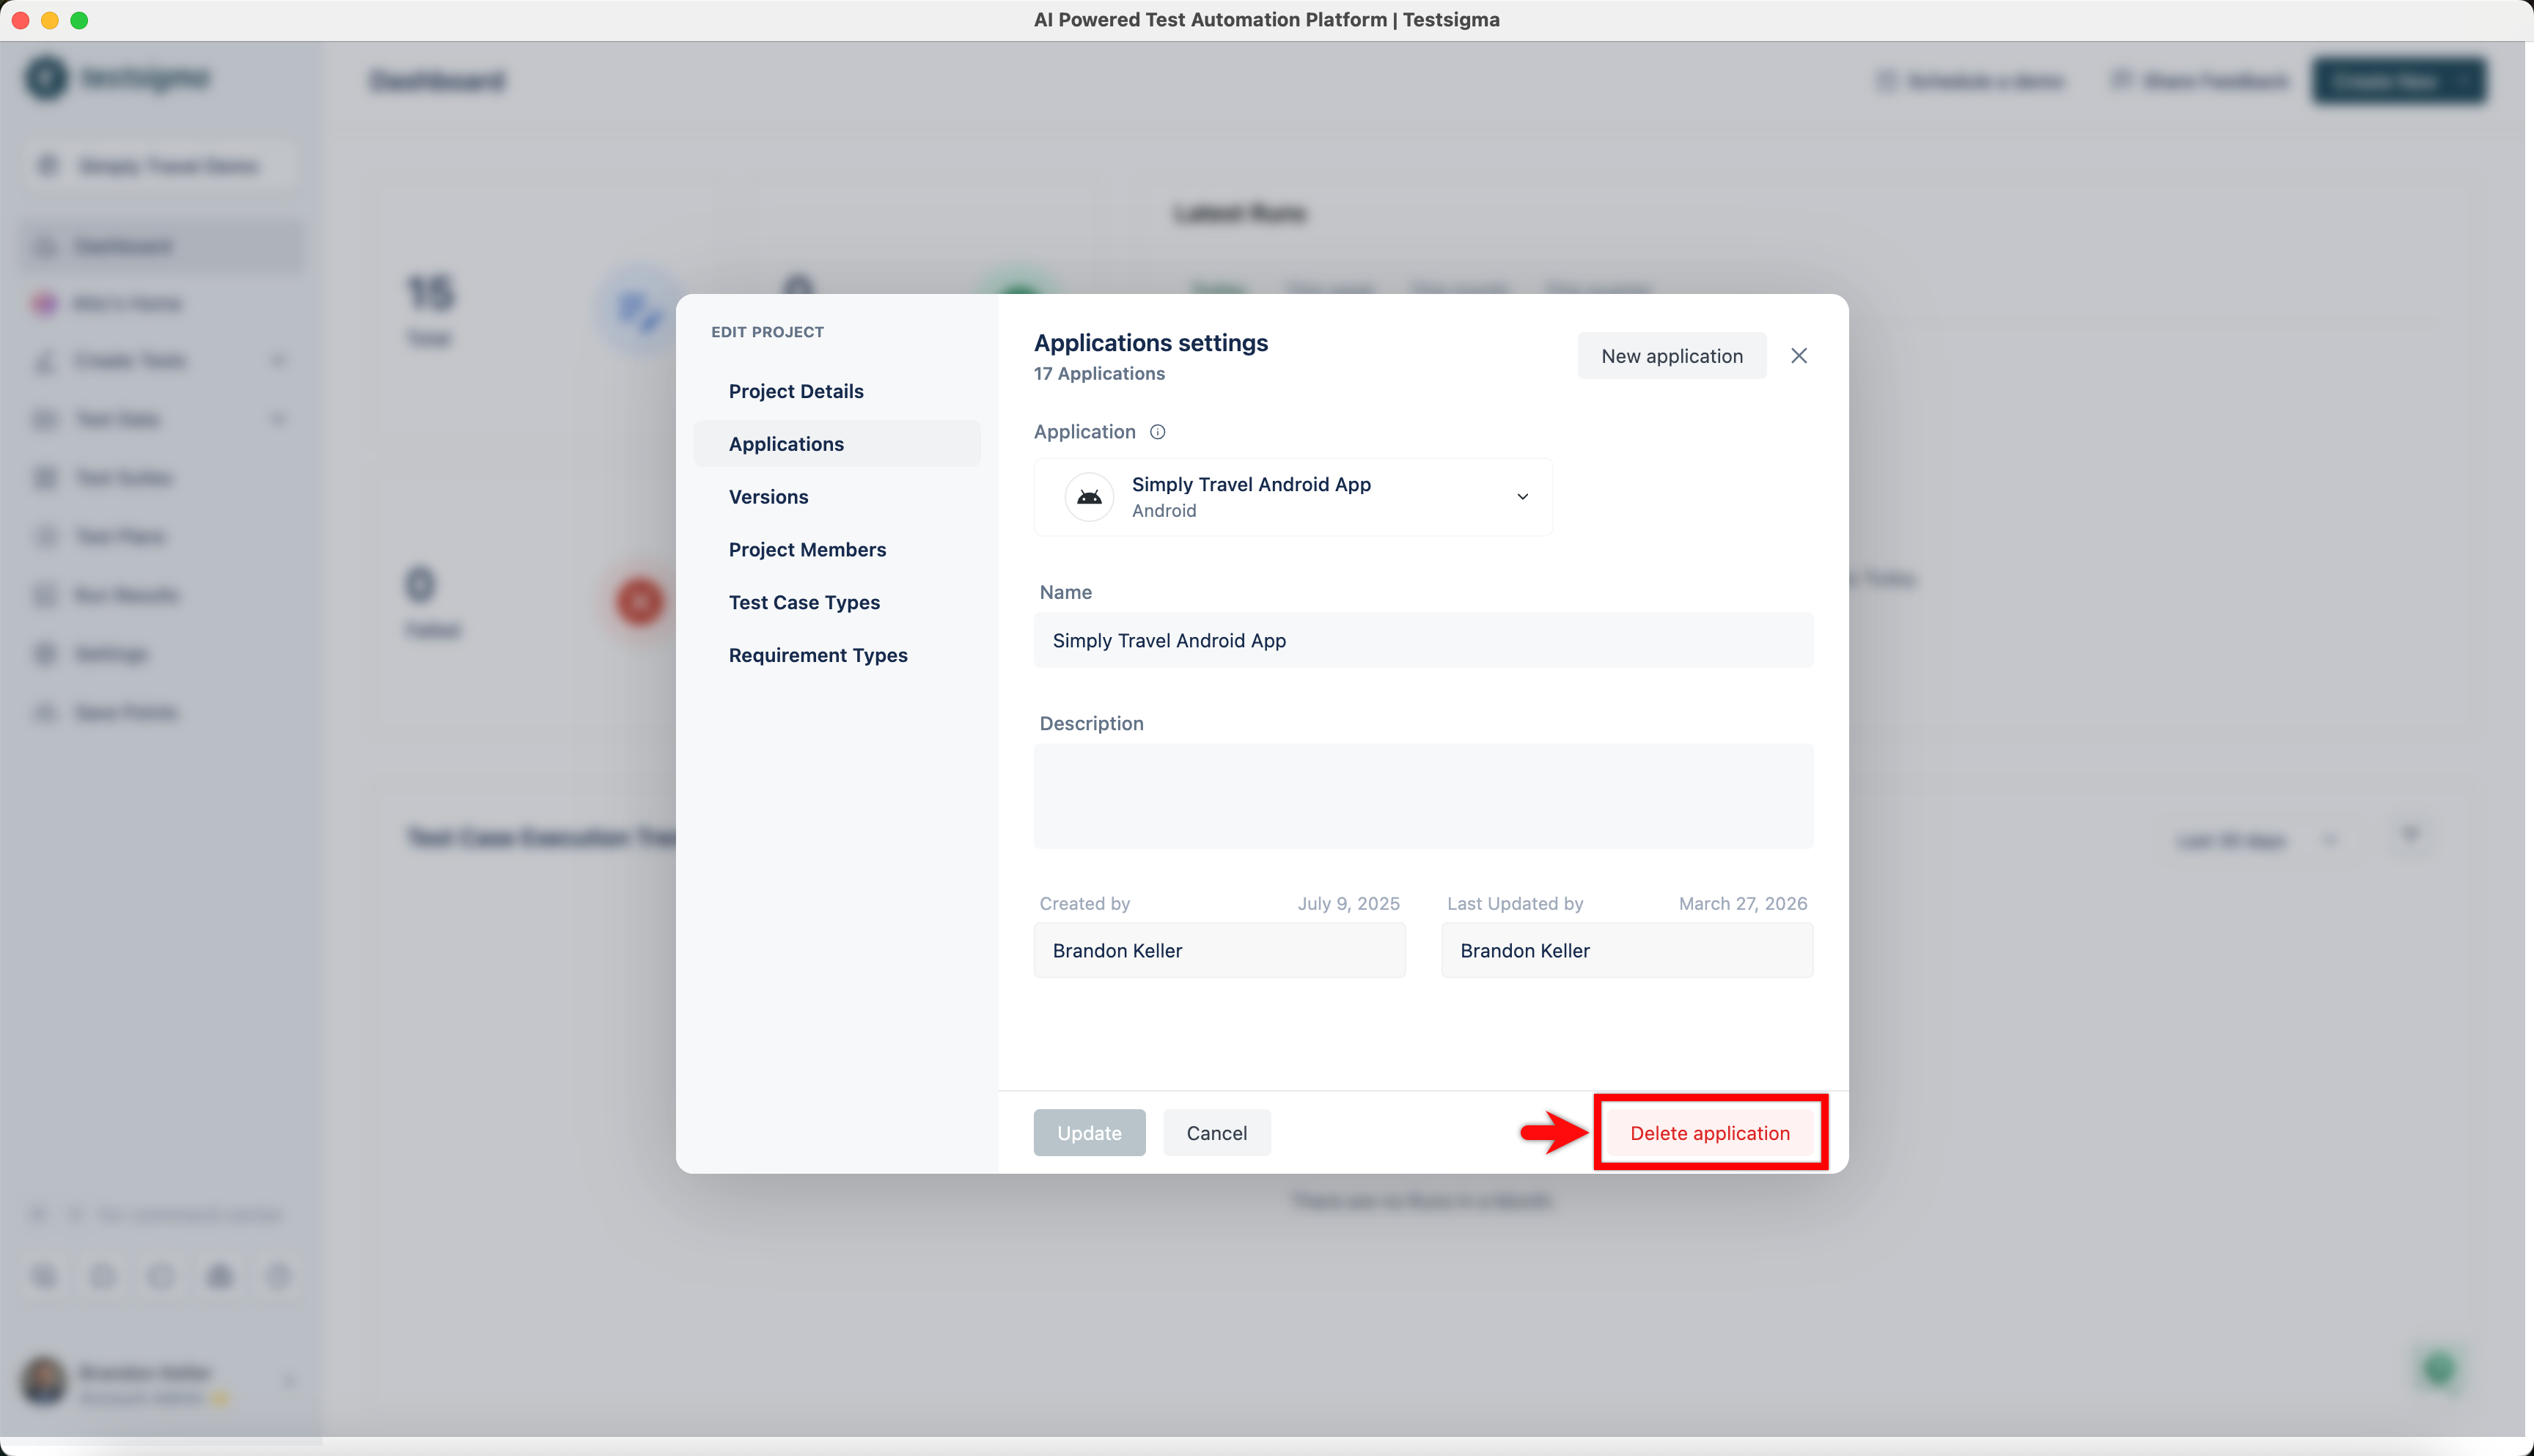
Navigate to Project Settings > Edit Project > Applications, select application you want to edit from the dropdown.
-
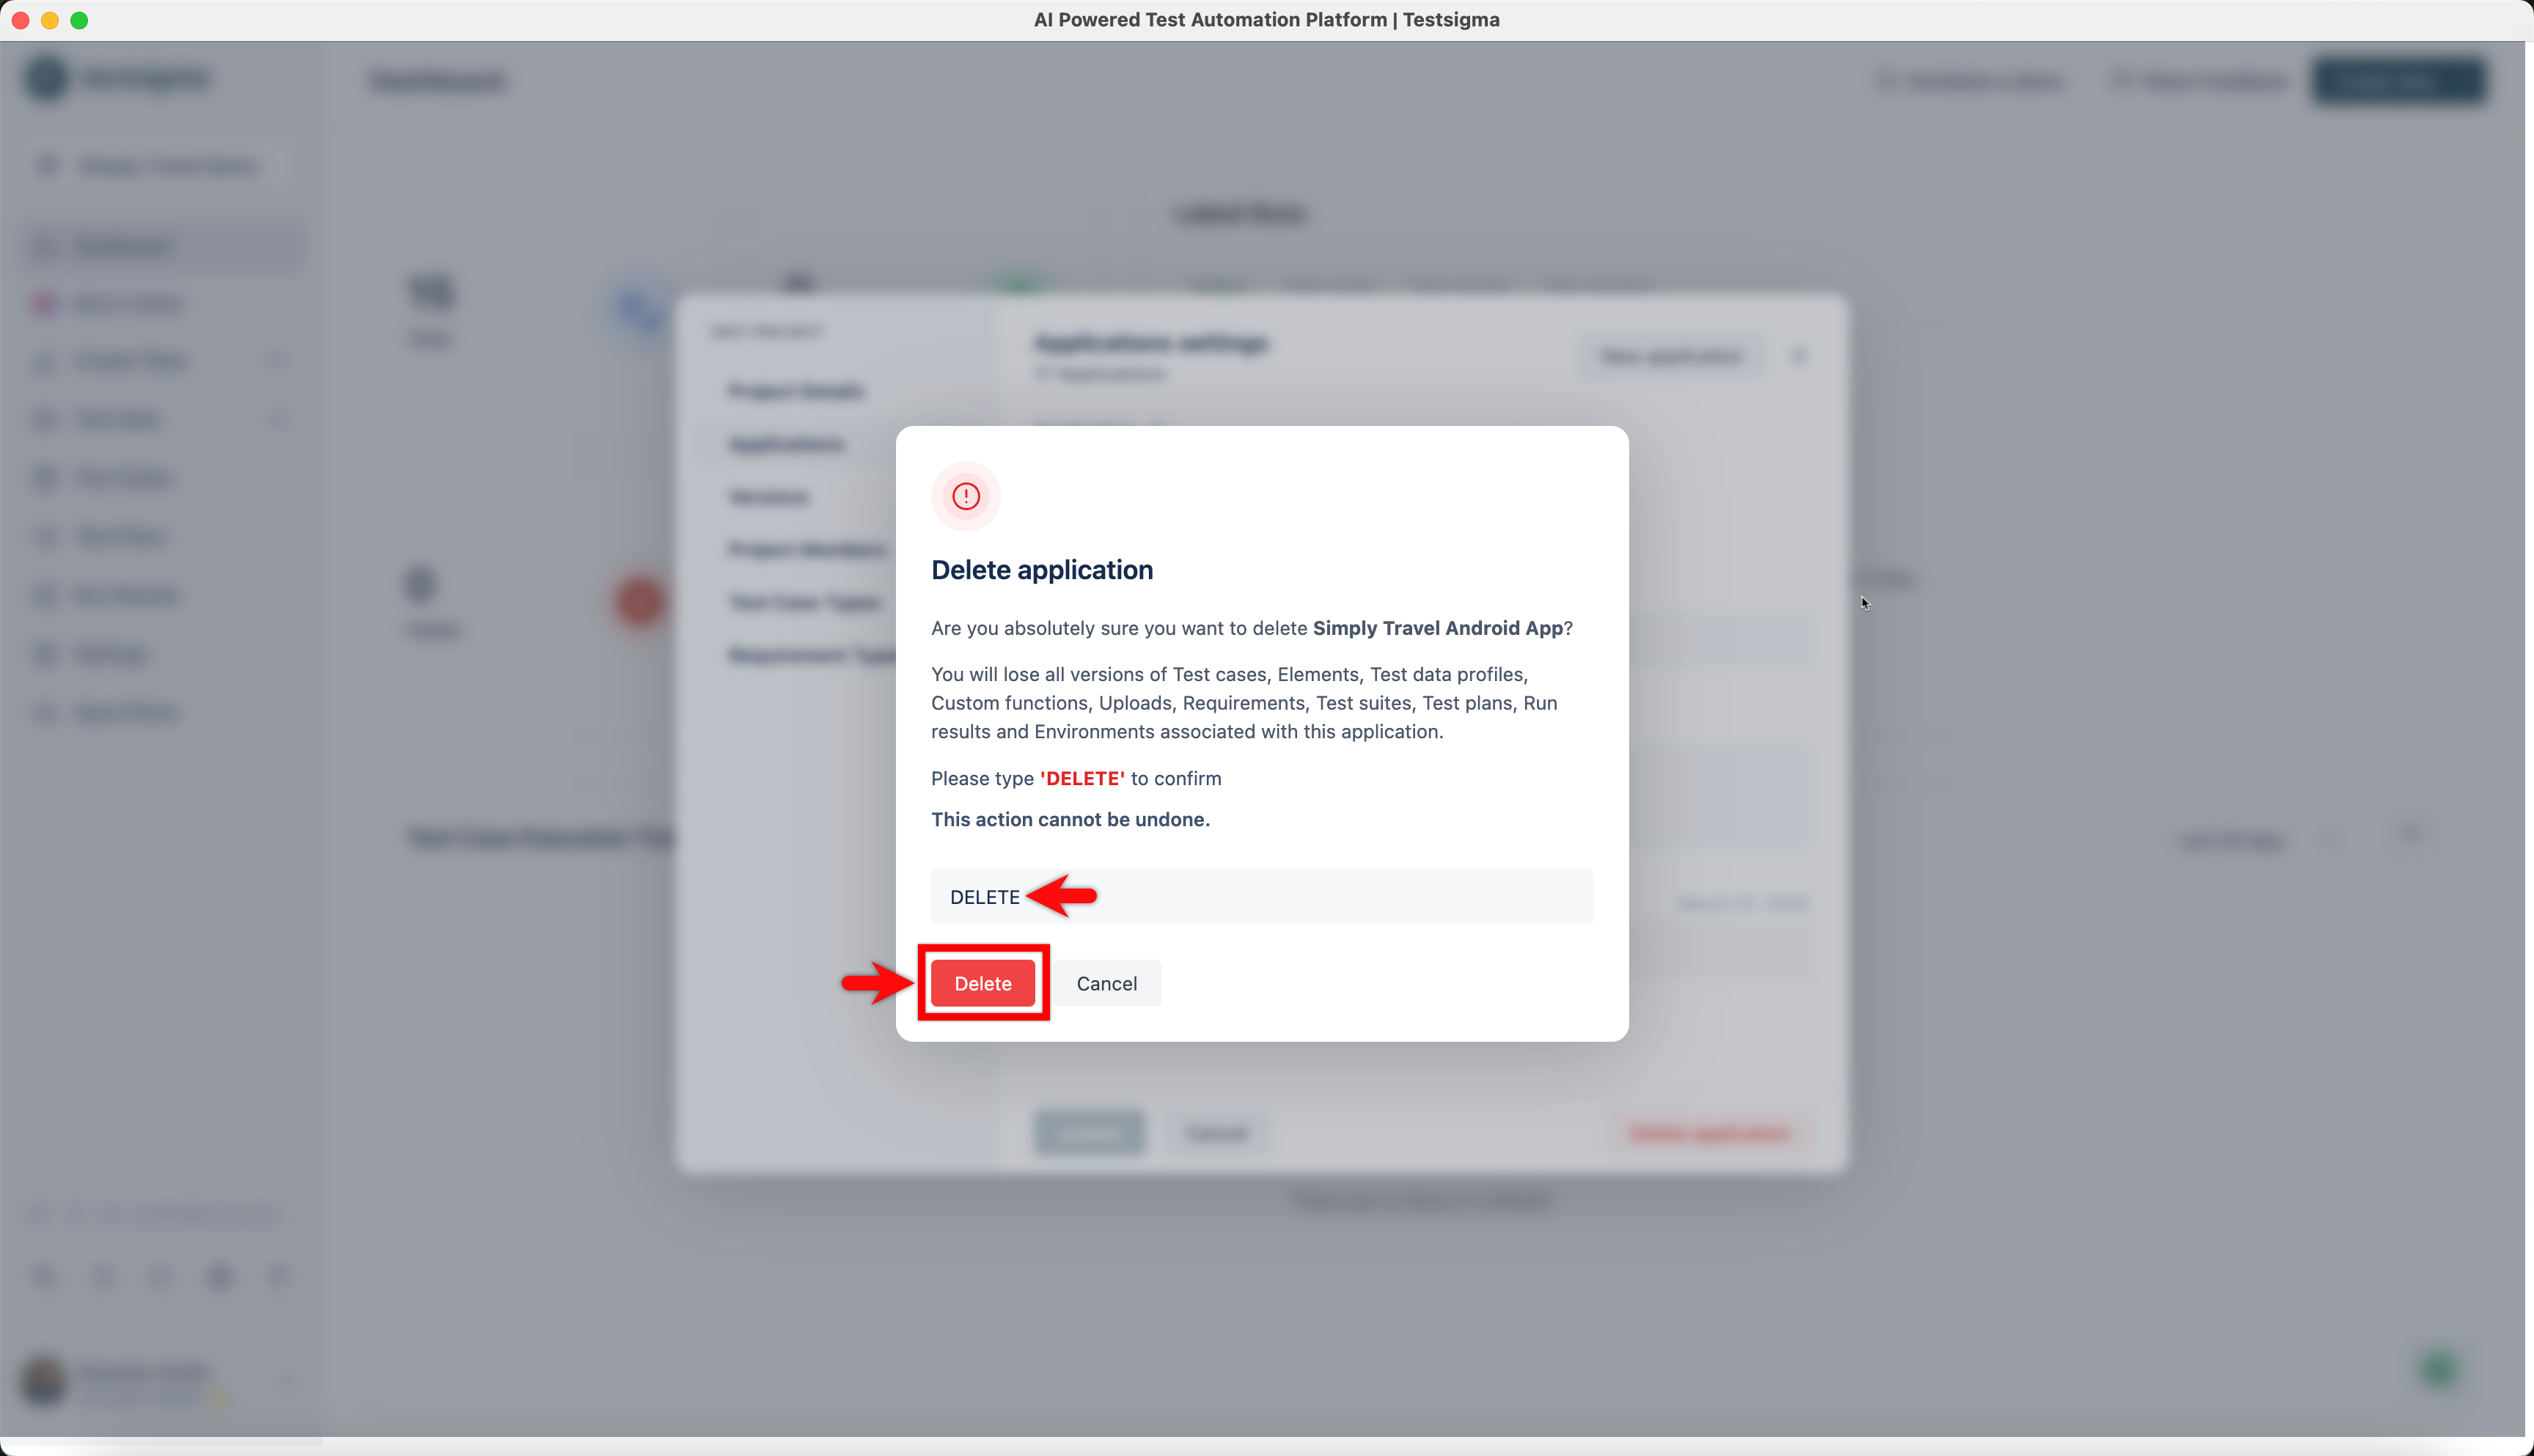
Click Delete Application.
-
Clicking on the Delete button for the application shows a warning Delete Project prompt. Enter DELETE, and click Delete to confirm the deletion.