Desired Capabilities
Using Custom User Profile in Chrome
Custom user profiles help you emulate settings such as pre-installed extensions, specific location, language, etc. for your web app test automation in Chrome browser.
To do the same, create a new profile, customize it as per your requirements by installing required extensions and changing the settings. After that, you can select the profile using Desired Capabilities in Testsigma while starting a Test Session.
You should already know how to add Desired Capabilities to your Tests. Refer to the documentation on configuring desired capabilities
Steps for using Custom User Profile in Testsigma
Section titled “Steps for using Custom User Profile in Testsigma”- Finding your current Profile path
- Making changes in the Profile folder
- Using the Desired Capability
1. Finding your current Profile path
Section titled “1. Finding your current Profile path”While executing, you can check the current Profile location by going to the following URL:
chrome://version
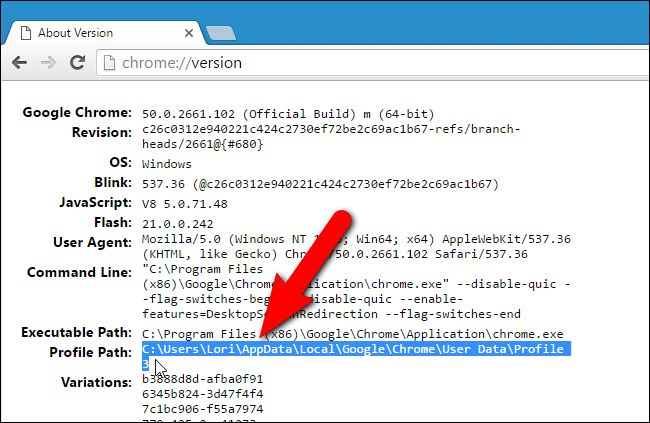
Location of Chrome Browser Profile(default profile)
Section titled “Location of Chrome Browser Profile(default profile)”| OS | Profile Path |
|---|---|
| Windows 7, 8.1, and 10 | C:\\Users<username>\AppData\Local\Google\Chrome\User Data\Default |
| Mac OS X El Capitan | Users/<username>/Library/Application Support/Google/Chrome/Default |
| Linux | /home/<username>/.config/google-chrome/default |
Workaround to use user-defined profile for Executing Tests on Testsigma
Section titled “Workaround to use user-defined profile for Executing Tests on Testsigma”We could use the —profile-directory argument for specifying the User Profile. However, due to a known bug in Chrome, you might need to do the following workaround and use the —user-data-dir argument.
2. Making changes in Profile folder (workaround)
Section titled “2. Making changes in Profile folder (workaround)”-
Open your default File Explorer (Windows Explorer - Windows, Nautilus - Linux and Files - Mac) and navigate to the location - C:\Users<username>\AppData\Local\Google\Chrome\User Data\Profile 1
-
Create a folder named ‘Default’ there and copy the contents of ‘Profile 1’ directory deselecting the recently created ‘Default’ folder.
-
Paste the copied contents inside the ‘Default’ folder.
3. Using the Desired Capability
Section titled “3. Using the Desired Capability”After that, you can use Desired Capability in the following format for using a user-defined profile in Testsigma. The following Desired Capability can be used to start Chrome Browser during an automation session using a user-defined profile.
| Name | Data Type | Value |
|---|---|---|
| goog:chromeOptions | String | {“args”:[“user-data-dir=/path/to/your/custom/profile”]} |