CI/CD
GitLab Integration With Testsigma
This article explains how to integrate GitLab with Testsigma for CI/CD purposes.
Prerequisites
Before you begin, ensure you have:
- A GitLab account.
- Testsigma API key.
- Testsigma Testplan ID. For more information on getting test plan ID, refer to the documentation on getting test plan ID.
Steps to integrate GitLab with Testsigma
Section titled “Steps to integrate GitLab with Testsigma”-
Login to your GitLab account.
-
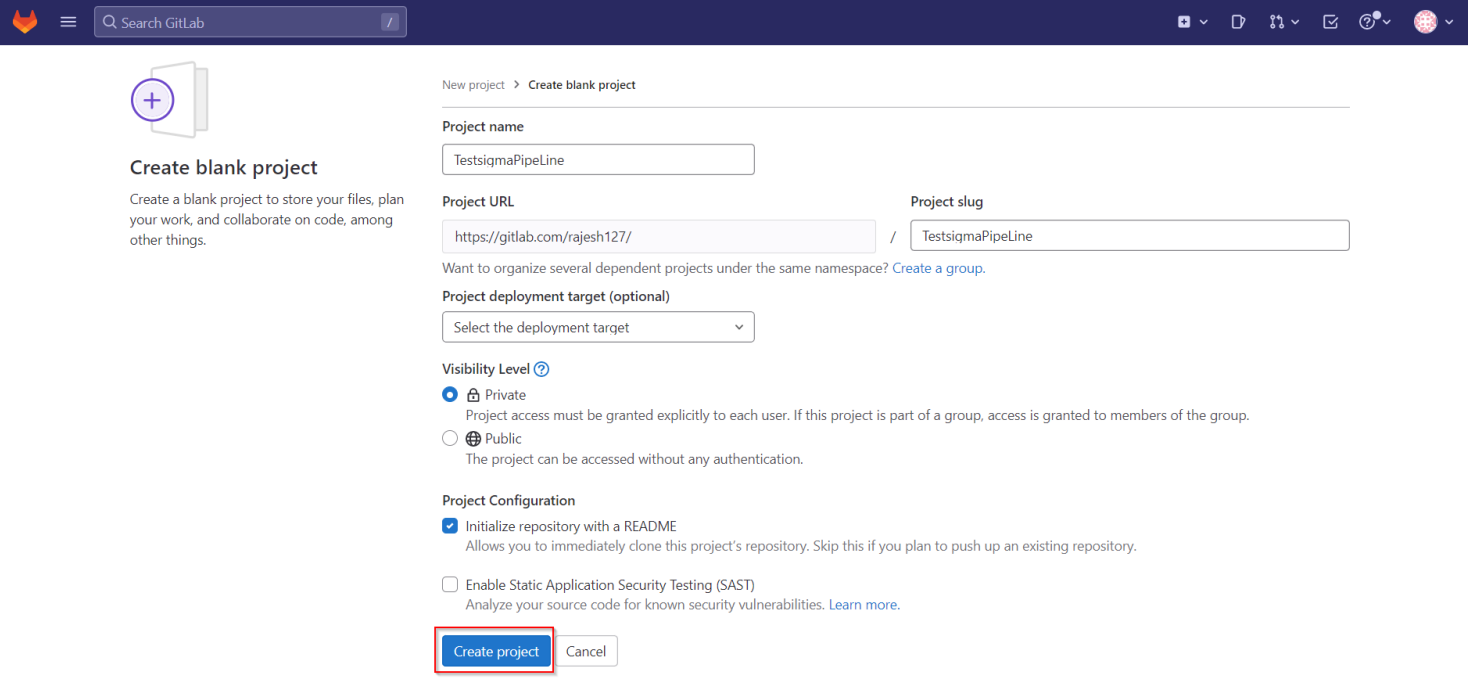
Create a blank project or create a CI/CD project as per your preference by clicking on New project.

-
On create project page, enter all the details and click on Create project.
-
Navigate to CI/CD and click on Jobs.

-
Click on Create CI/CD Configuration file to create a YML file. Alternatively, you can also use the below YML sample to create the job.
stages: - buildbuild-code-job: stage: build script: - echo "Calling Shell Script of testsigma" - pwd - ls -la - chmod a+x gitlabcicd.sh - ./gitlabcicd.sh
- Once you have access to the shell script, you need to provide the ID of that Test Plan and the API Key along with other parameters.
- To get the Test Plan ID, refer to the documentation on getting test plan ID.
- To get the API key, refer to the documentation on generating API keys.
-
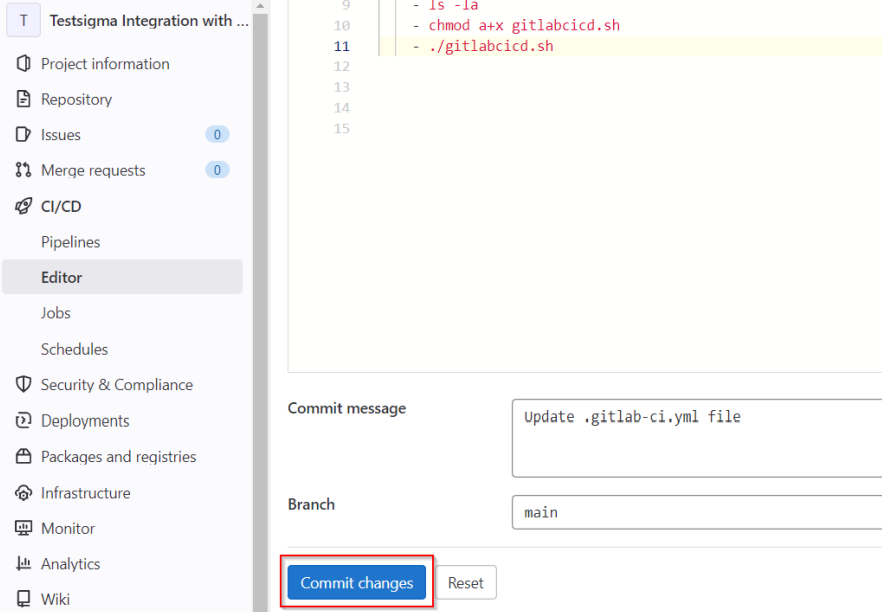
Click on Commit changes once you have created the YML script, and the job will start to run.
-
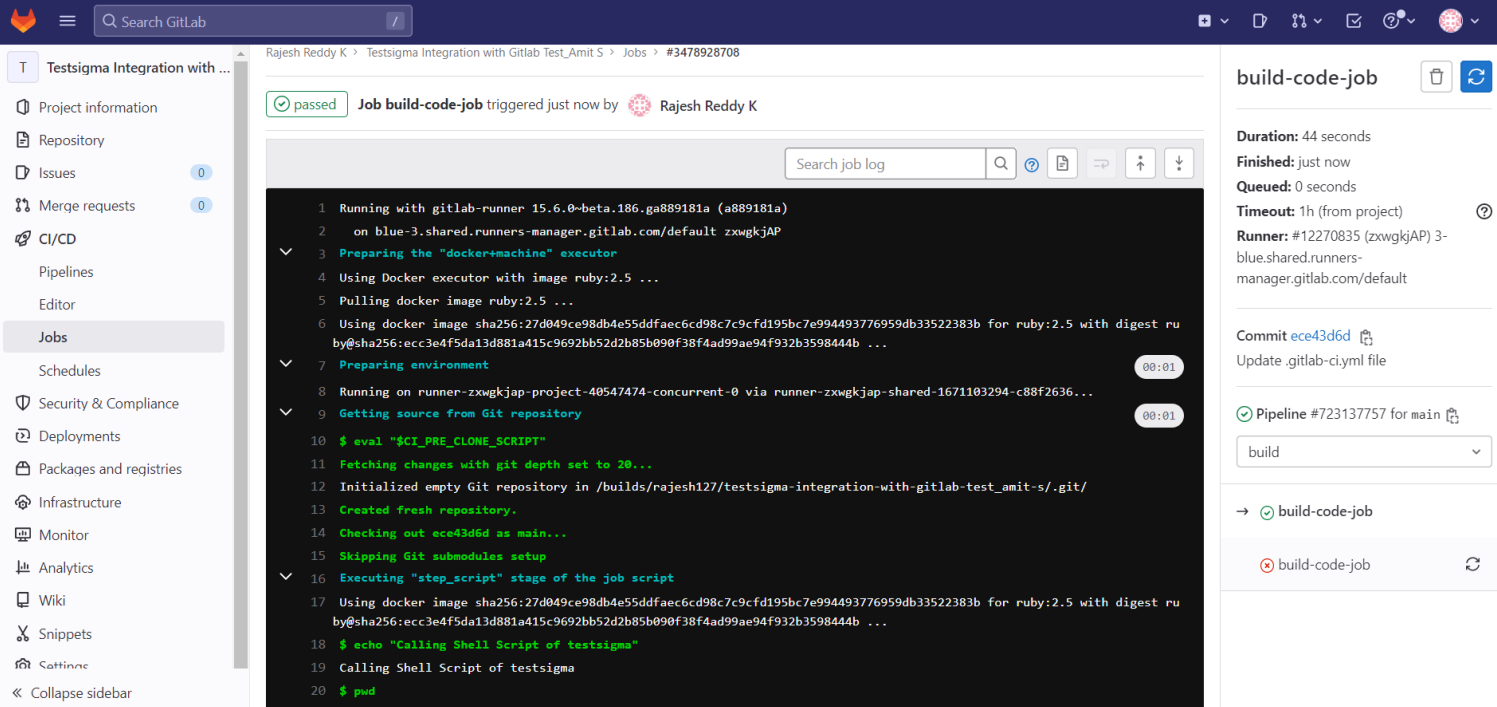
From the screenshot below, you can see the job running. You can also notice that the test plan configured inside the shell script would start running.
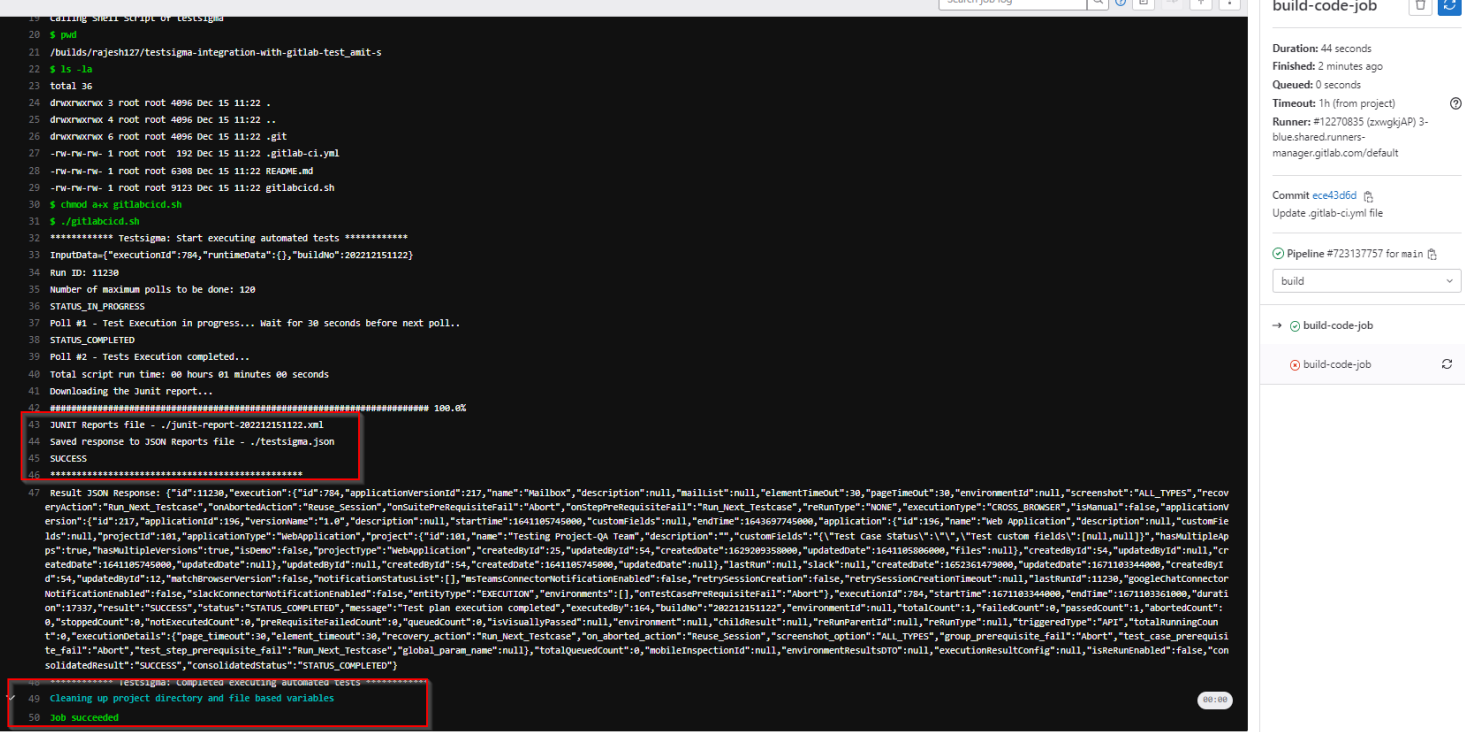
Once the job is completed you can see the execution report as an XML report based on the path you have shared on the shell script.
- Post completion of the job, you can see the details below: