Test Cases
Label Management in Testsigma
The Label Management feature in Testsigma helps you manage labels linked to test cases, elements, step groups, test suites, and test plans. You can view all labels in one place, check their associations, and easily unlink or delete them from the management page. This article discusses how to manage labels in Testsigma.
Prerequisites
Before you begin, ensure that you have referred to:
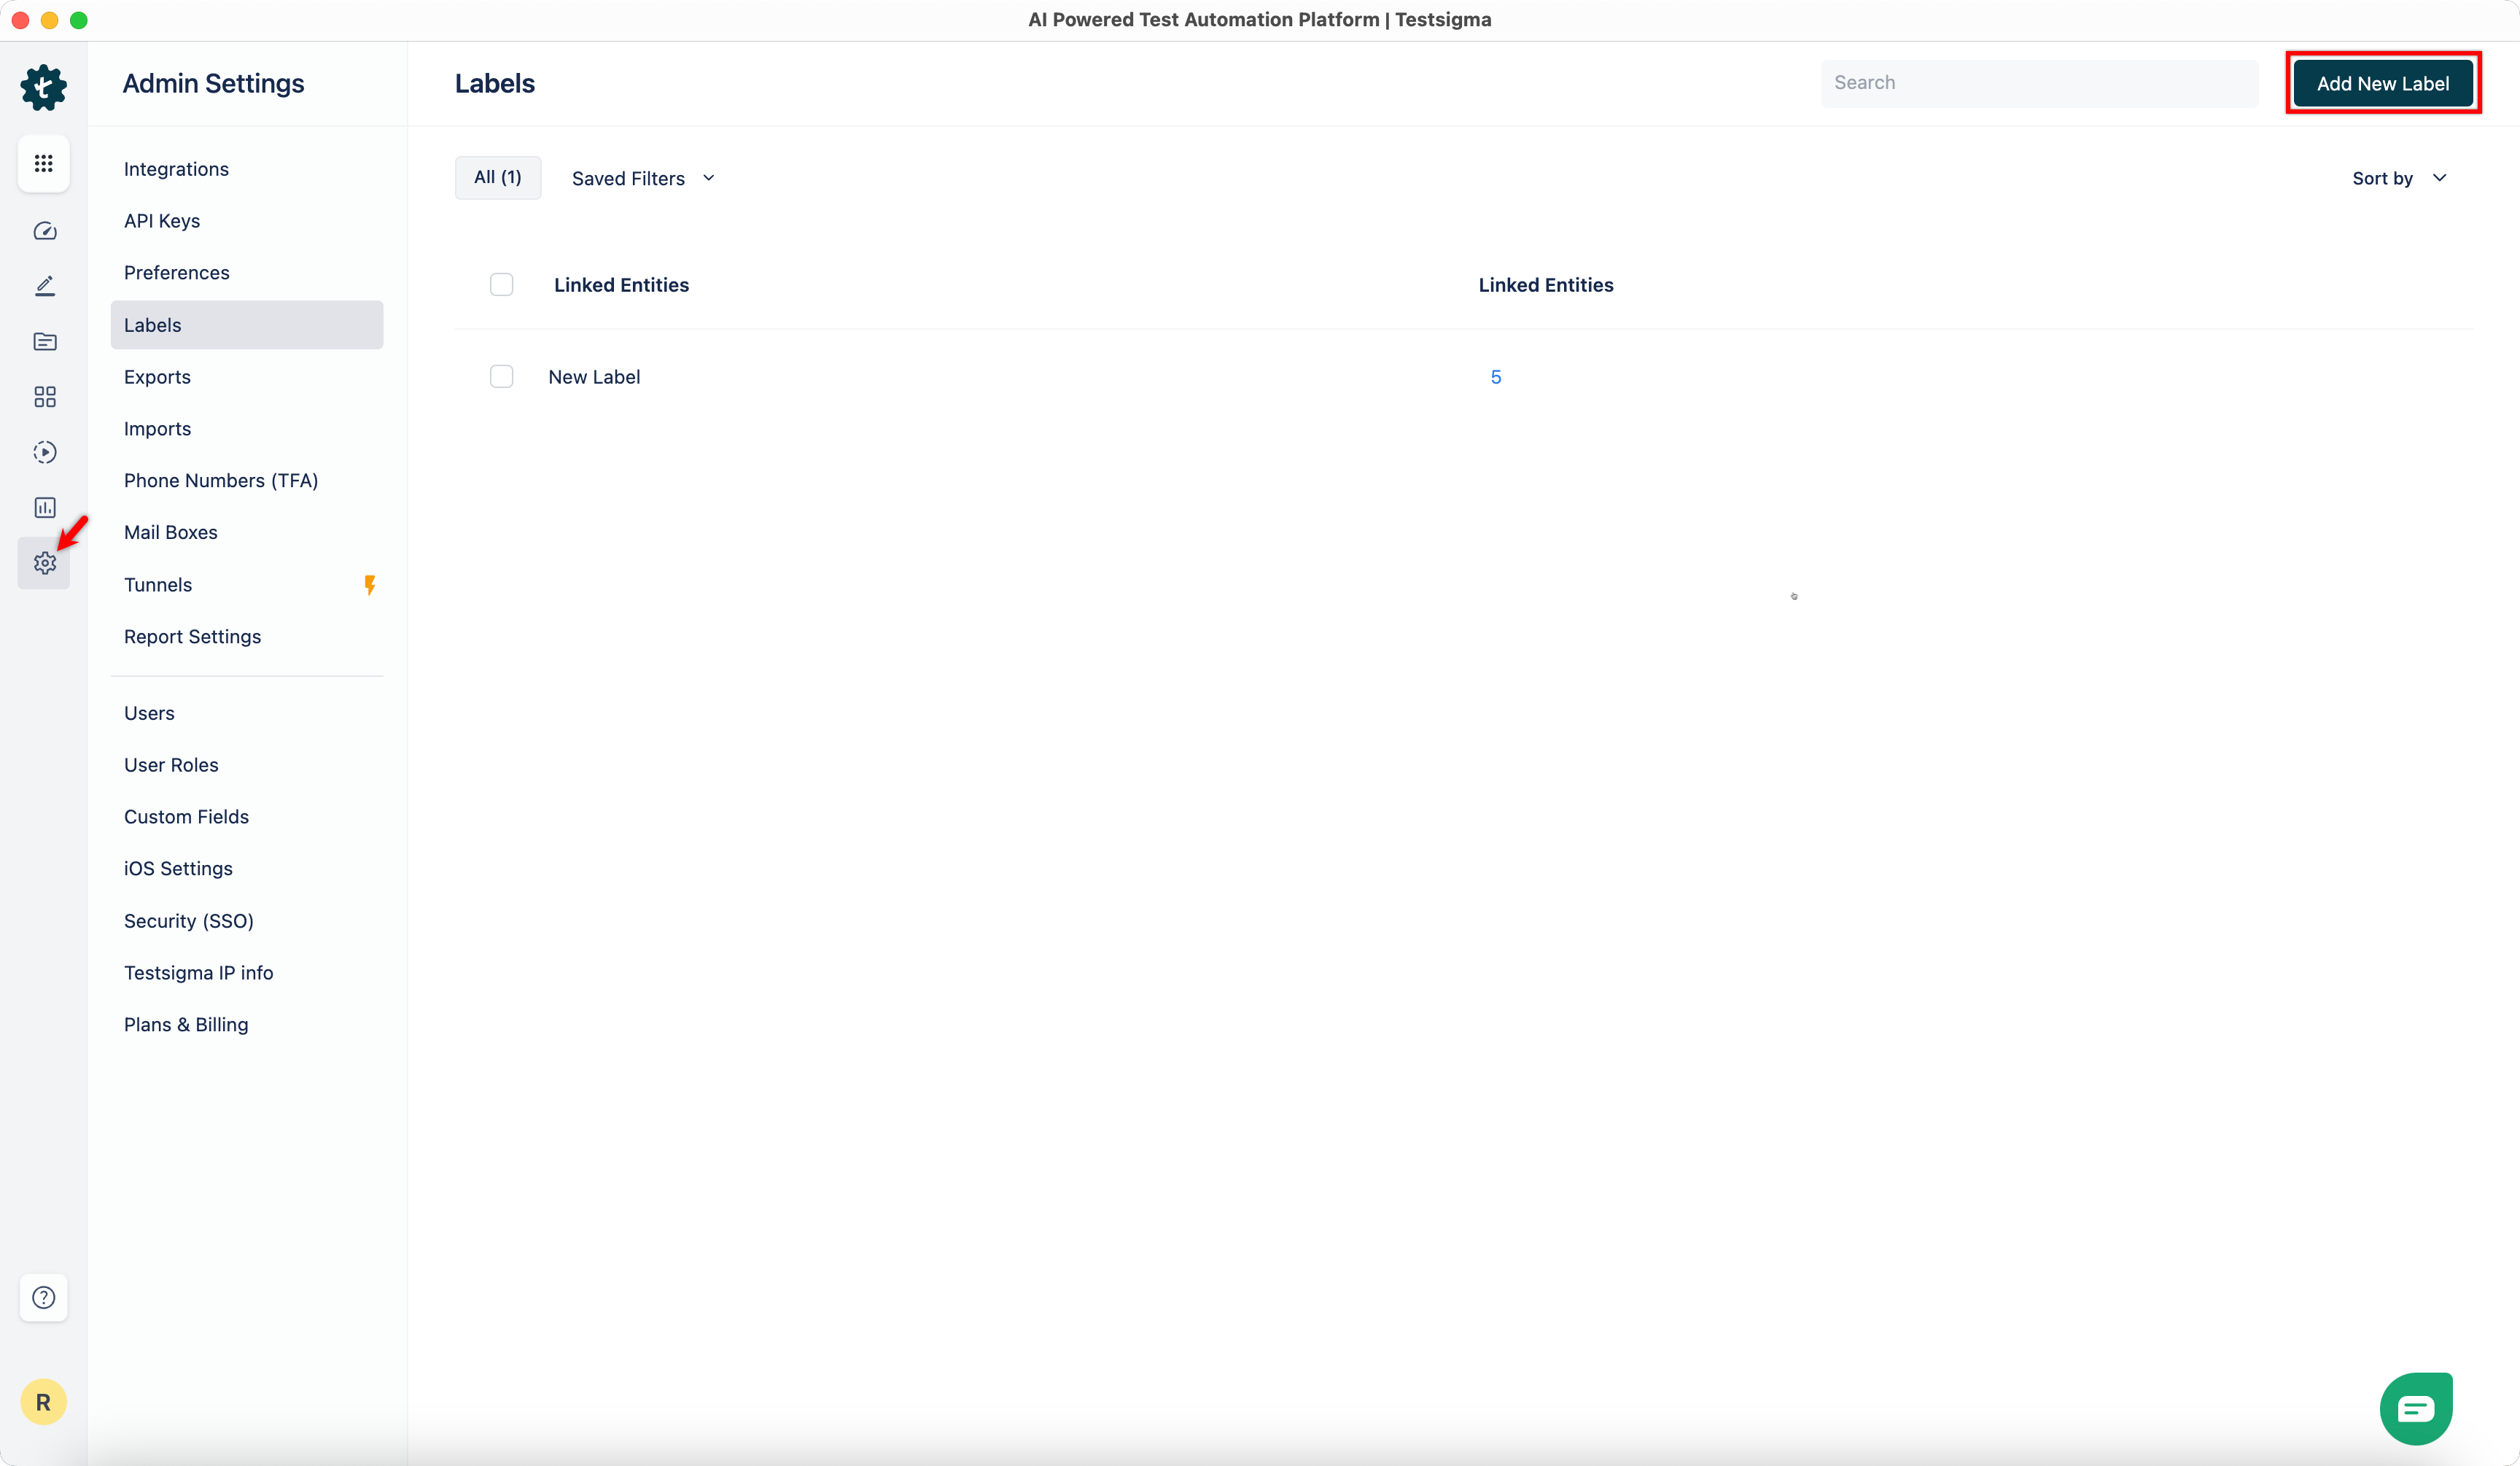
Steps to Create a Label
Section titled “Steps to Create a Label”-
From the left navigation bar, go to Settings > Labels, and click Add New Label in the top-right corner.
-
Enter a name and click the tick mark icon to save the label.
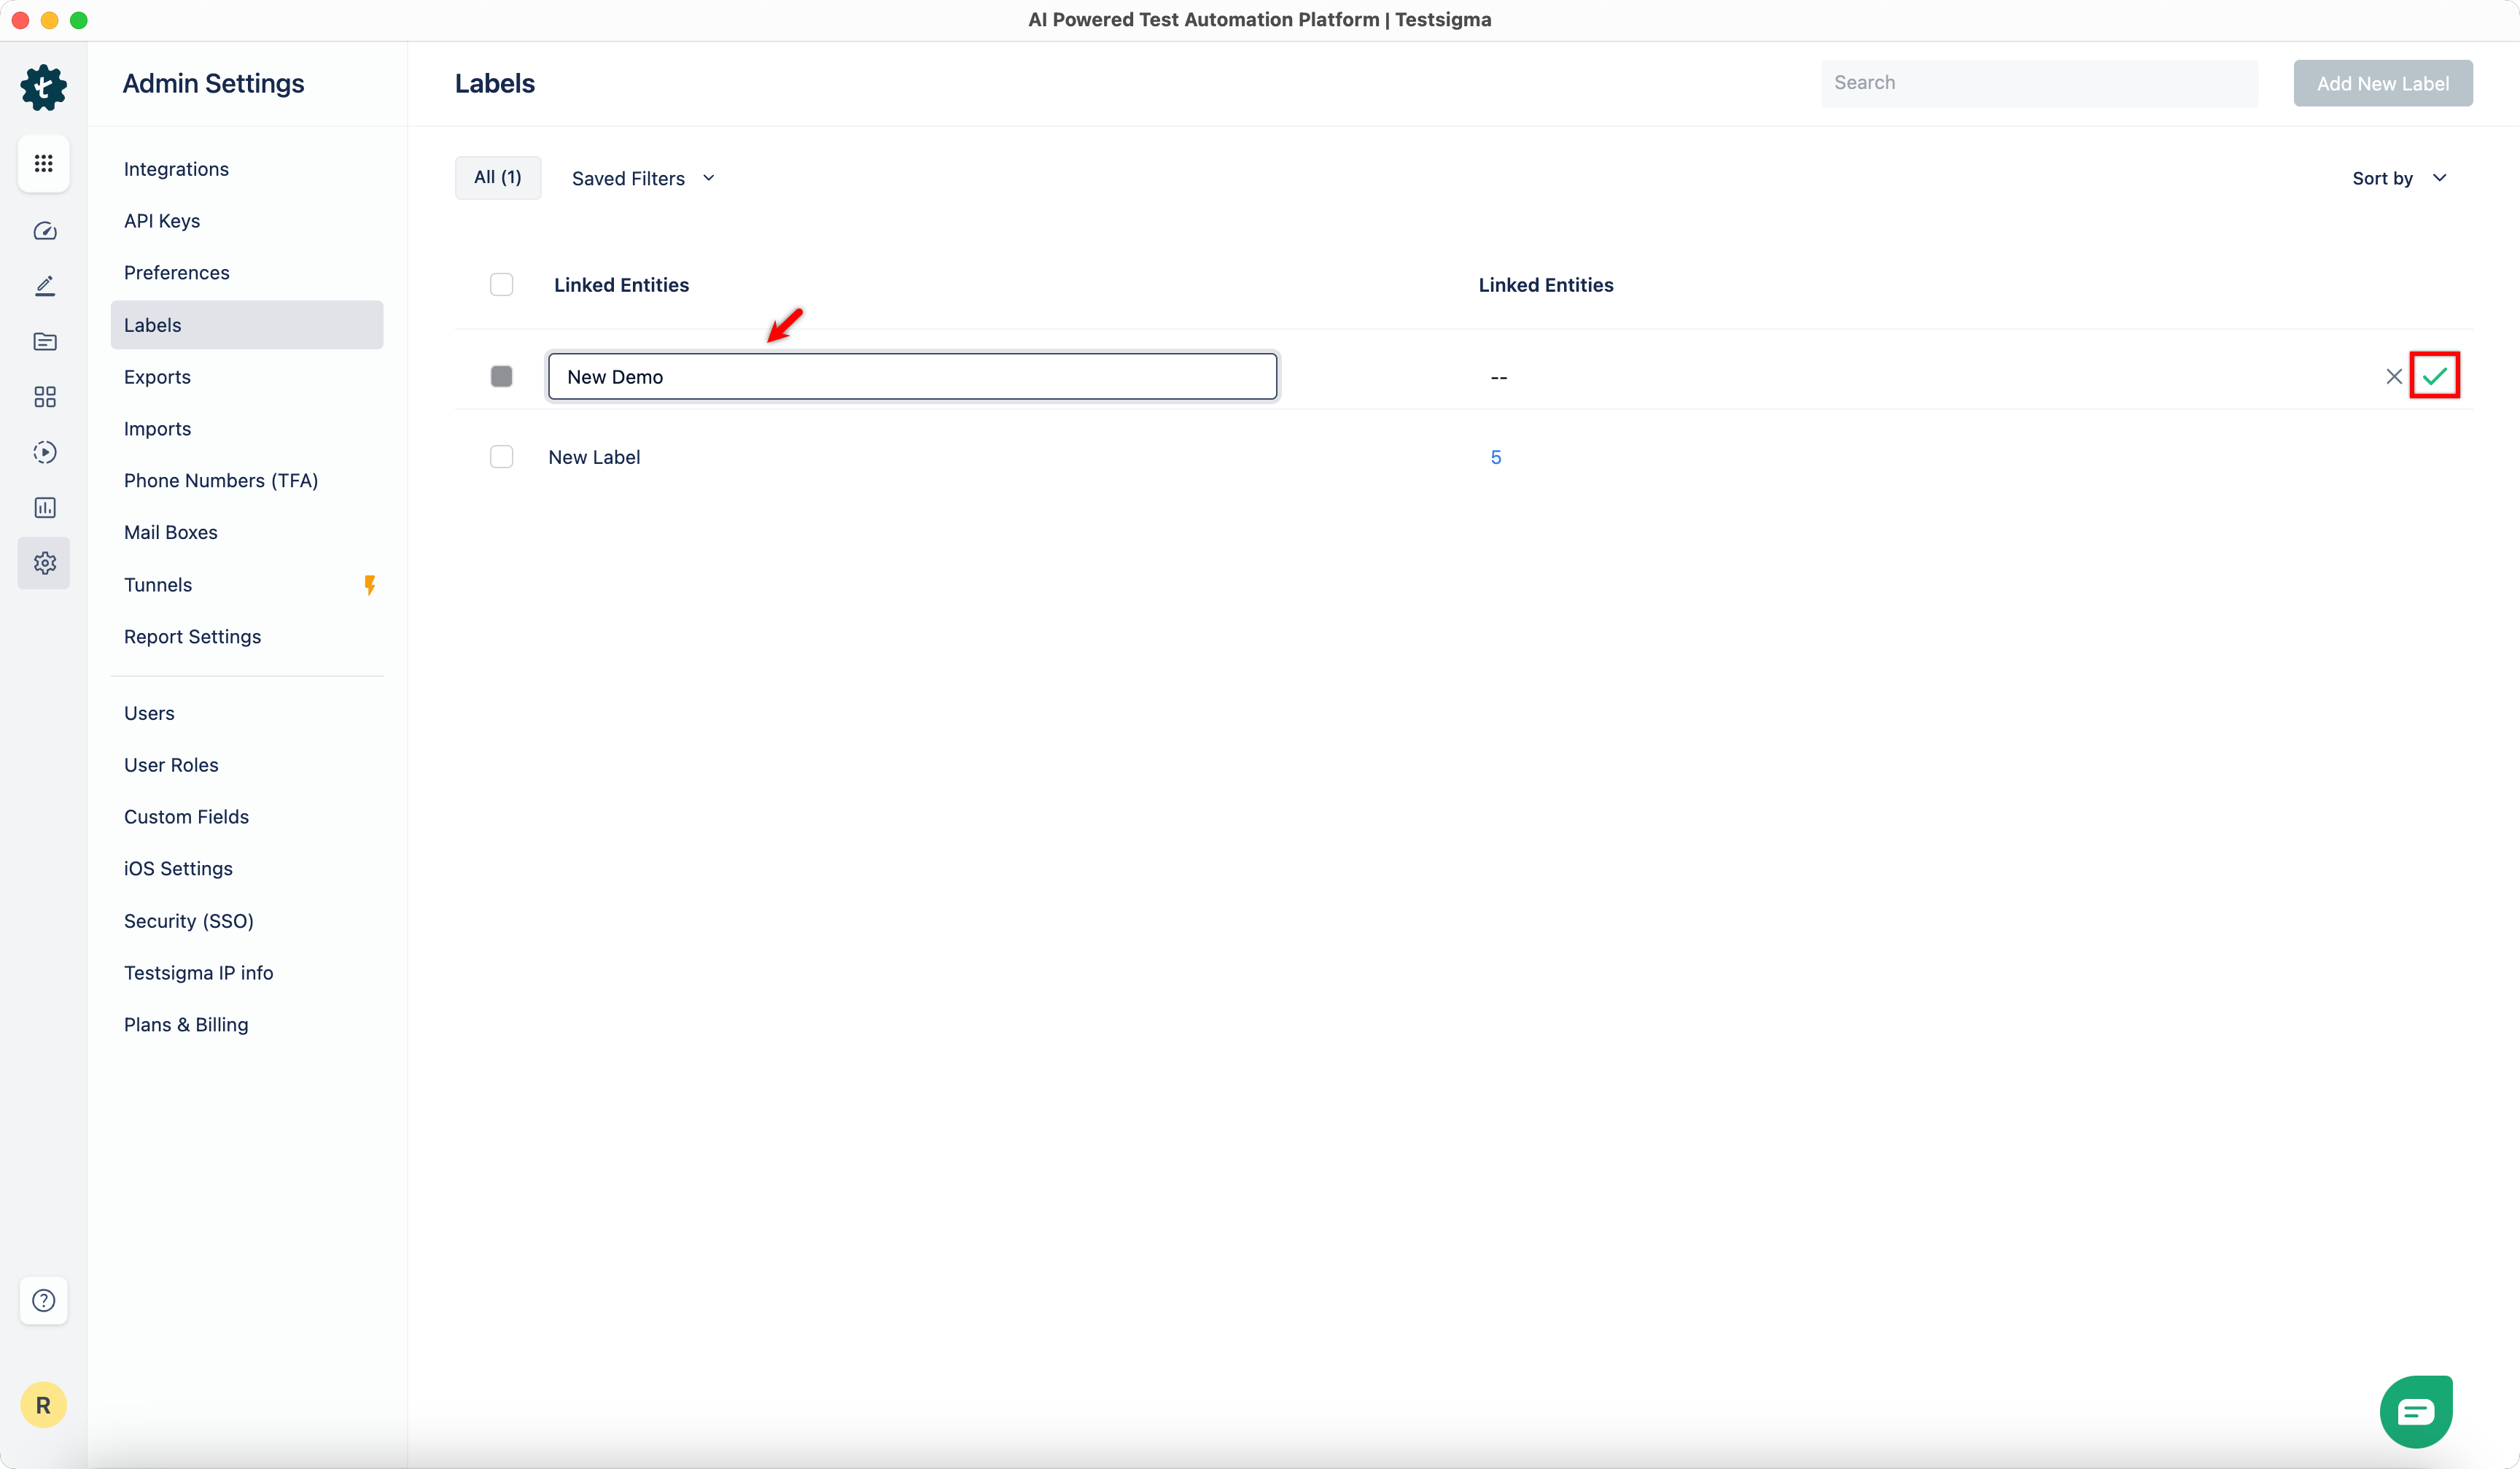
-
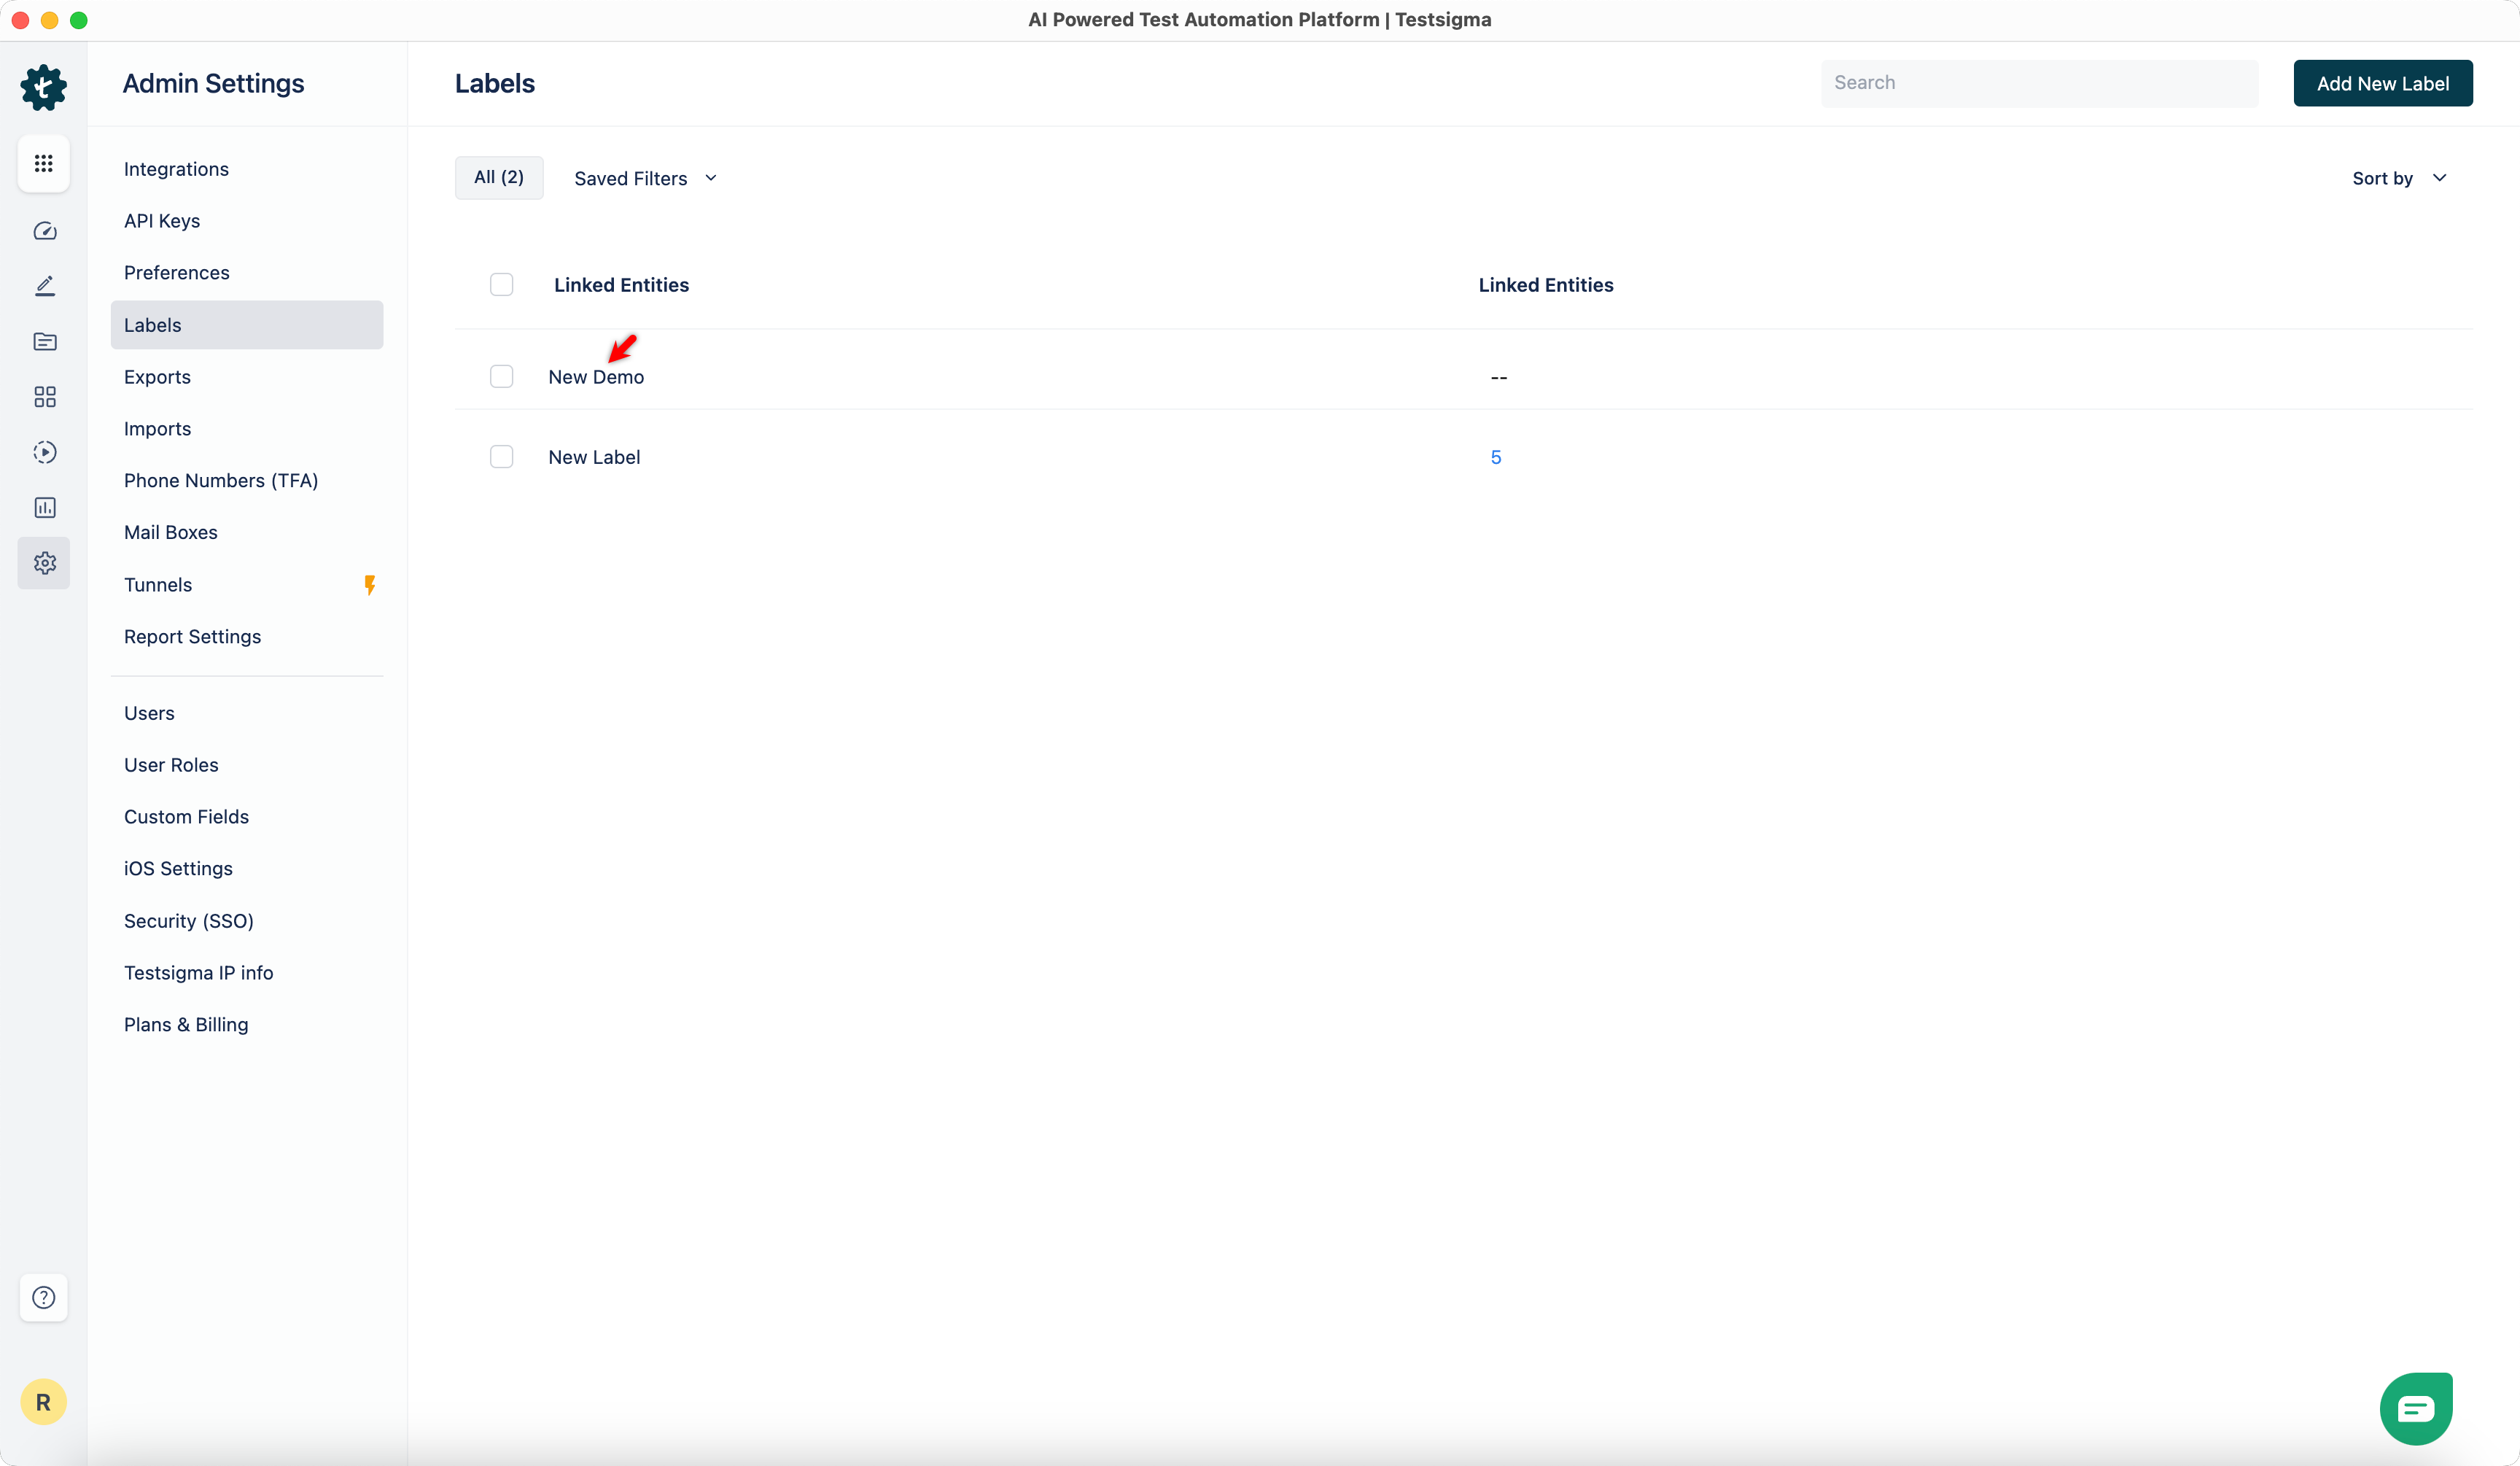
The label will be added to the list.
Steps to Associate Label to Test Case
Section titled “Steps to Associate Label to Test Case”-
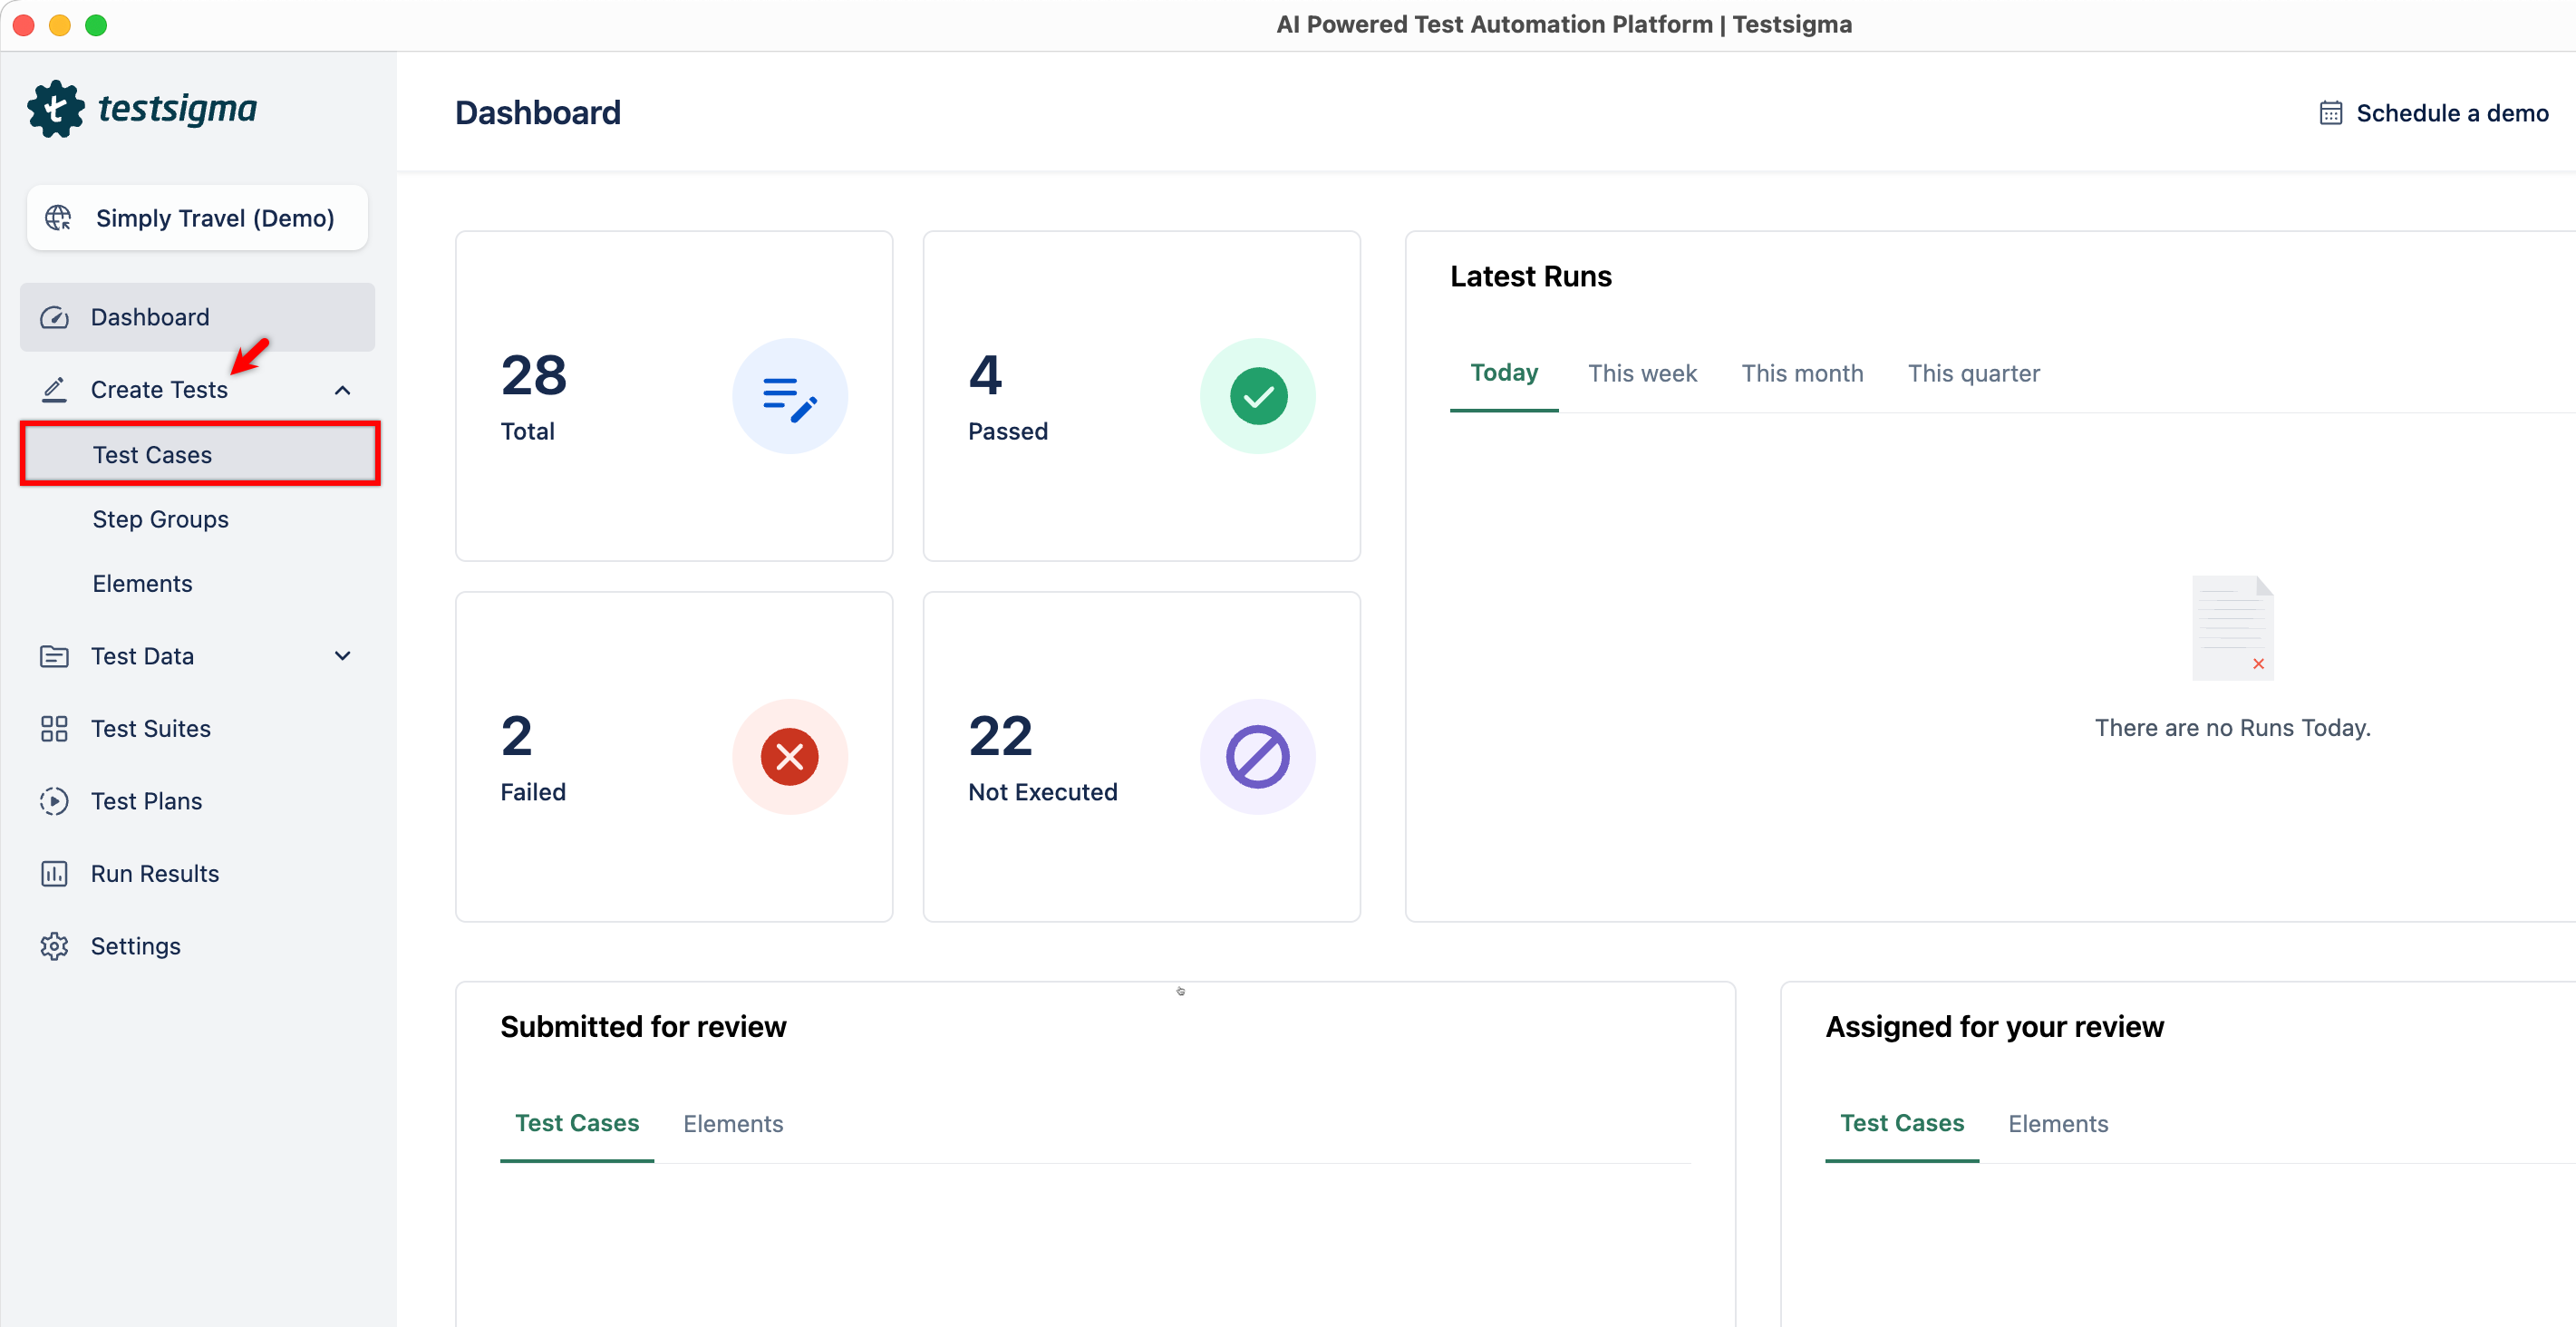
From the left navigation bar, go to Create Tests > Test Cases.
-
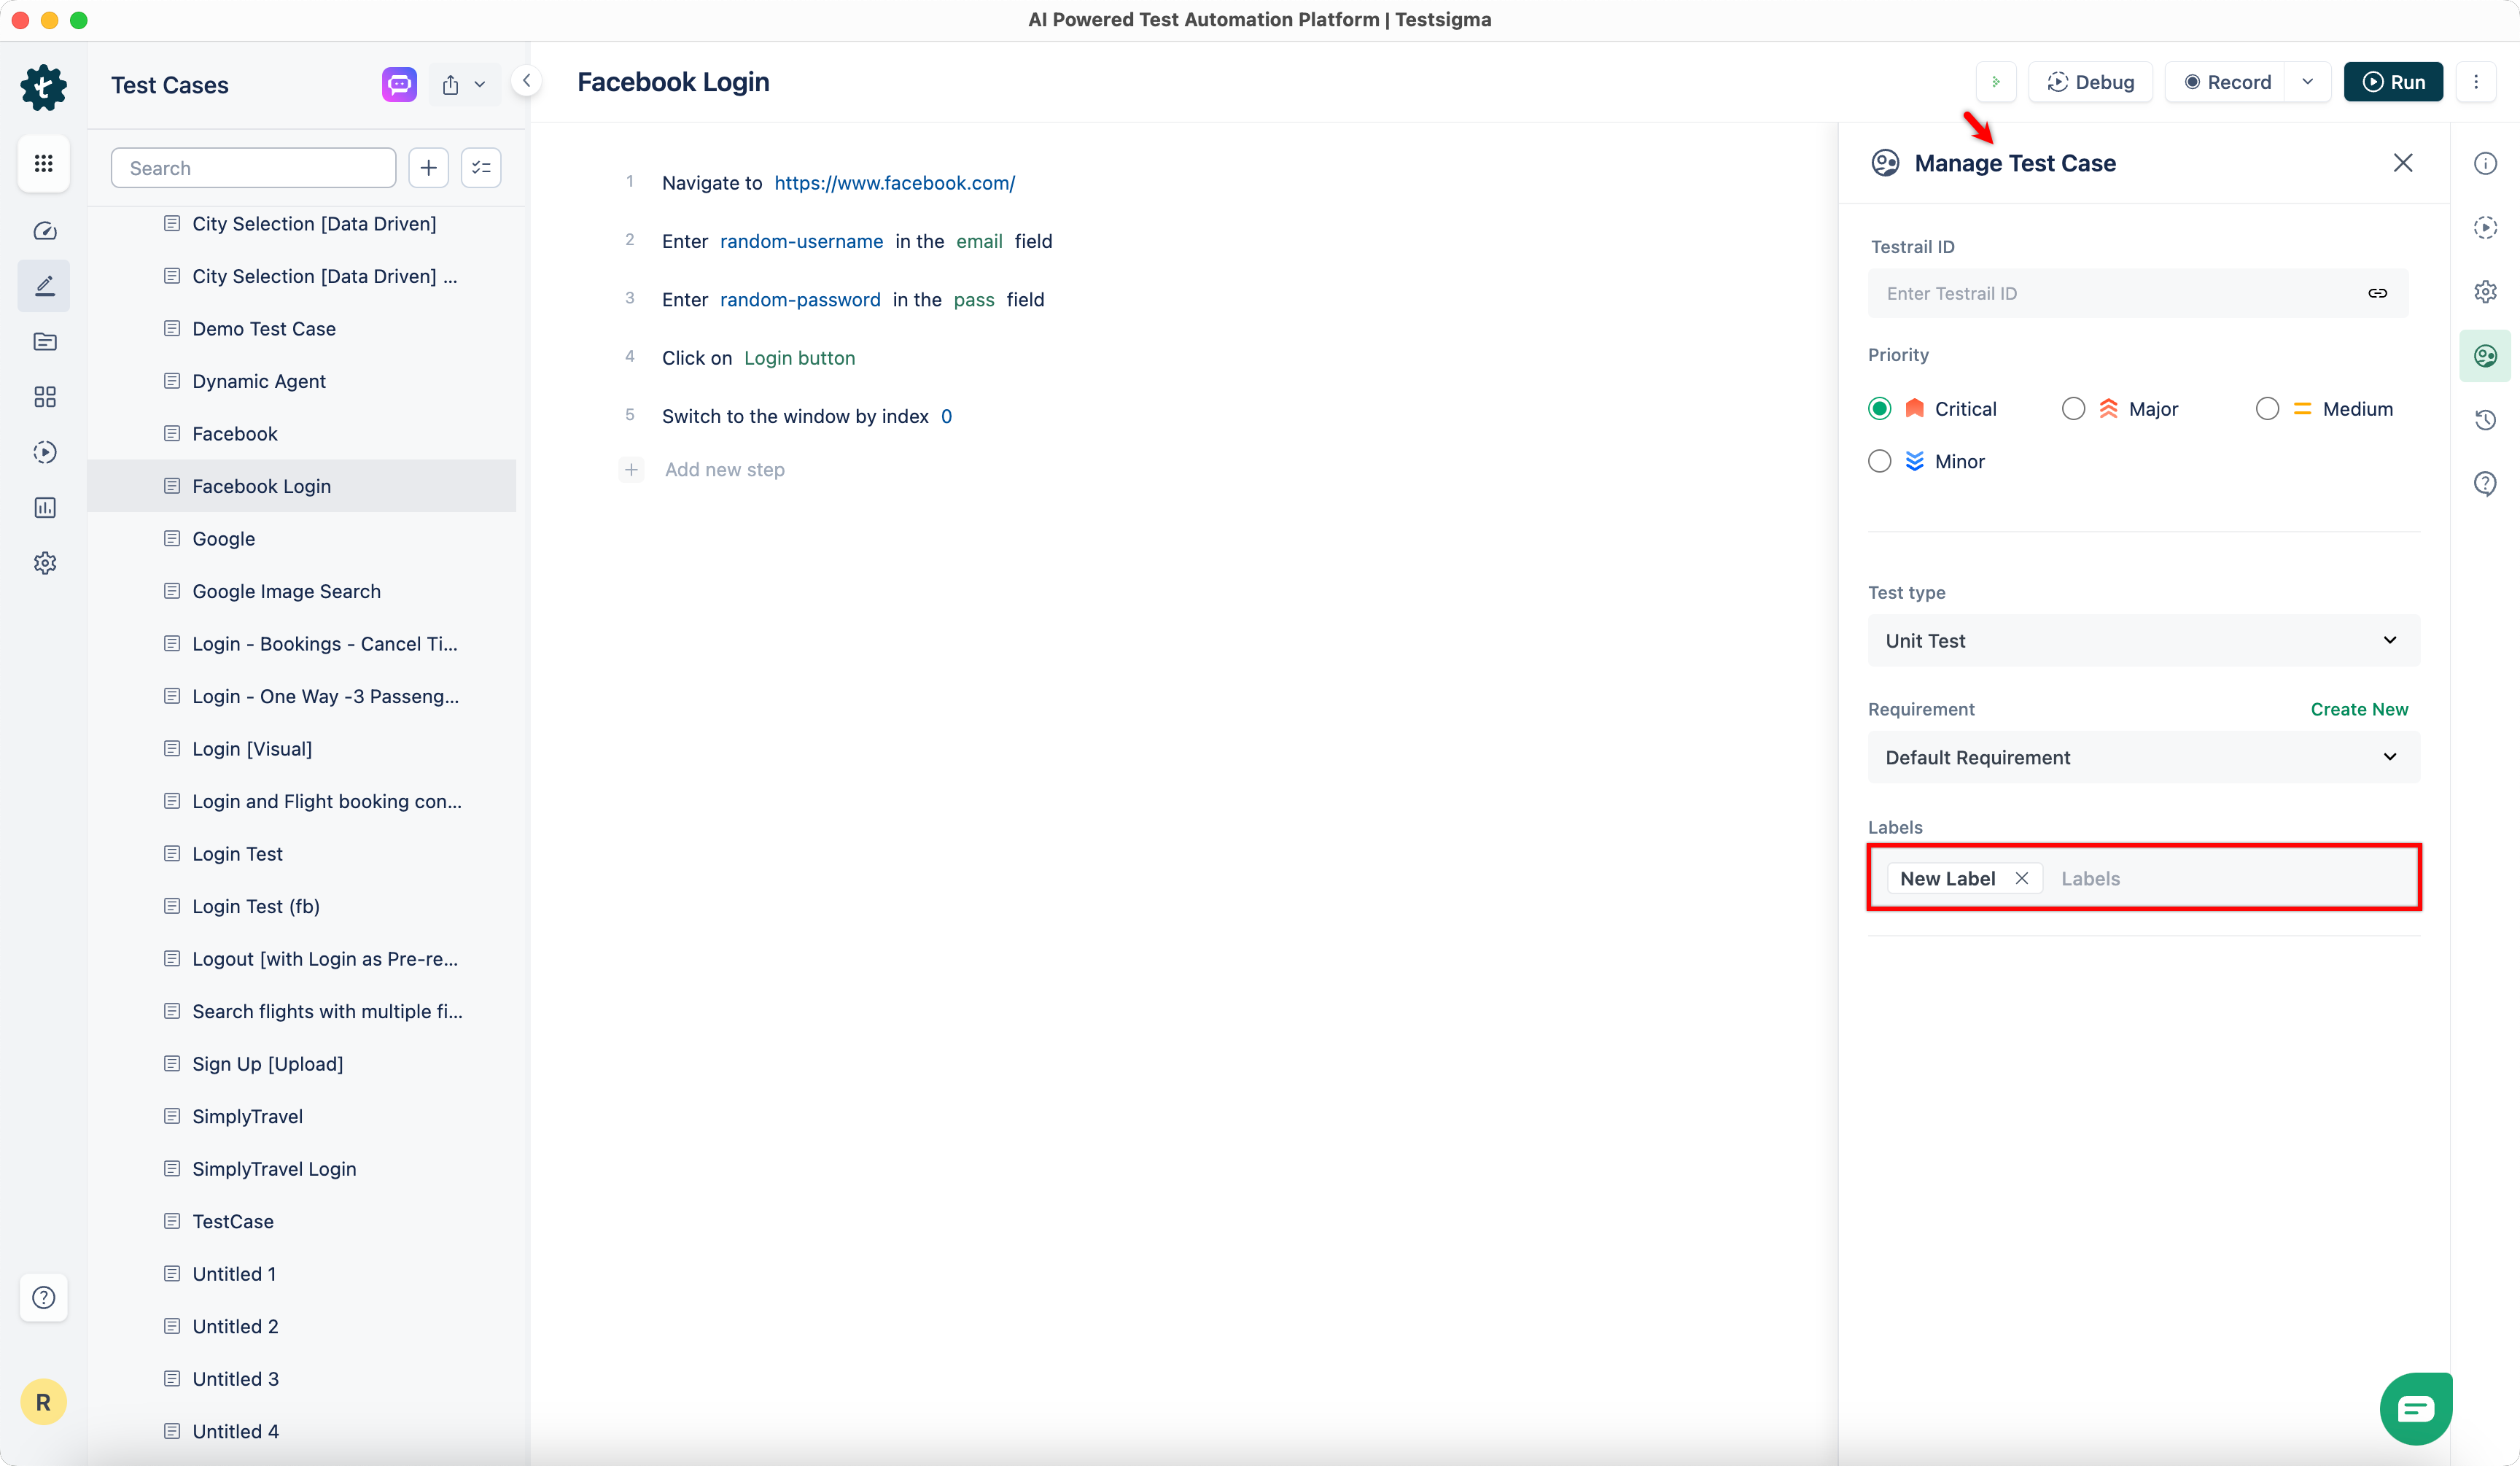
Create a test case or open an existing test case.
-
In the Utility Panel, click Manage Test Case, and scroll down to Labels.
-
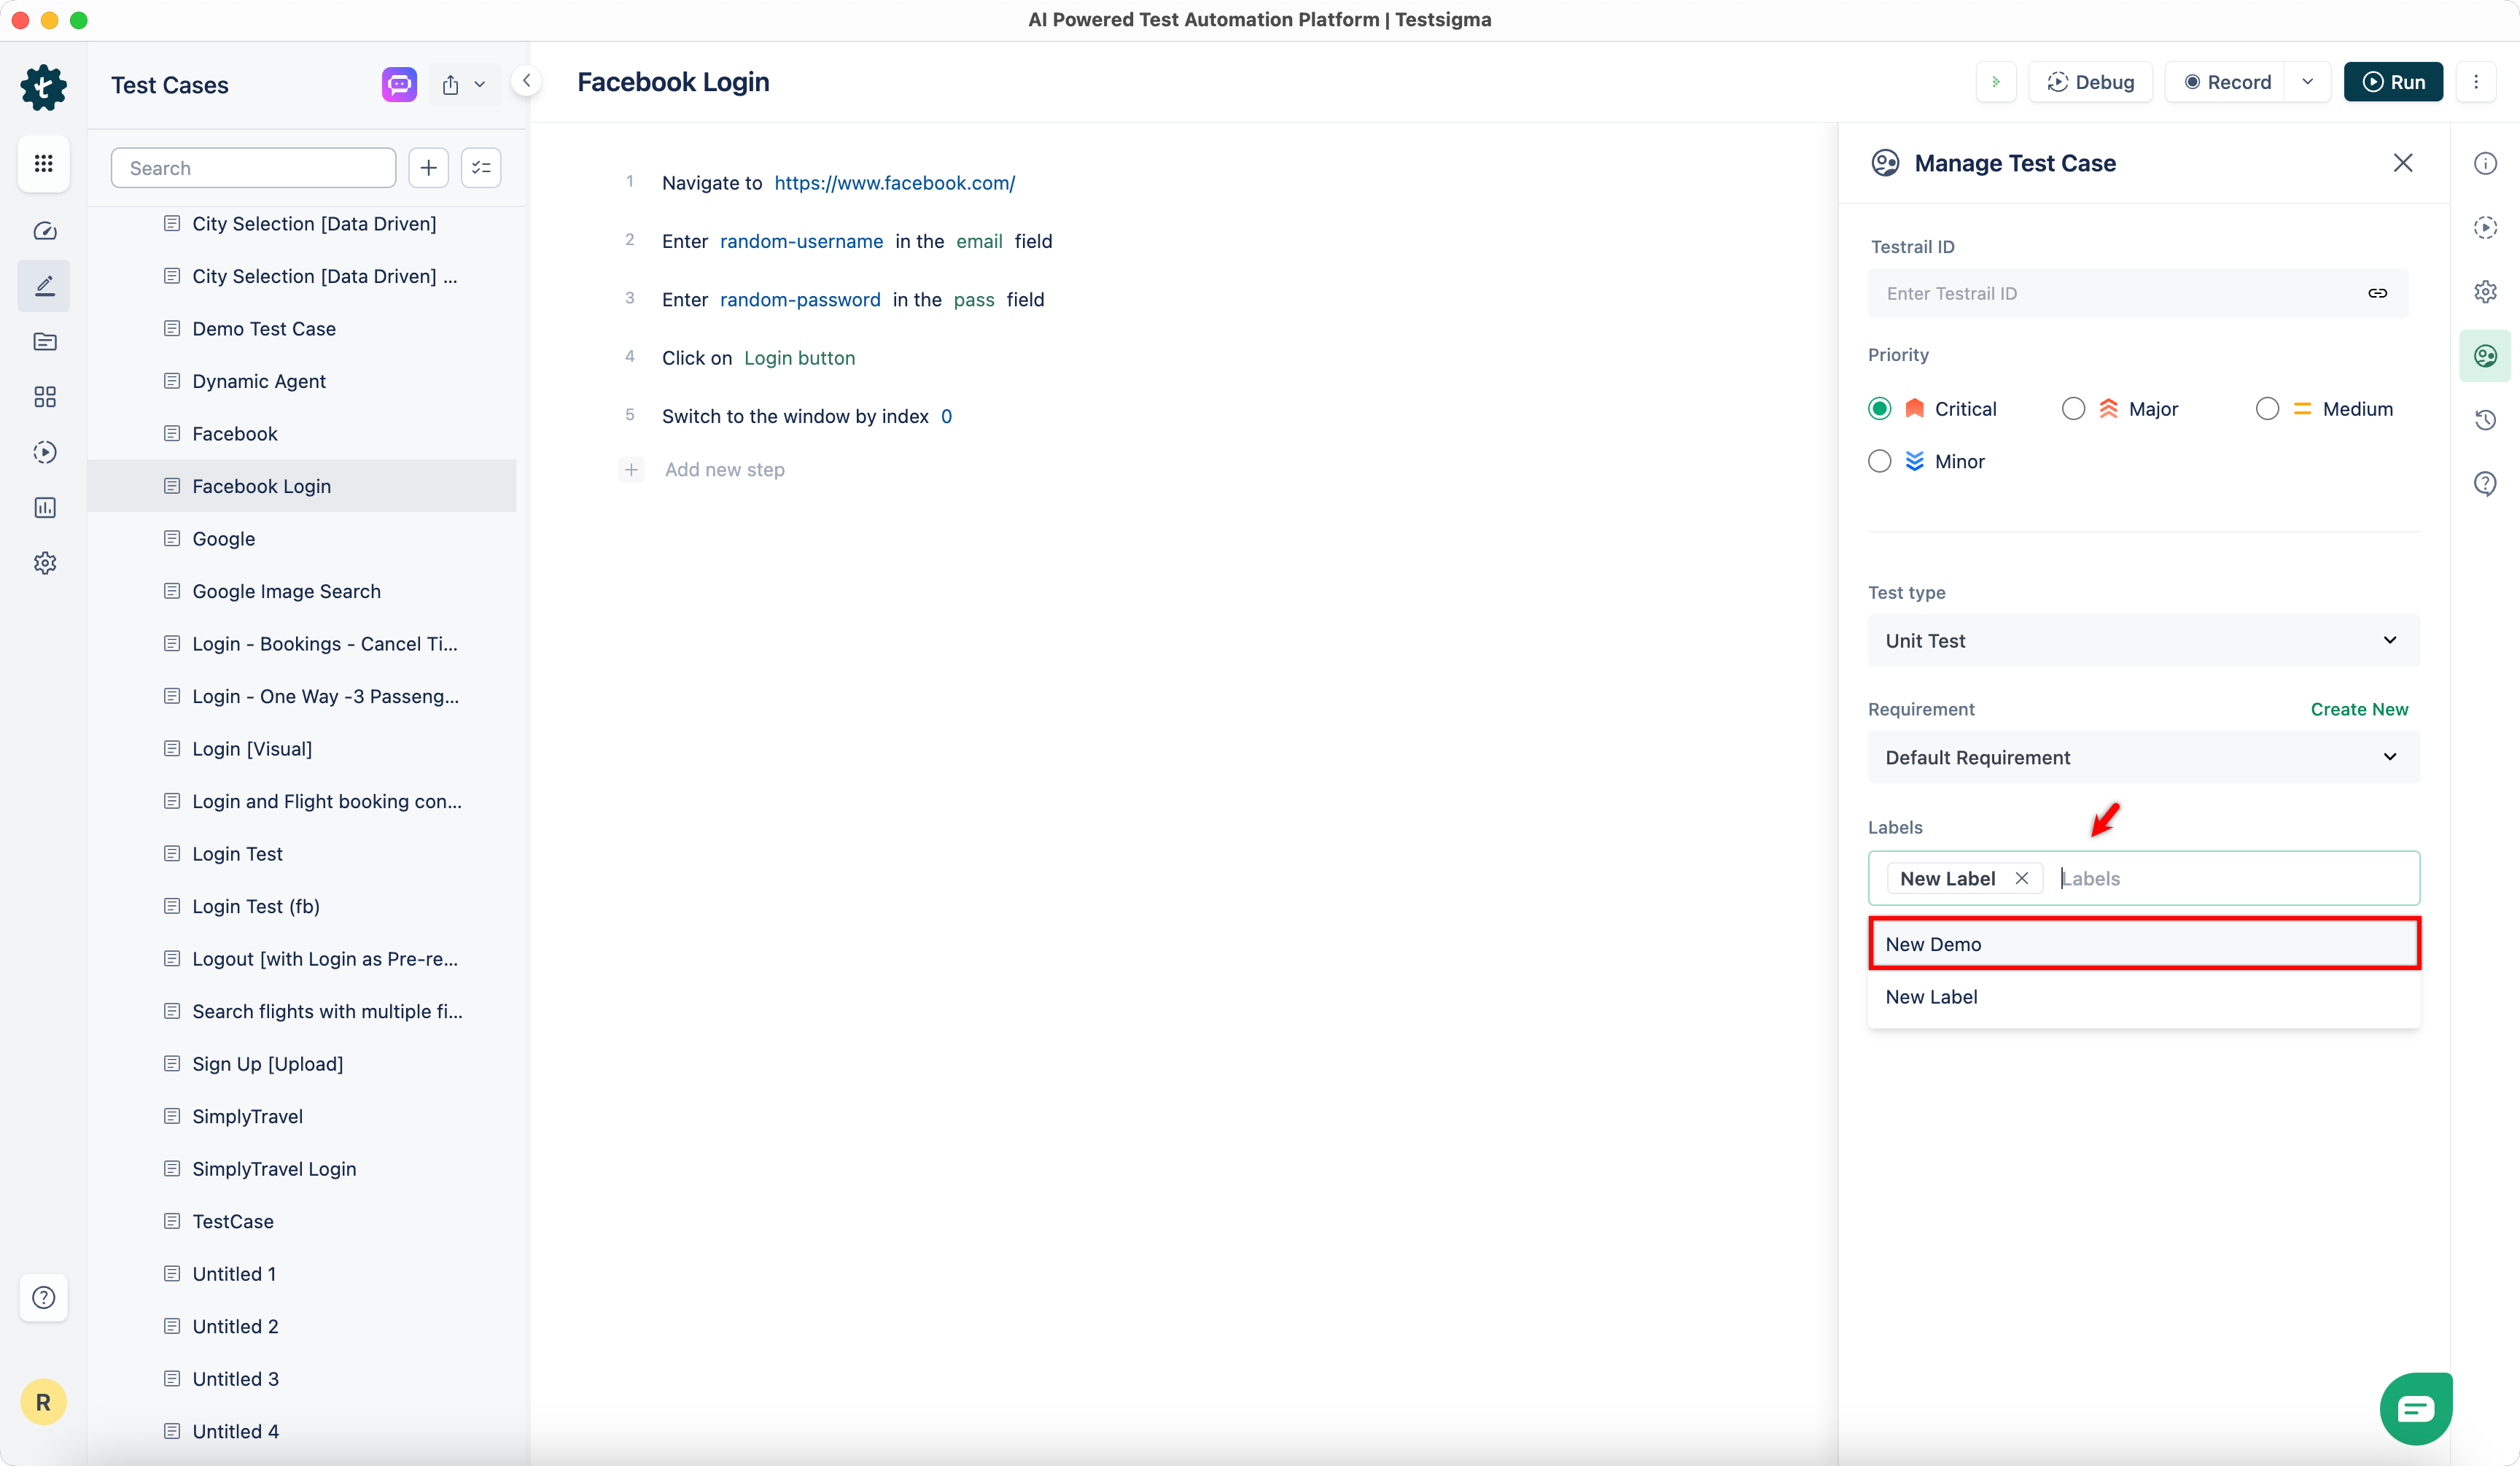
Click Labels, then select the labels you want to associate with the test case from the dropdown menu.
-
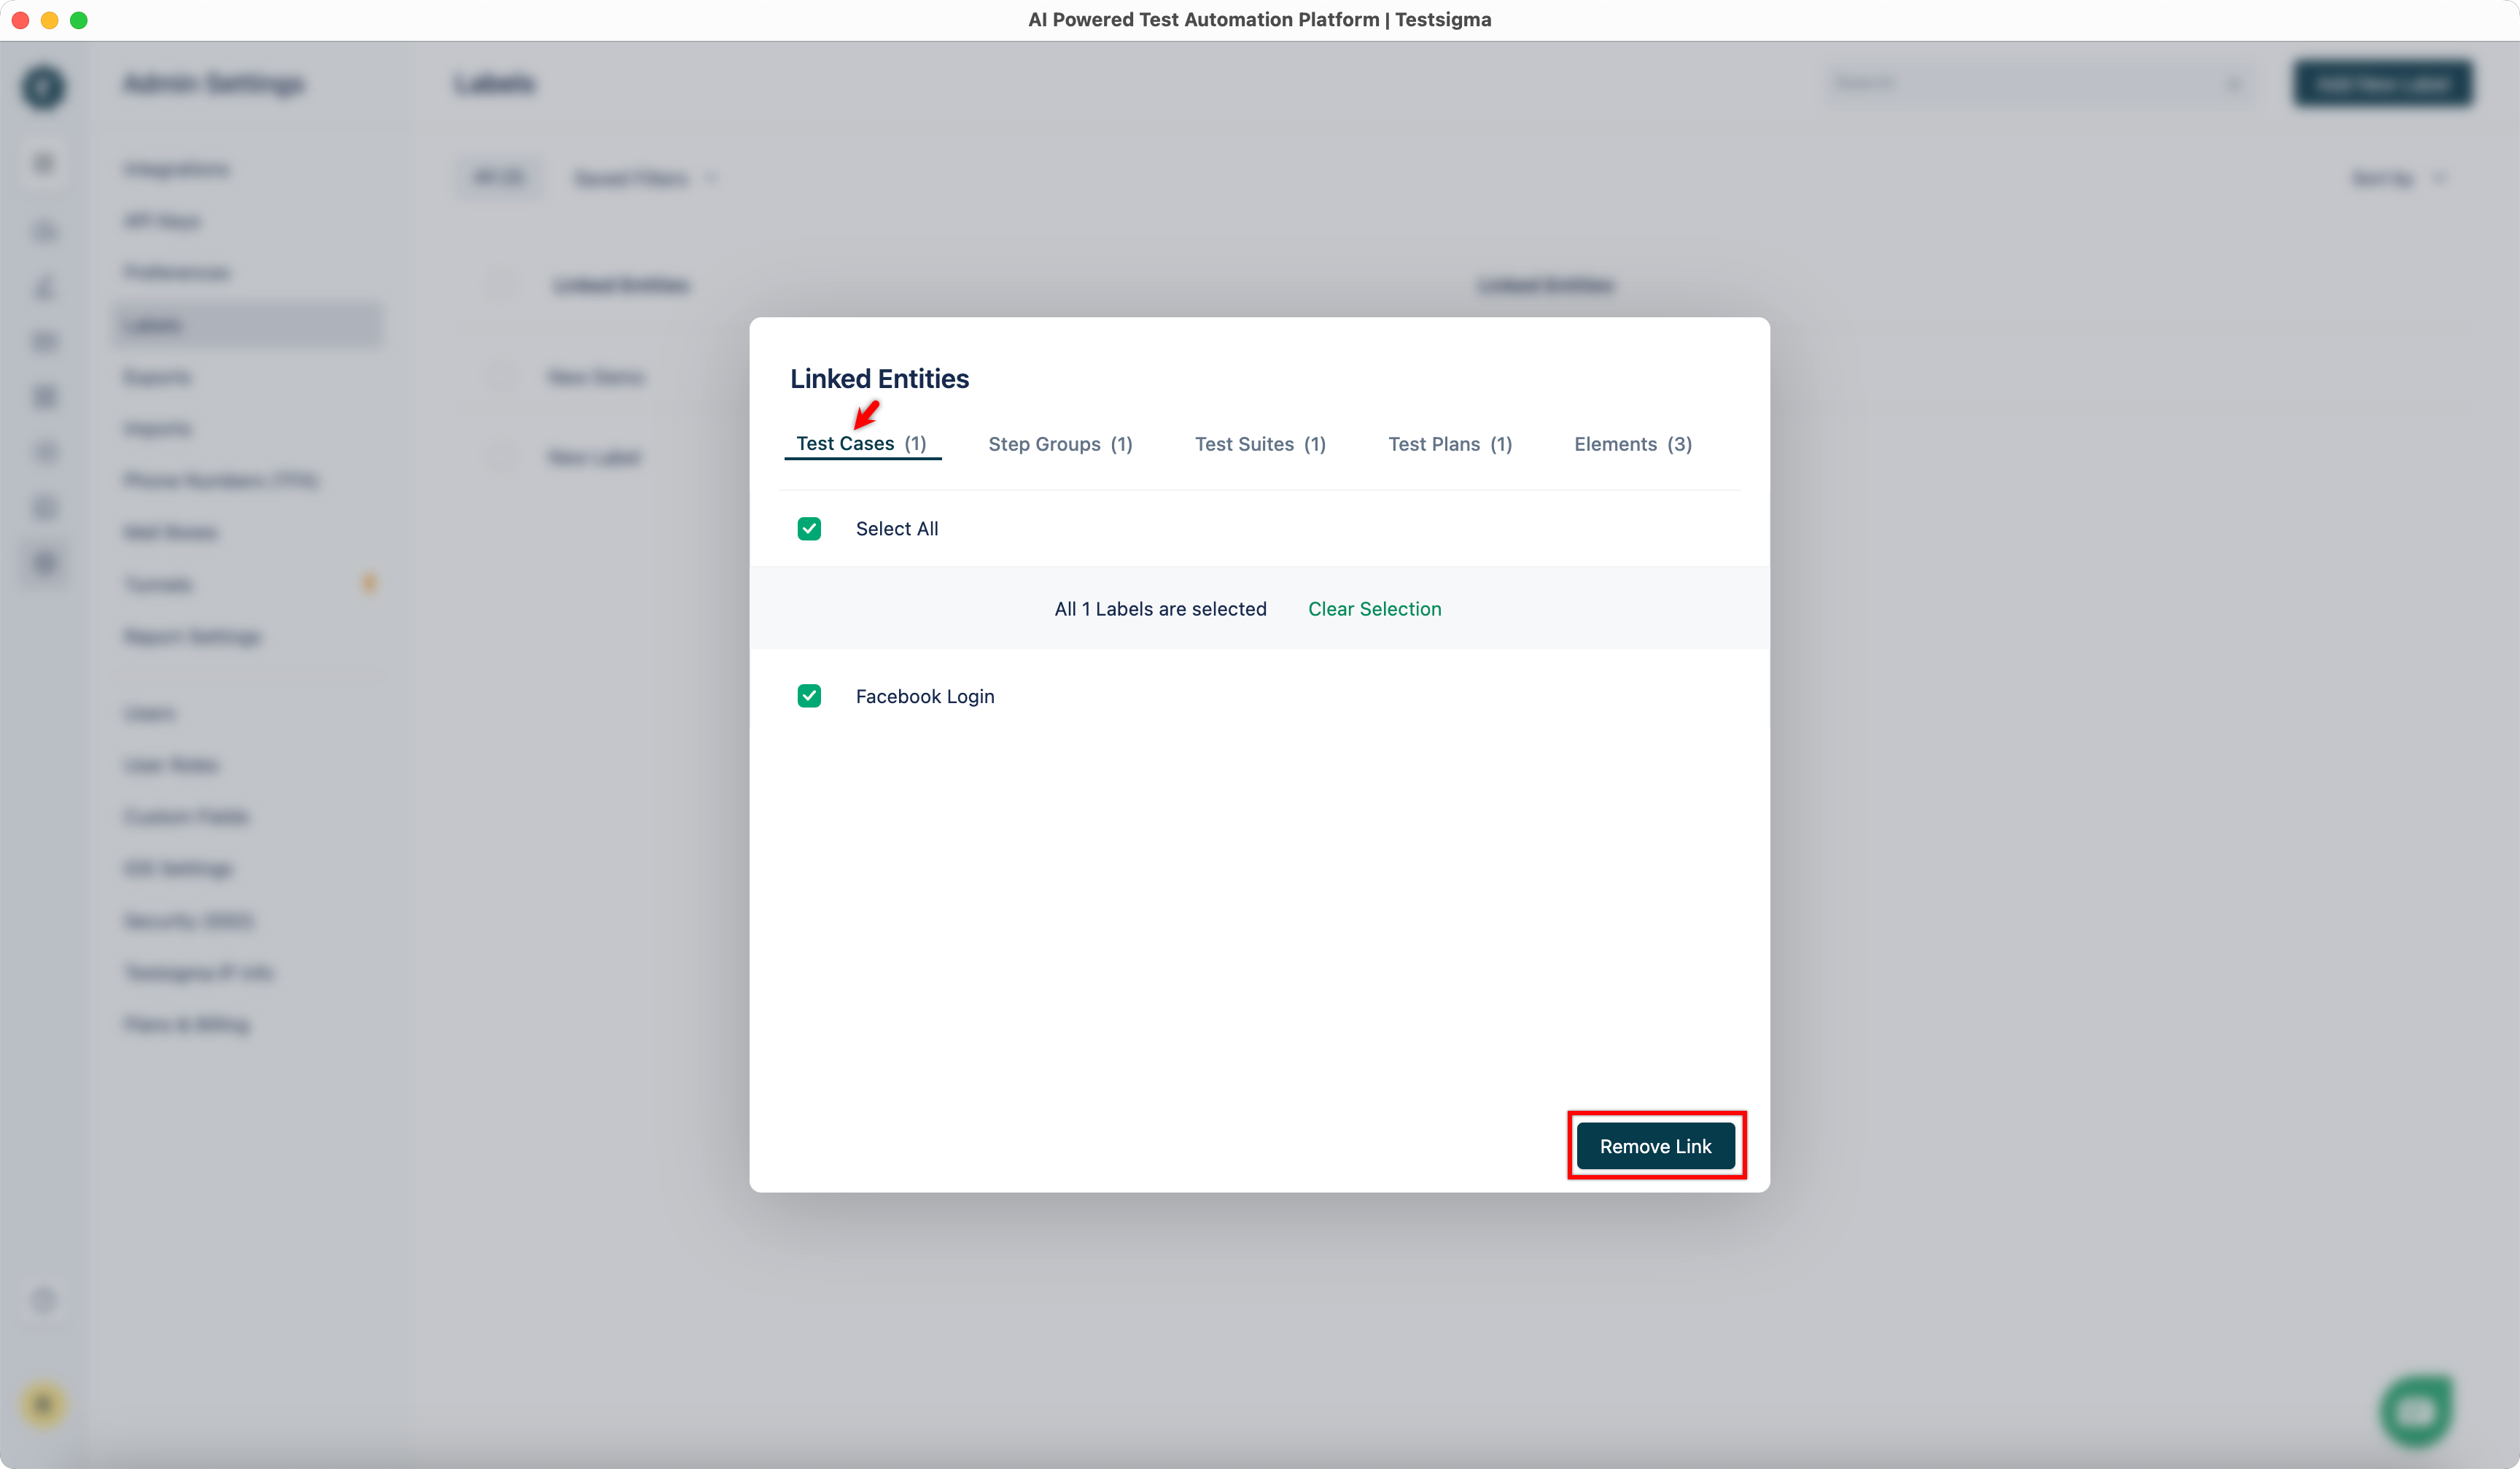
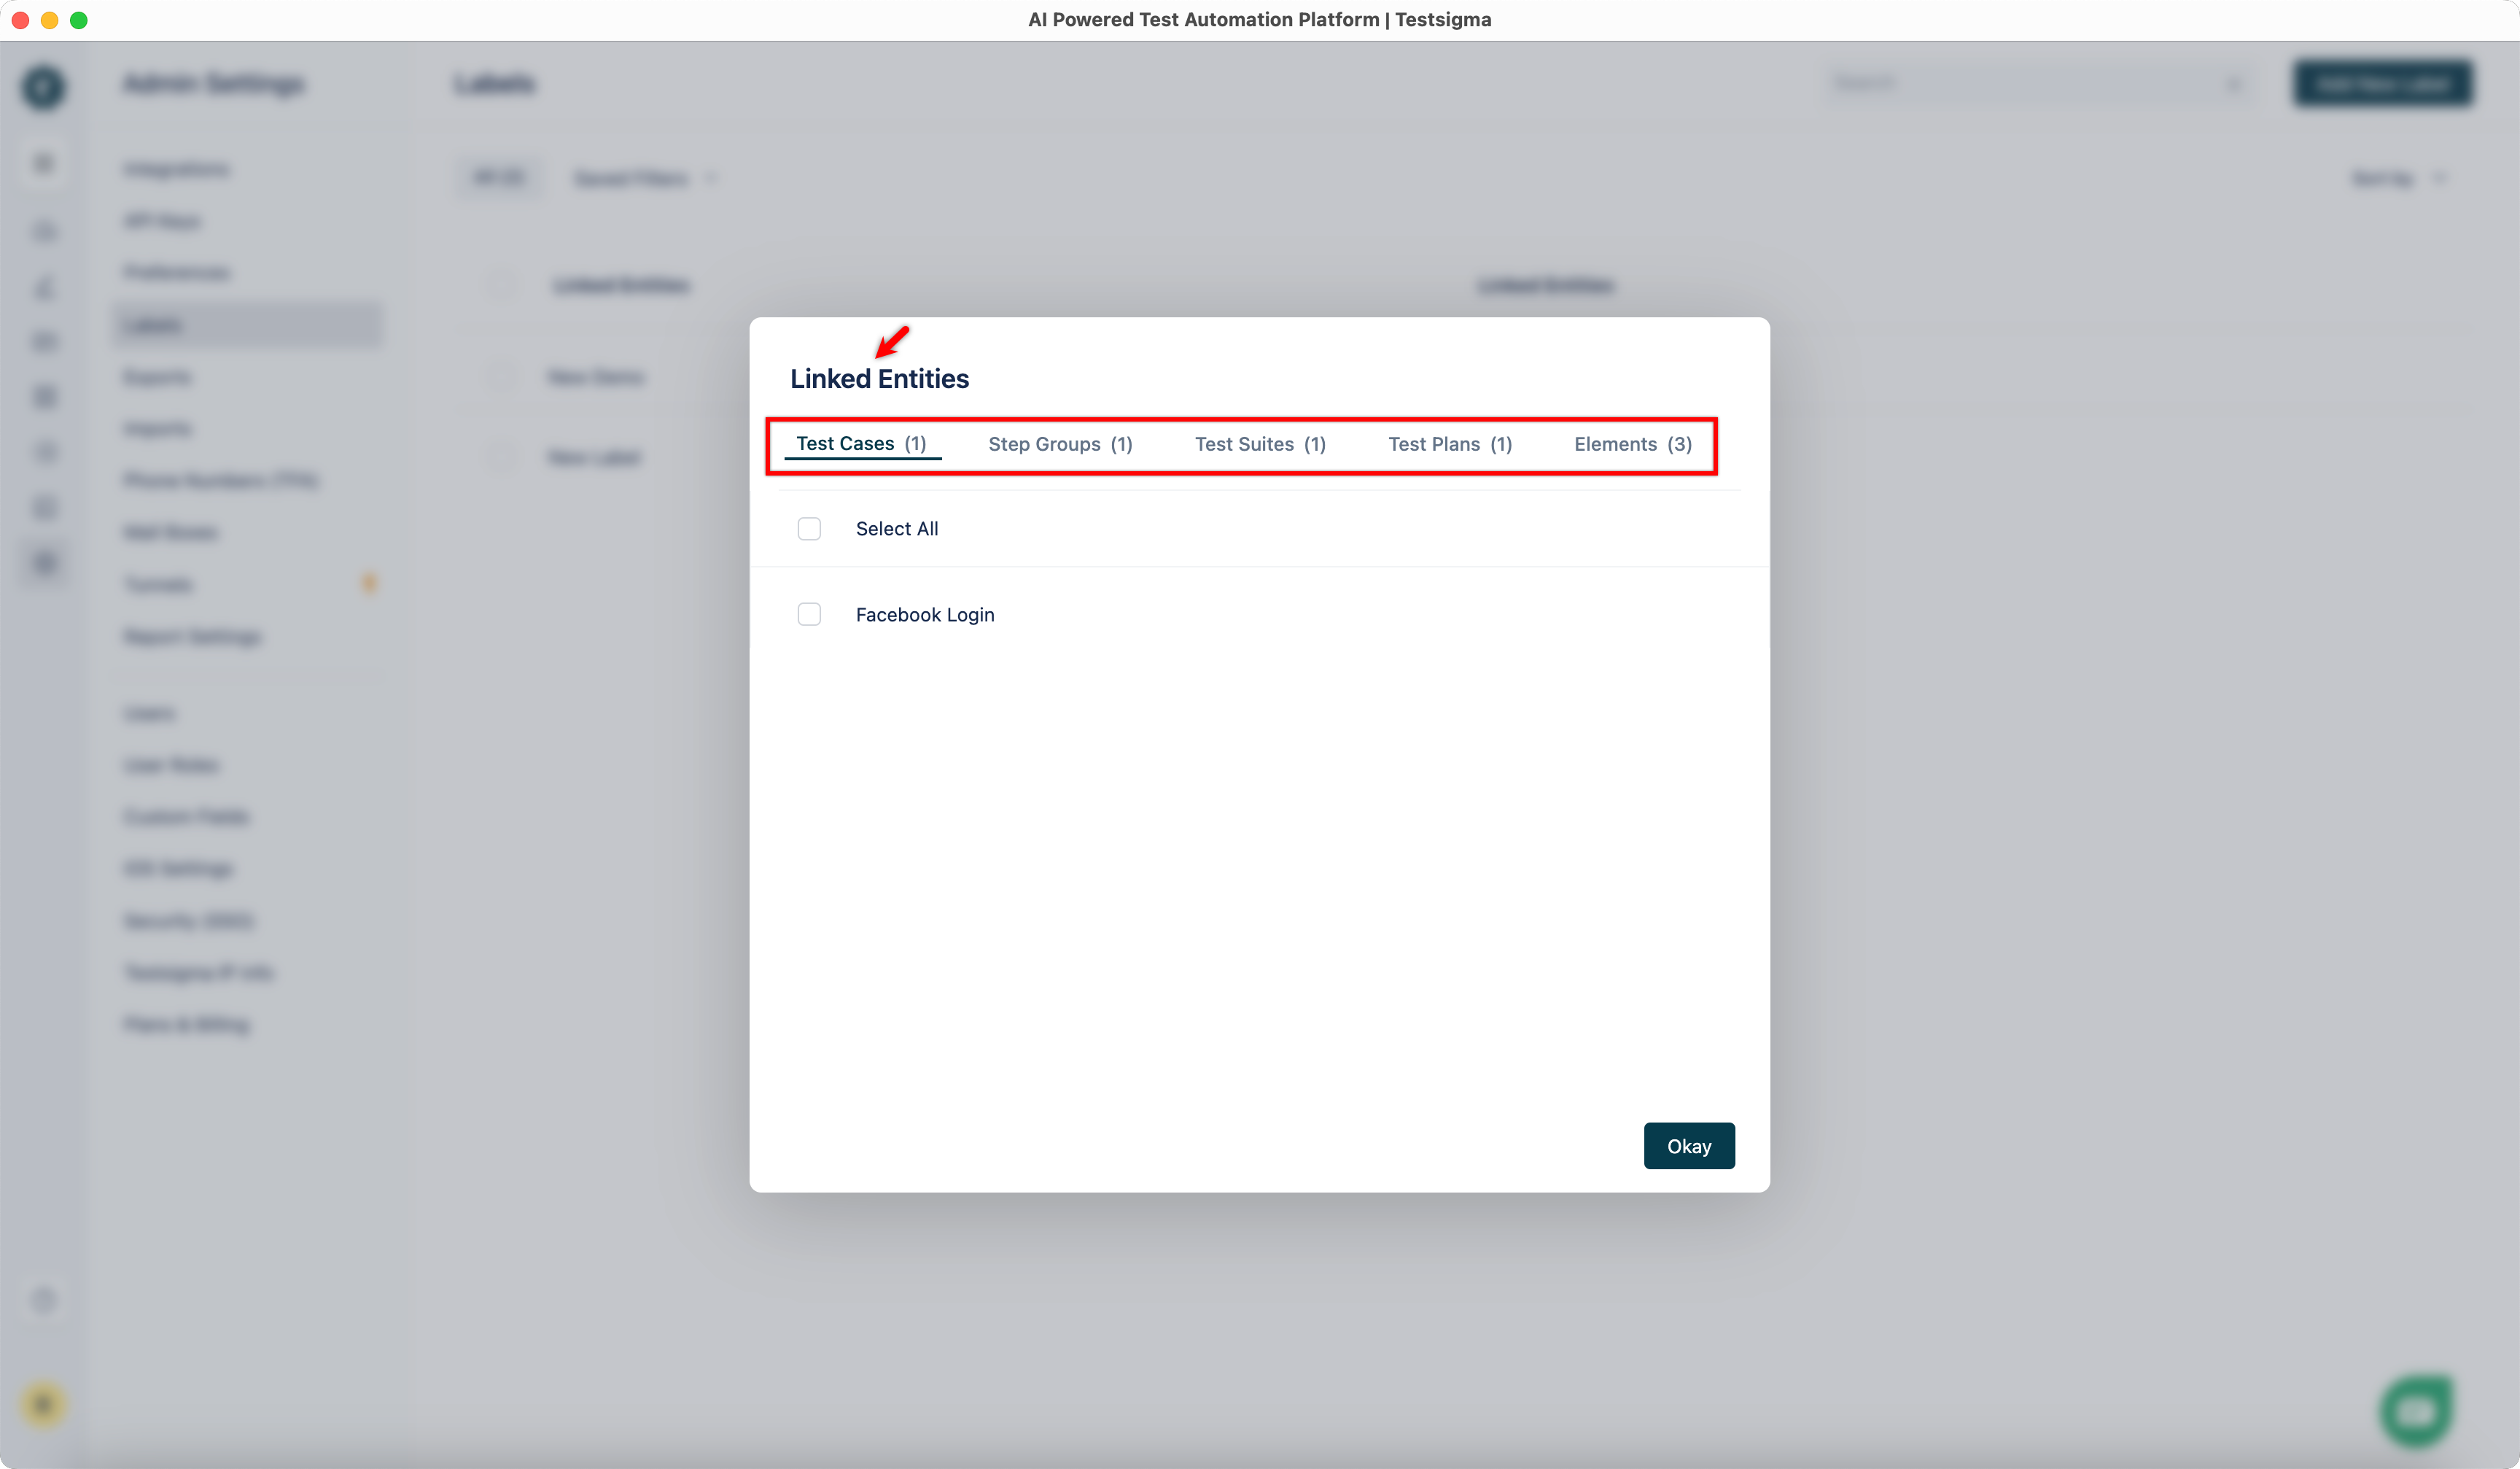
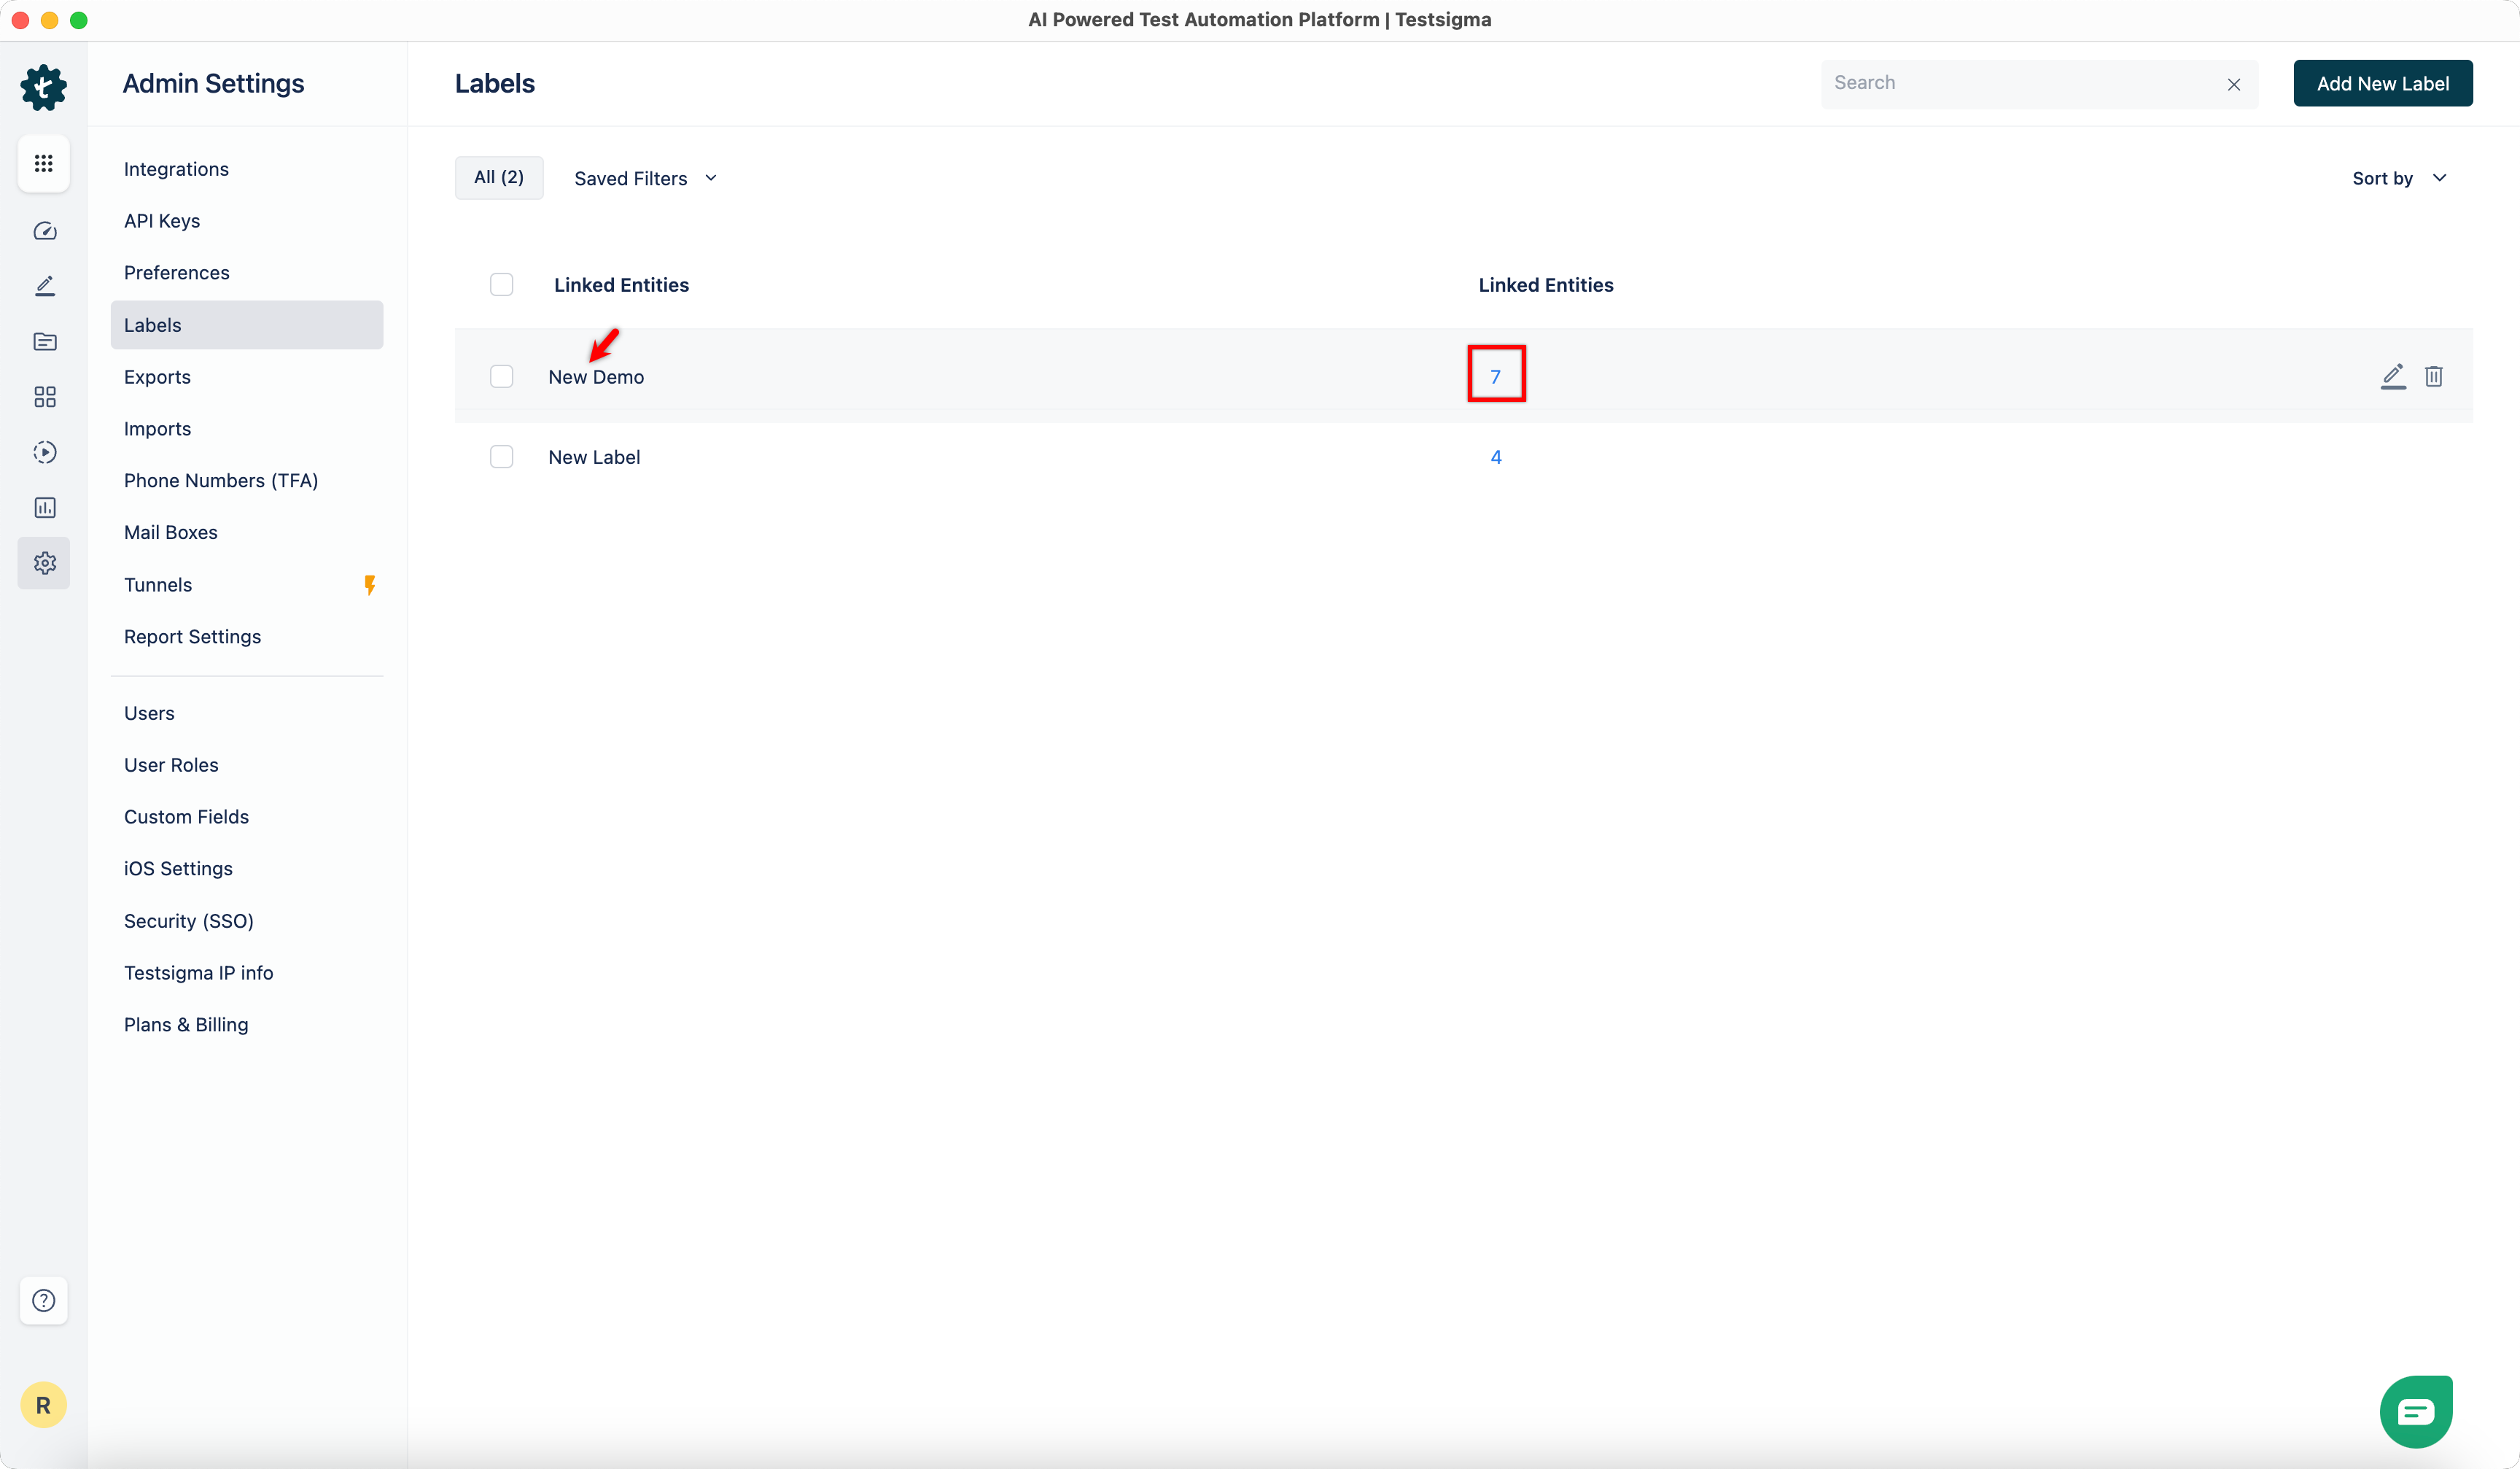
Now go to Settings > Labels, select a label, and click the number corresponding to it to view assets associated with a label.
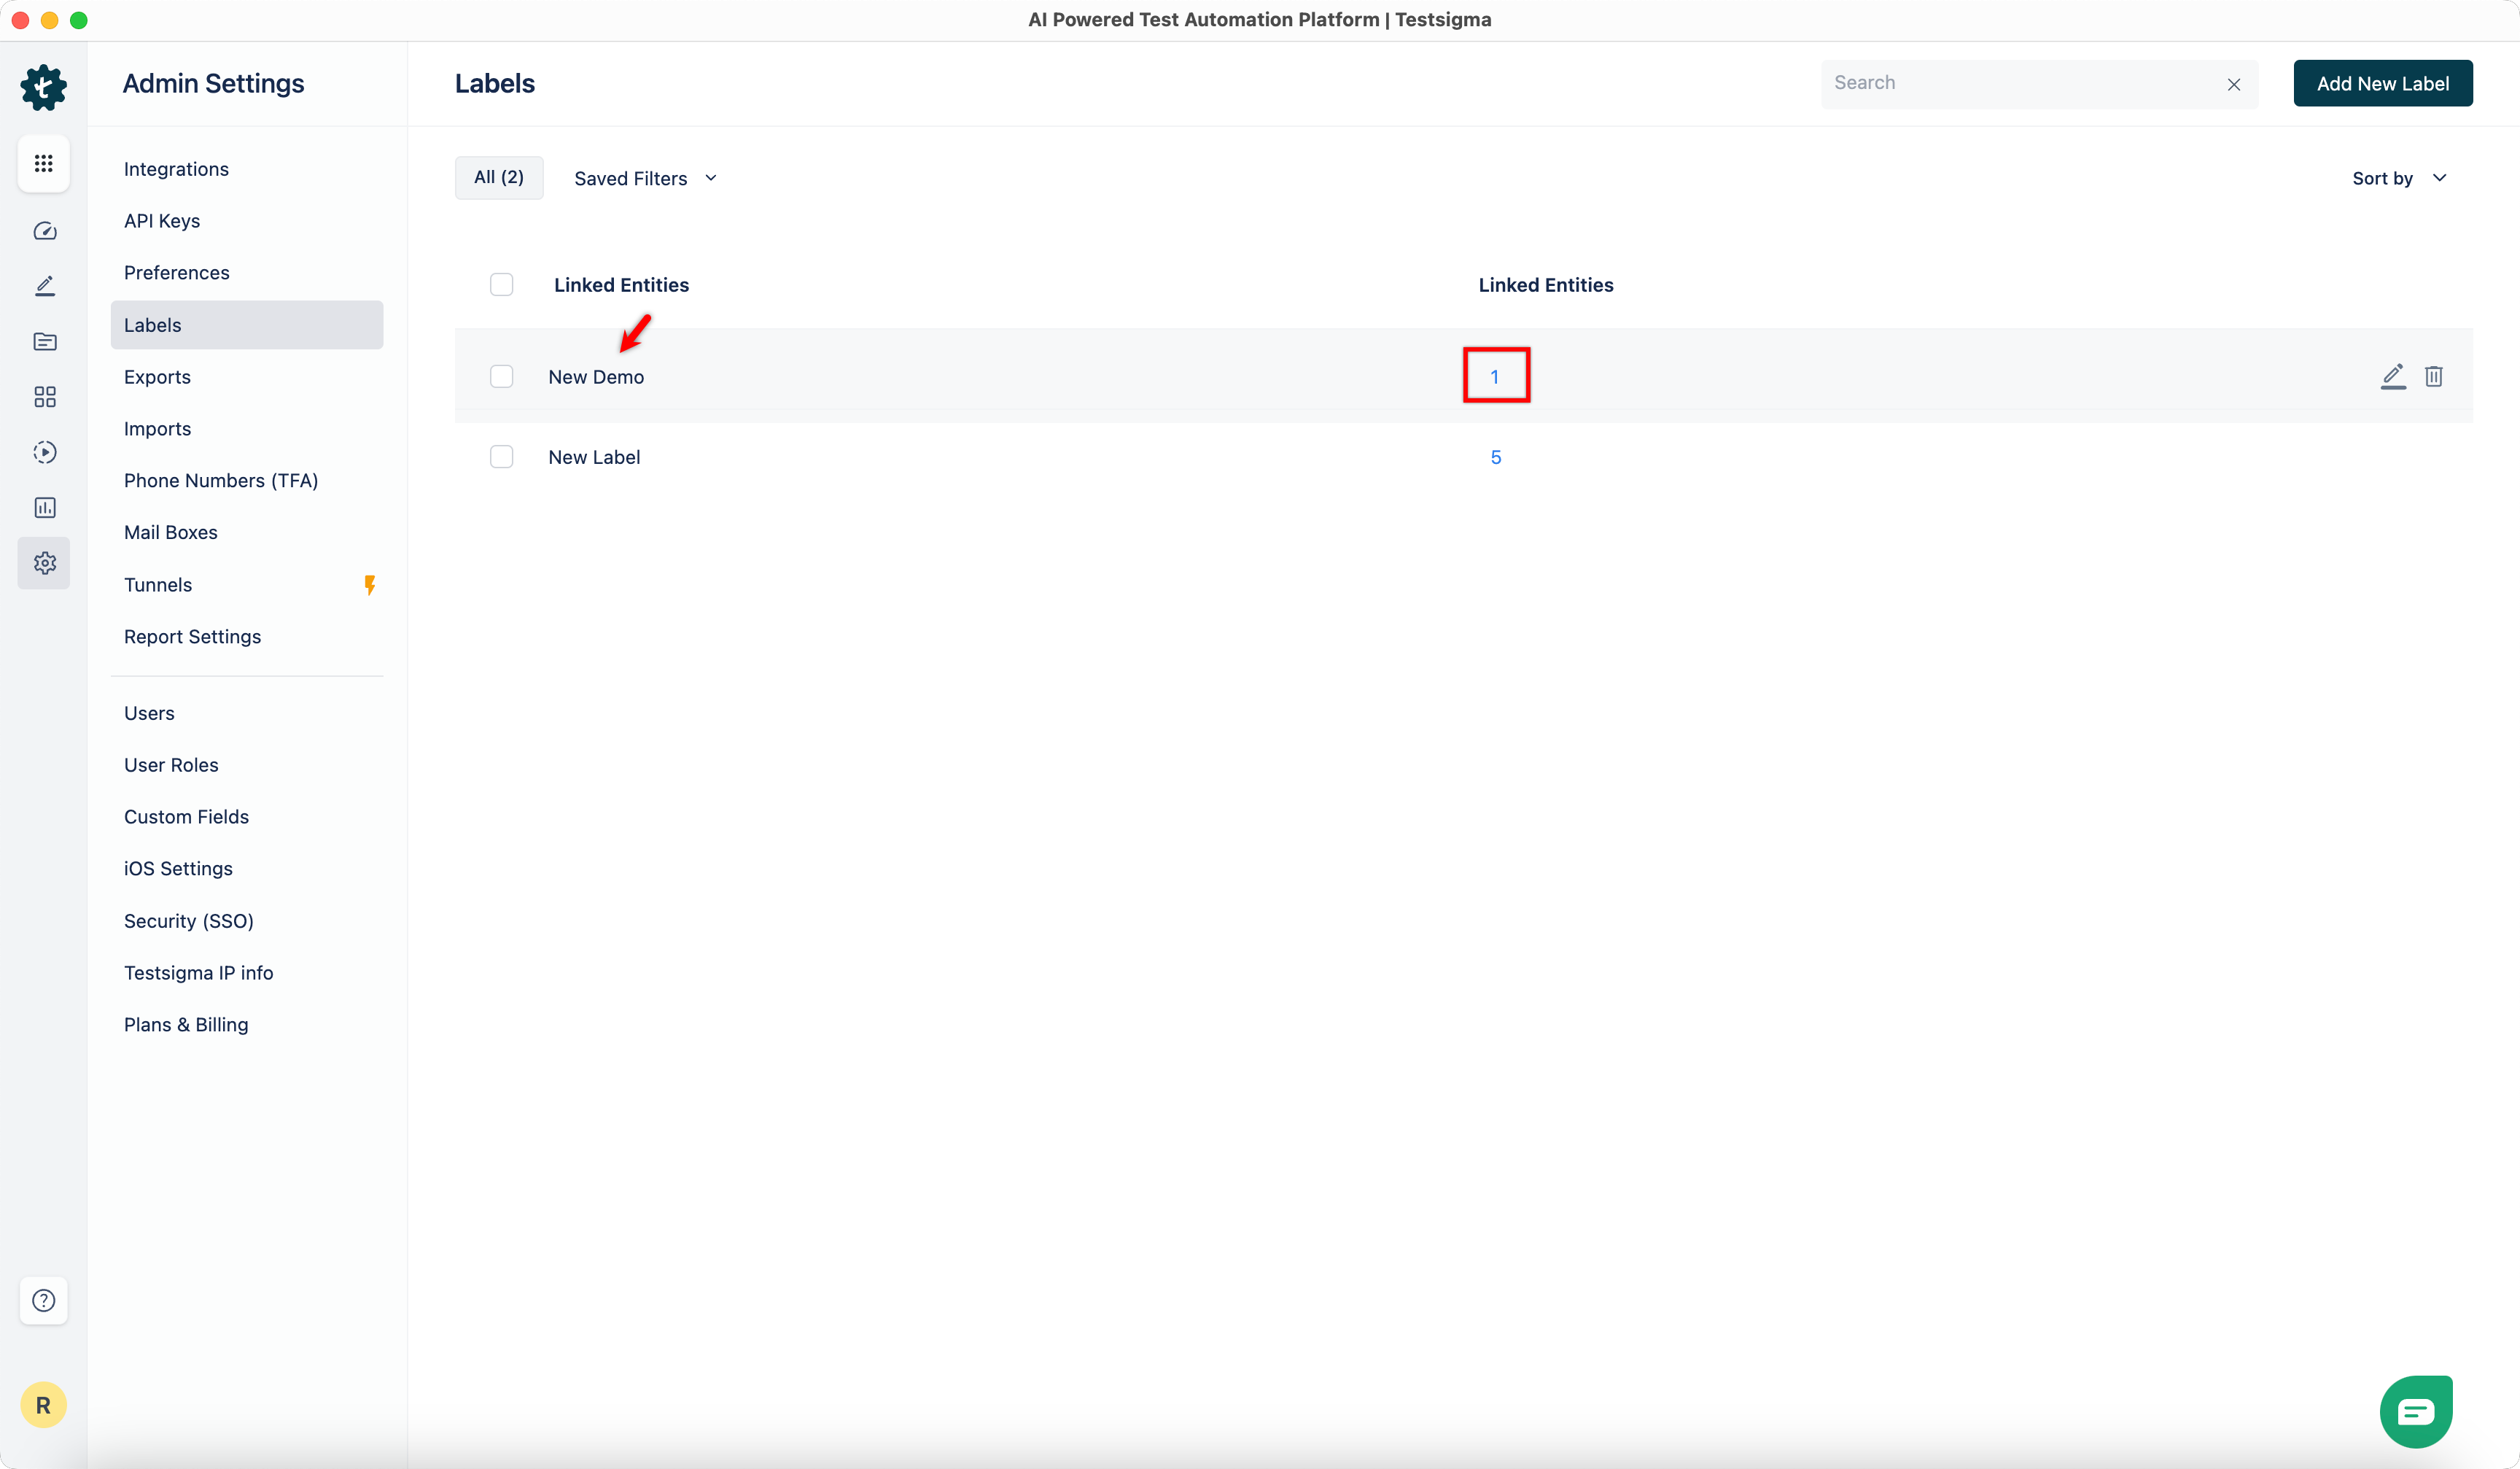
- All entities linked to a label, such as Test Cases, Elements, Step Groups, Test Suites, and Test Plans, appear in this dialog.
Steps to Unlink Labels from Entities
Section titled “Steps to Unlink Labels from Entities”-
From the left navigation bar, go to Settings > Labels, select a label, and click the number corresponding to it to view the associated assets.
-
In the Linked Entities dialog, go to the Entity tab, select the assets you want to unlink, and click Remove Link.