Elements
Record Single Element Using Recorder
In an iOS project in Testsigma, you can selectively capture elements one at a time using the Testsigma recorder. This article discusses how to capture single element using recorder.
Prerequisites
Before you begin, ensure that:
- You have referred to the documentation on creating projects.
- You have referred to the documentation on creating applications.
- You have installed the Testsigma Chrome Extension. For more information on installing Testsigma Chrome Extension, refer to the documentation on Testsigma Chrome Extension.
- You have an iOS application that is available for testing.
Steps to Record an Element
Section titled “Steps to Record an Element”-
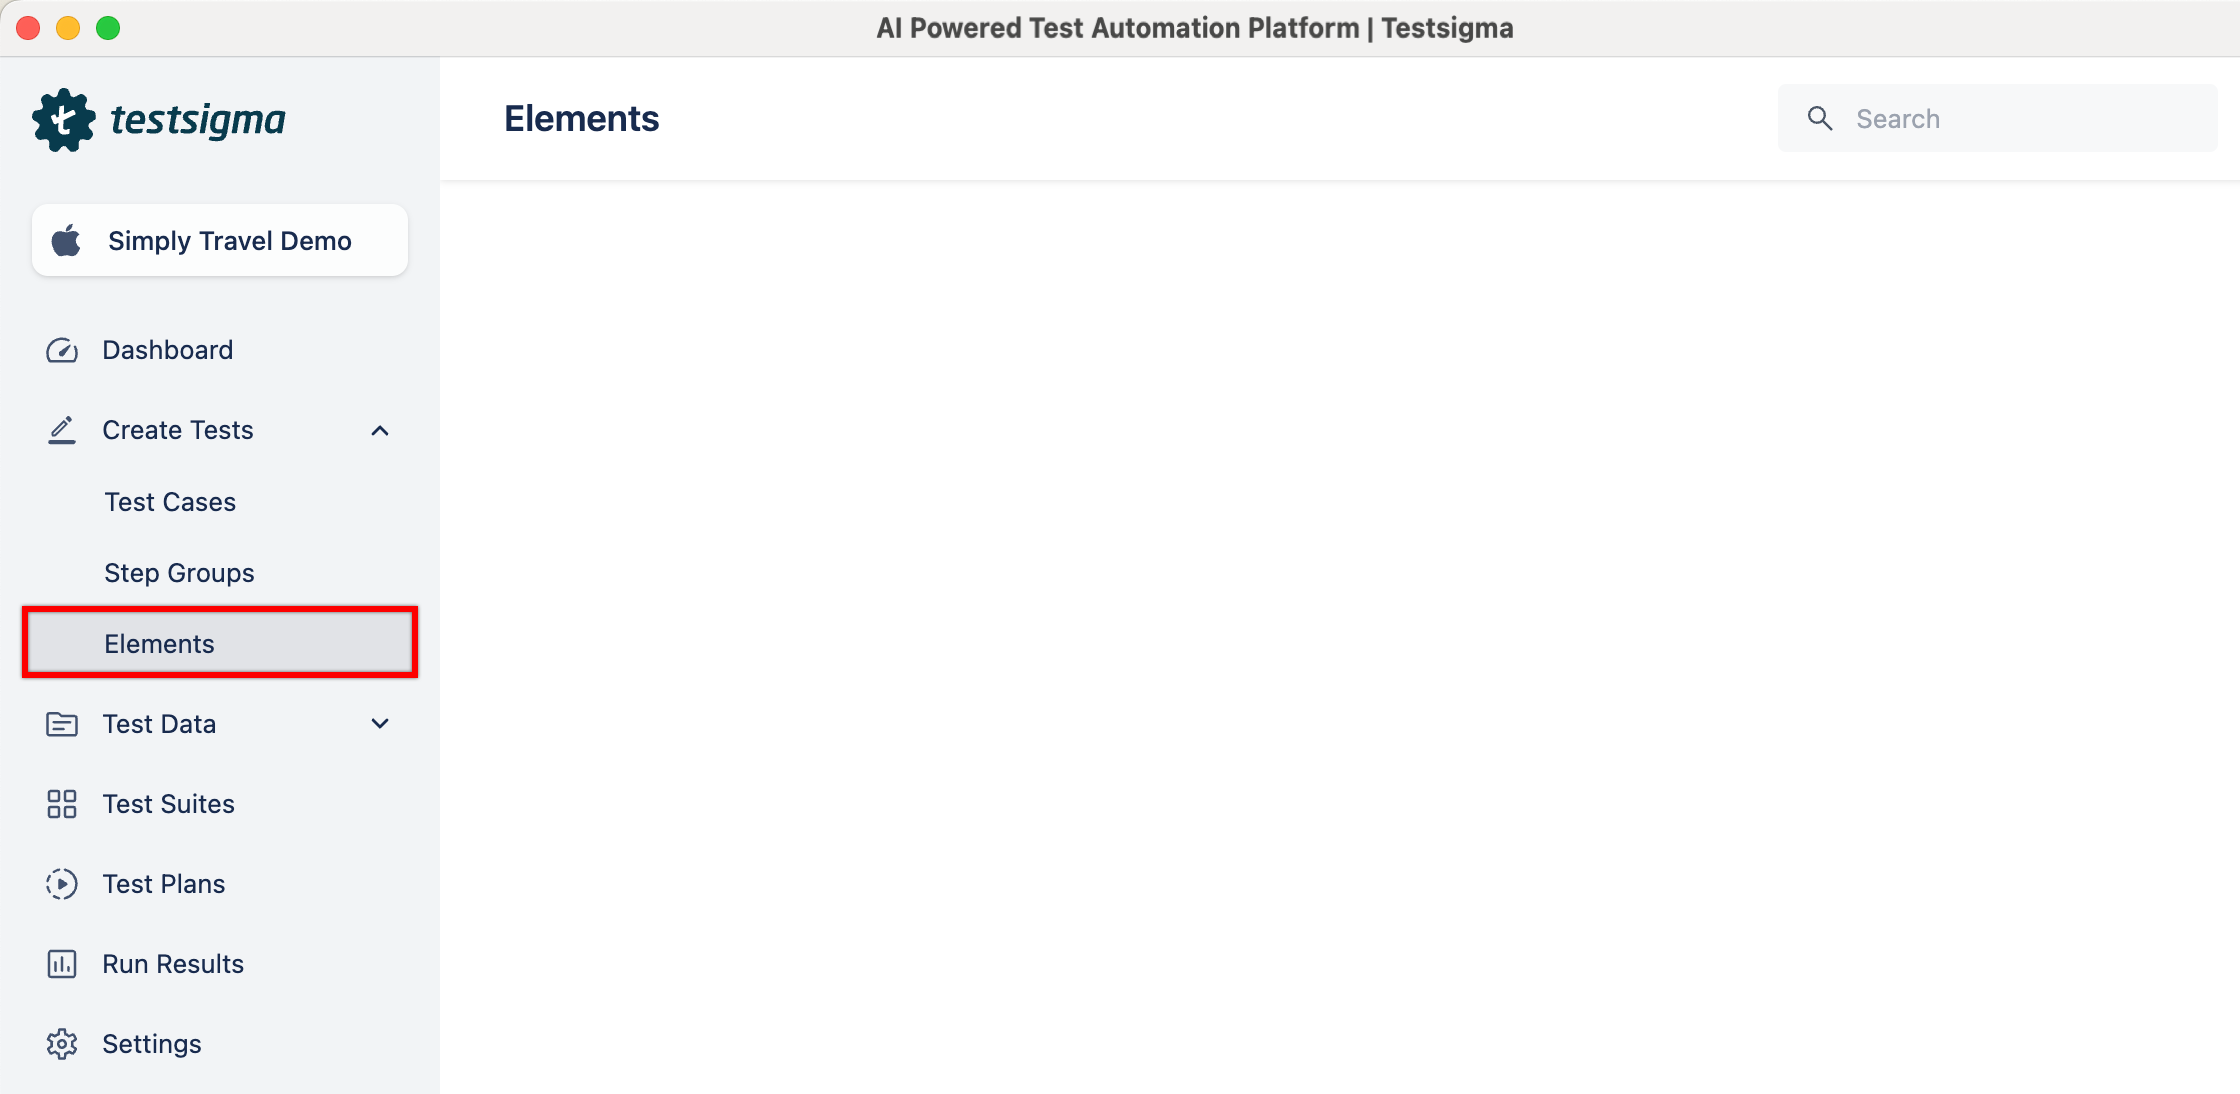
From the left navigation bar, go to Create Tests > Elements.
-
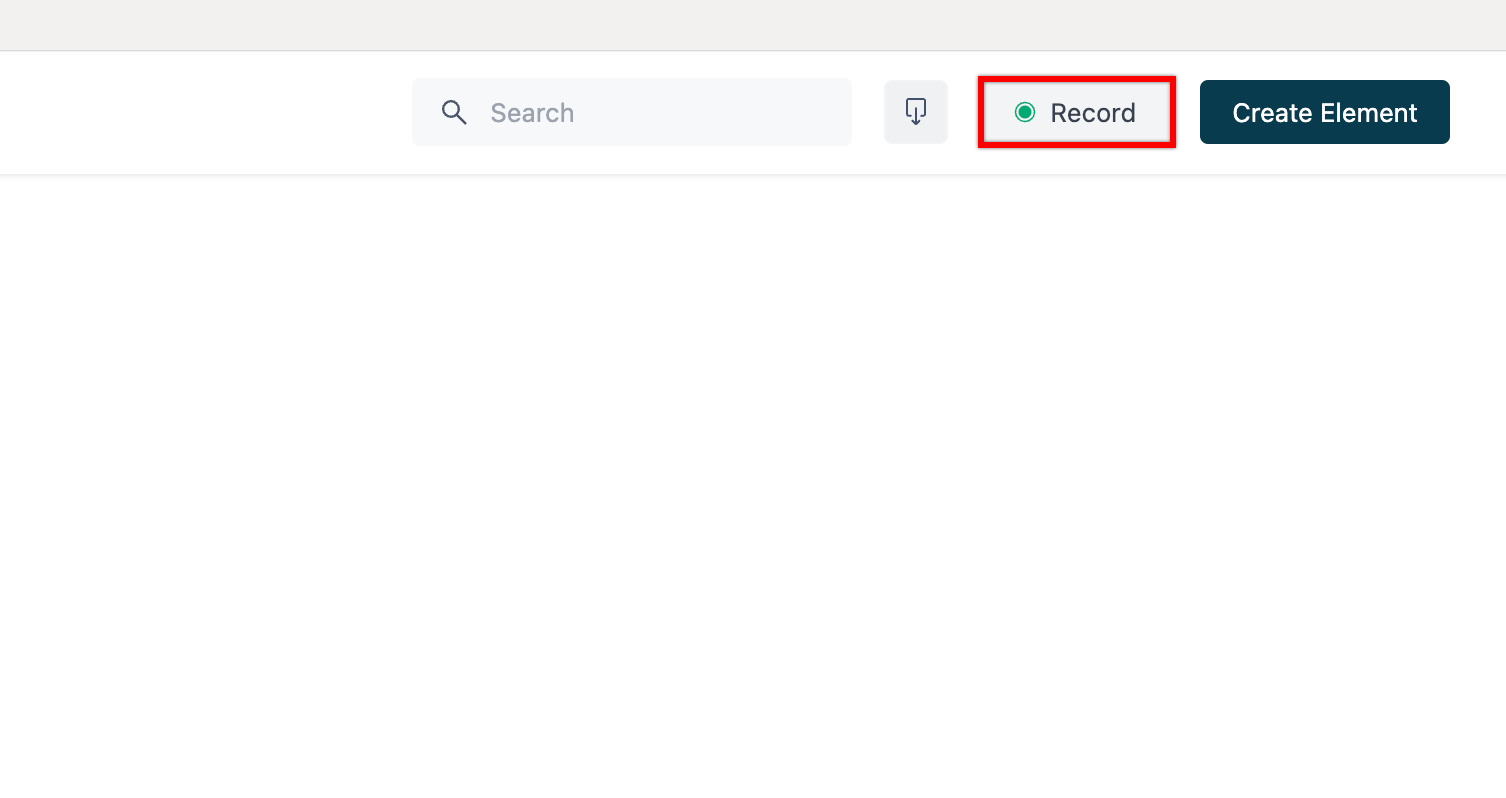
Click on Record.
-
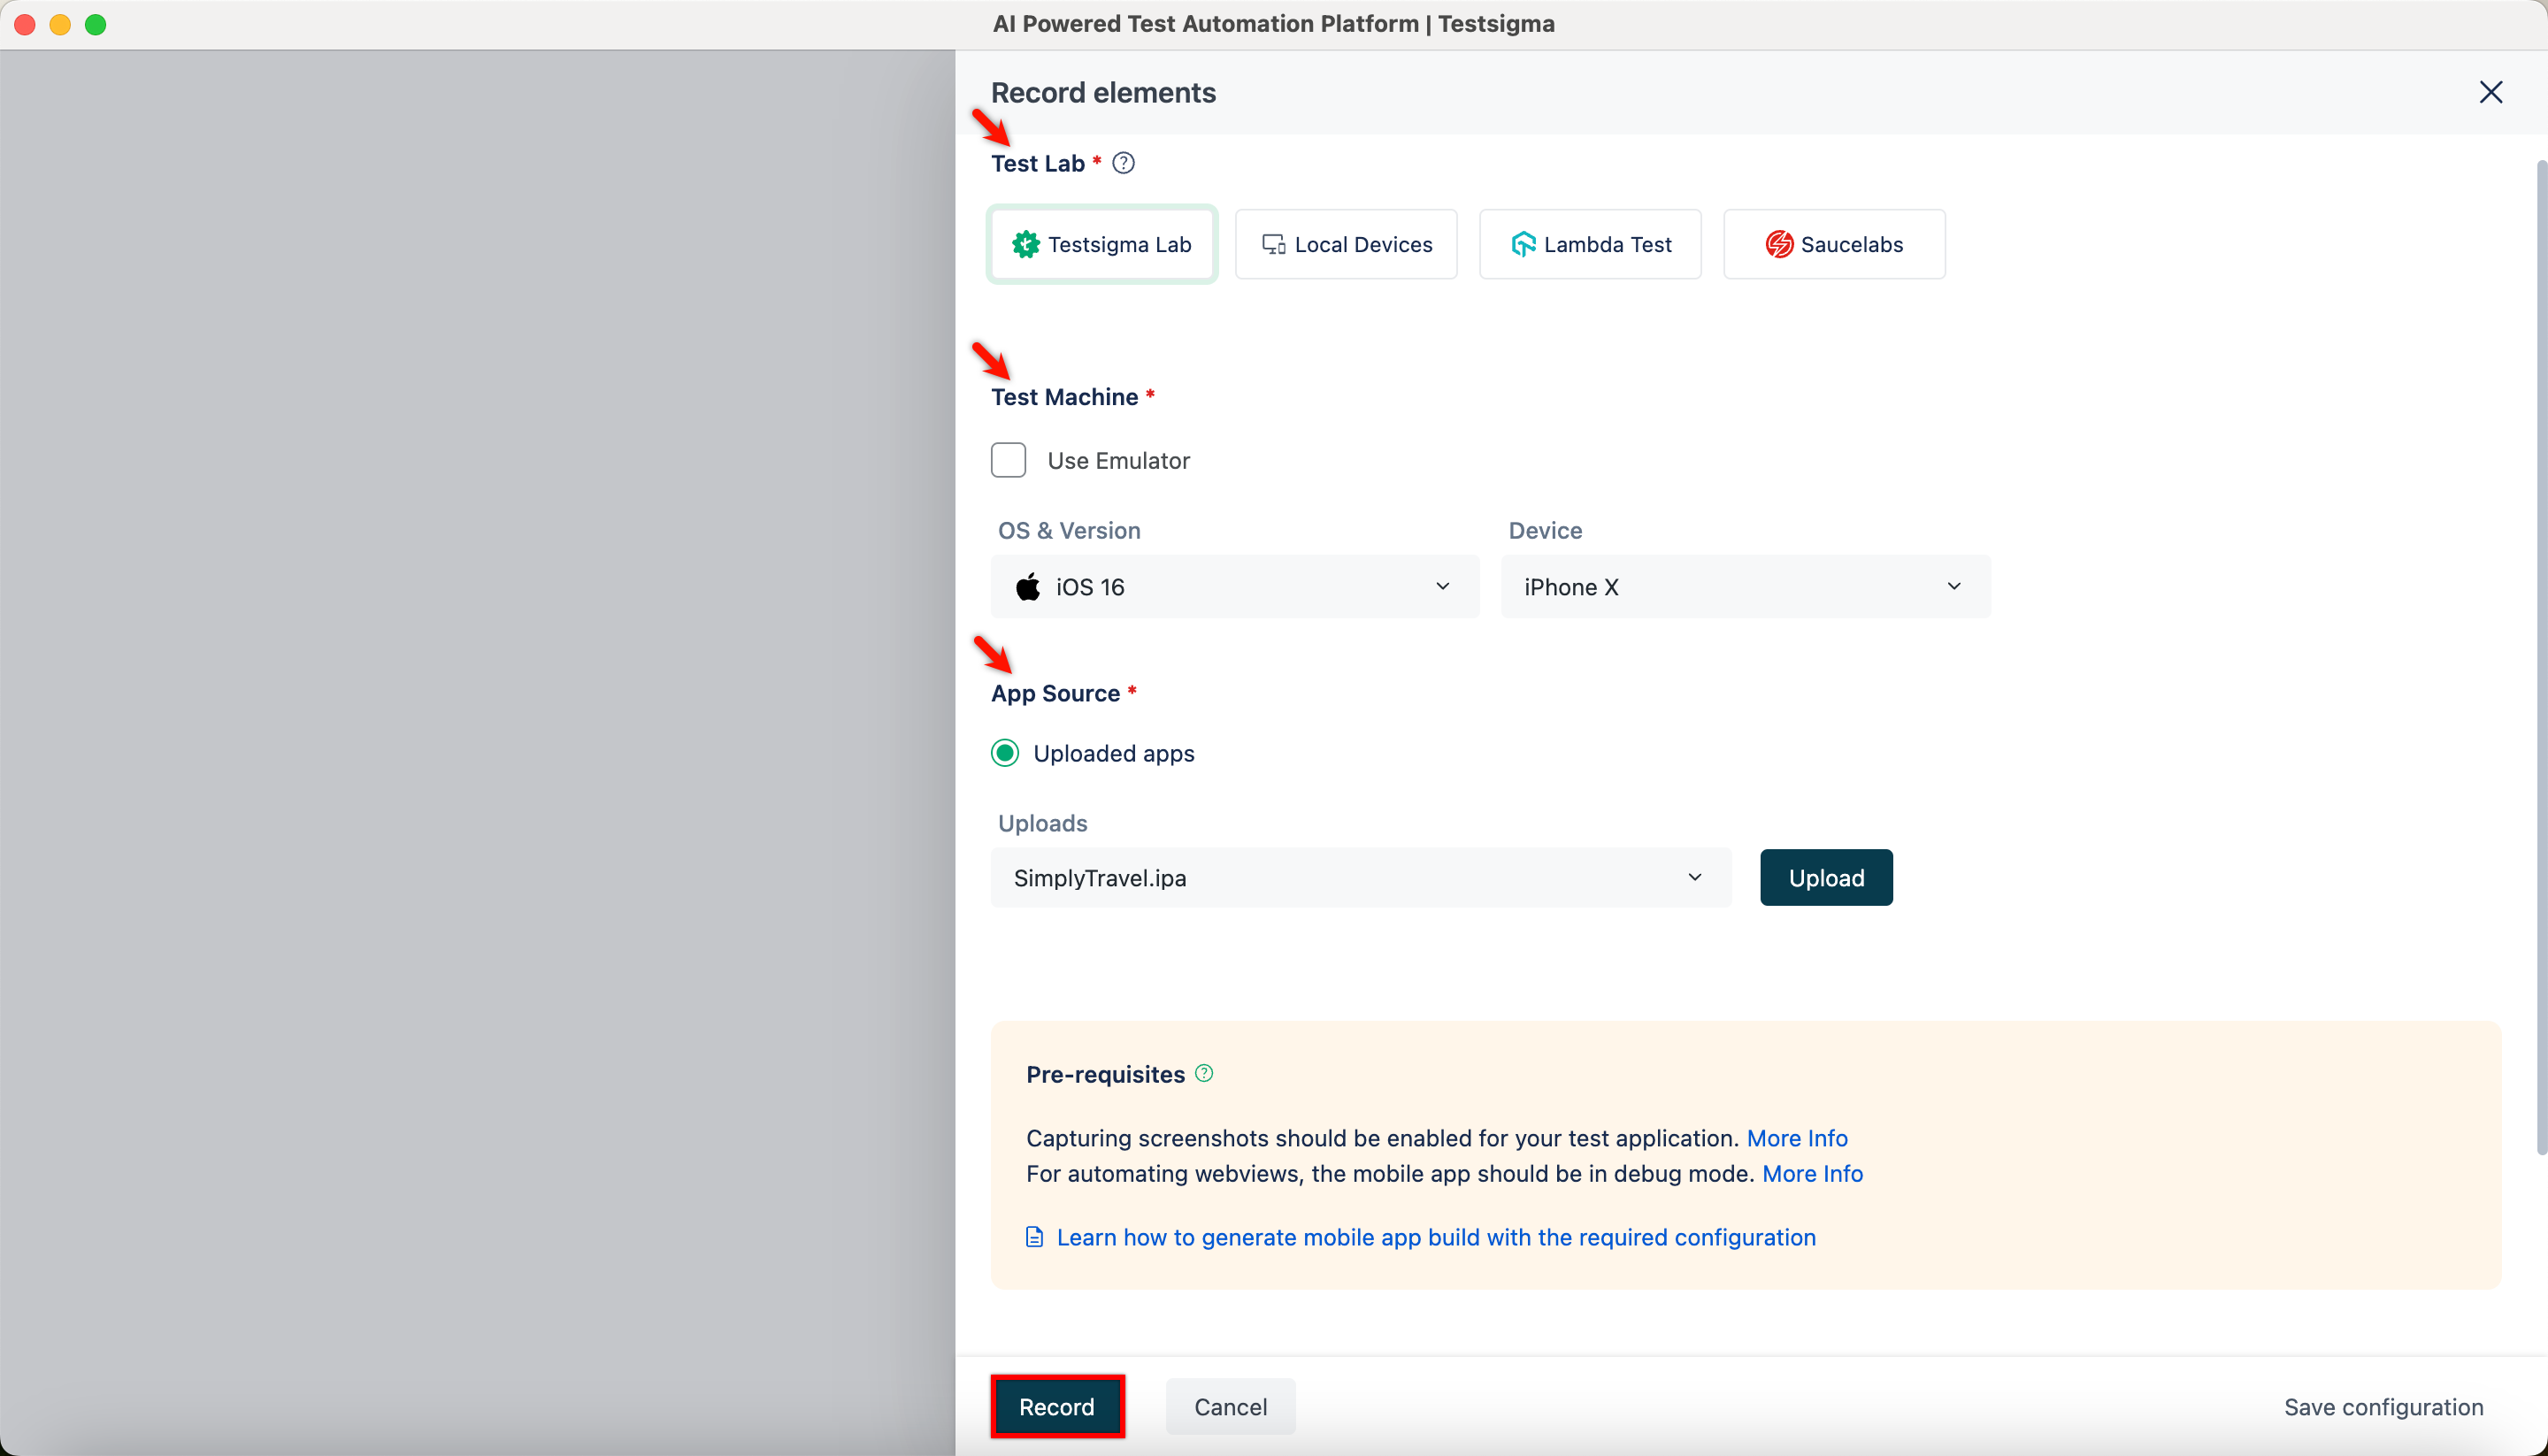
On Record Elements overlay, select Test Lab, Test Machine, Upload App Source and click on Record.
-
Wait for the app to load fully.
-
Once the app is loaded, click on element you want to capture.
-
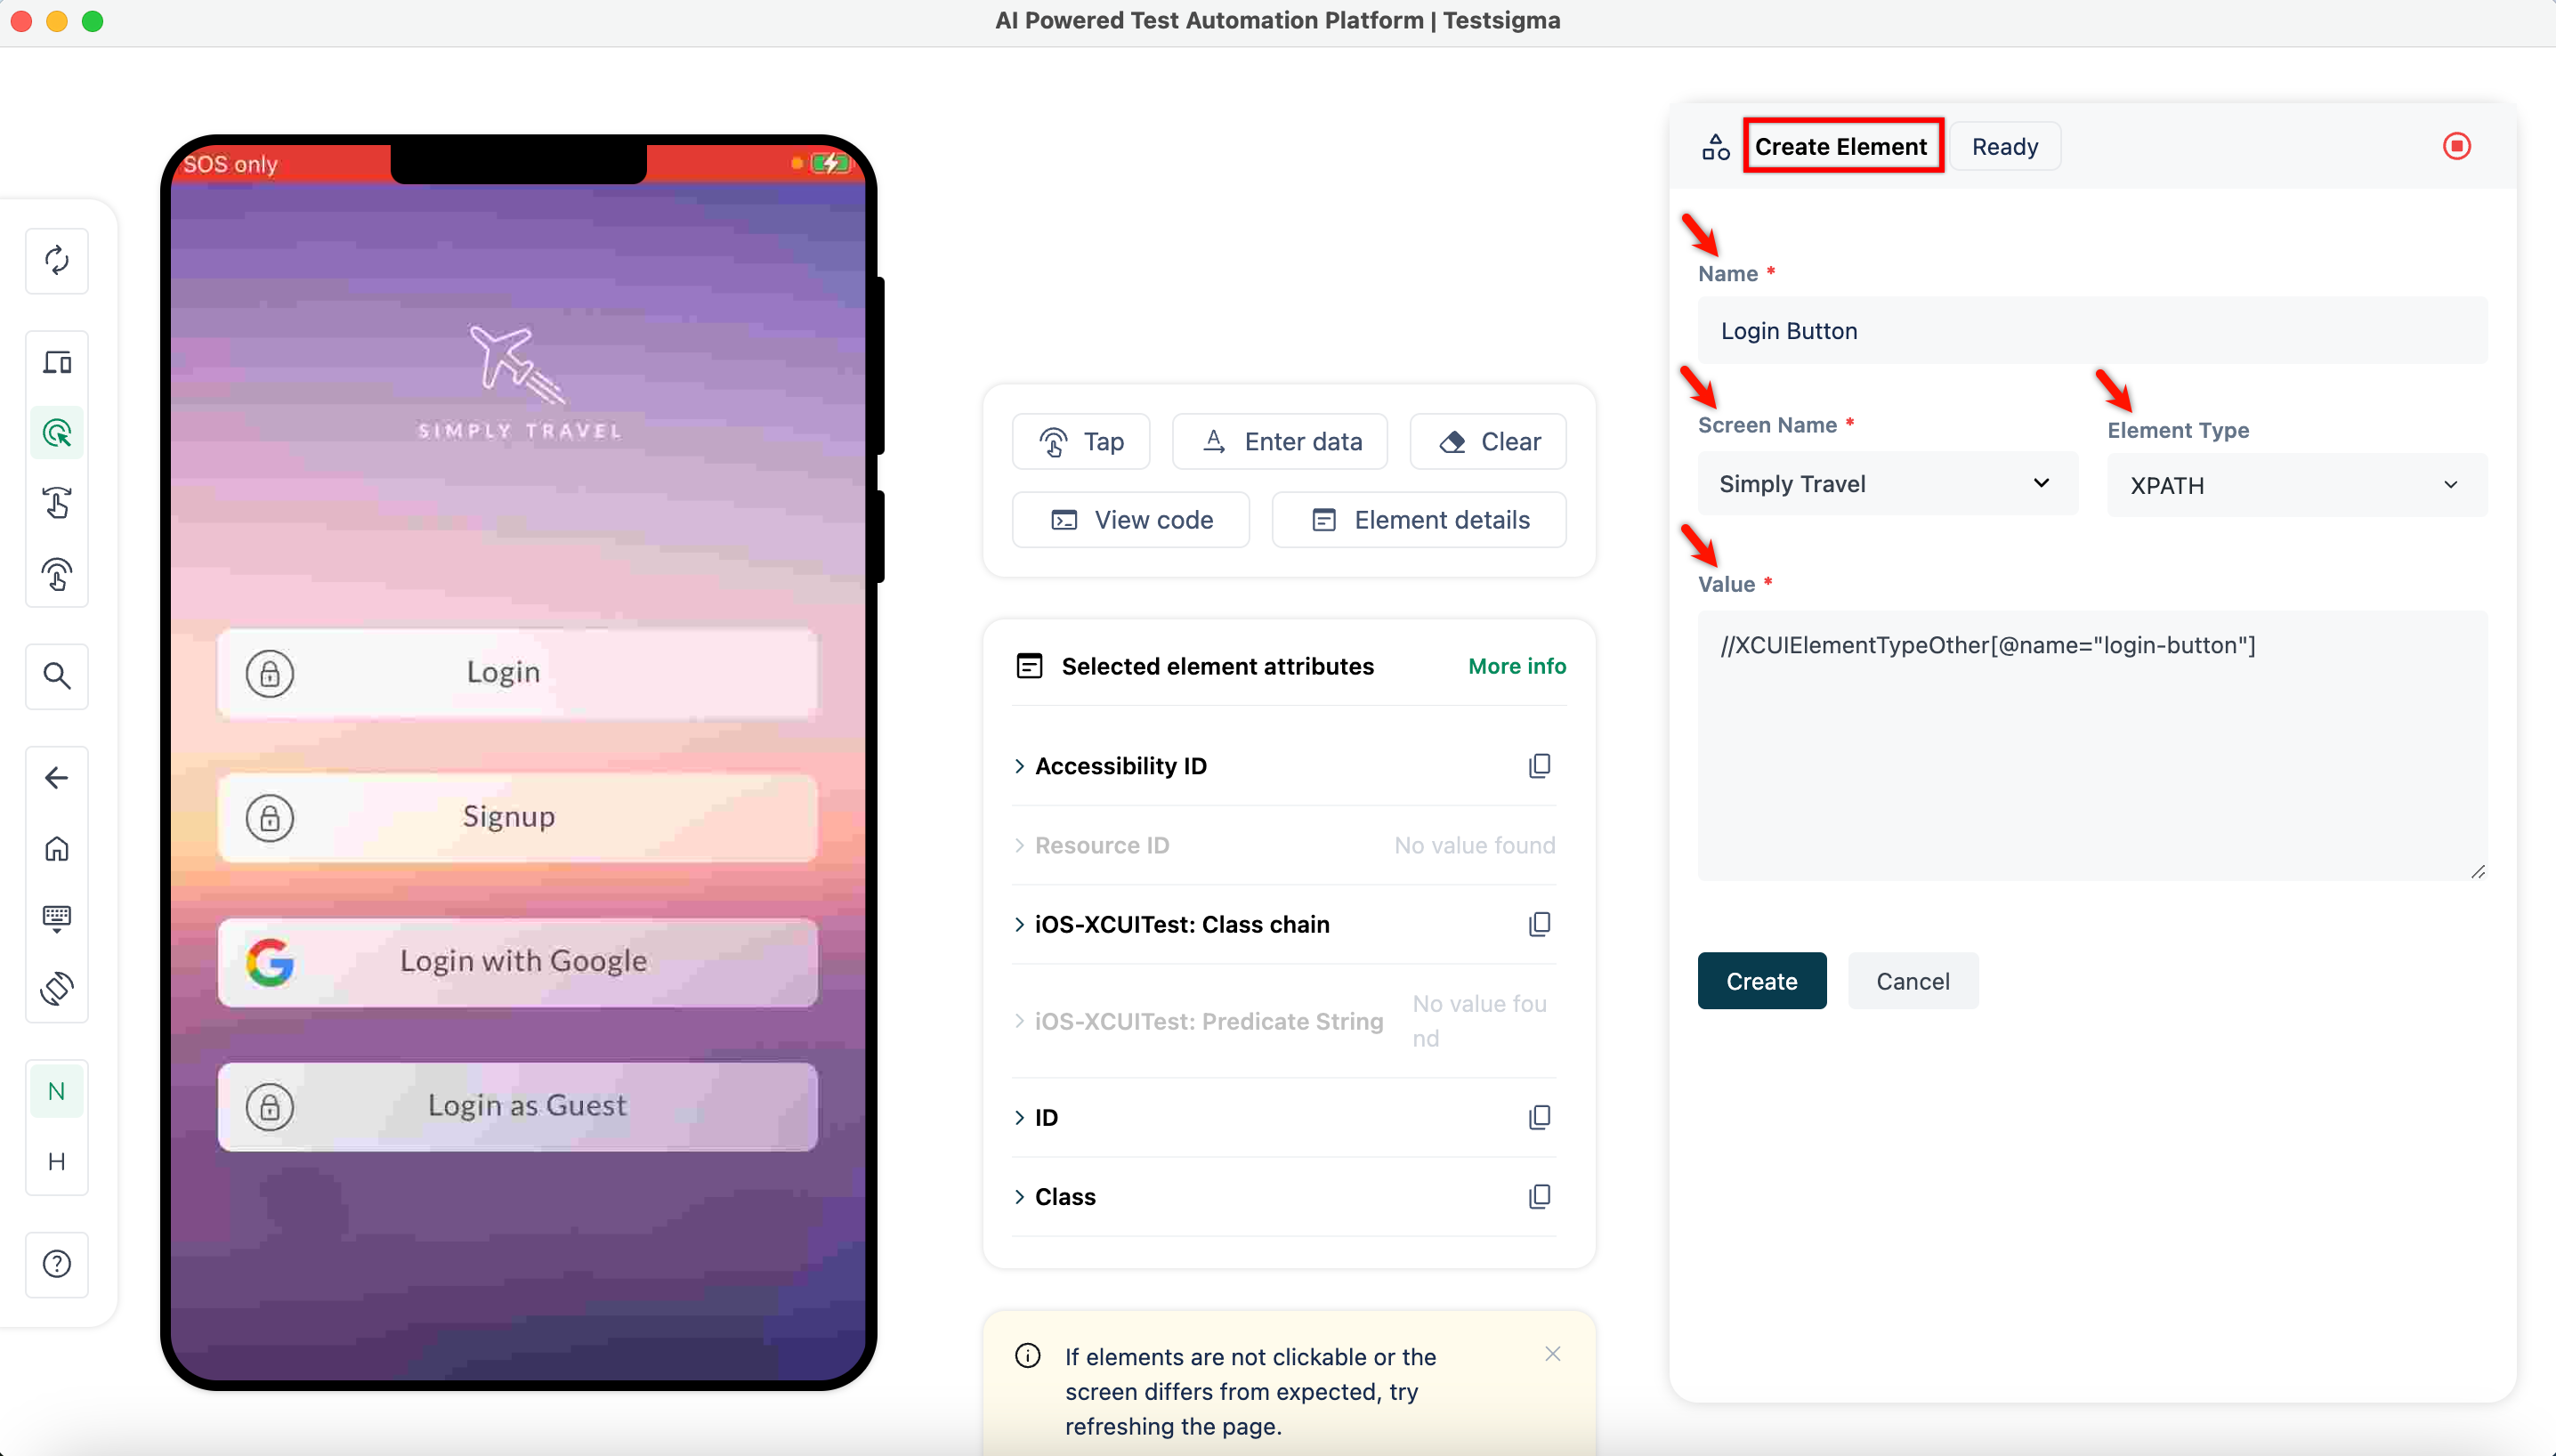
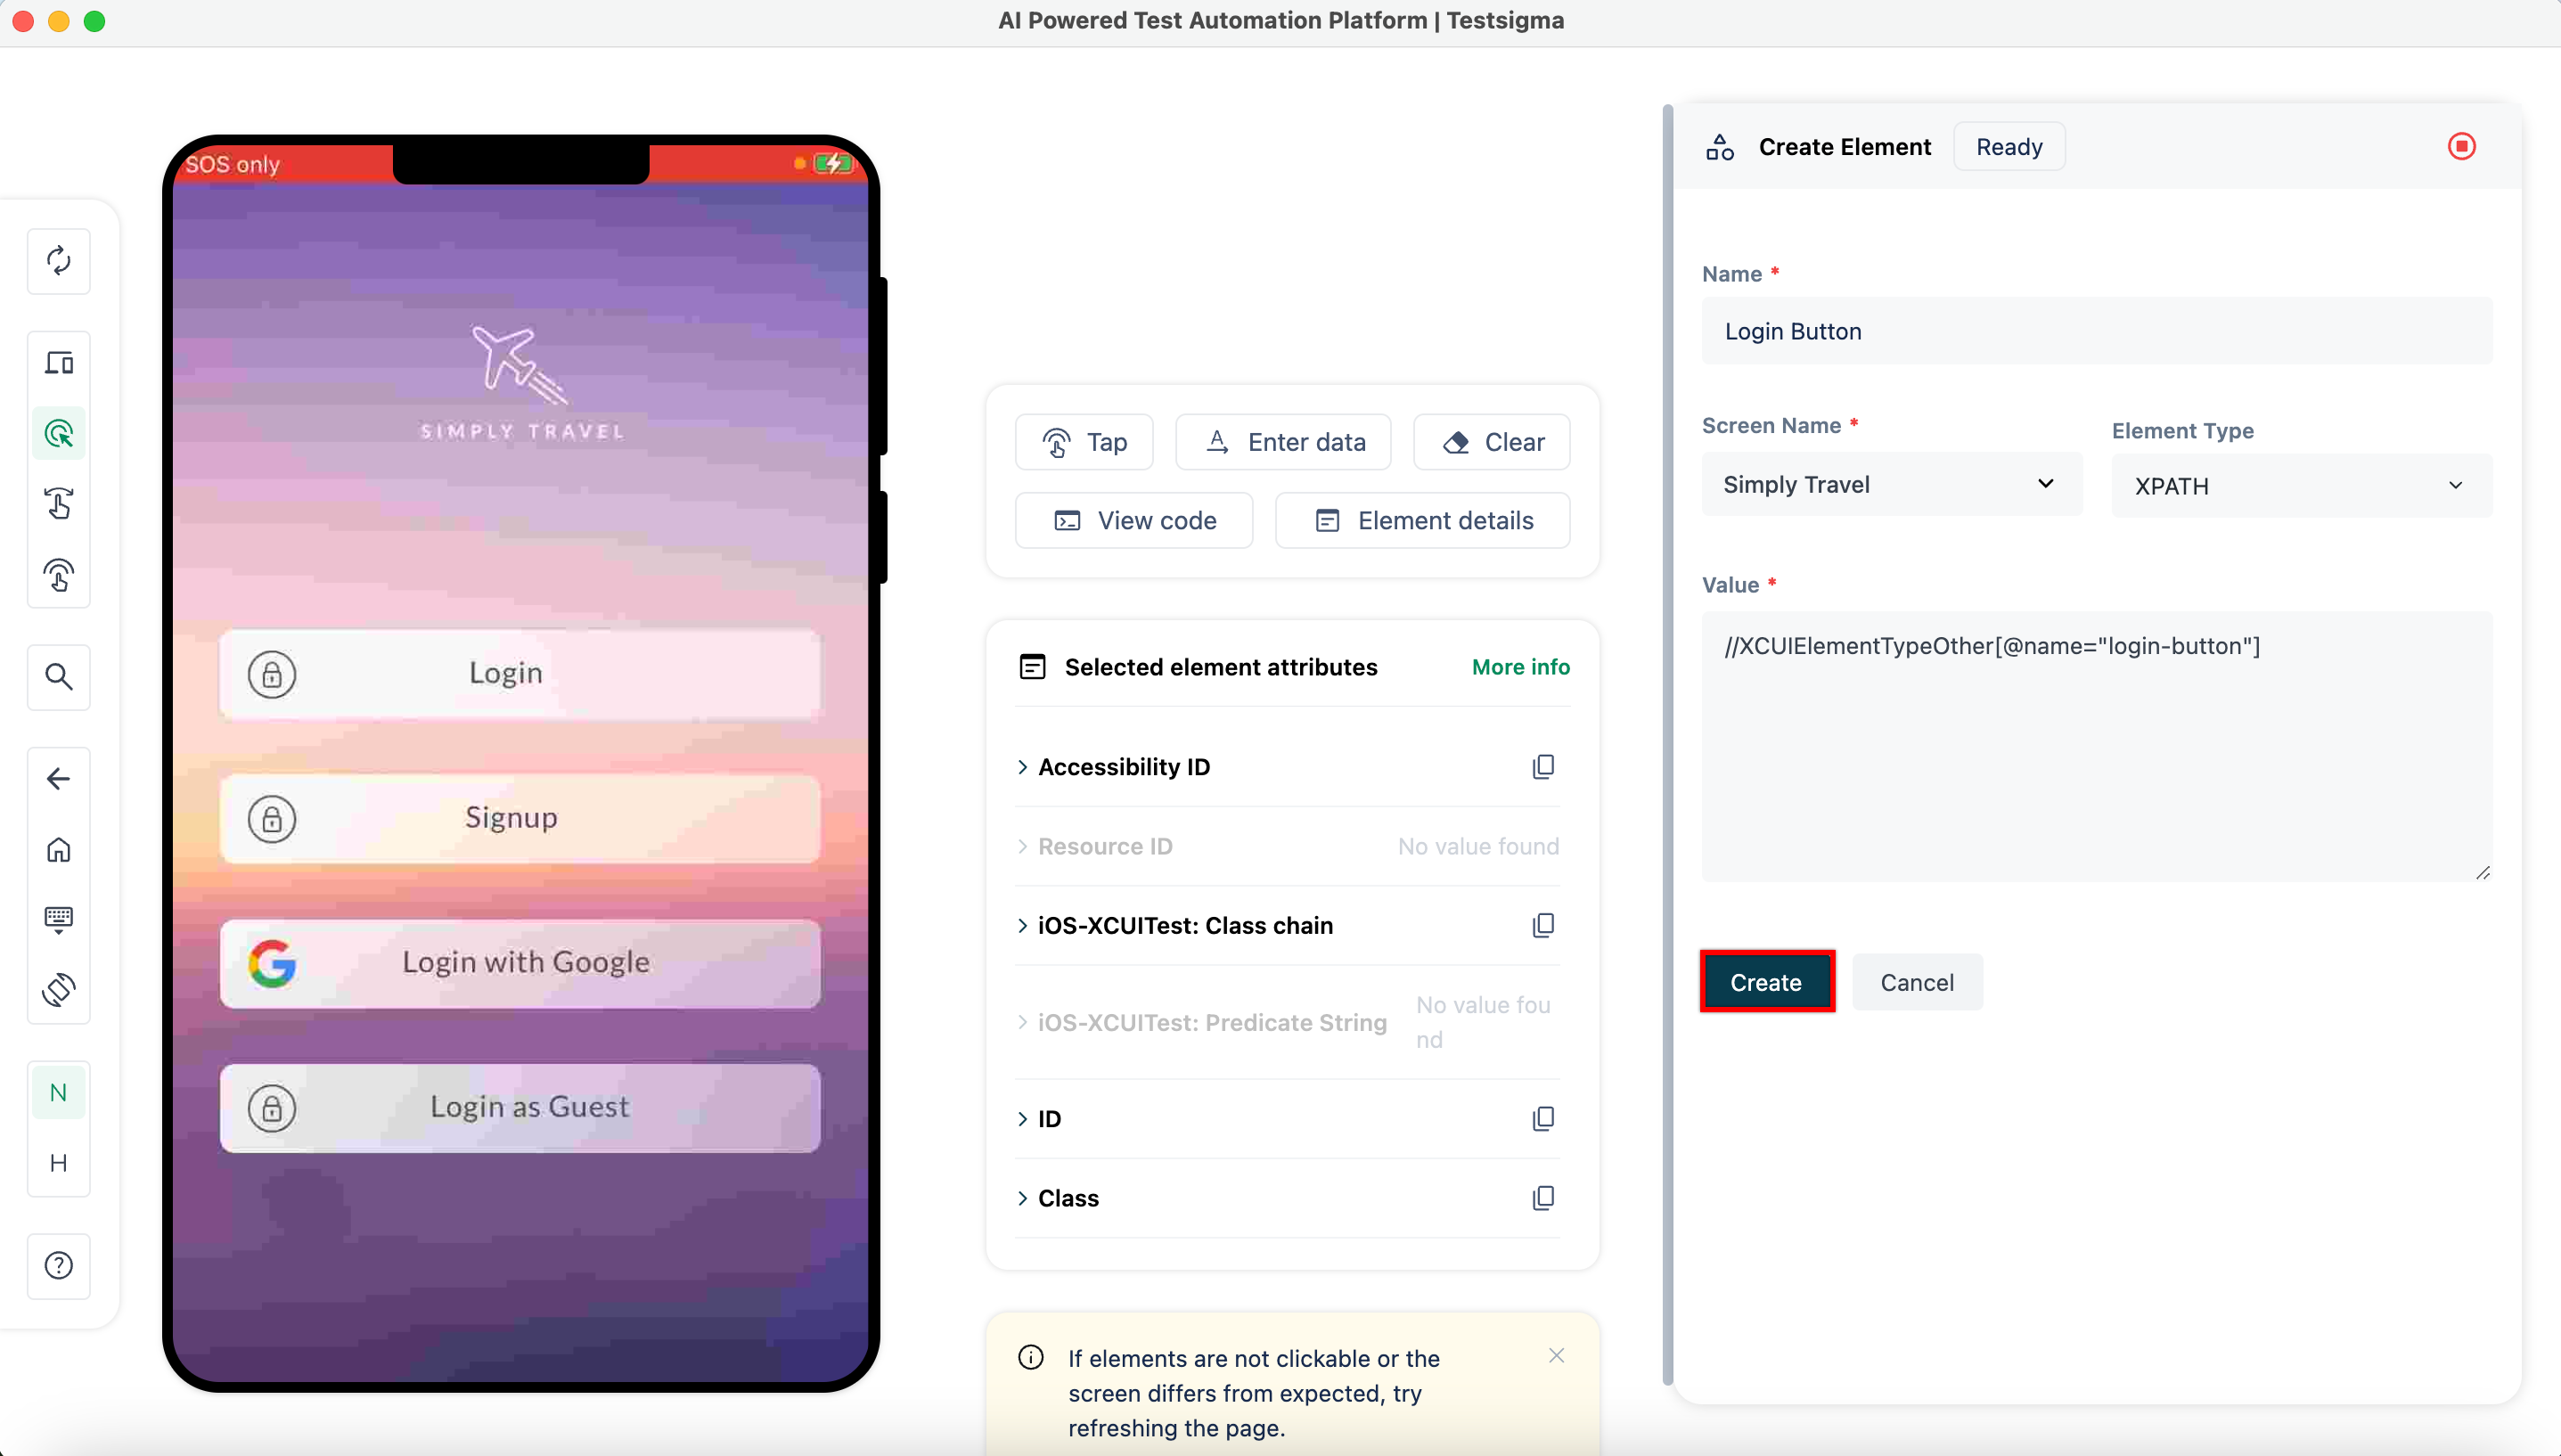
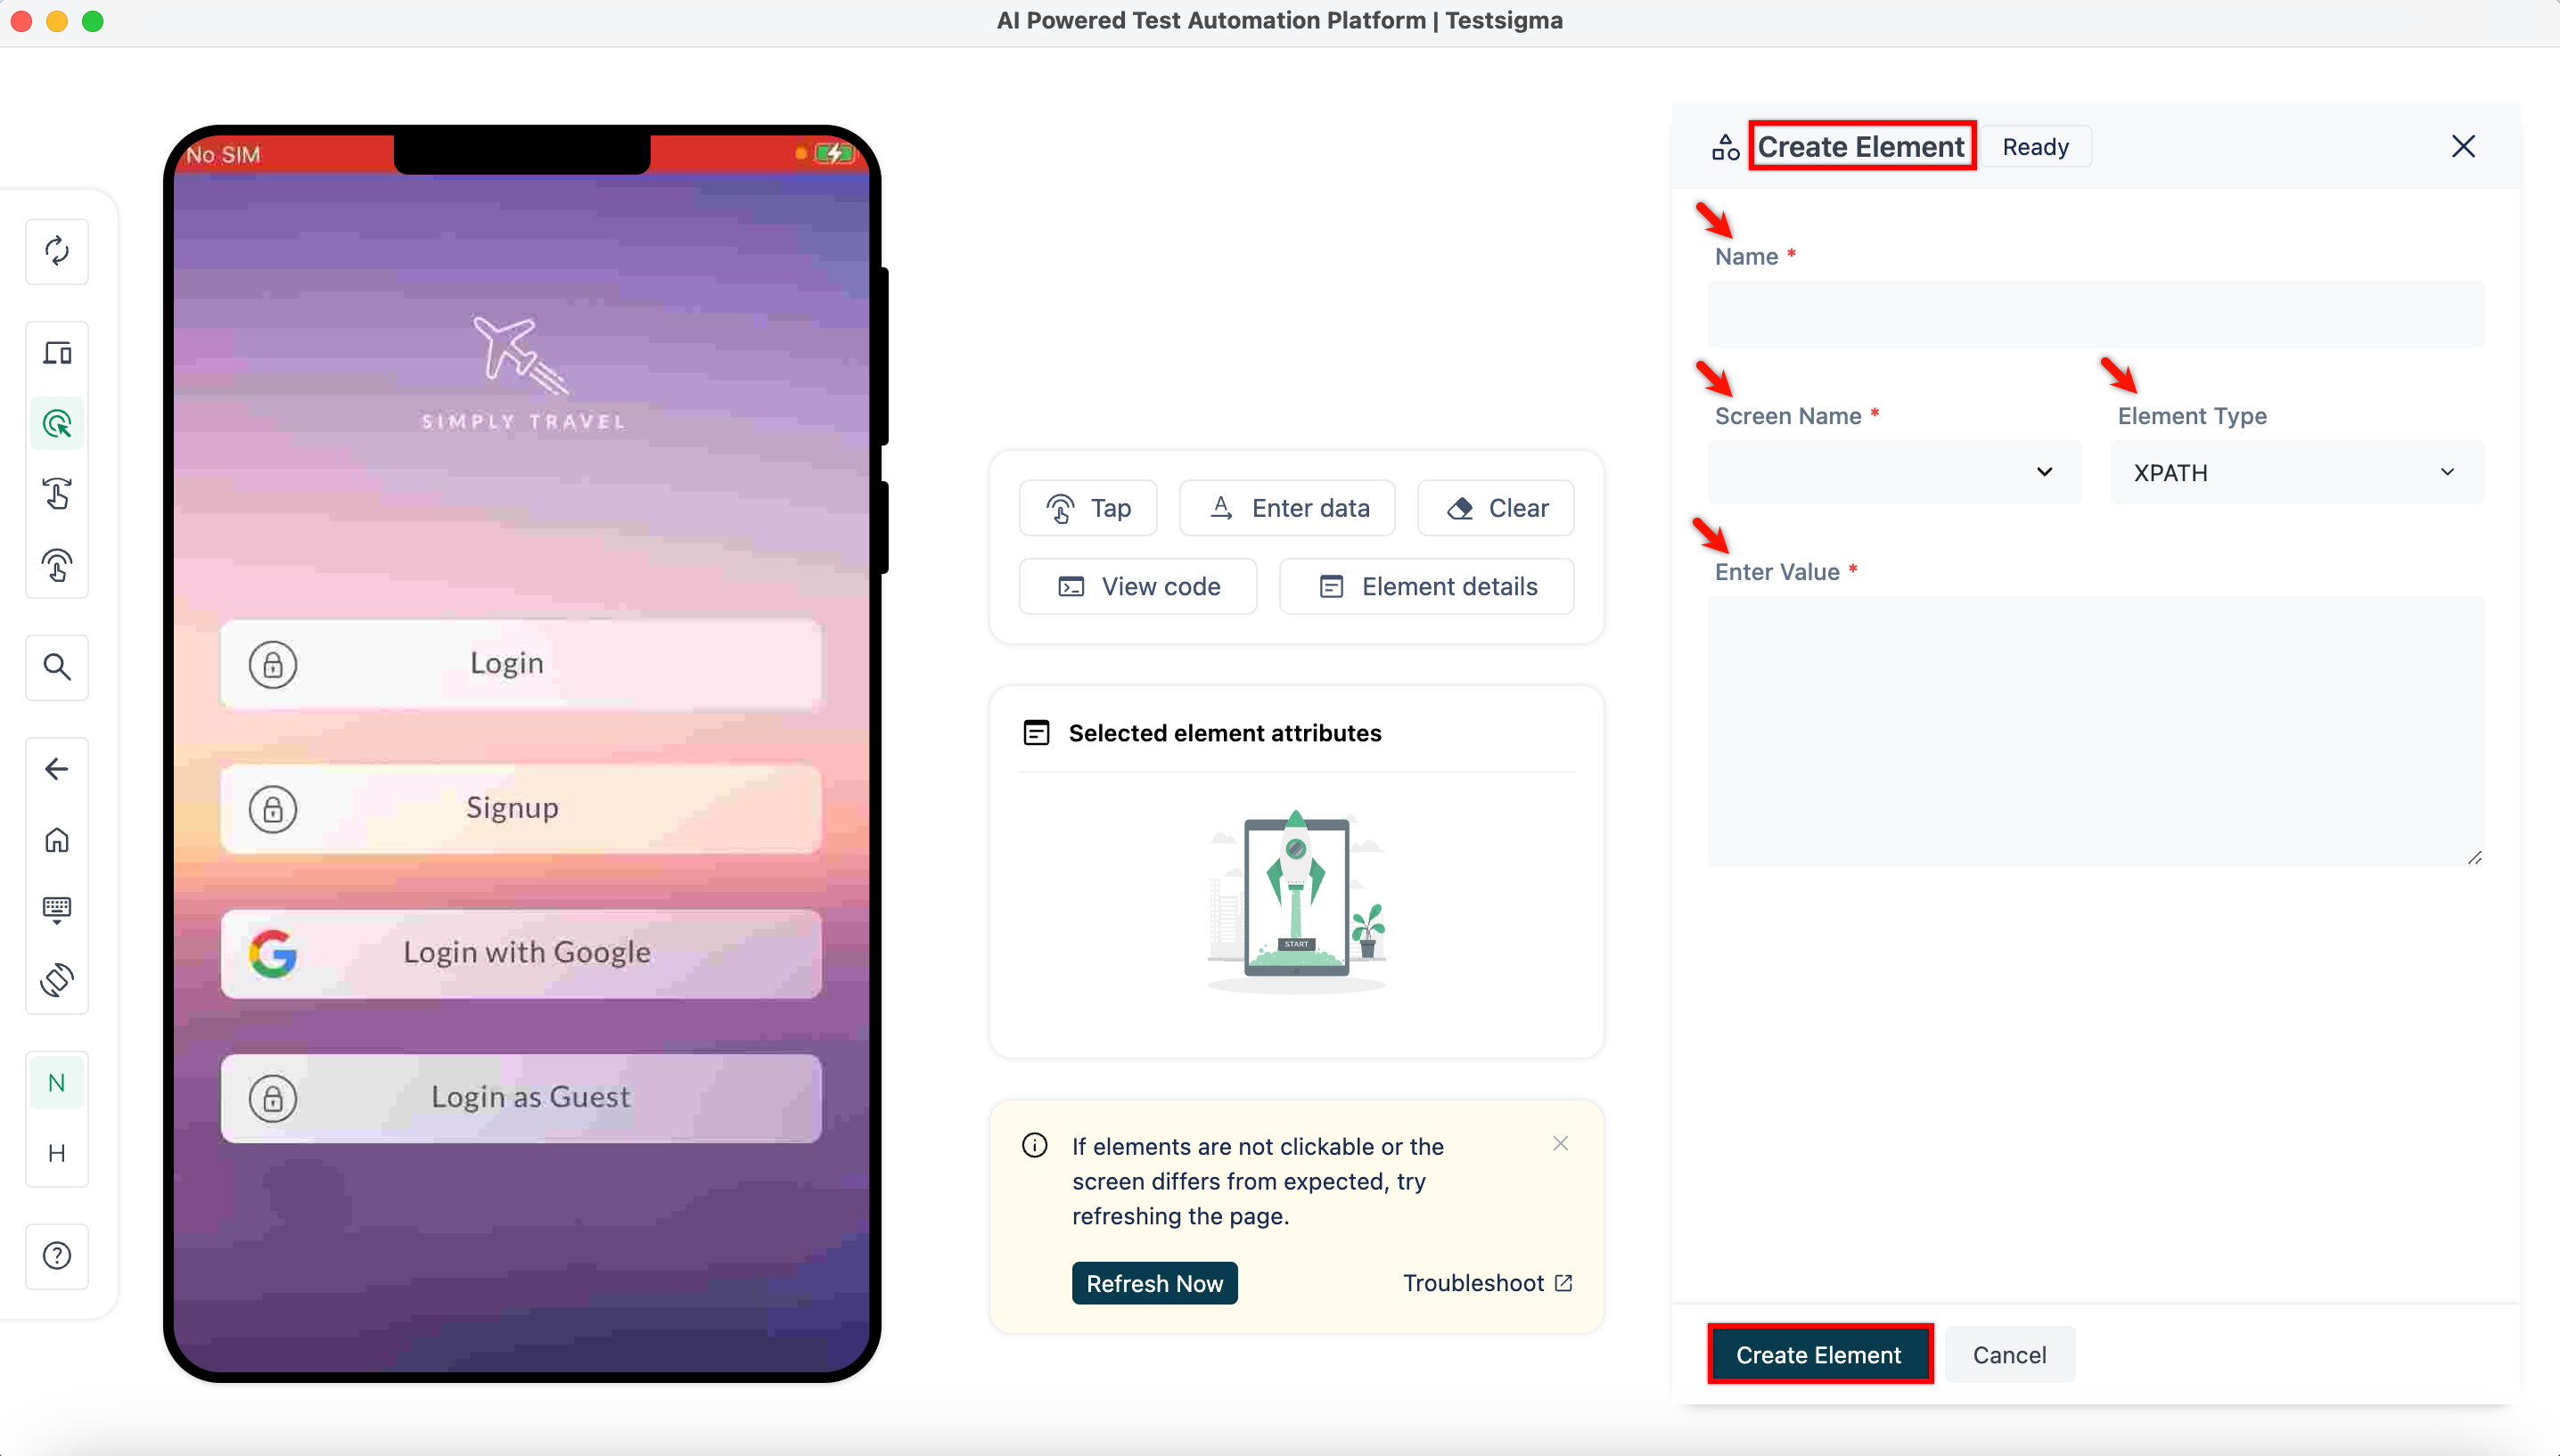
On the Create Element section, validate the Name, Screen Name, Element Type, Value and the Value.
-
Click on Create.
-
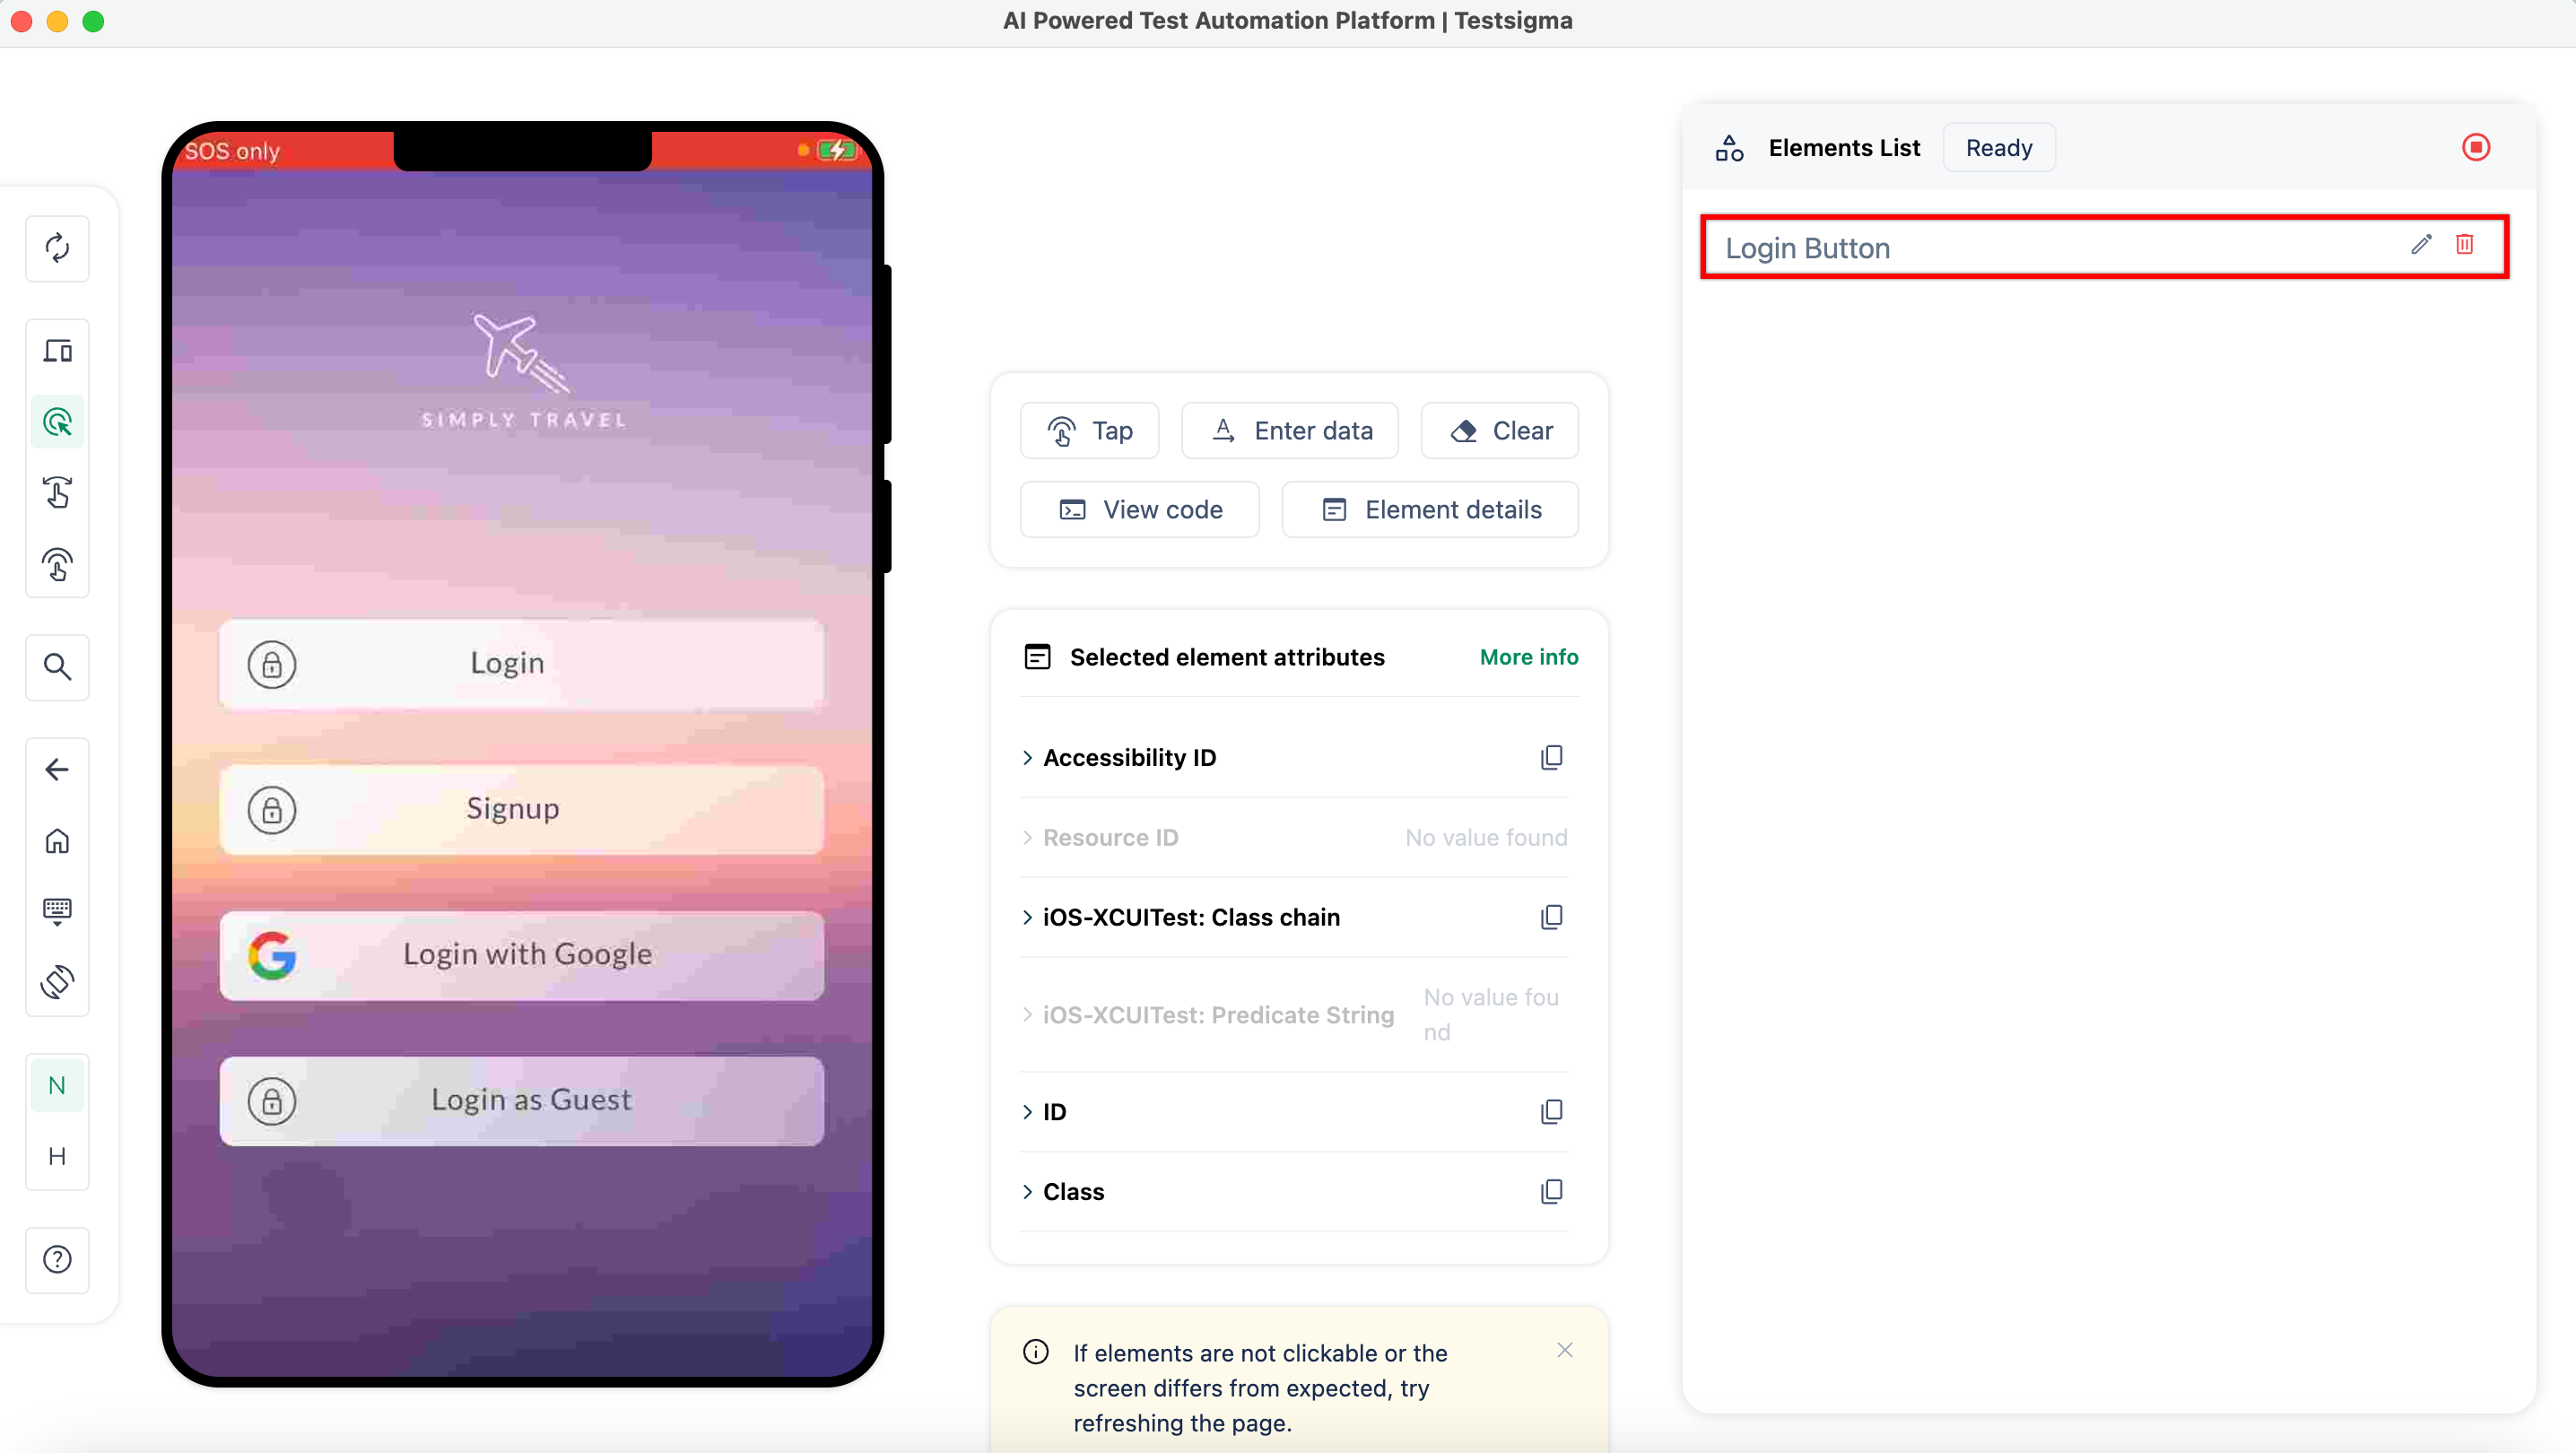
The element will be saved in the elements list.
- Stop the recorder to close the session.
Creating an Element While Creating Test Case
Section titled “Creating an Element While Creating Test Case”Alternatively, you can also create the element while creating test case by following the steps below.
-
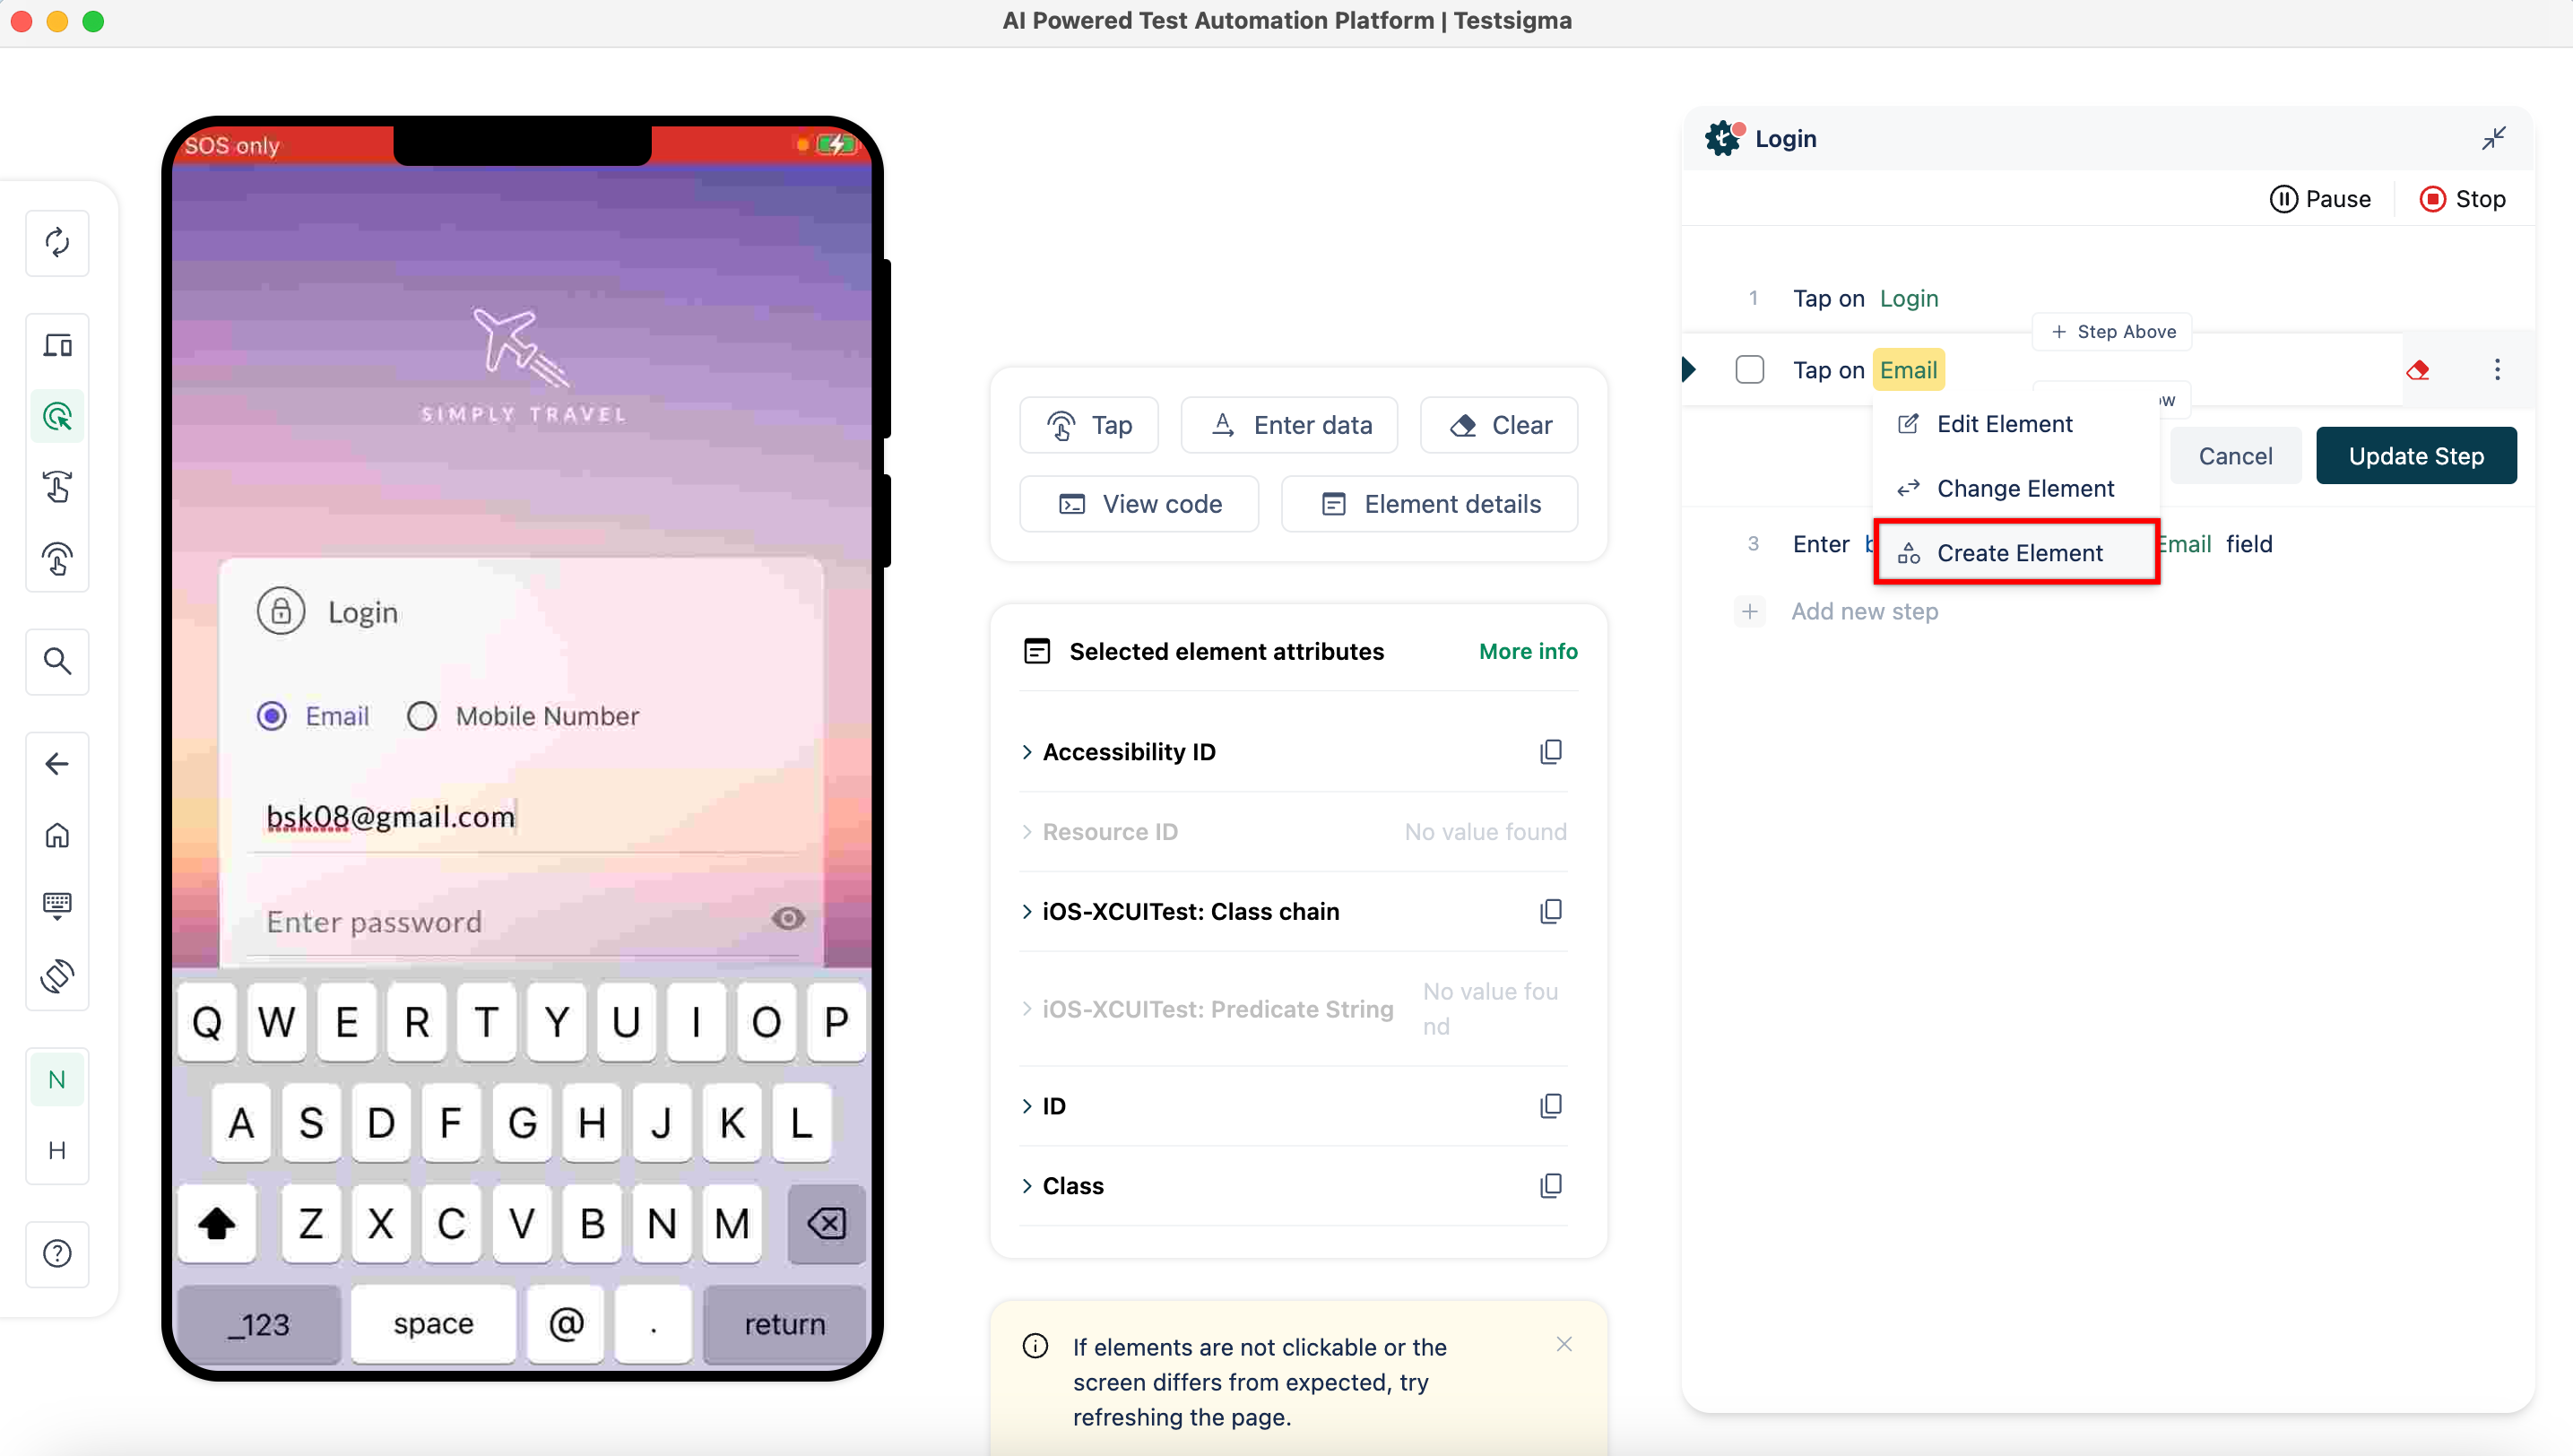
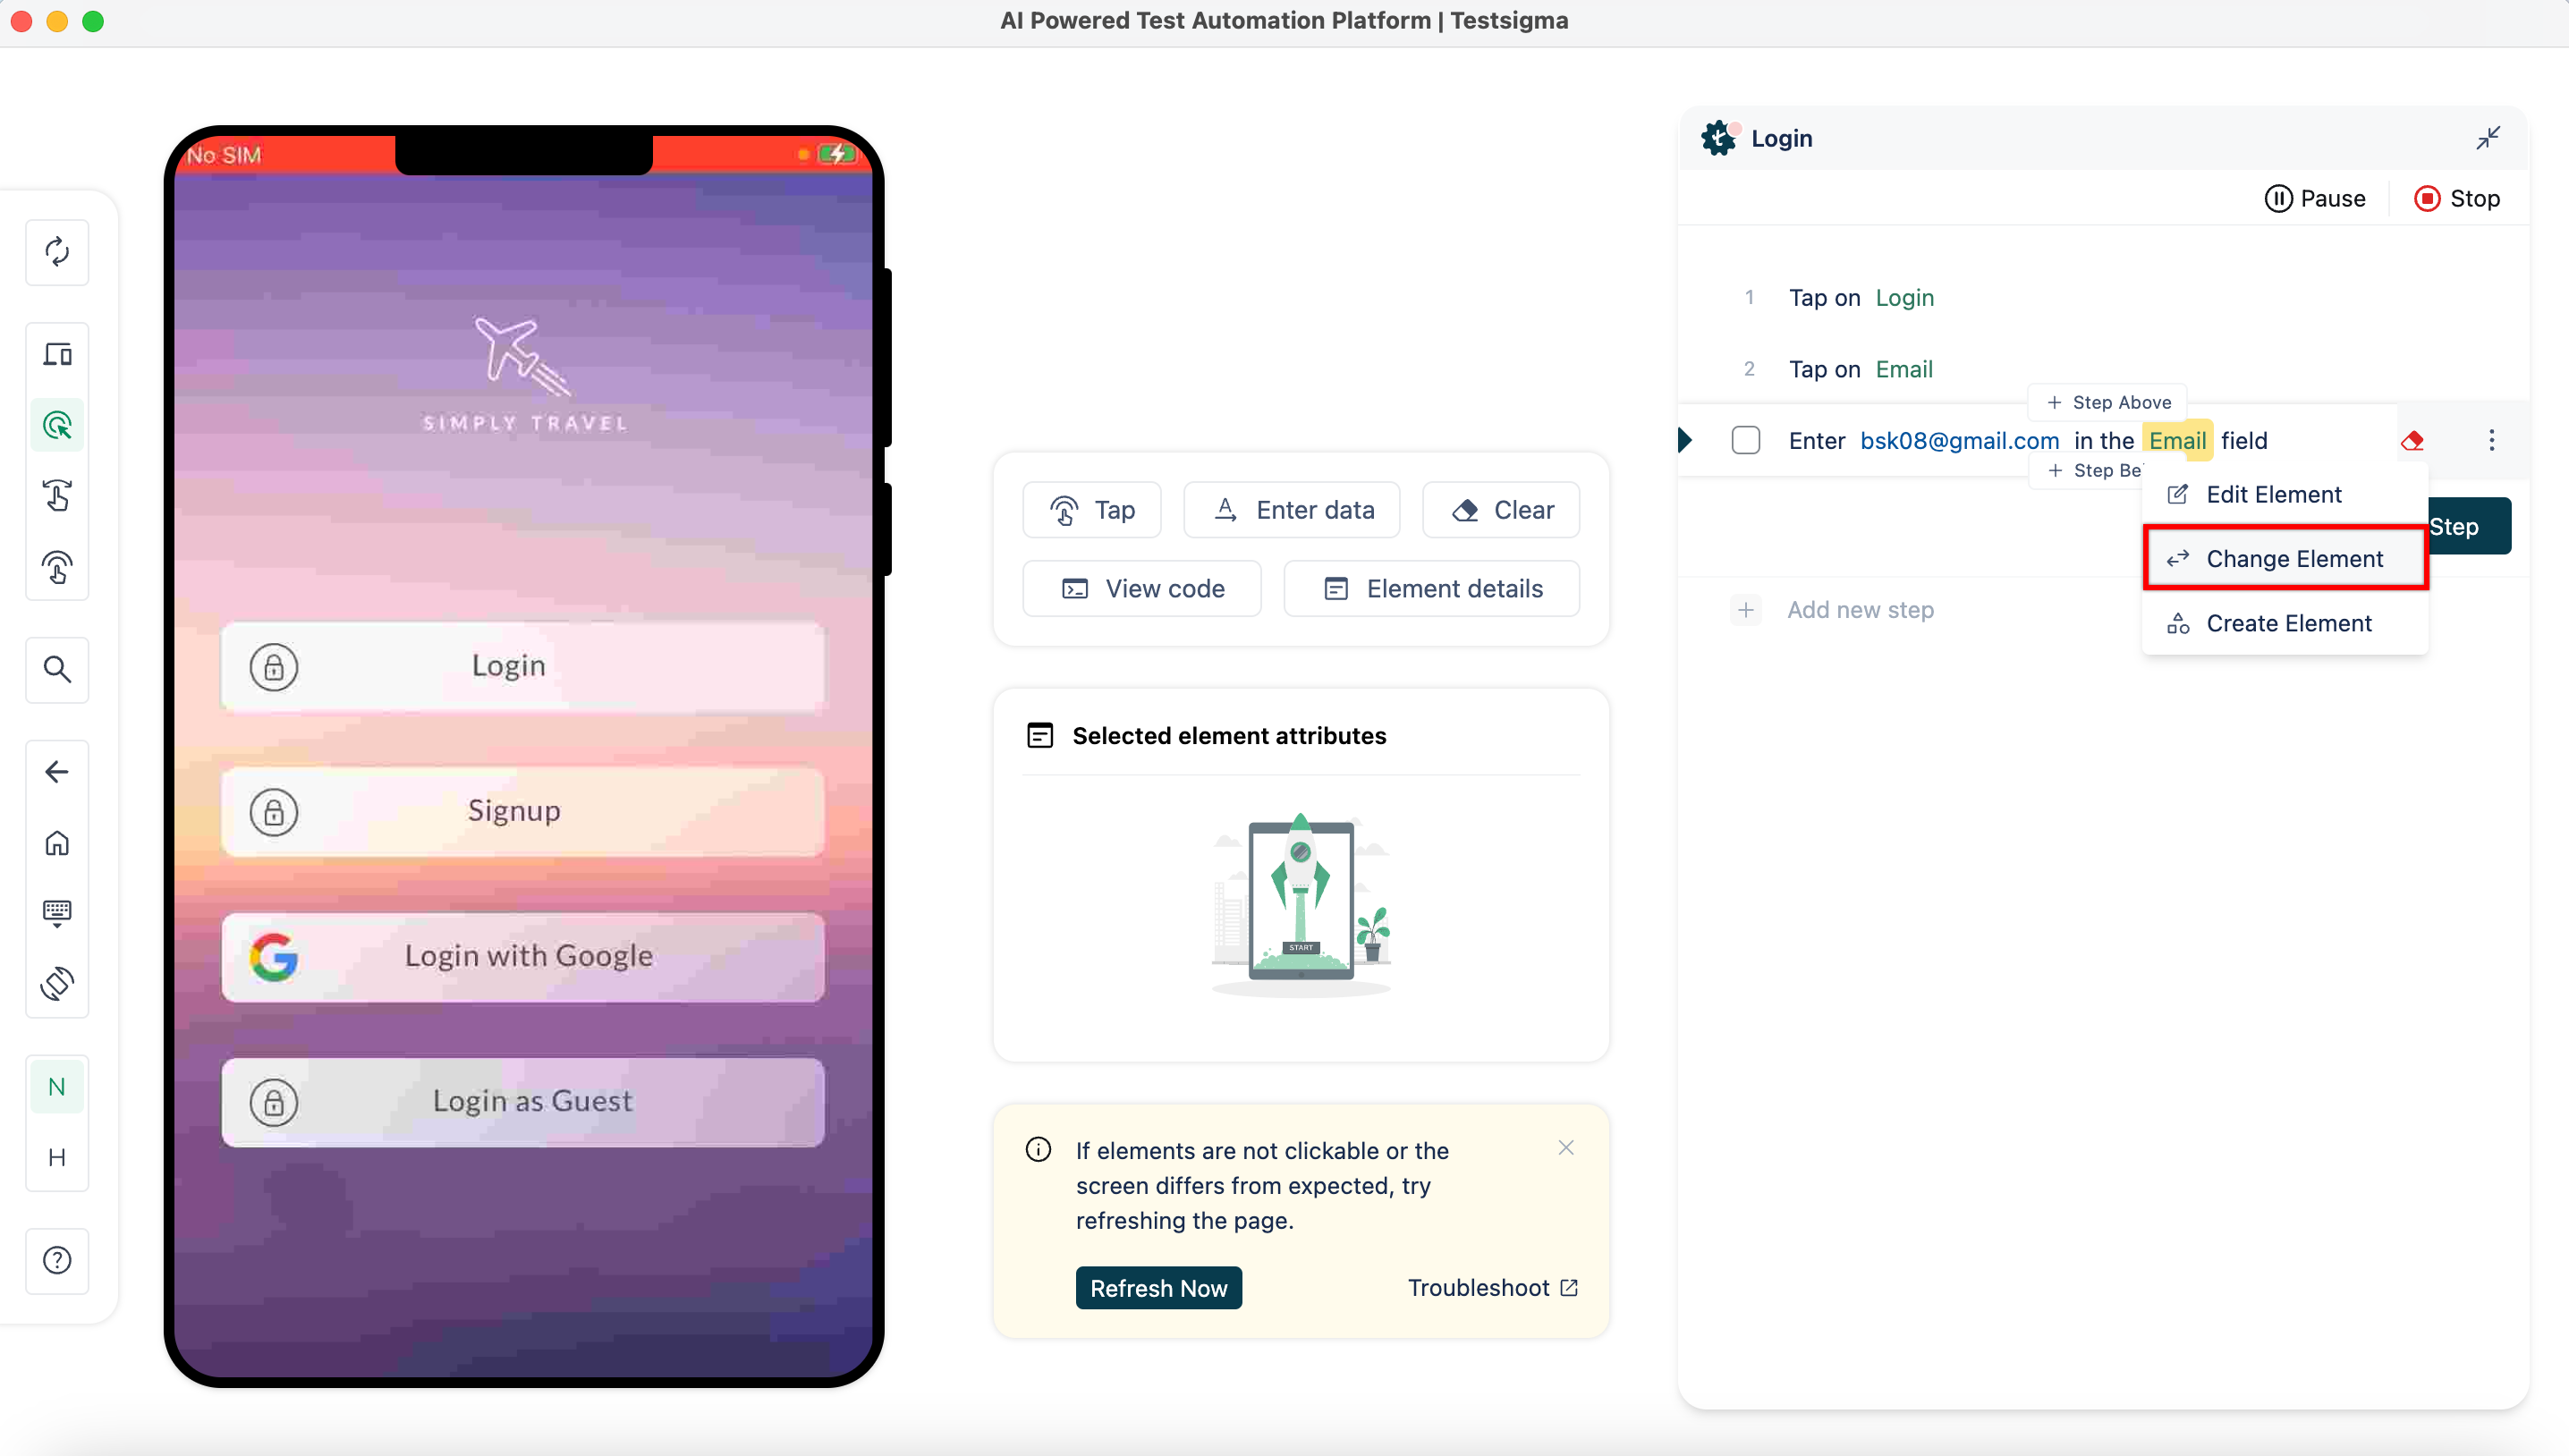
Hover over the element on the test step and click on Create Element from the dropdown.
-
On Create Element overlay, enter Name, Screen Name, Value select the Element Type and click on Create Element.
Reusing Elements Recorded
Section titled “Reusing Elements Recorded”-
Create a test case in which you will be reusing your pre-recorded elements.
-
Start recording test steps for the test case.
-
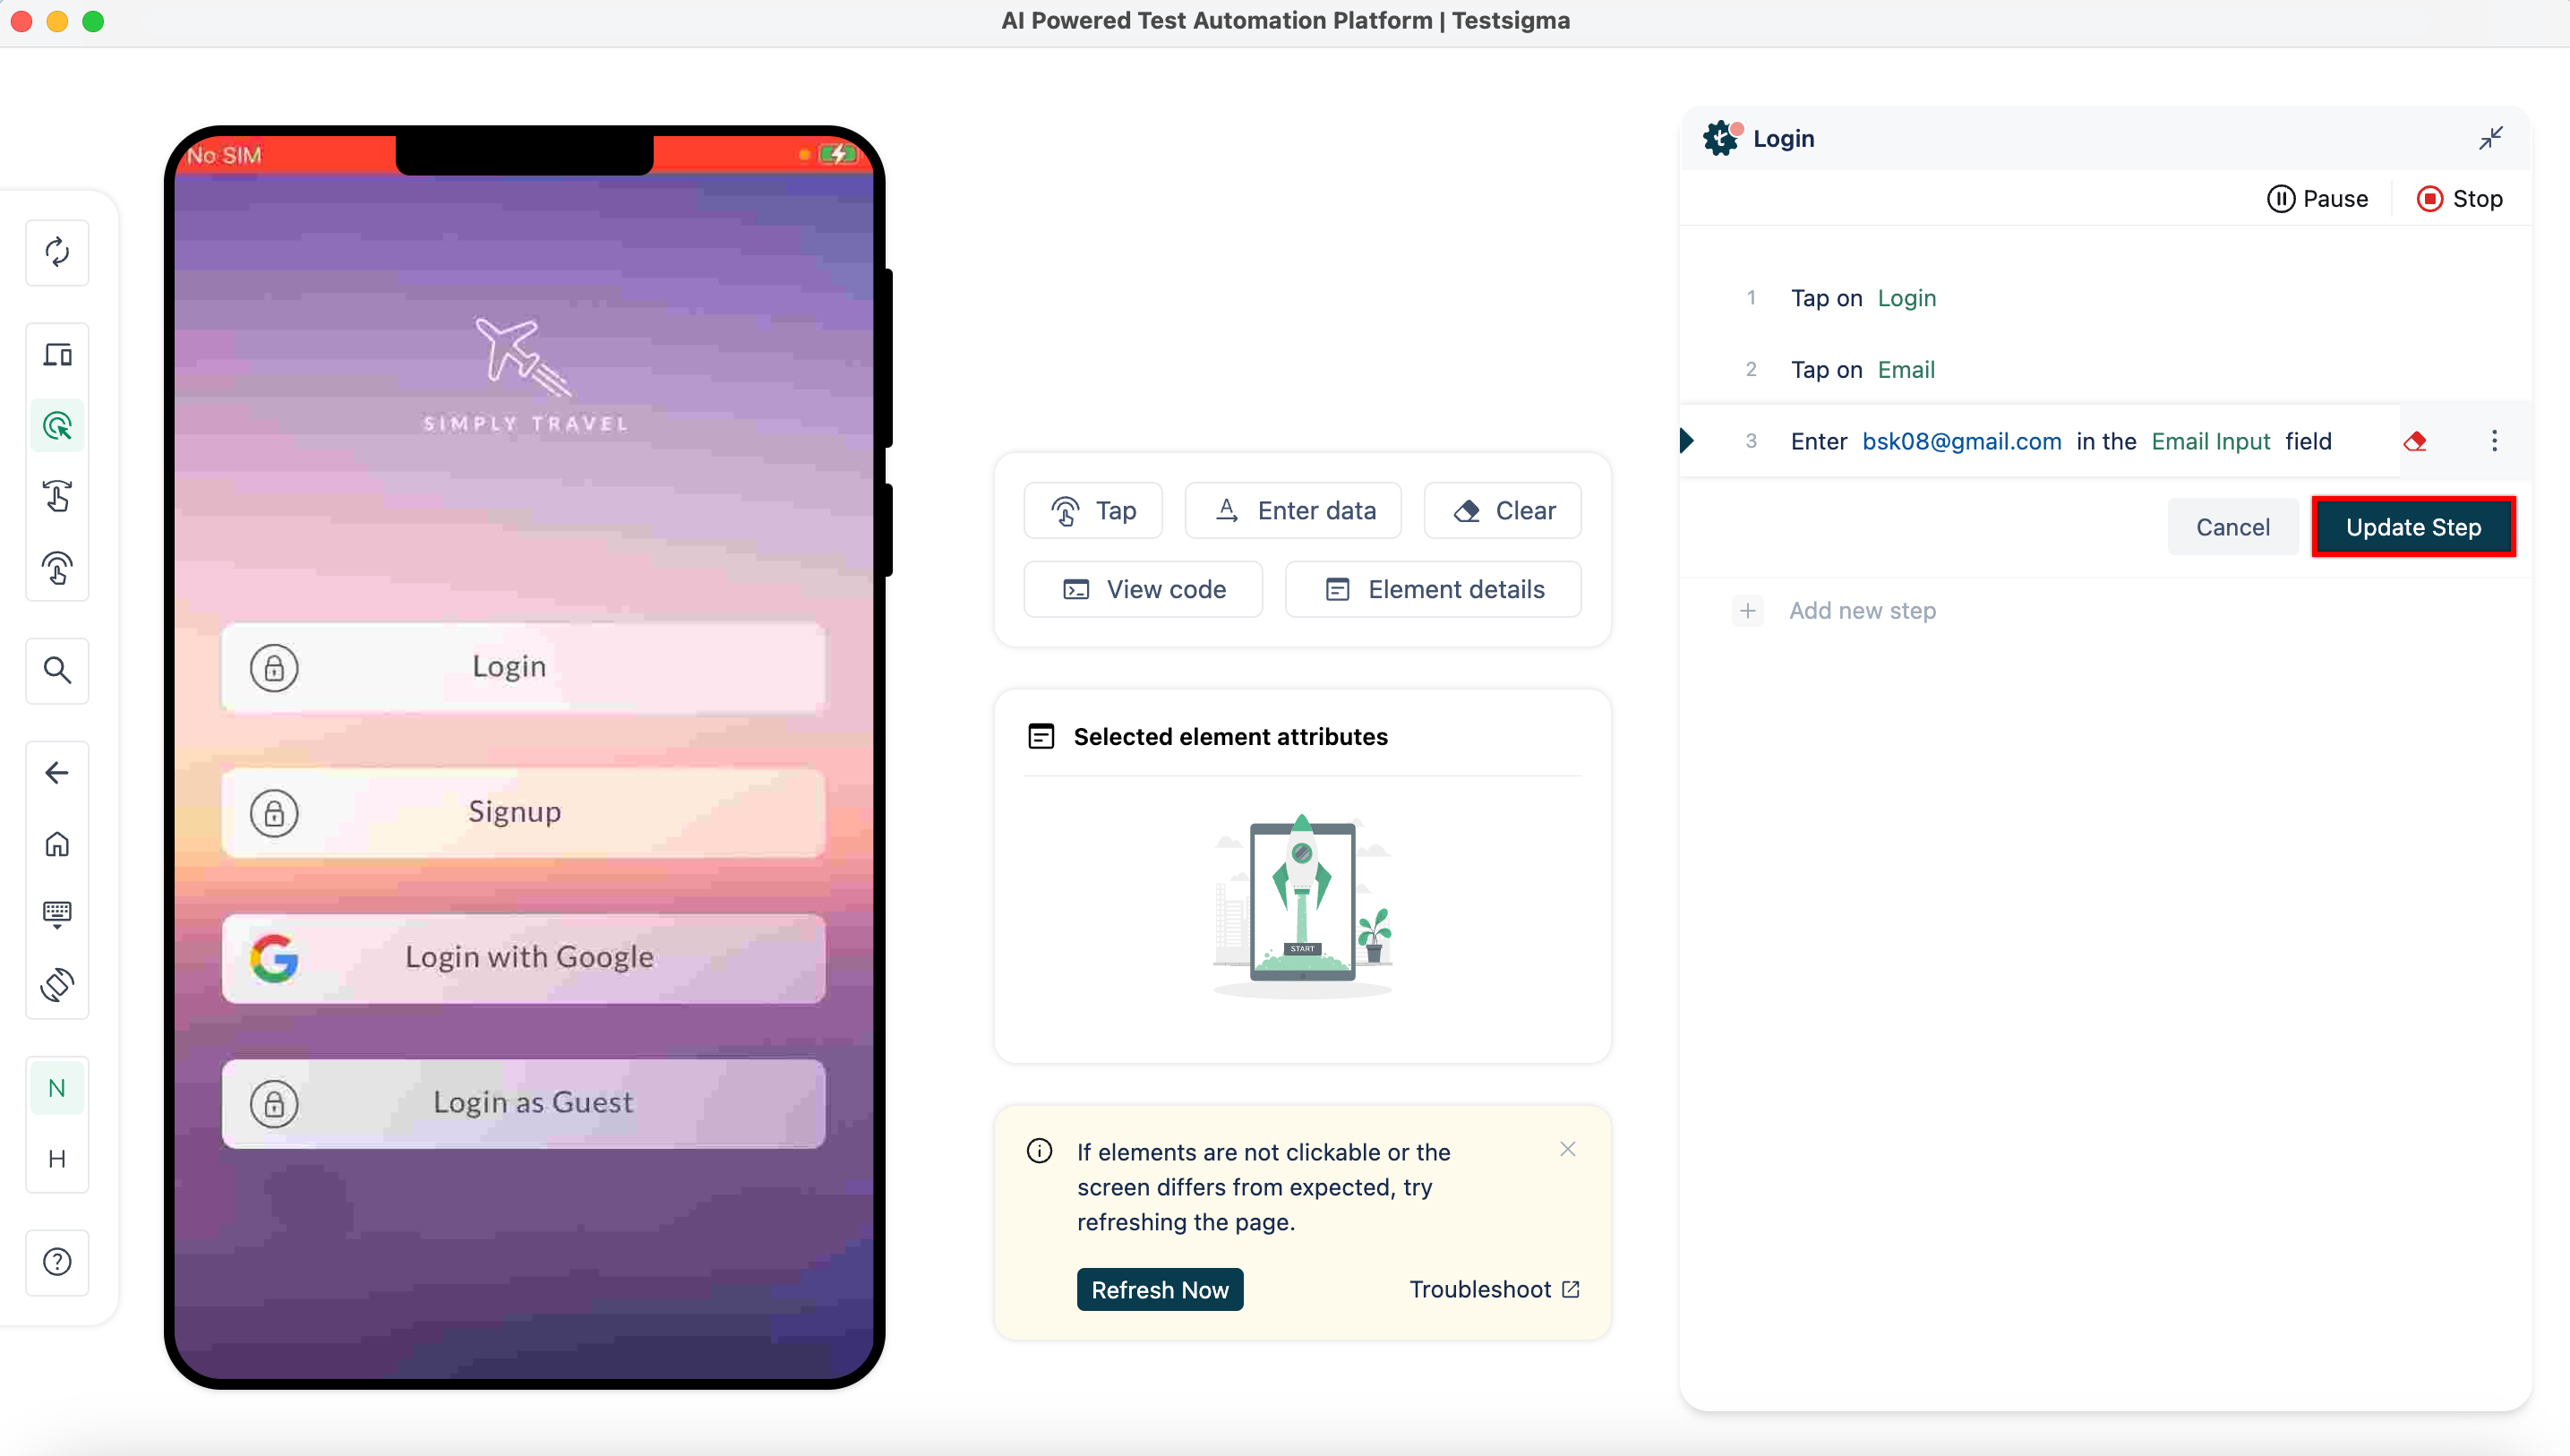
Hover over the element on the test step where you want to reuse the saved element and click on Change Element.
-
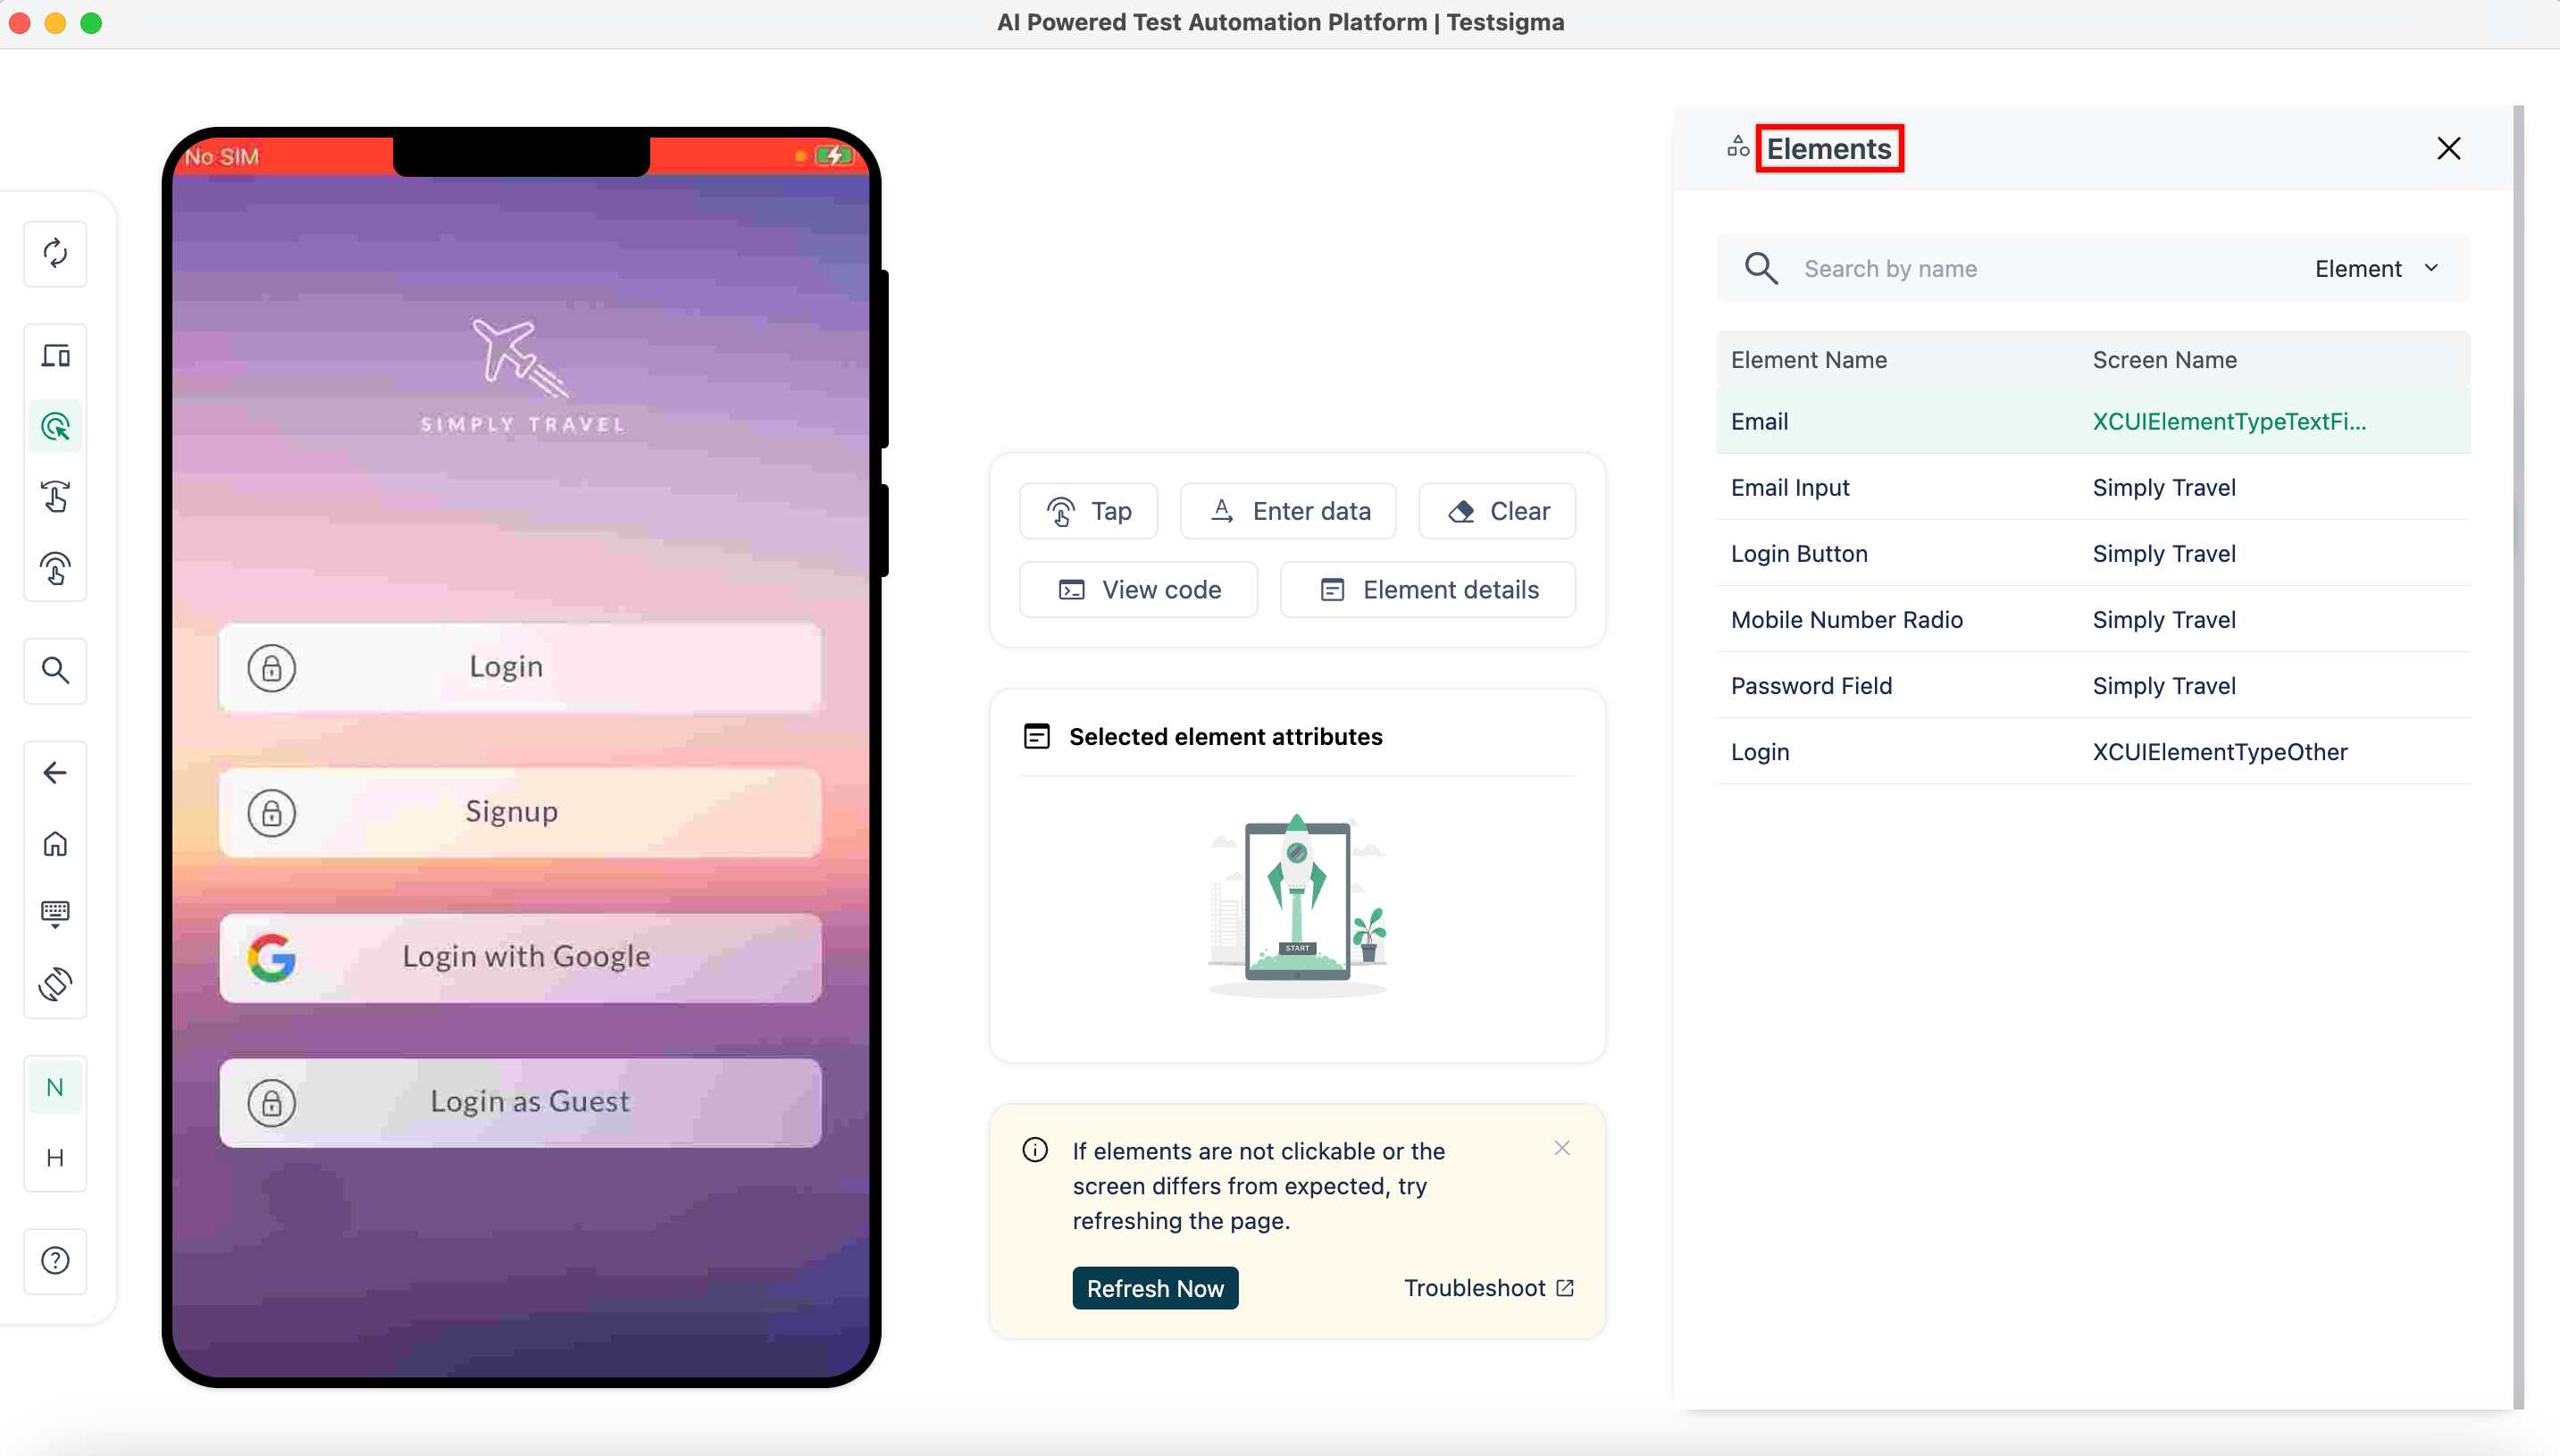
On Elements overlay, select the element you want to reuse.
-
Click on Update Step to finalize the change.