Integrations
qTest Integration with Testsigma
qTest is a manual test management tool. With qTest integration in Testsigma, you can link qTest test cases to Testsigma test cases and export Testsigma run results to qTest. This article discusses integrating qTest with Testsigma.
Prerequisites
Before you begin, ensure that:
- You have a valid Host URL, Username, and Password from TestRail.
- You have referred to the documentation on creating test cases.
- You have referred to the documentation on creating test plans.
Steps to Integrate Testsigma with qTest
Section titled “Steps to Integrate Testsigma with qTest”-
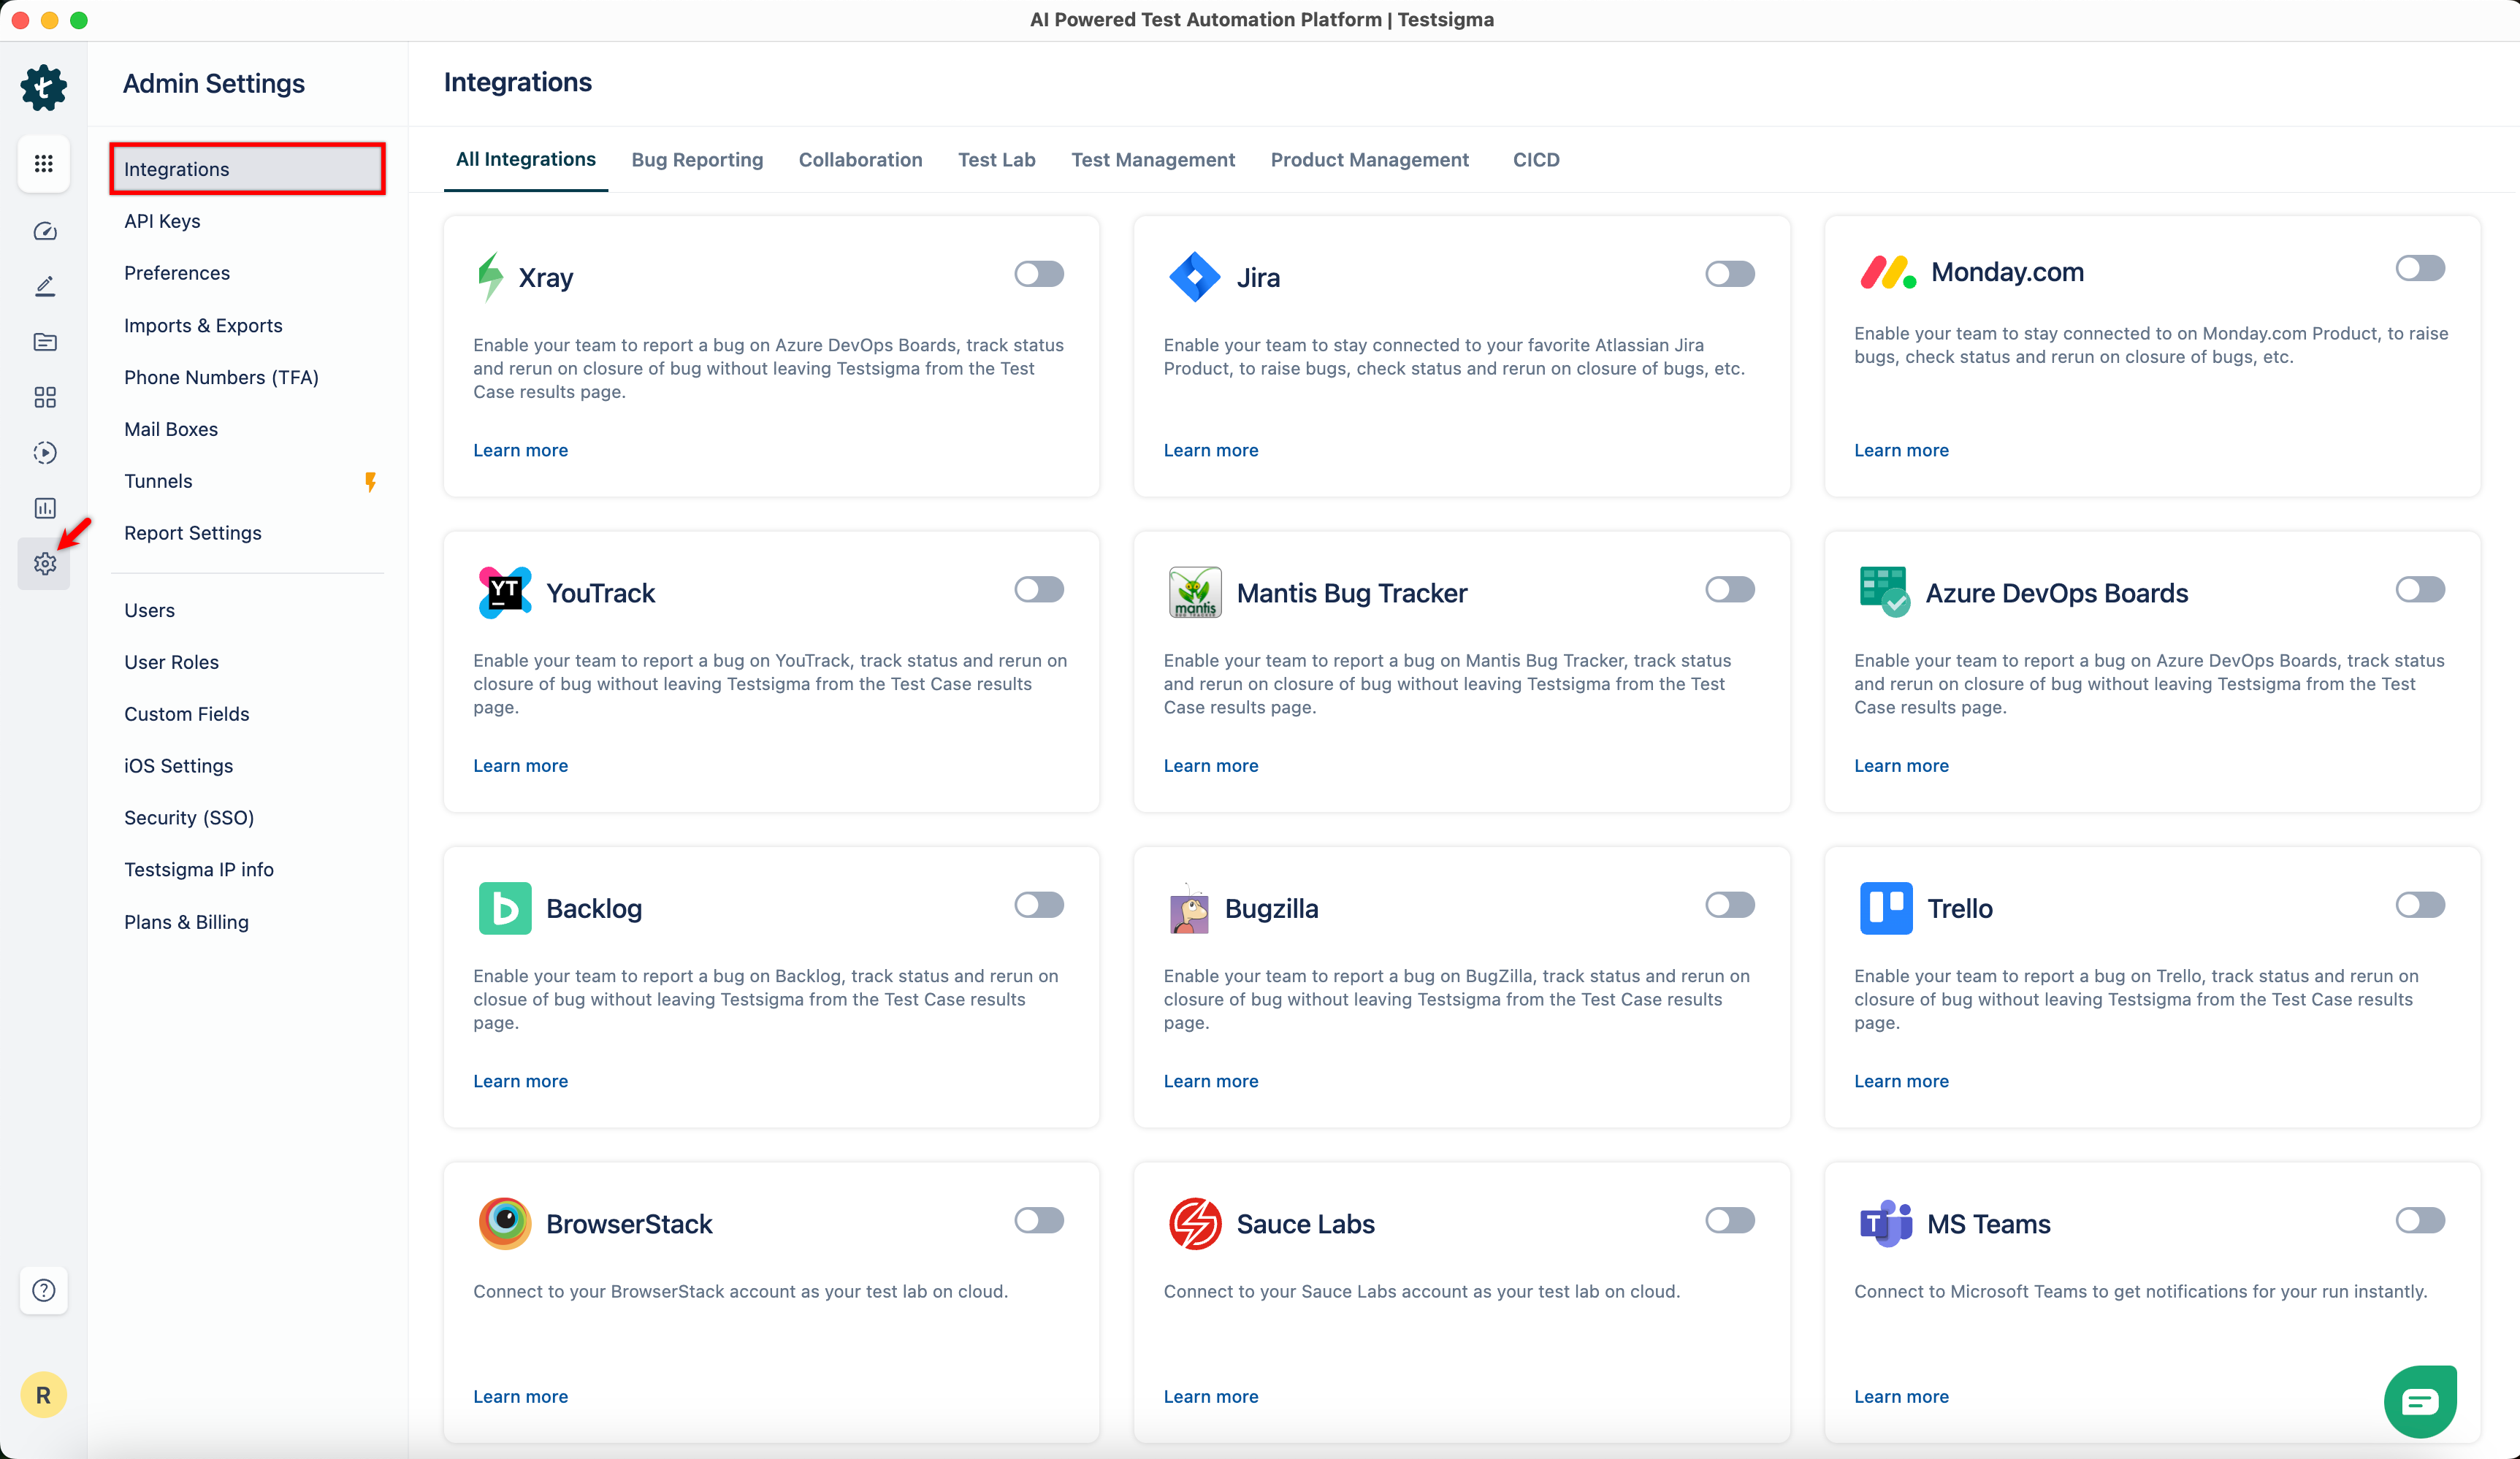
From the left navigation bar, go to Settings > Integrations.
-
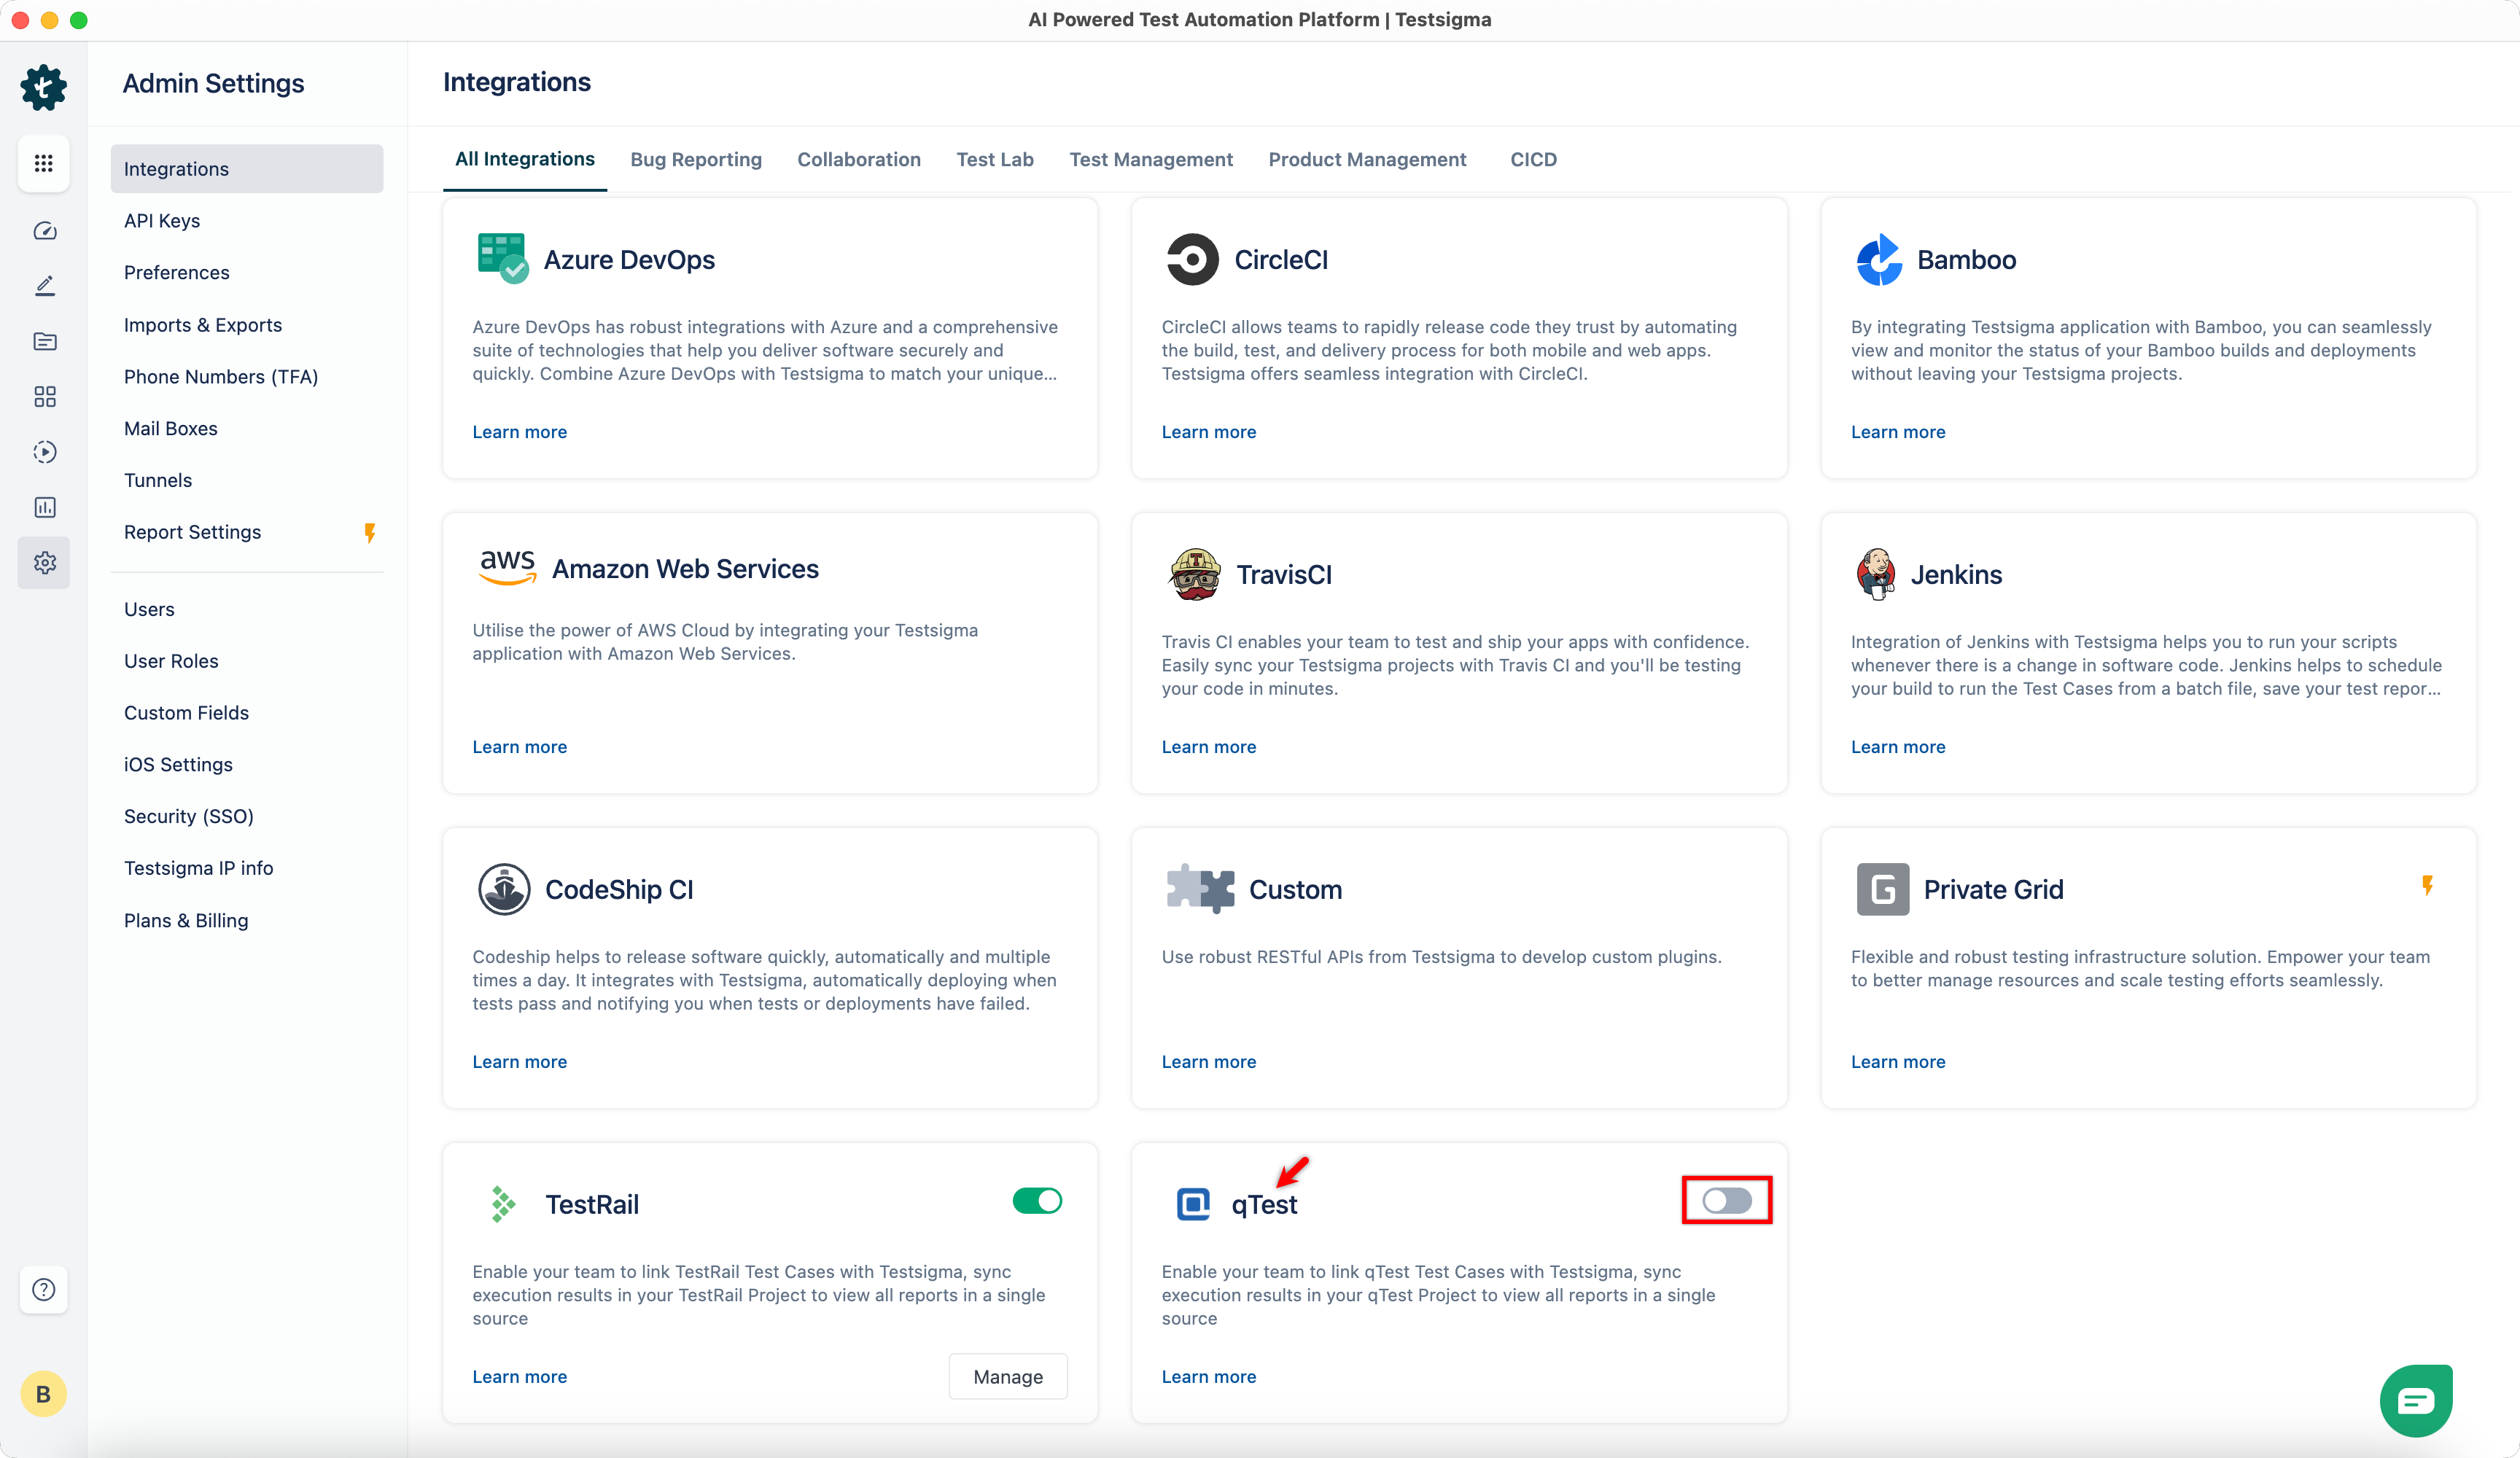
Enable toggle on qTest widget.
-
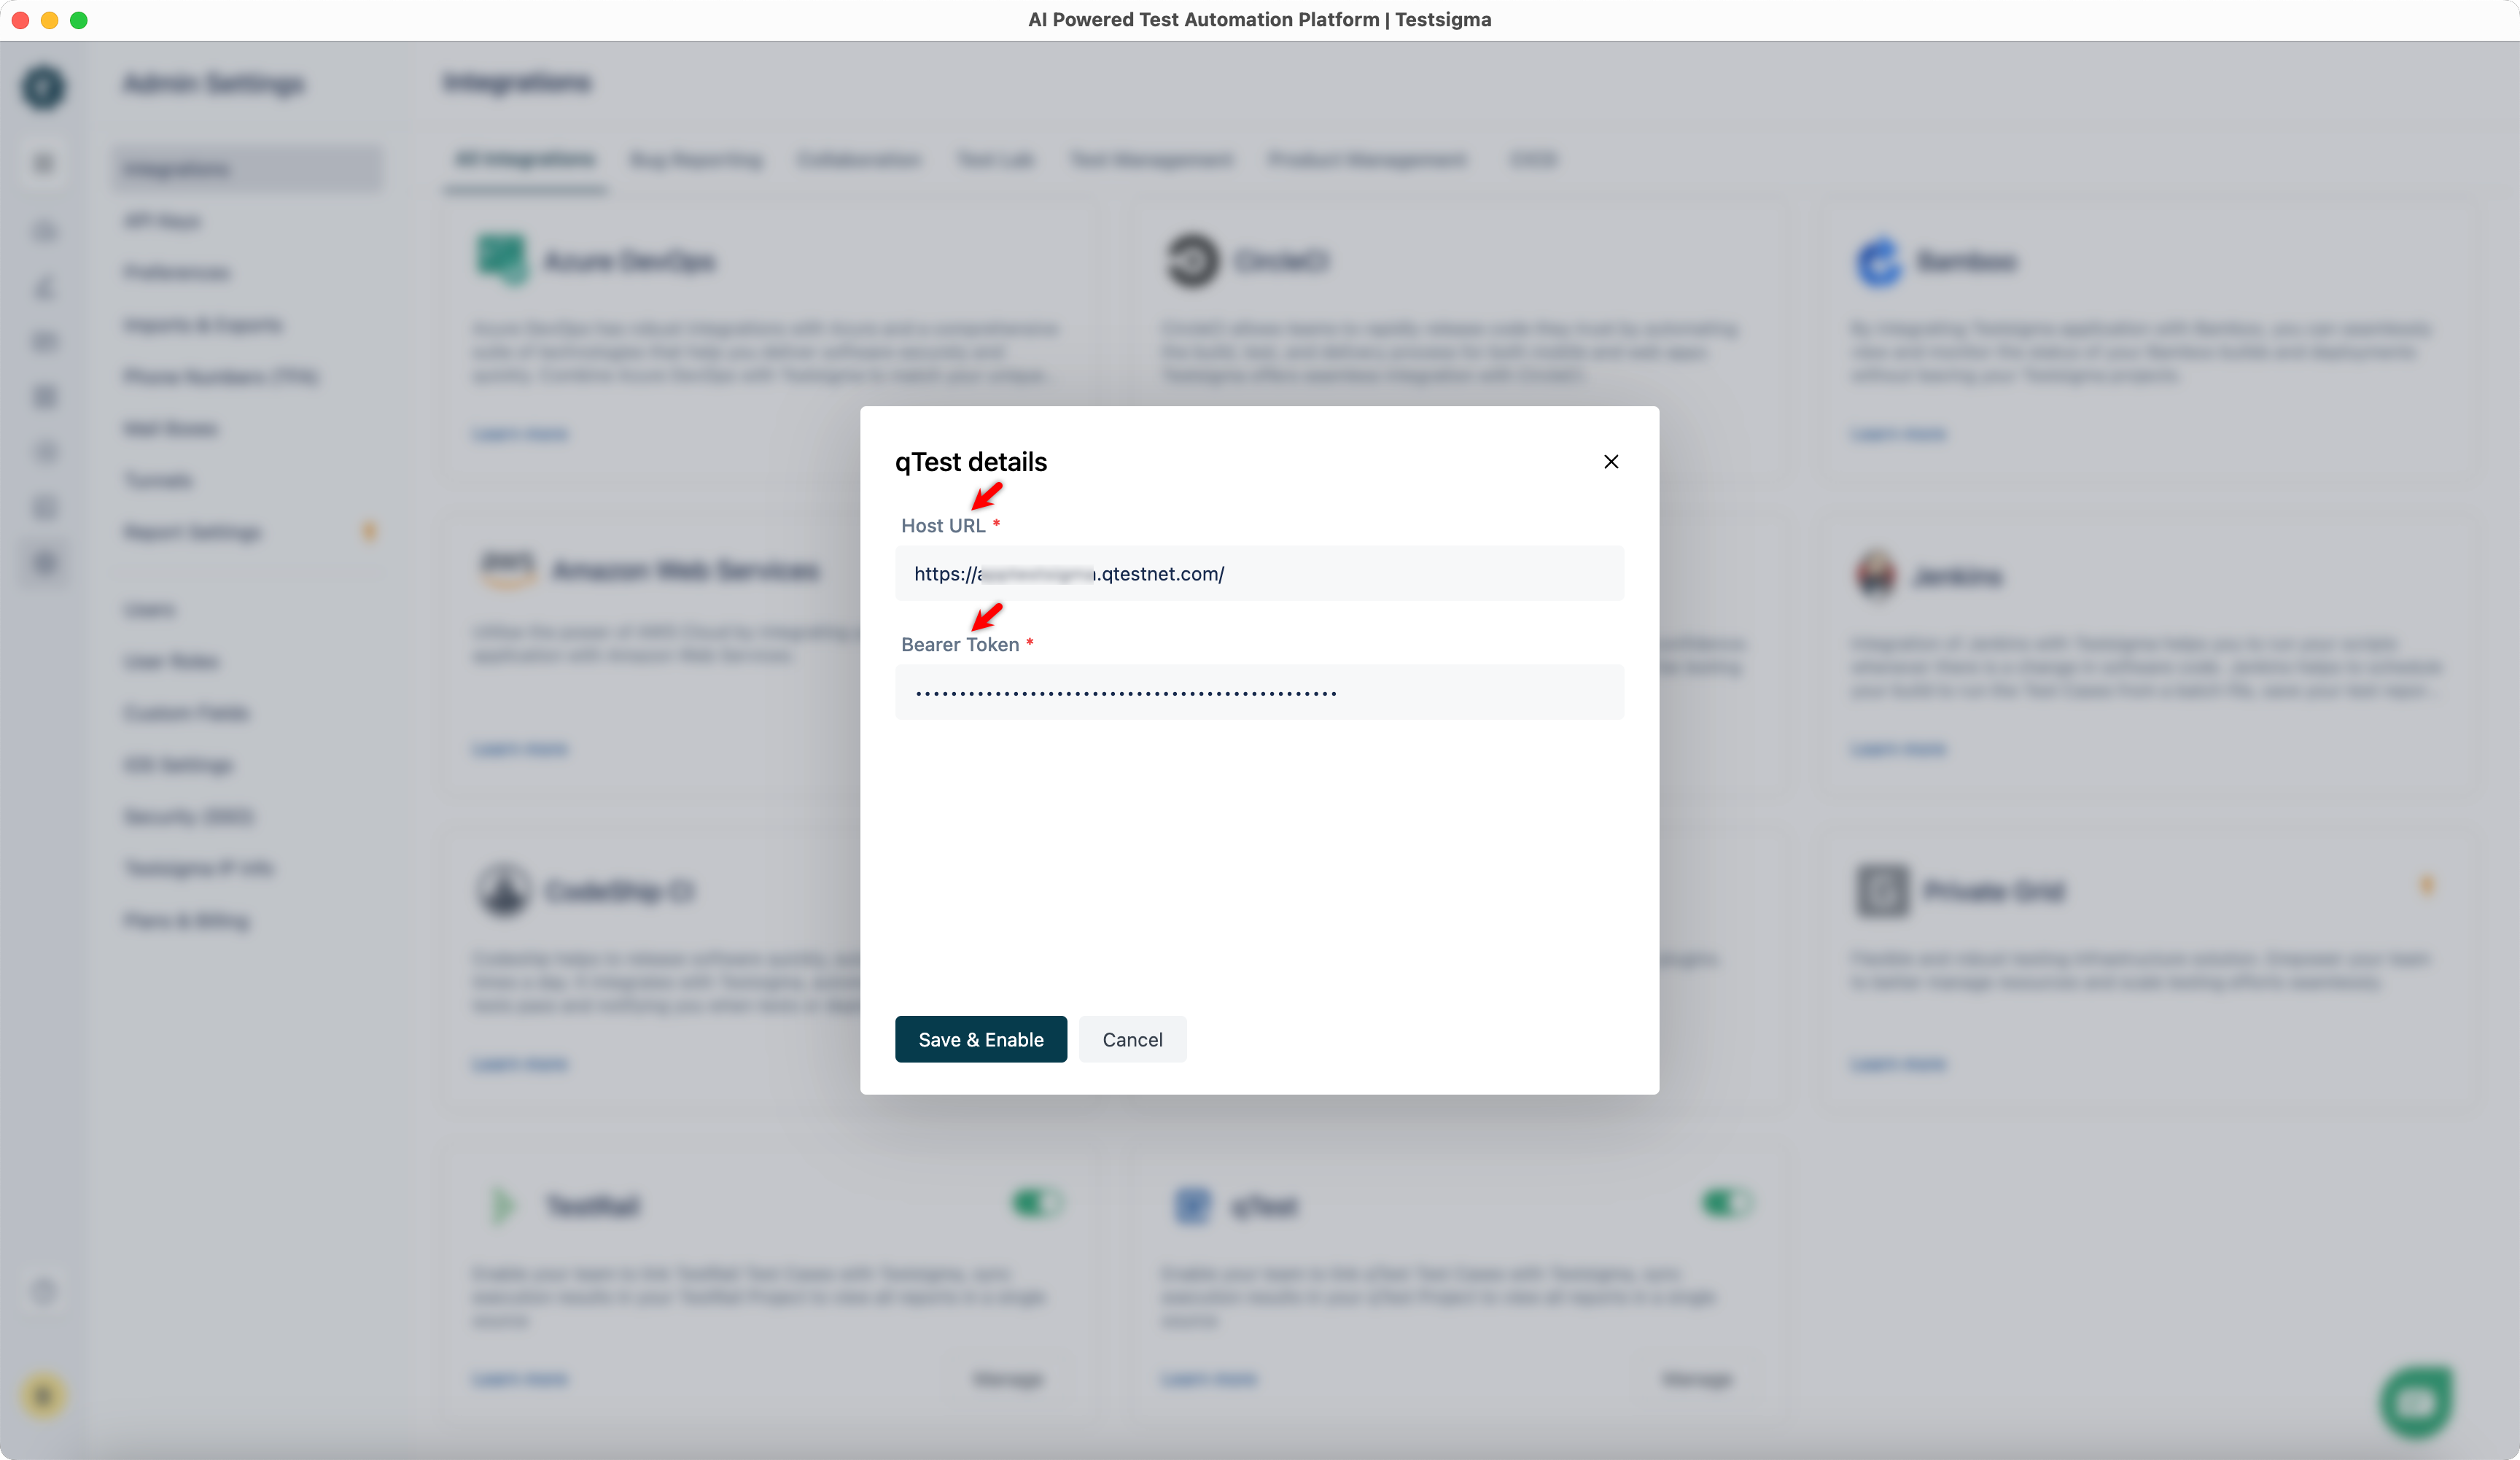
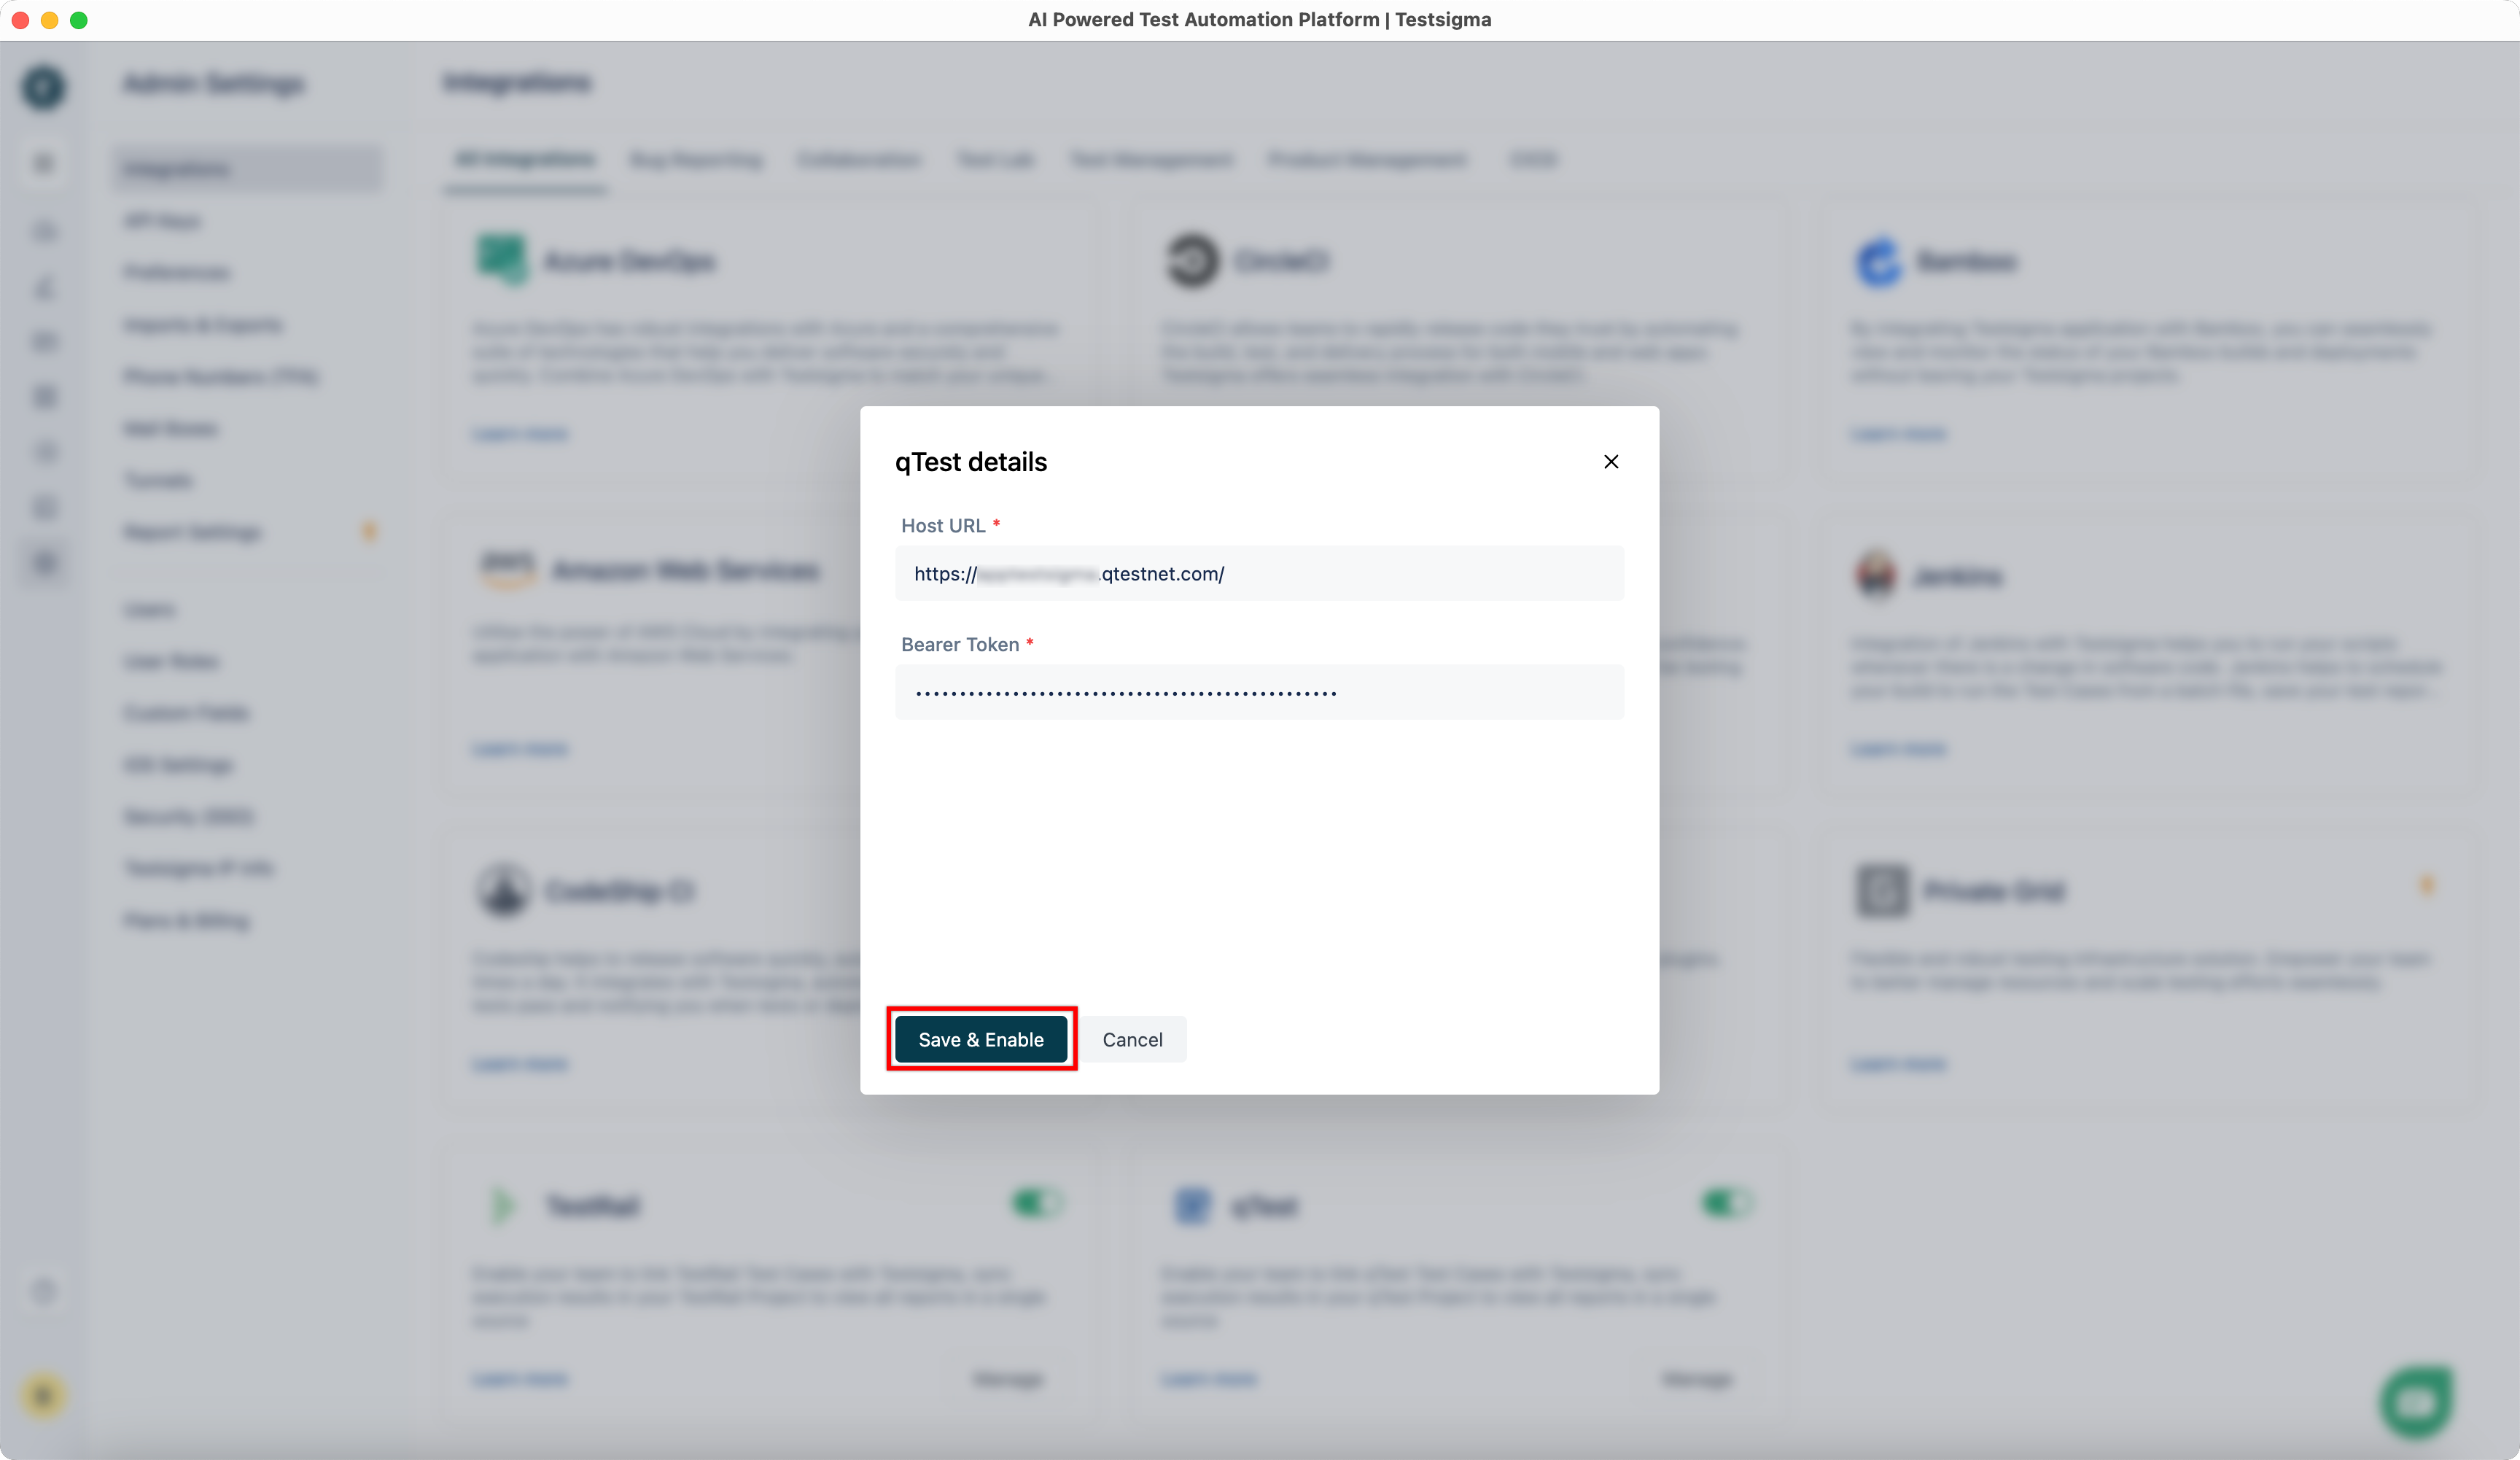
On the qTest Details dialog, enter Host URL and Bearer Token.
-
Click Save & Enable.
Steps to Link qTest ID with Testsigma Test Case
Section titled “Steps to Link qTest ID with Testsigma Test Case”- Open the test case in qTest and copy its ID.

-
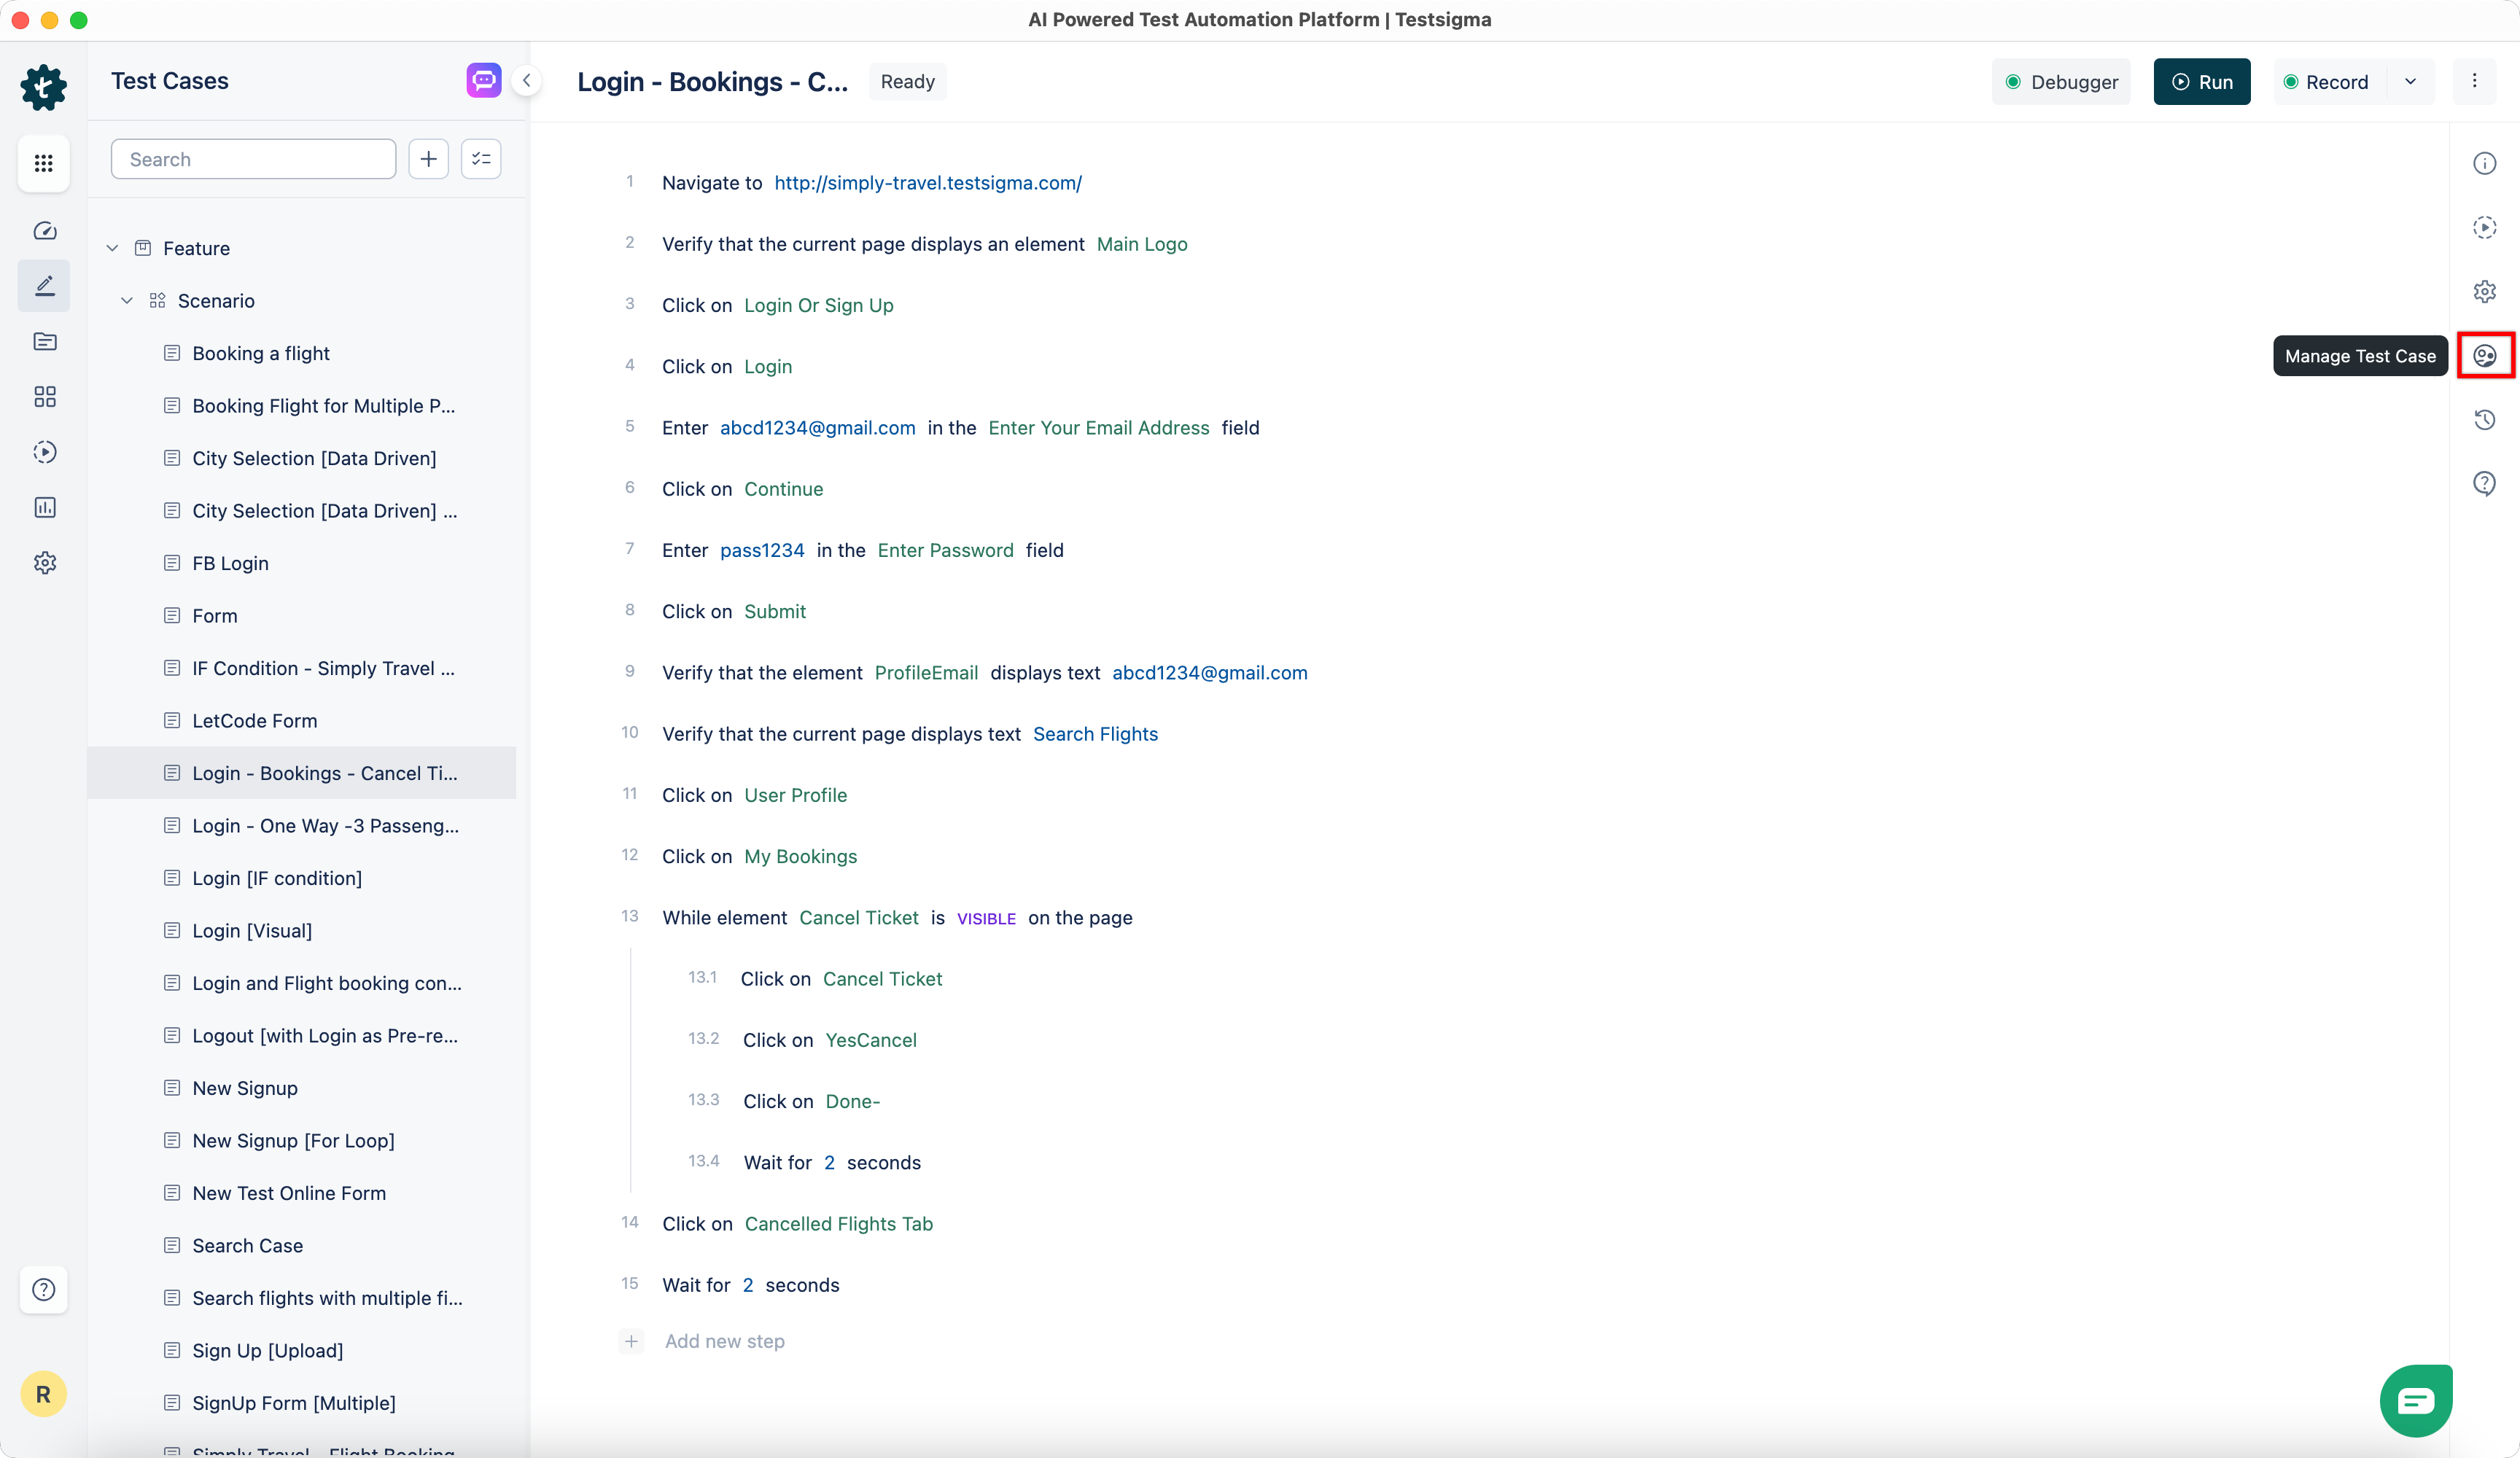
Navigate to the test case you want to link in Testsigma and select Manage Test Case from the Utility Panel.
-
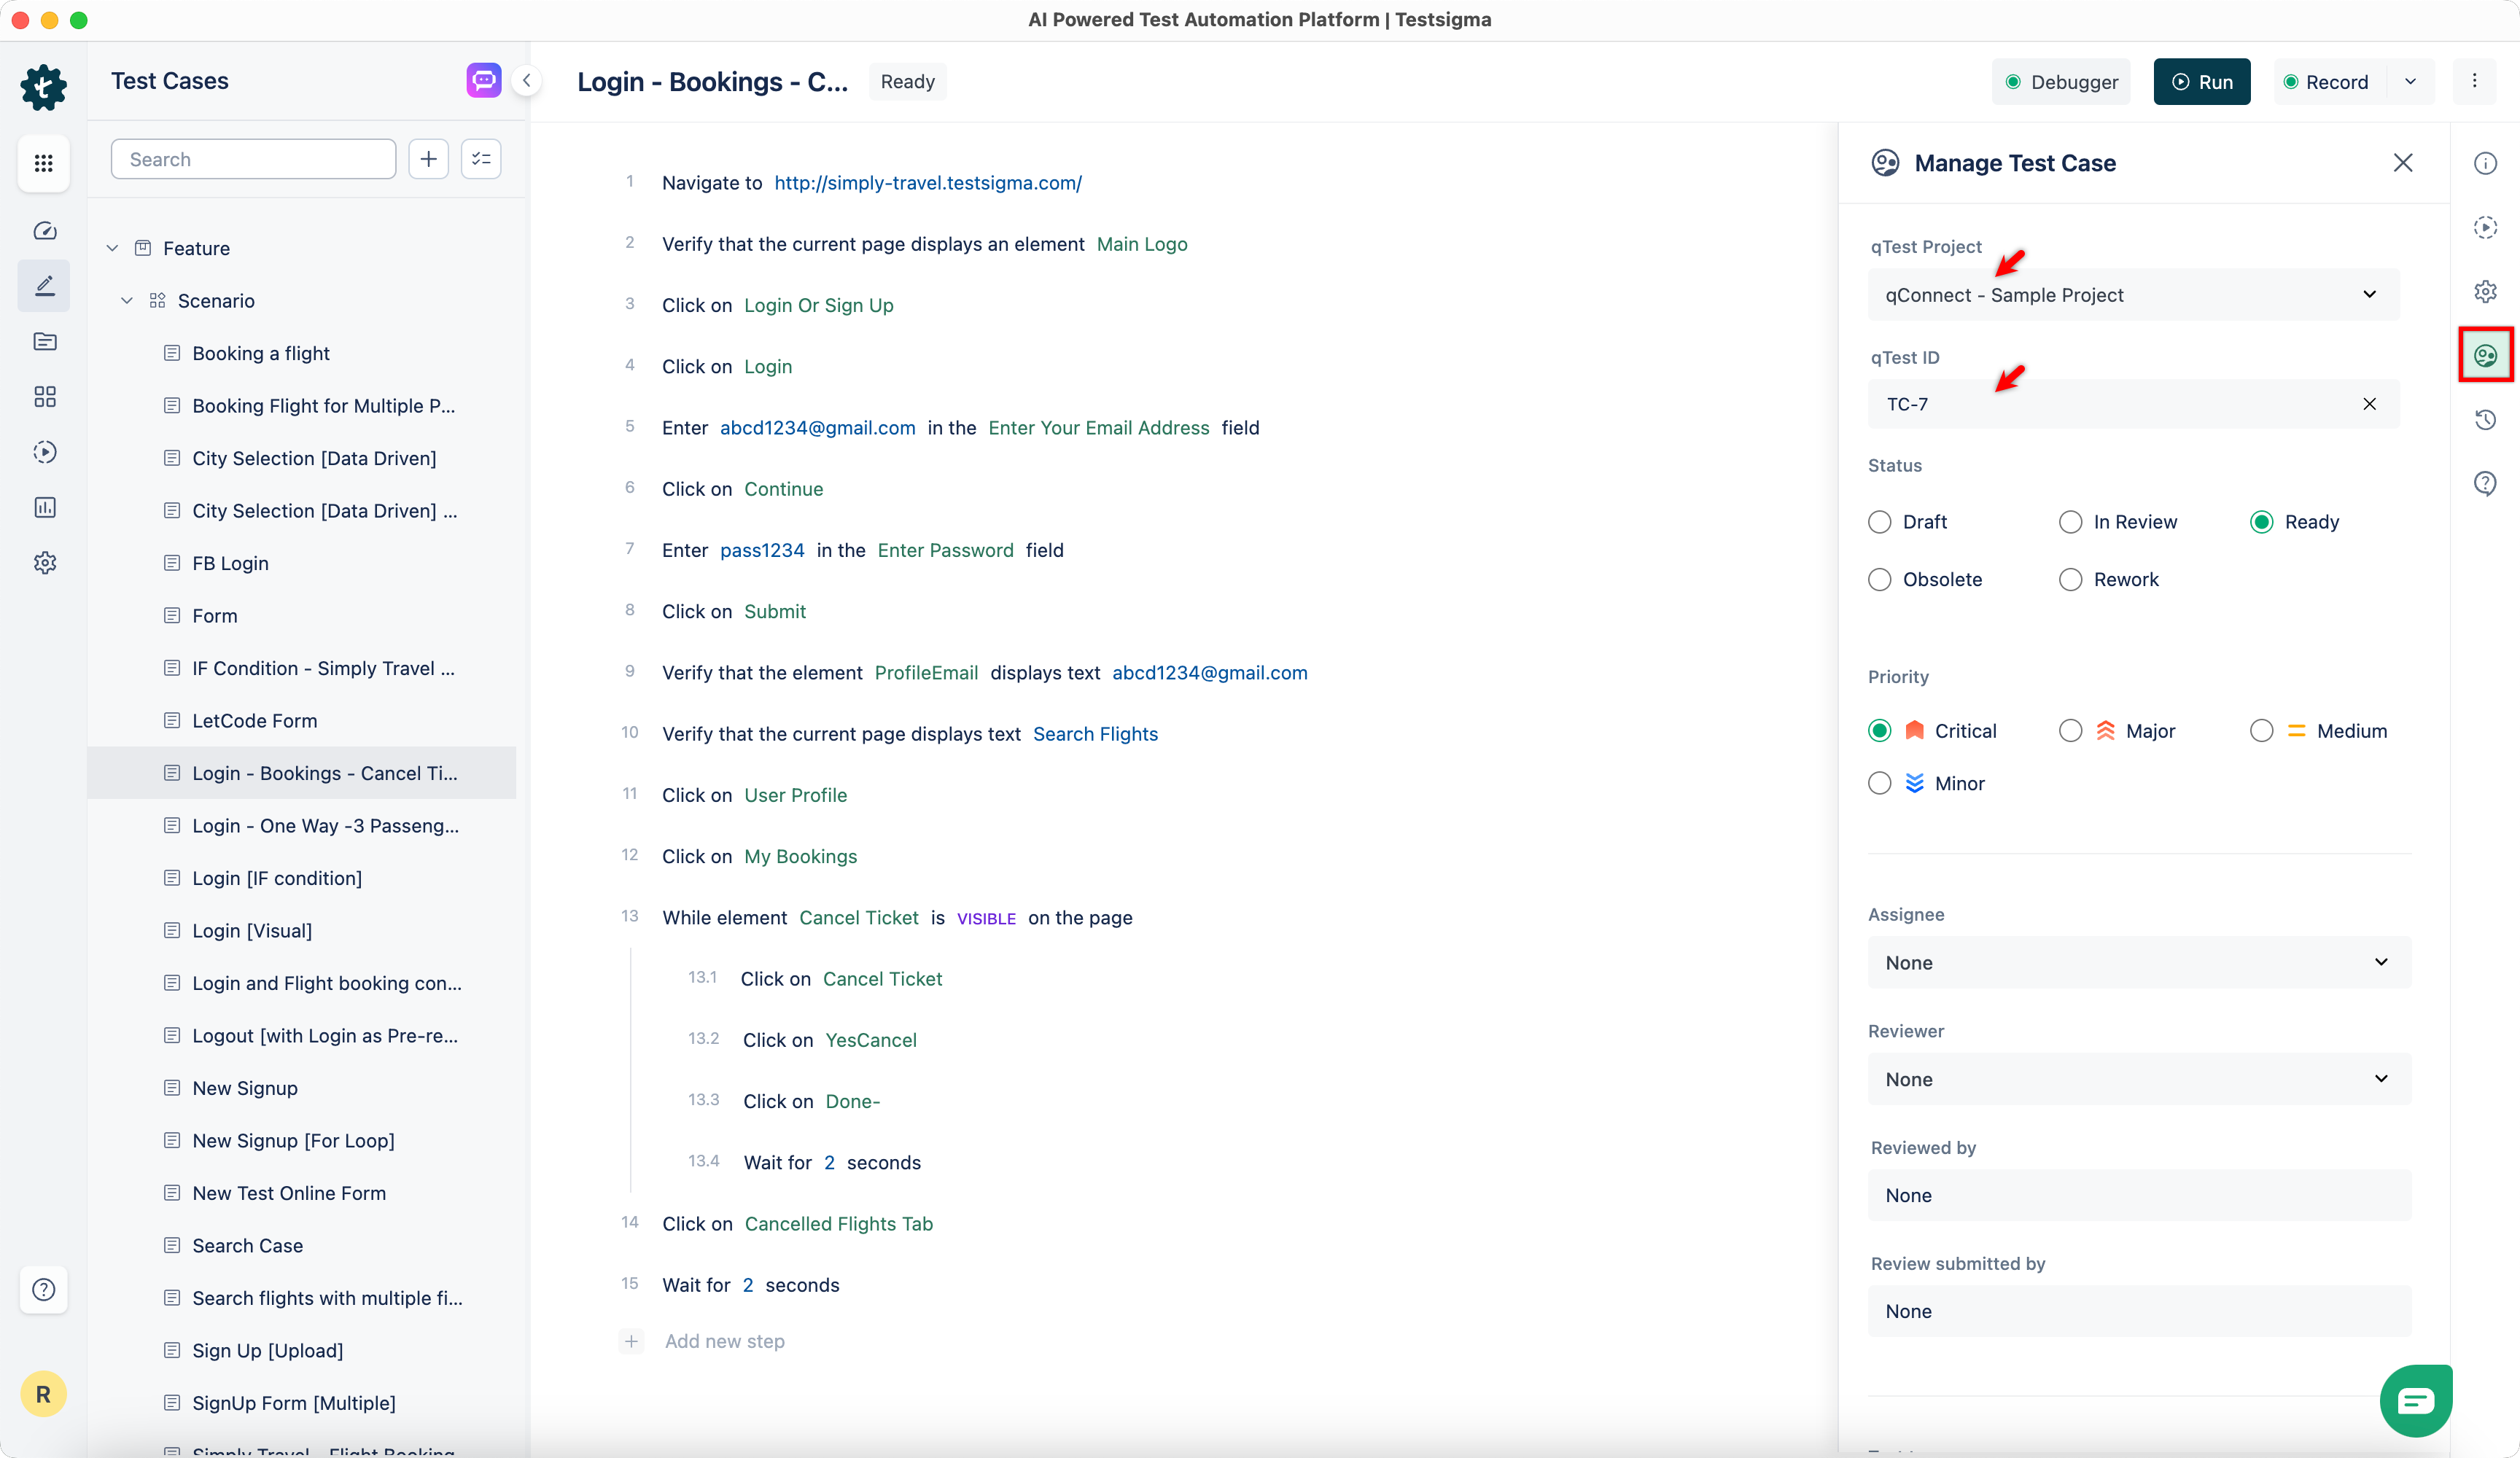
Select a qTest Project from the dropdown menu, enter the qTest ID in the input box, click the link icon.
 Follow steps 1–3 for each qTest test case you want to map in Testsigma.
qTest Automation Settings
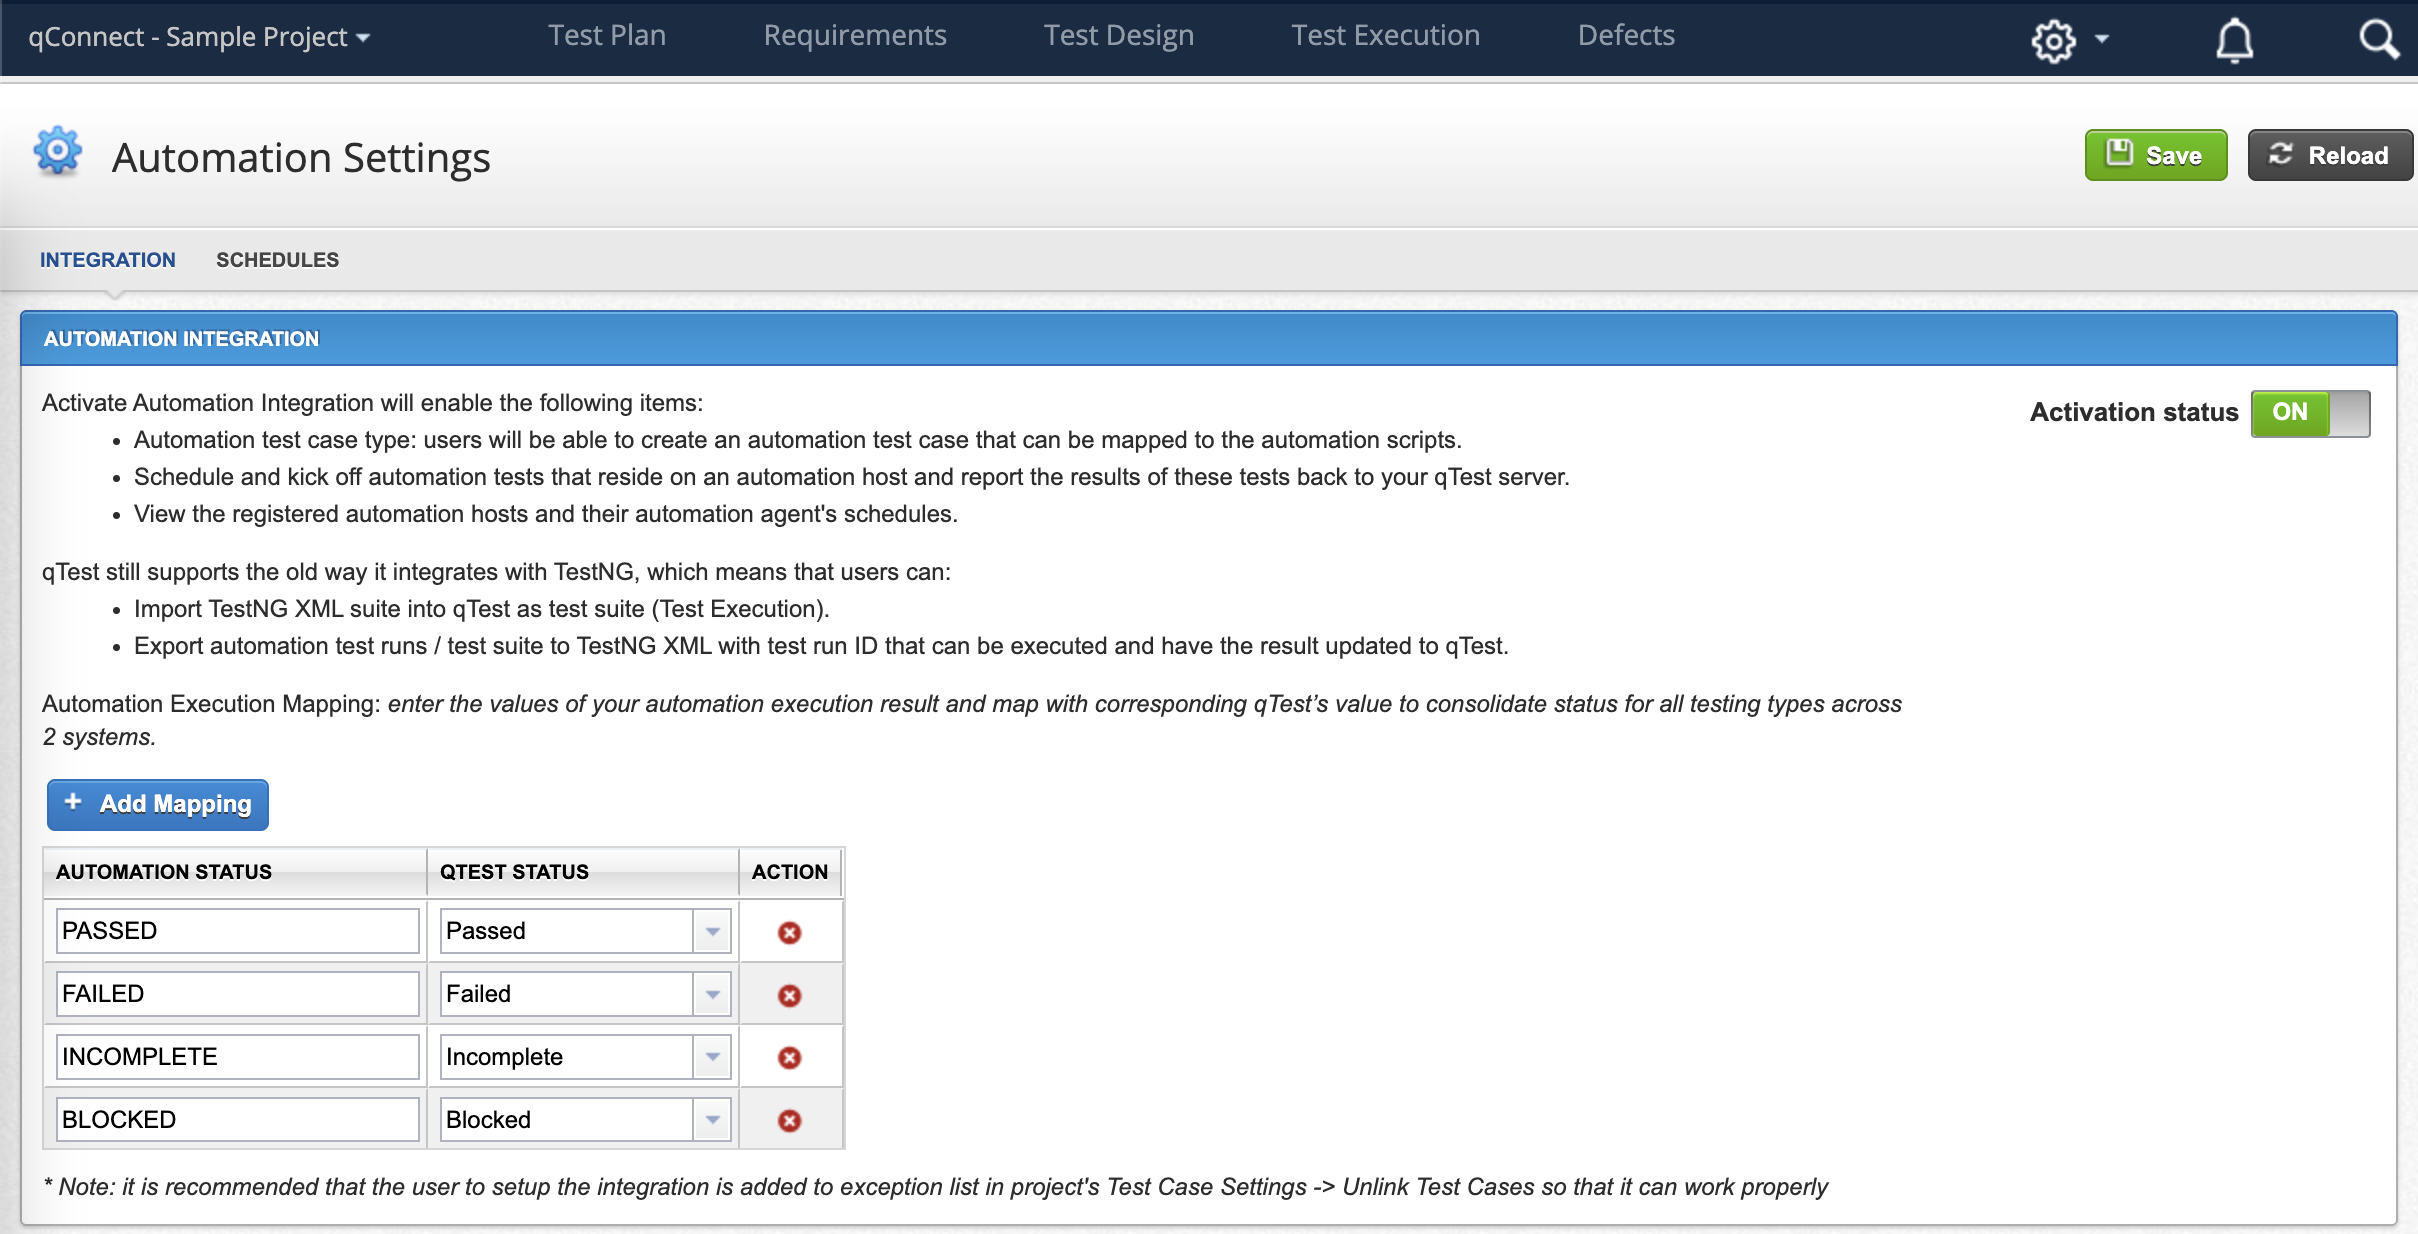
Section titled “qTest Automation Settings”In qTest, activate Automation Integration and map automation statuses accordingly. For more info, see Automation Settings.
Automation Status Mapping
Section titled “Automation Status Mapping”| Automation Status | qTest Status |
|---|---|
| PASSED | Passed |
| FAILED | Failed |
| INCOMPLETE | Incomplete |
| BLOCKED | Blocked |
Make sure that the above mentioned statuses are correctly mapped within qTest to maintain consistency in test result tracking.
Steps to Execute Test Plan
Section titled “Steps to Execute Test Plan”-
After linking the test cases in Testsigma, create a test suite with the linked test cases and add it to a test plan.
-
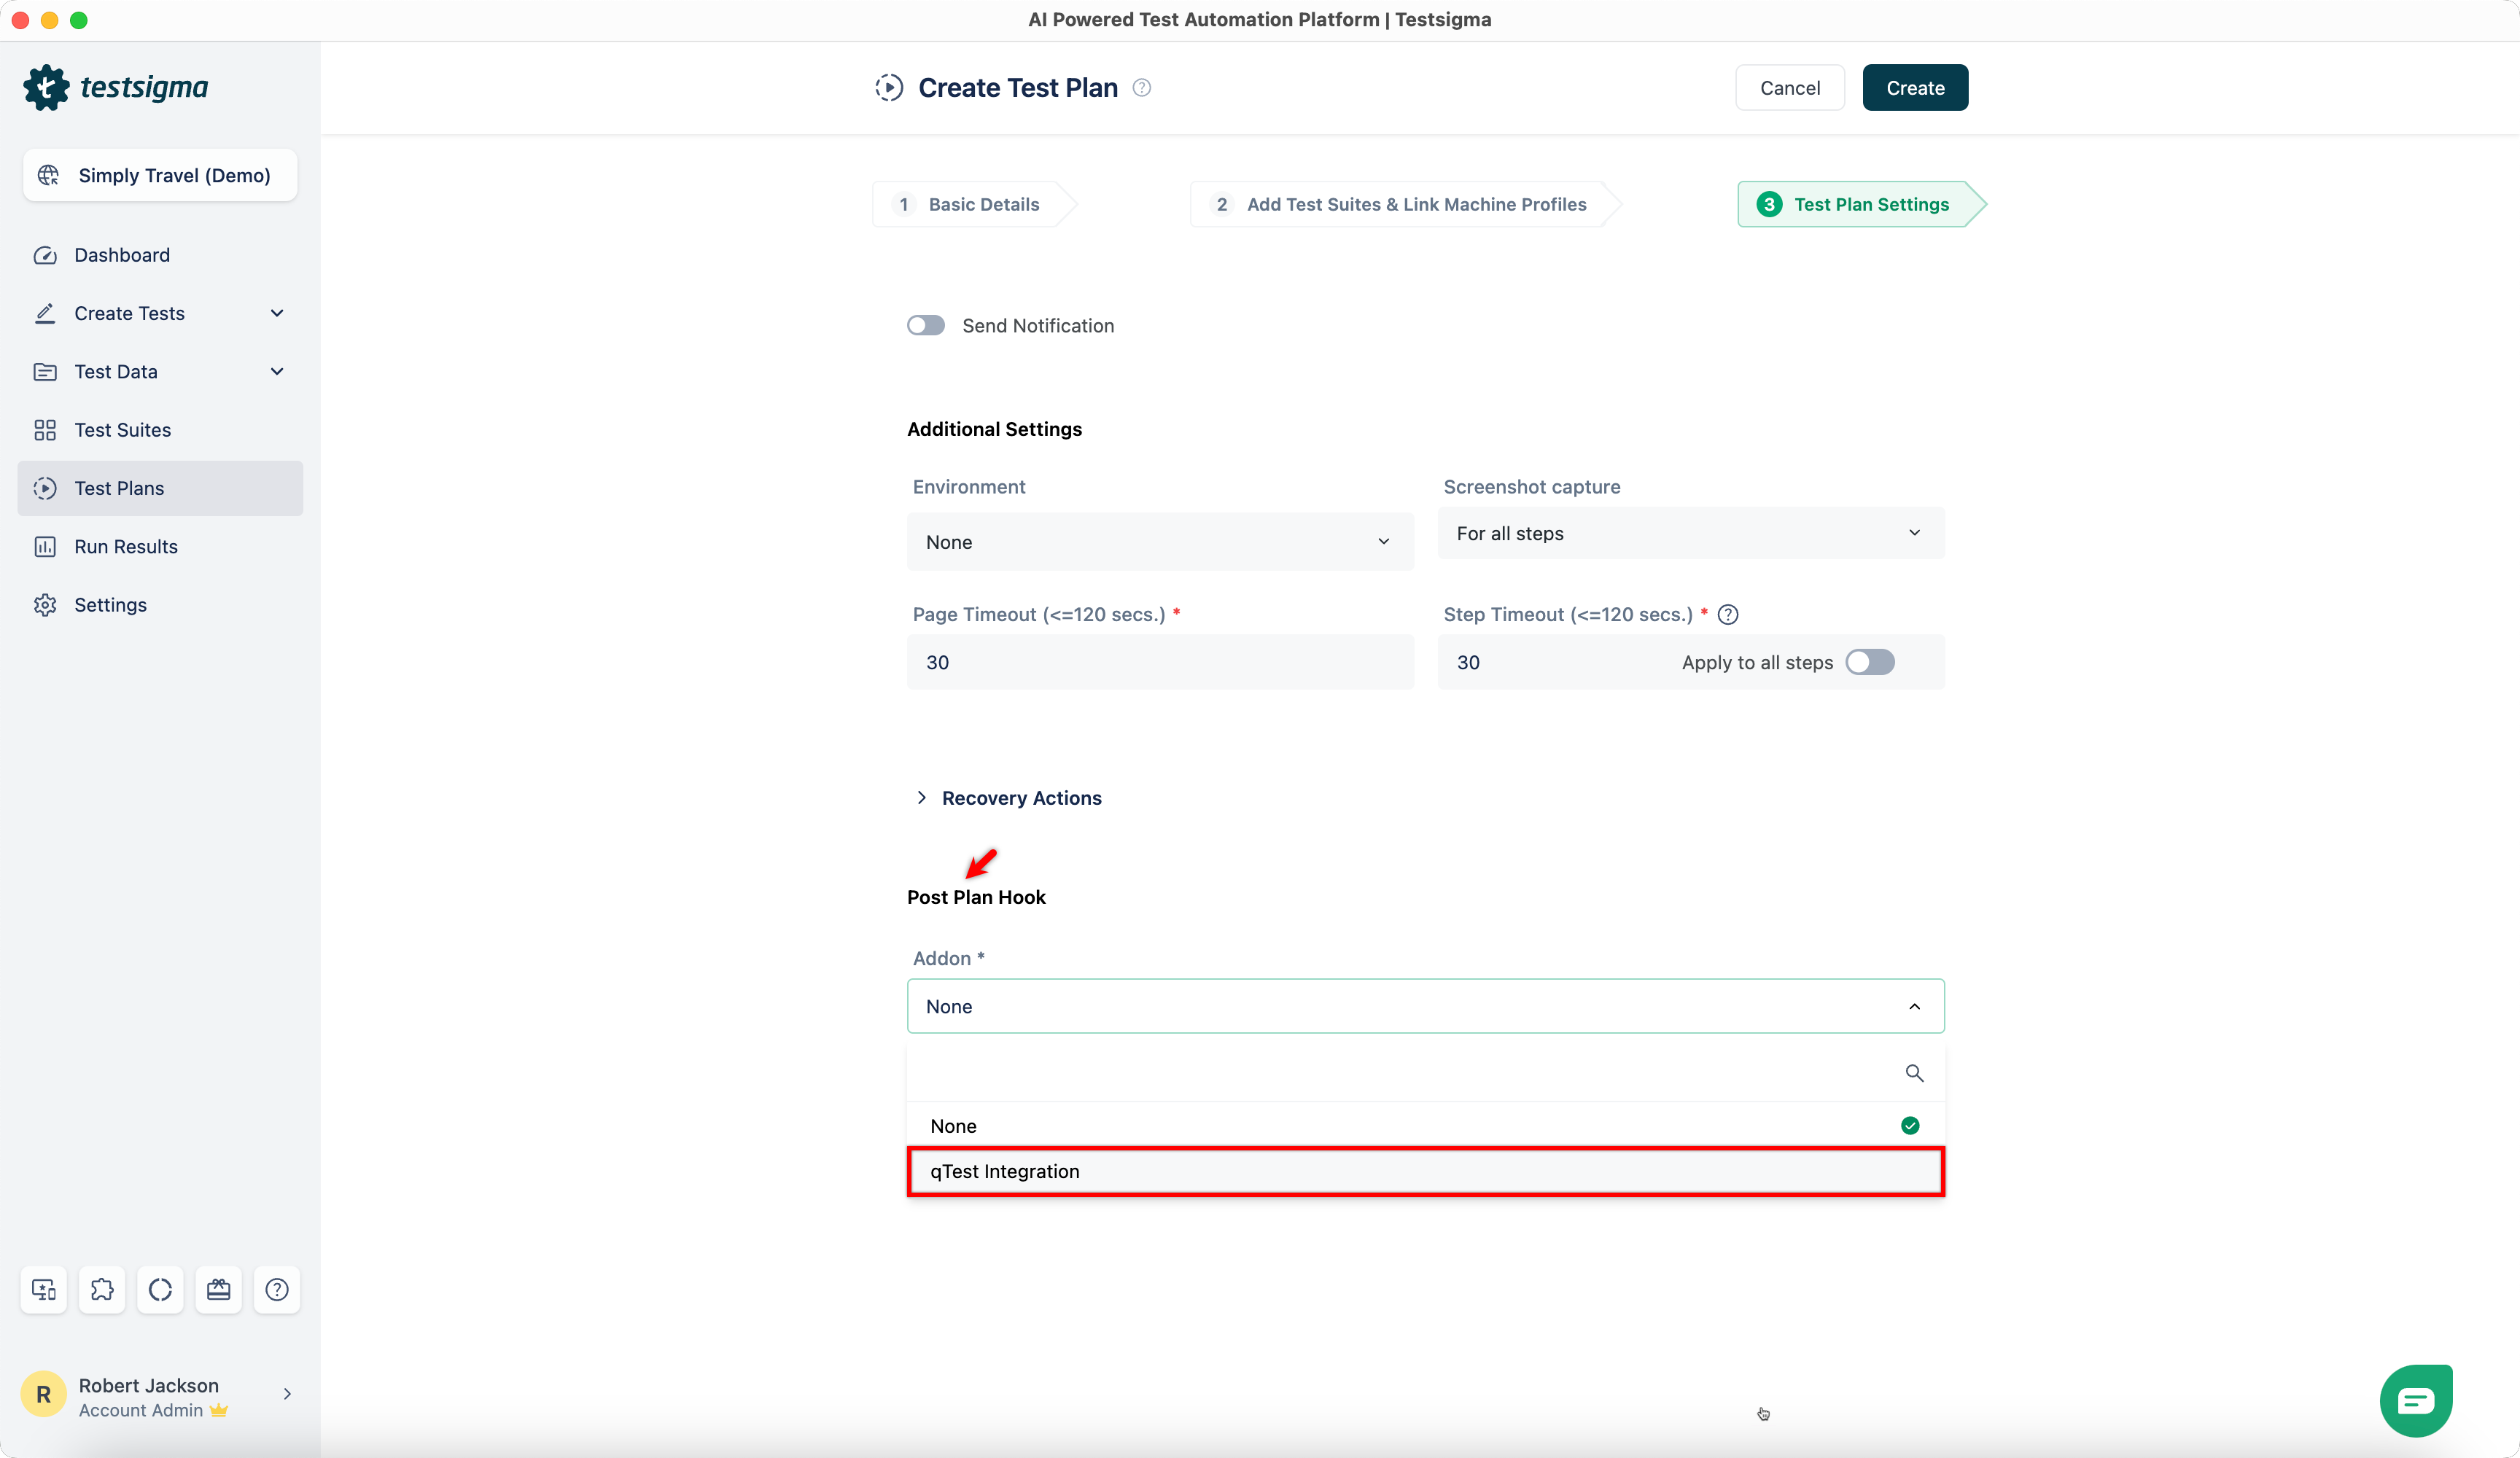
In the Test Plan Settings, select qTest Addon from the Post Plan Hook dropdown menu.
-
Enter the following details in the respective text boxes:
-
API_KEY: Testsigma API Key (For more information, see Settings > API Keys).
-
RELEASE_ID: ID of the qTest Release.
Click Release & copy the numeric value afterid=in the URL, which is your Release ID.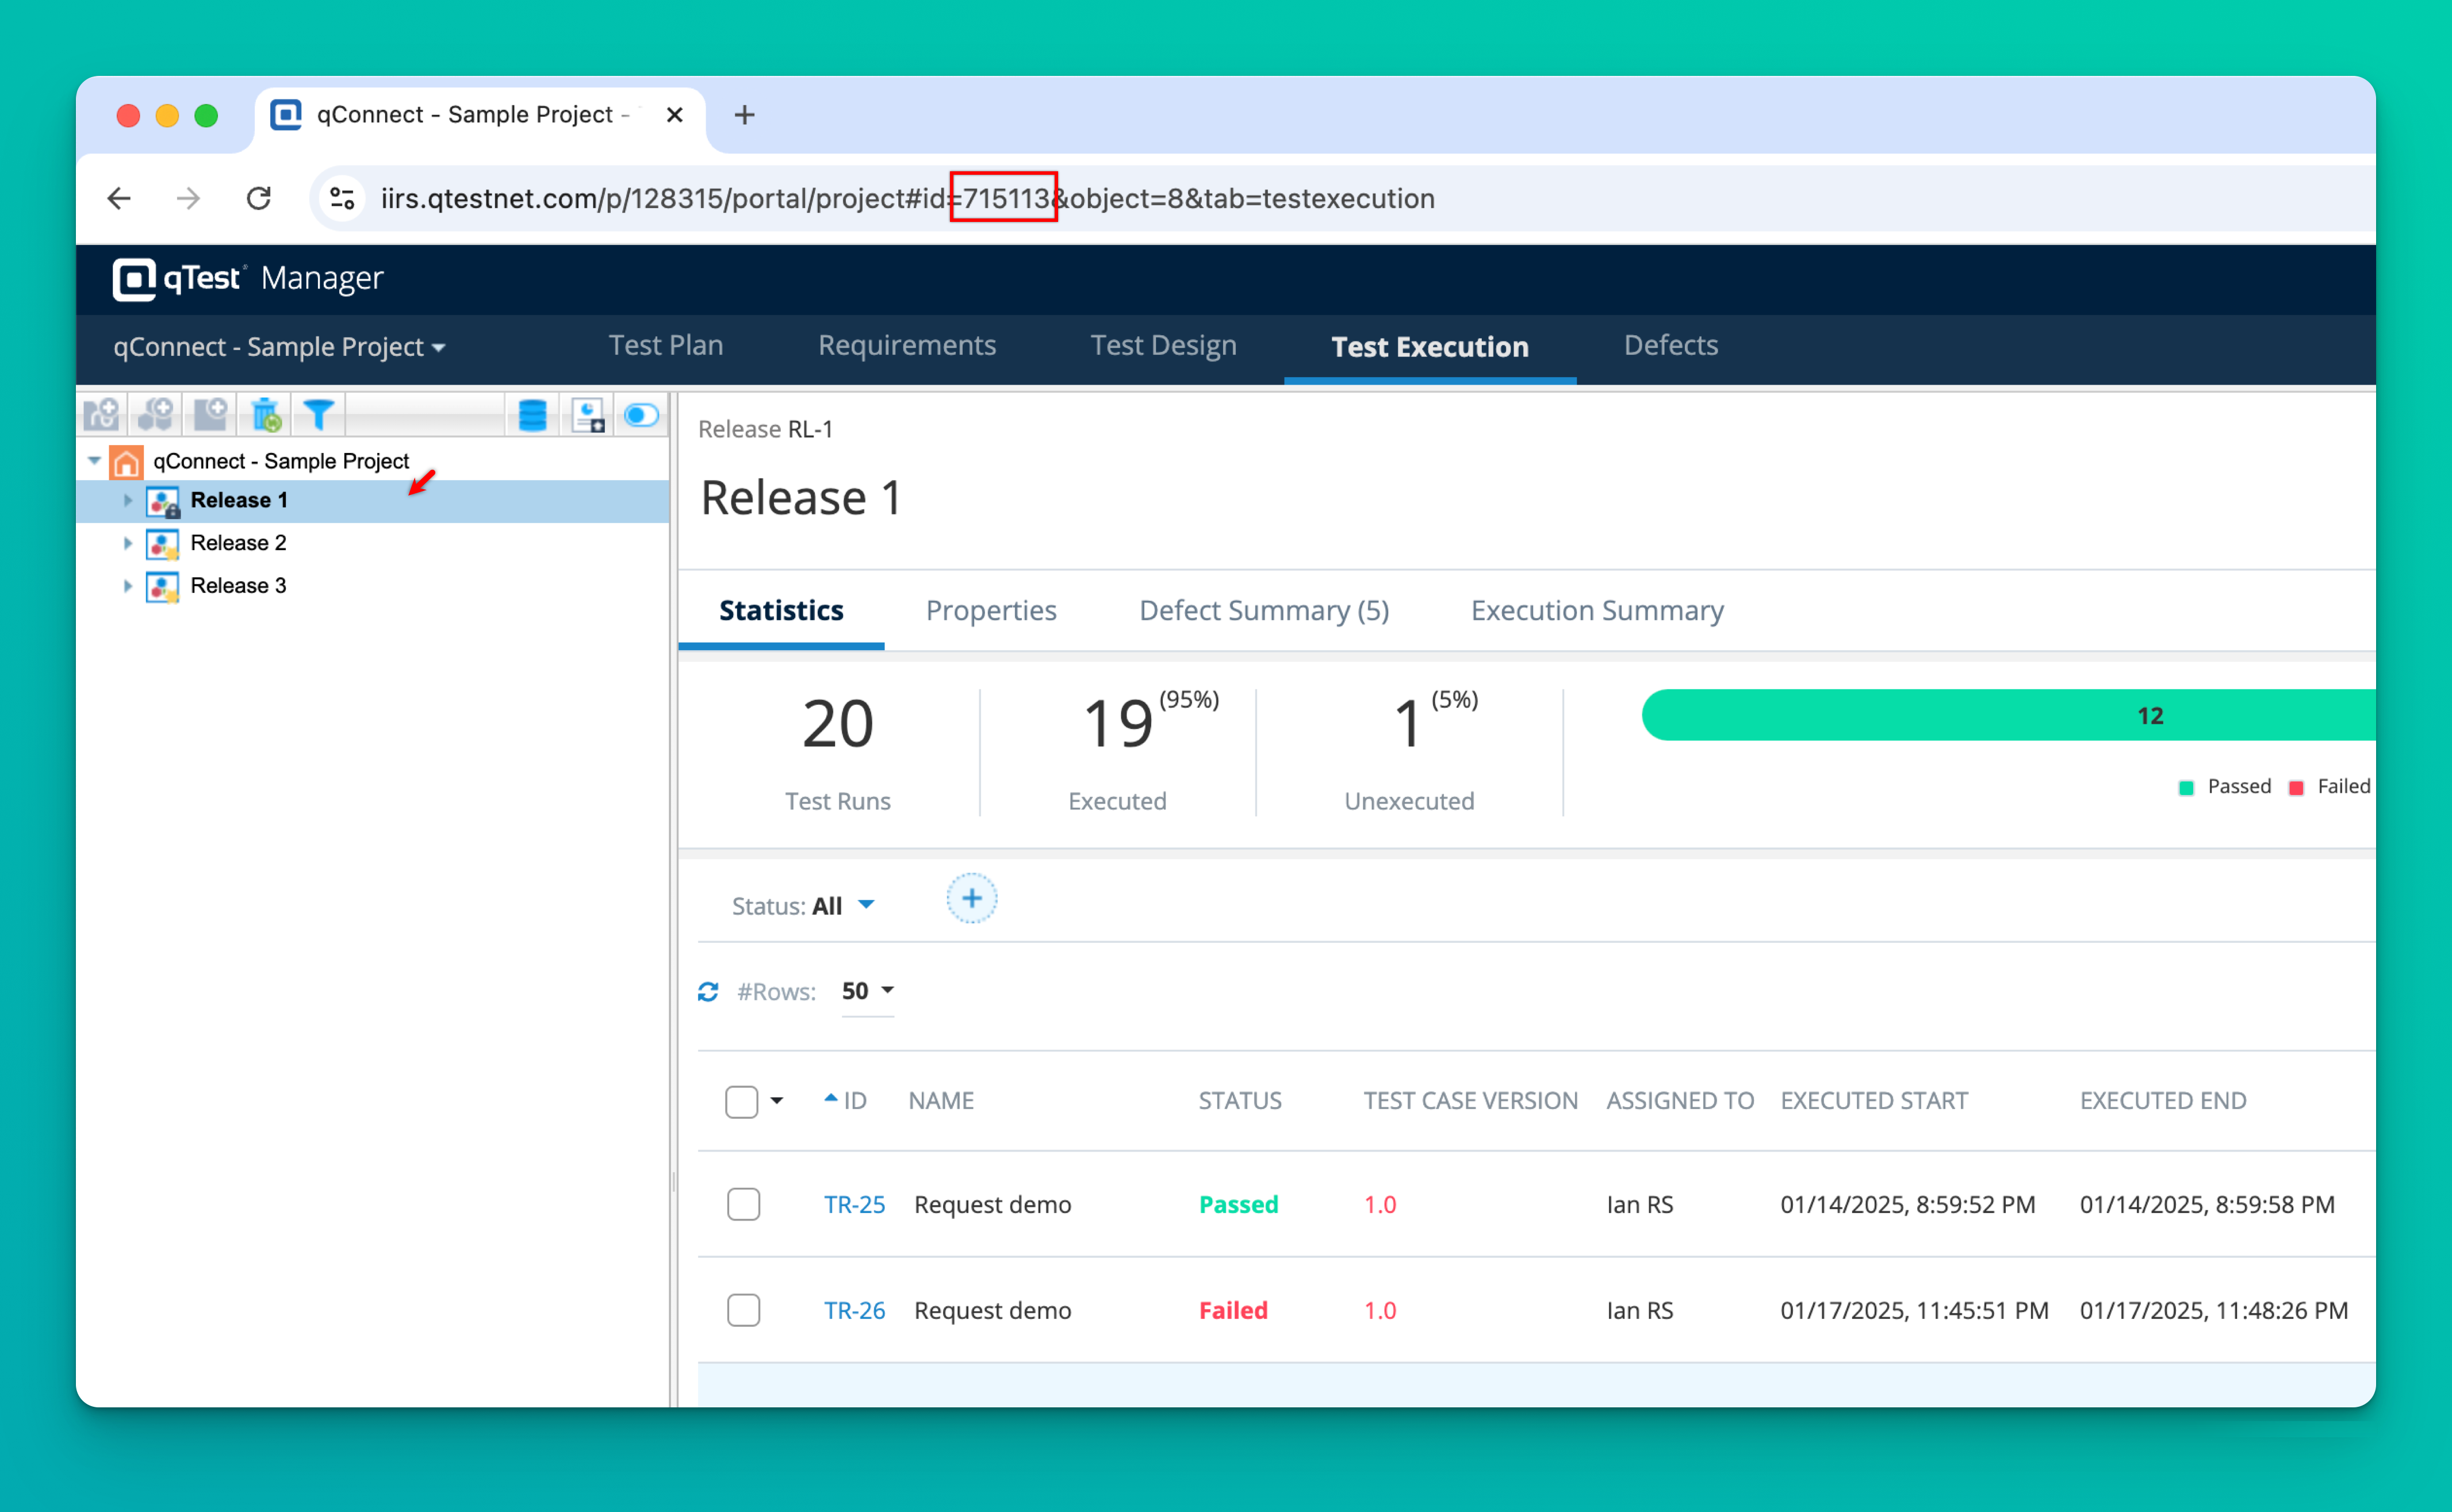
-
CYCLE_ID: ID of the qTest Cycle.
Click Cycle & copy the numeric value afterid=in the URL, which is your Cycle ID.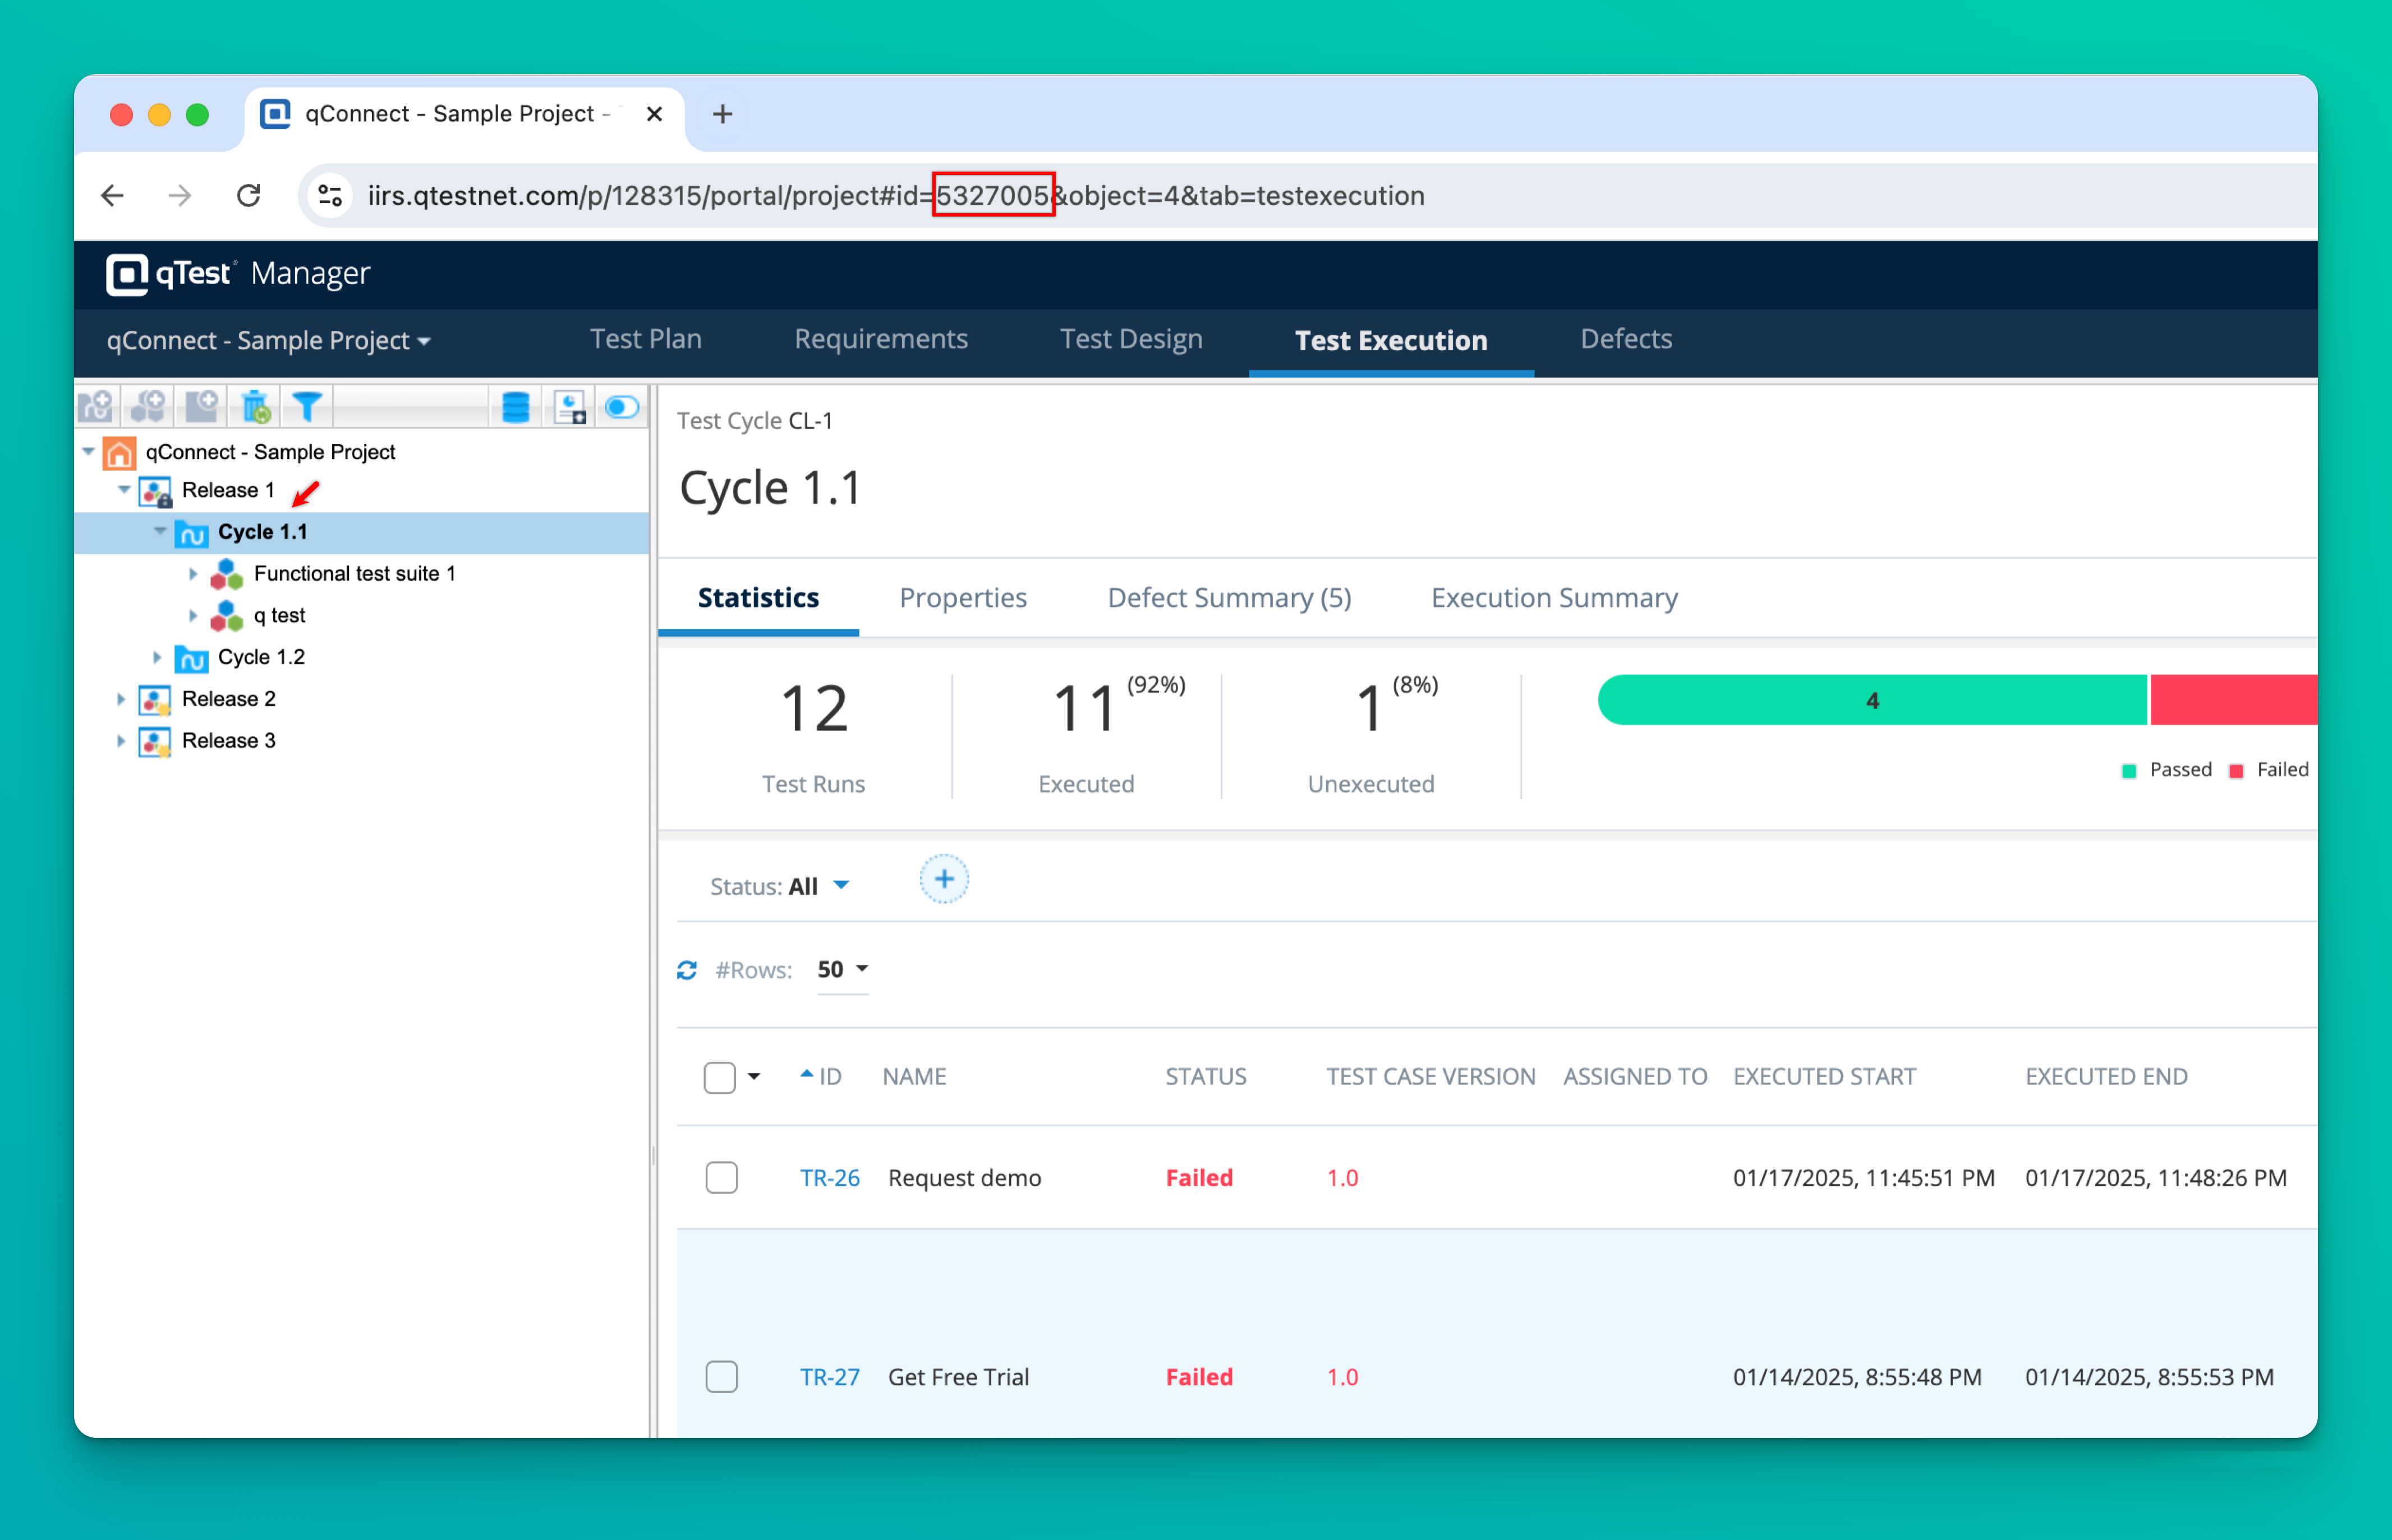
-
OVERRIDE_ON_RERUN: Set to true/false.
- true: On test plan rerun, pushes results into the original qTest cycle.
- false: Creates a new cycle with Rerun #num appended to the original cycle name.
-
PROJECT_ID: ID of the qTest Project.
Click Project & copy the numeric value after/p/in the URL, which is your Project ID.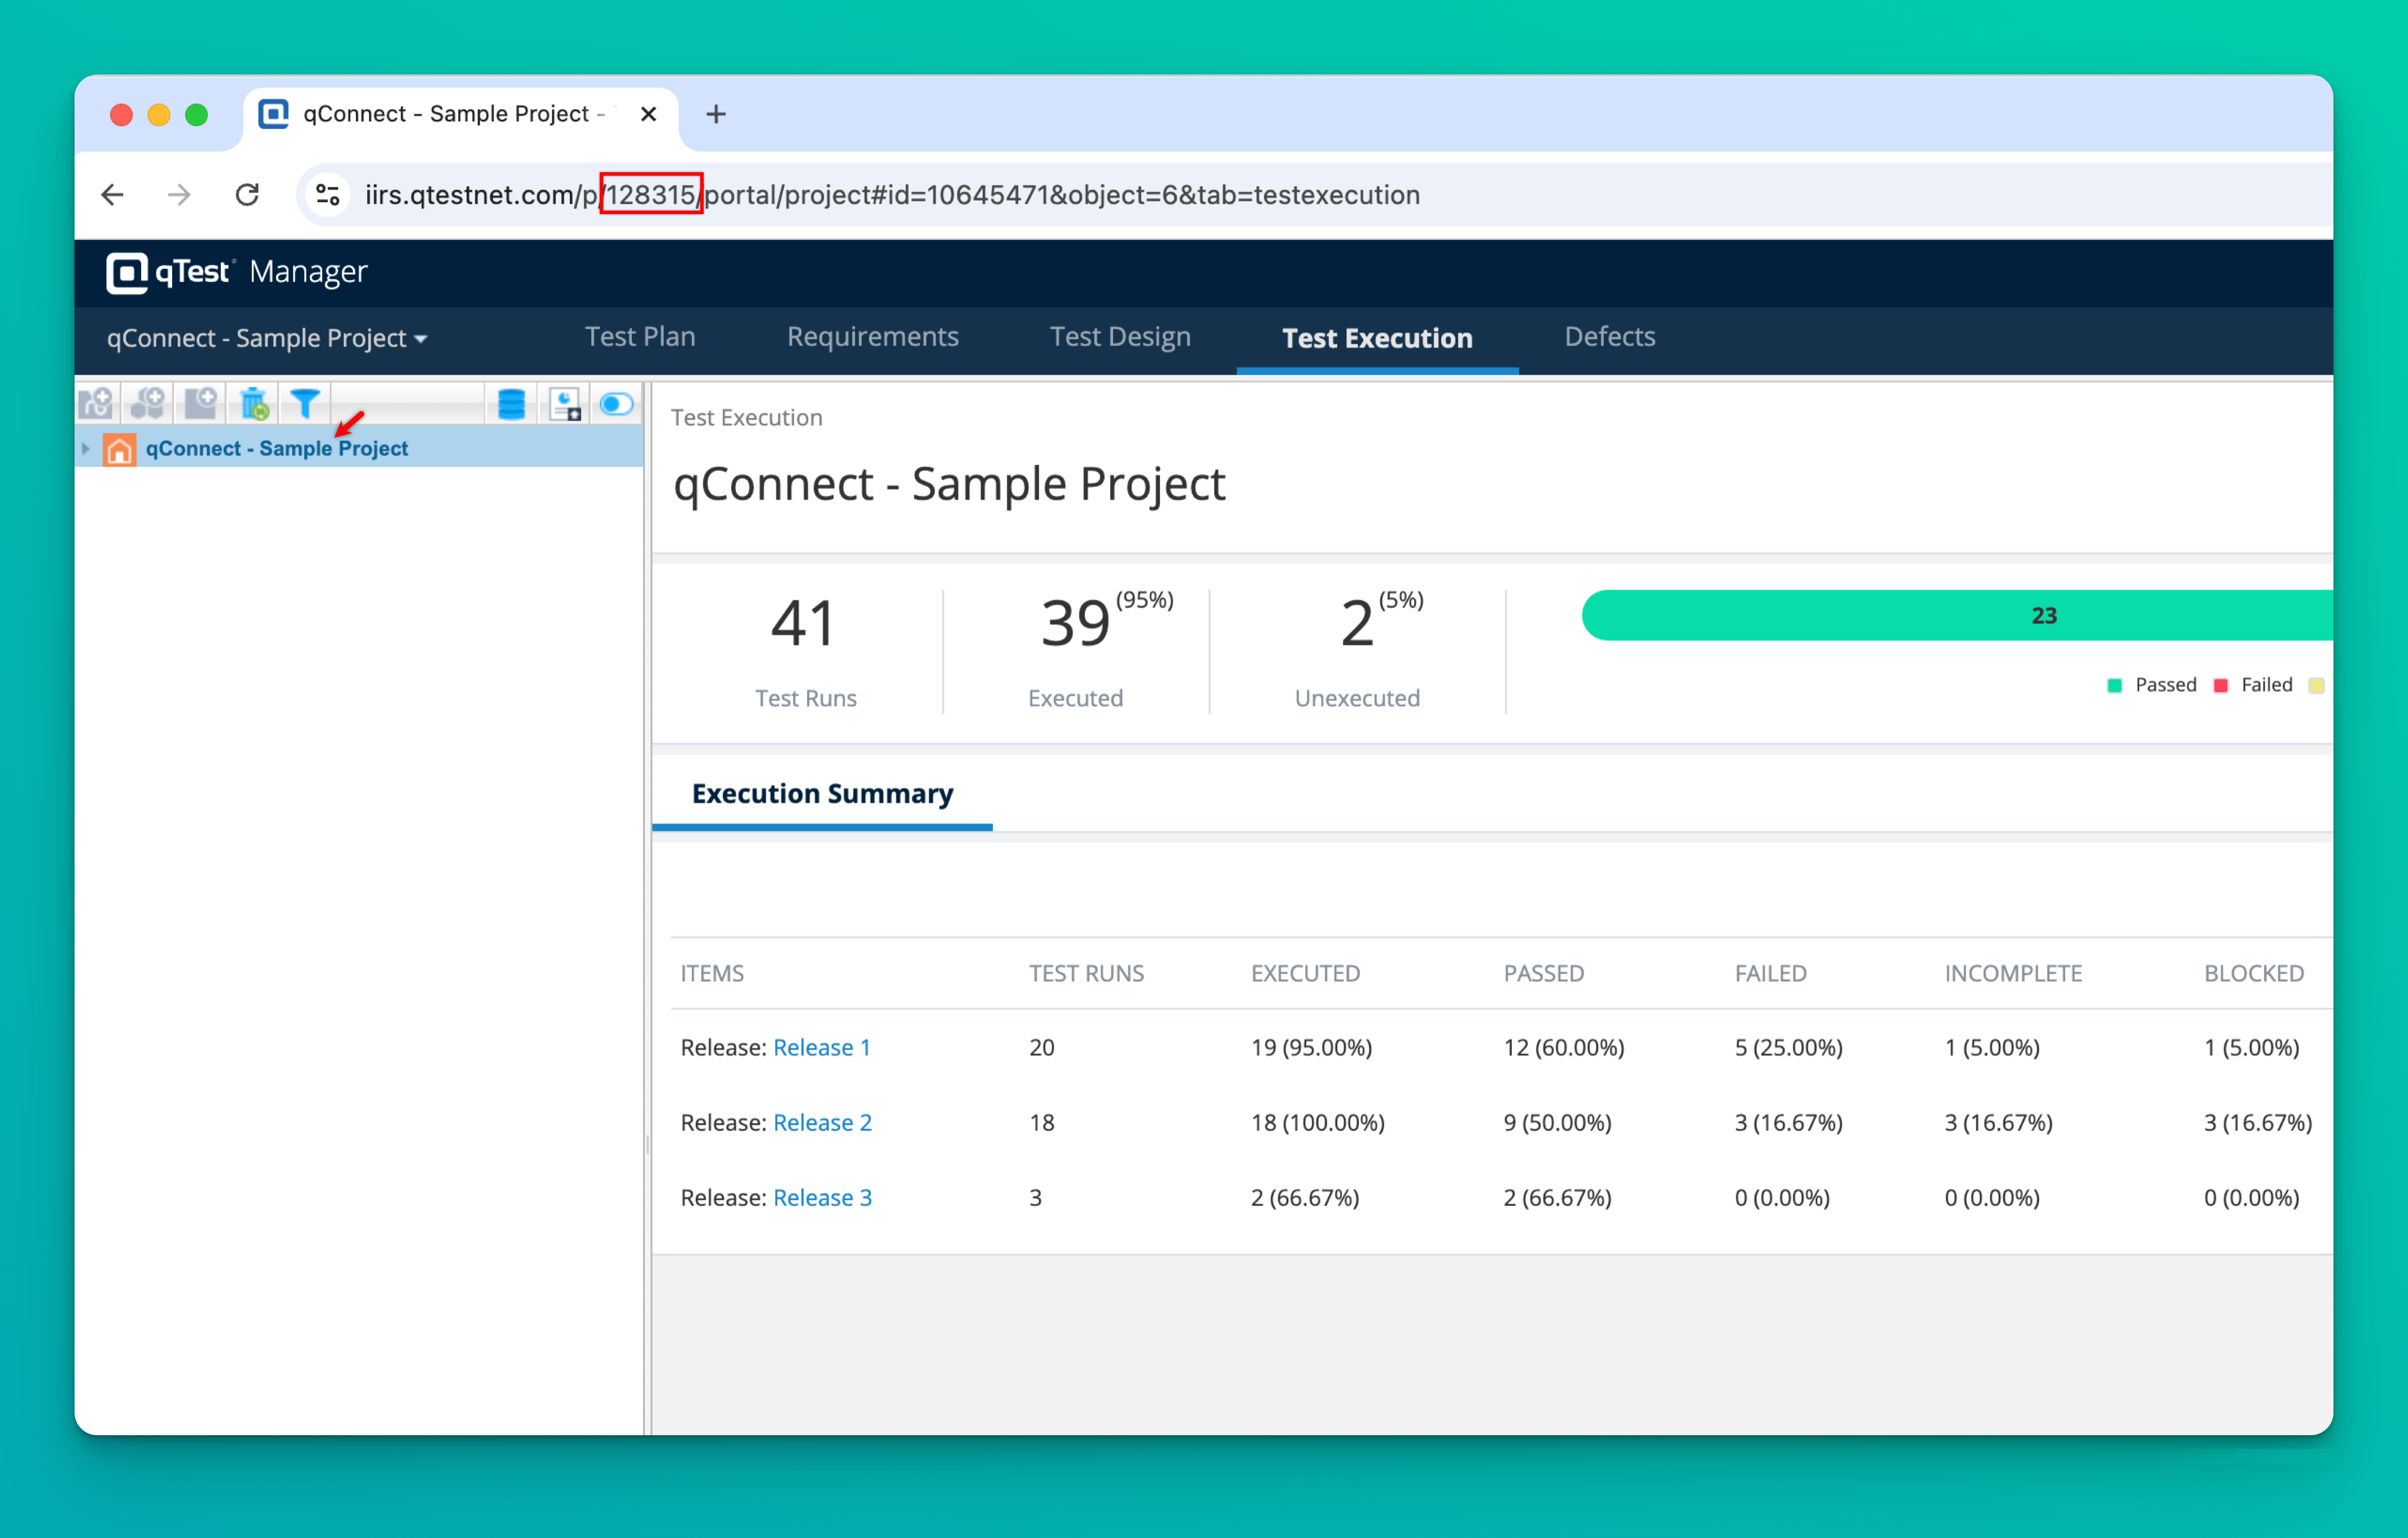
-
TEMPLATE_URL: URL of the JUnit template file used to configure result data for the Testsigma test plan run. (This is an optional field and is required only if customization is needed. For customization requests, contact support@testsigma.com.)

[[info | NOTE:]] | - The Template URL must be publicly accessible. | | - If the Release ID and Cycle ID are not provided when triggering the execution, Testsigma automatically generates them in qTest for the execution.
-
-
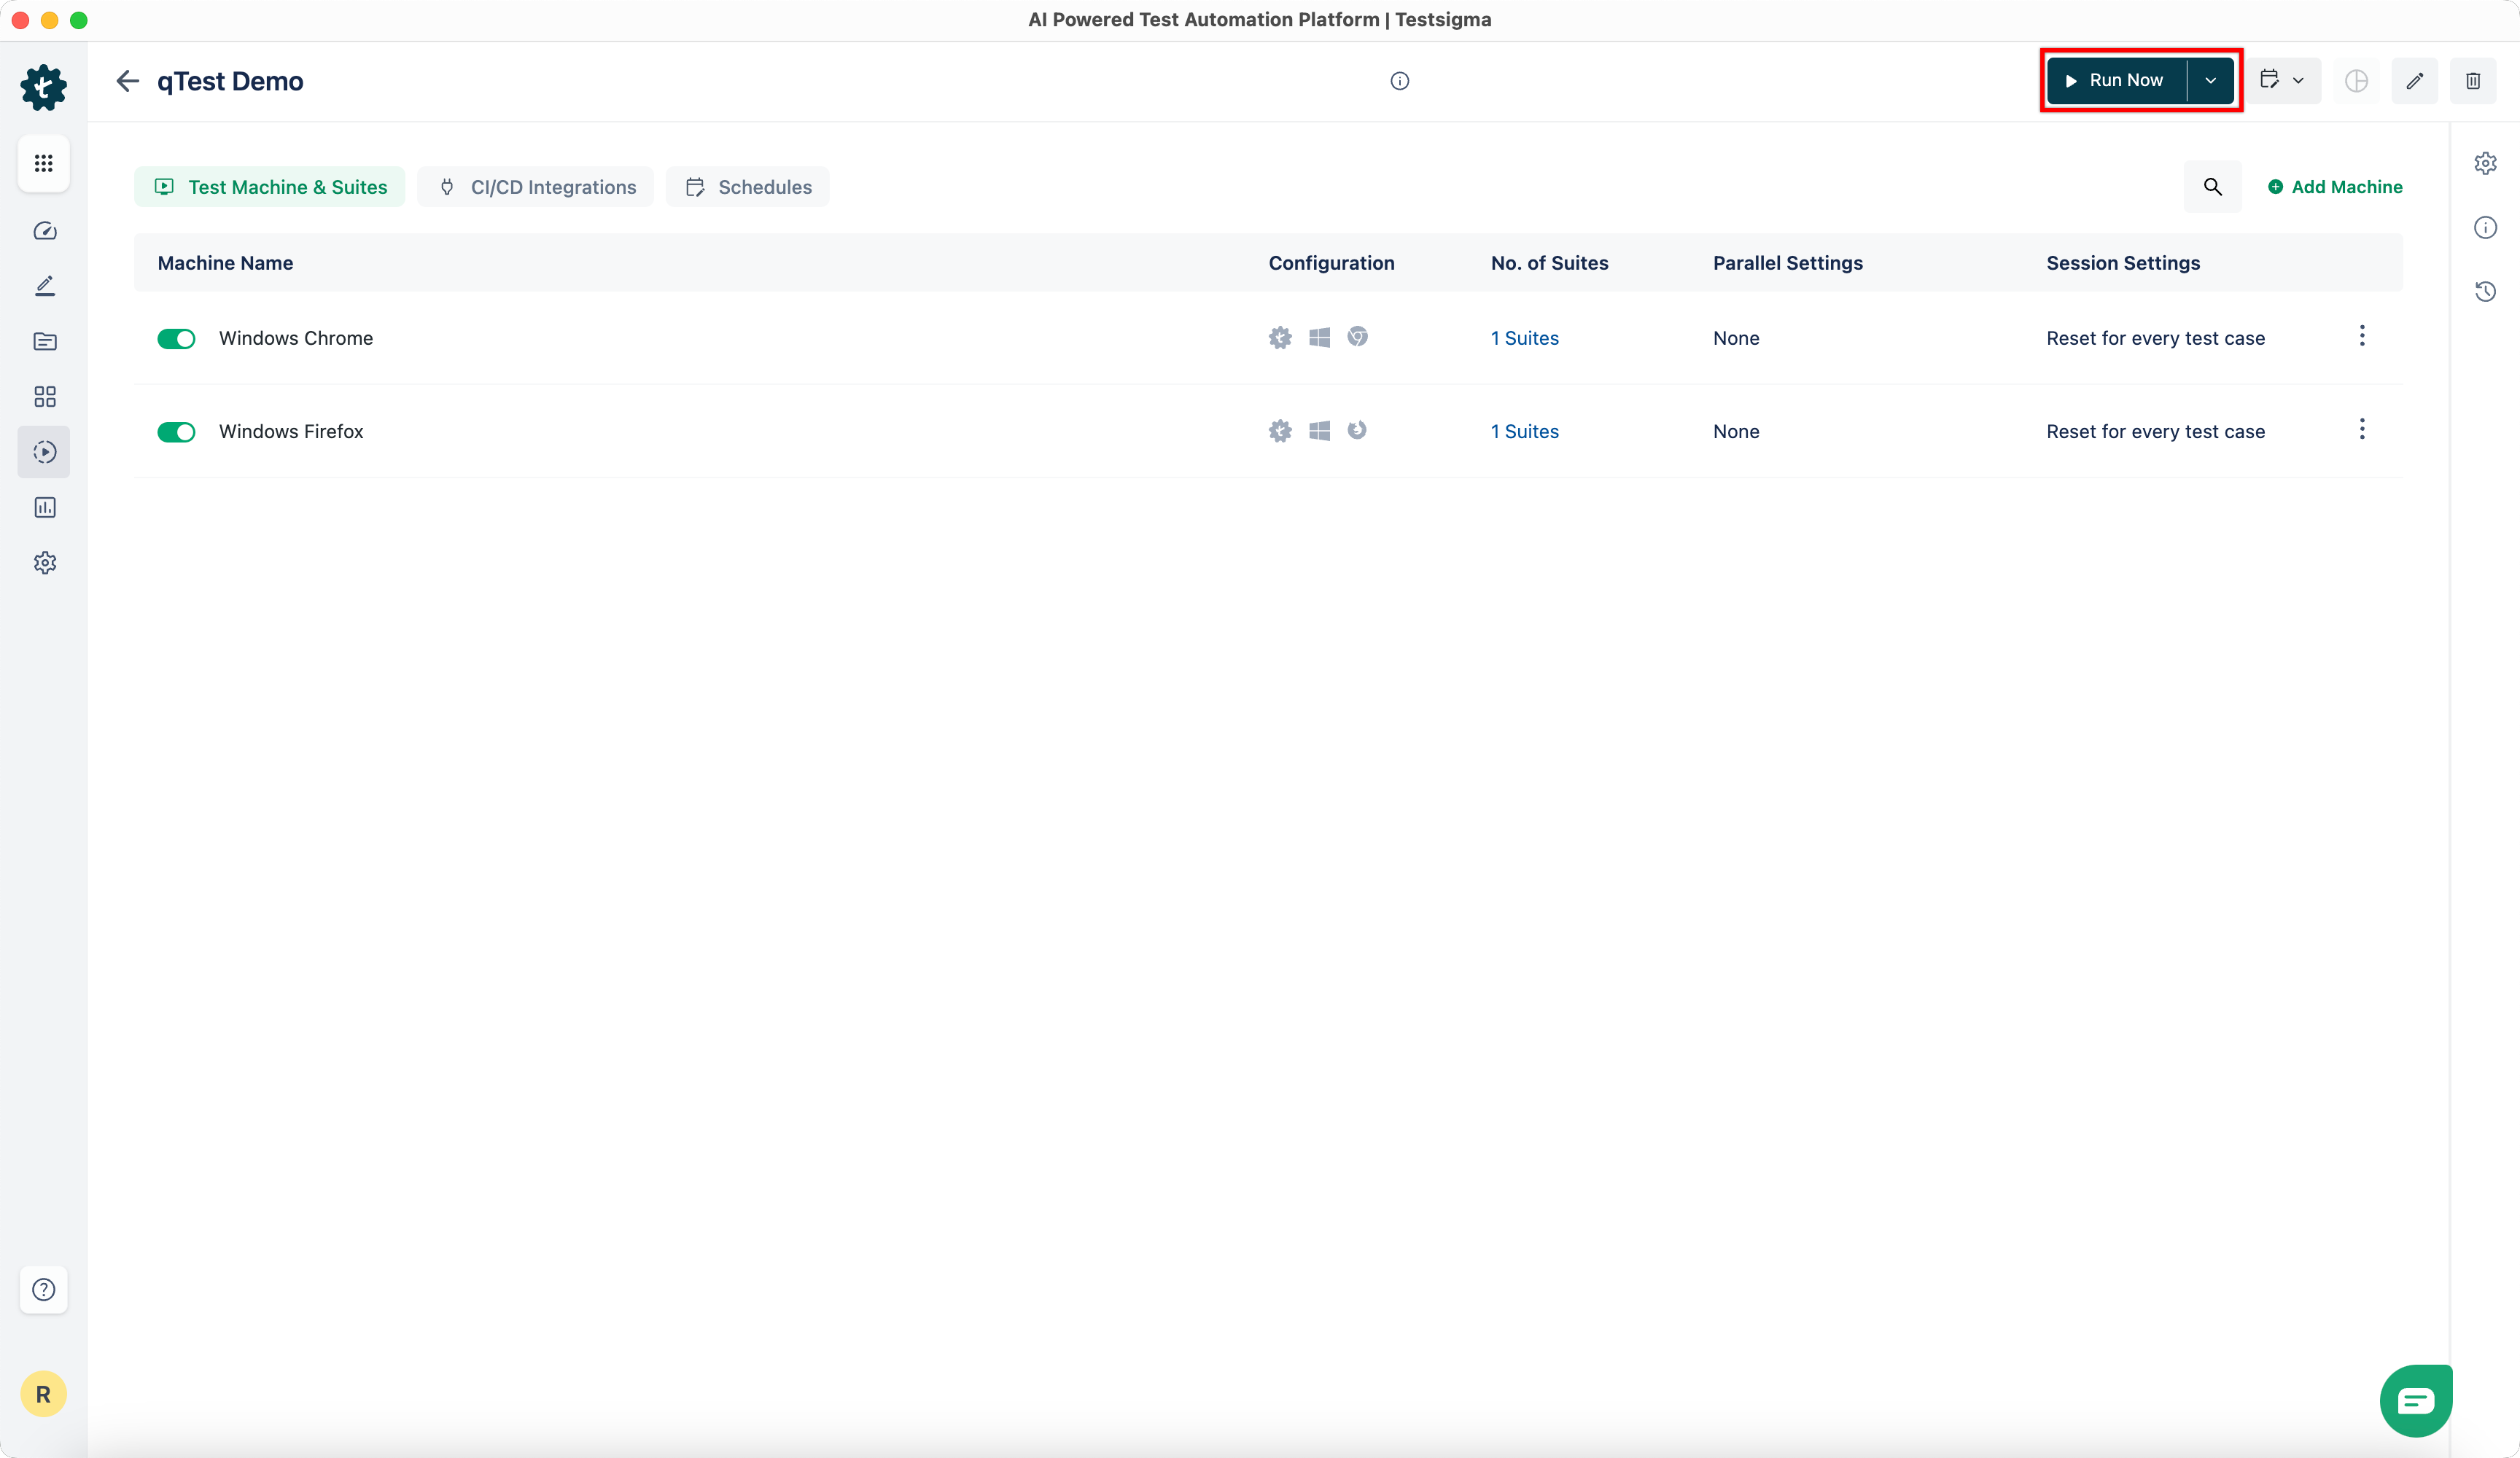
Go to Test Plans and click Run Now to execute the test plan. A duplicate test run is created, and results are displayed upon completion.
-
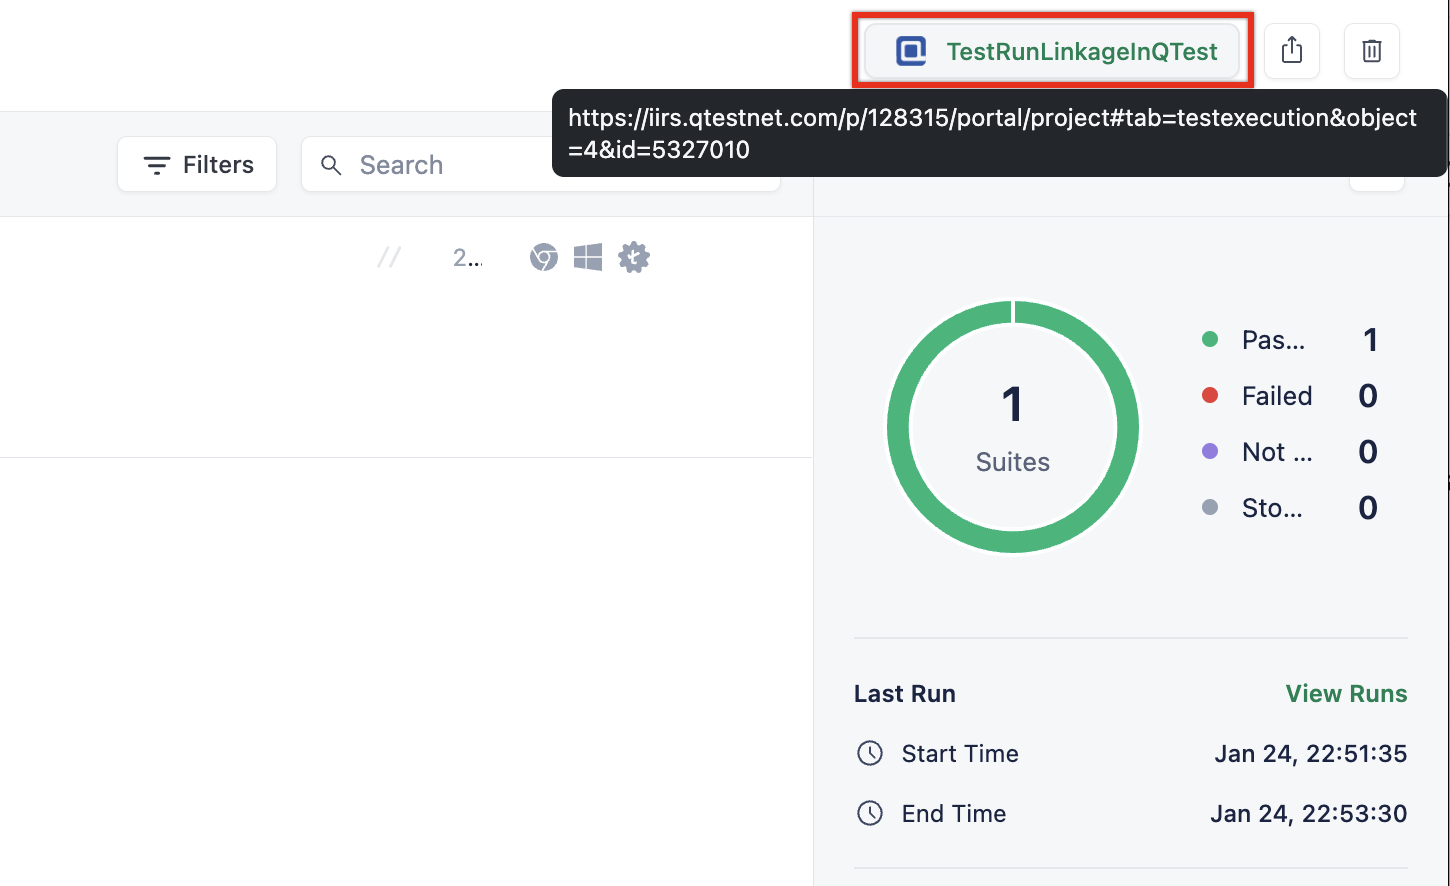
Click qTest Result Link in the top right corner to navigate to the qTest run results.
Trigger qTest Test Plans Using APIs
Section titled “Trigger qTest Test Plans Using APIs”You can also trigger qTest test plans using APIs. Click here to download the Postman collection.
a. Authorization: Bearer Token (copied from Settings > API Keys in Testsigma).
b. Provide the following details in Request Body
-
Build Number: The unique identifier for the qTest execution.
-
Hook Data: Includes the following parameters:
-
Testsigma API Key: Copied from Settings > API Keys in Testsigma.
-
Project ID: The project ID from qTest.
-
Template URL: The URL of the template JUnit file used to configure result data.
-
-
Title: Provide a title.
-
Execution Lab: Specifies the execution environment or lab used for running the test cases.
Here’s a quick GIF demonstrating steps to trigger qTest test plan using APIs.