Test Data
Phone Number Type Test Data
The phone number data type is used to automate two-factor authentication (2FA) and mobile number-based login. Testsigma provides you with a valid mobile phone number on request, with which you can create test cases that require a valid phone number.
Prerequisites
Before you begin, ensure that you have referred to:
Use Case
Section titled “Use Case”Let’s add 2FA for a test case which includes 2 steps:
- First we enter the phone number to which the OTP will be sent.
- Fetch the OTP from the SMS received on the phone number.
Using Phone Number Type Test Data
Section titled “Using Phone Number Type Test Data”-
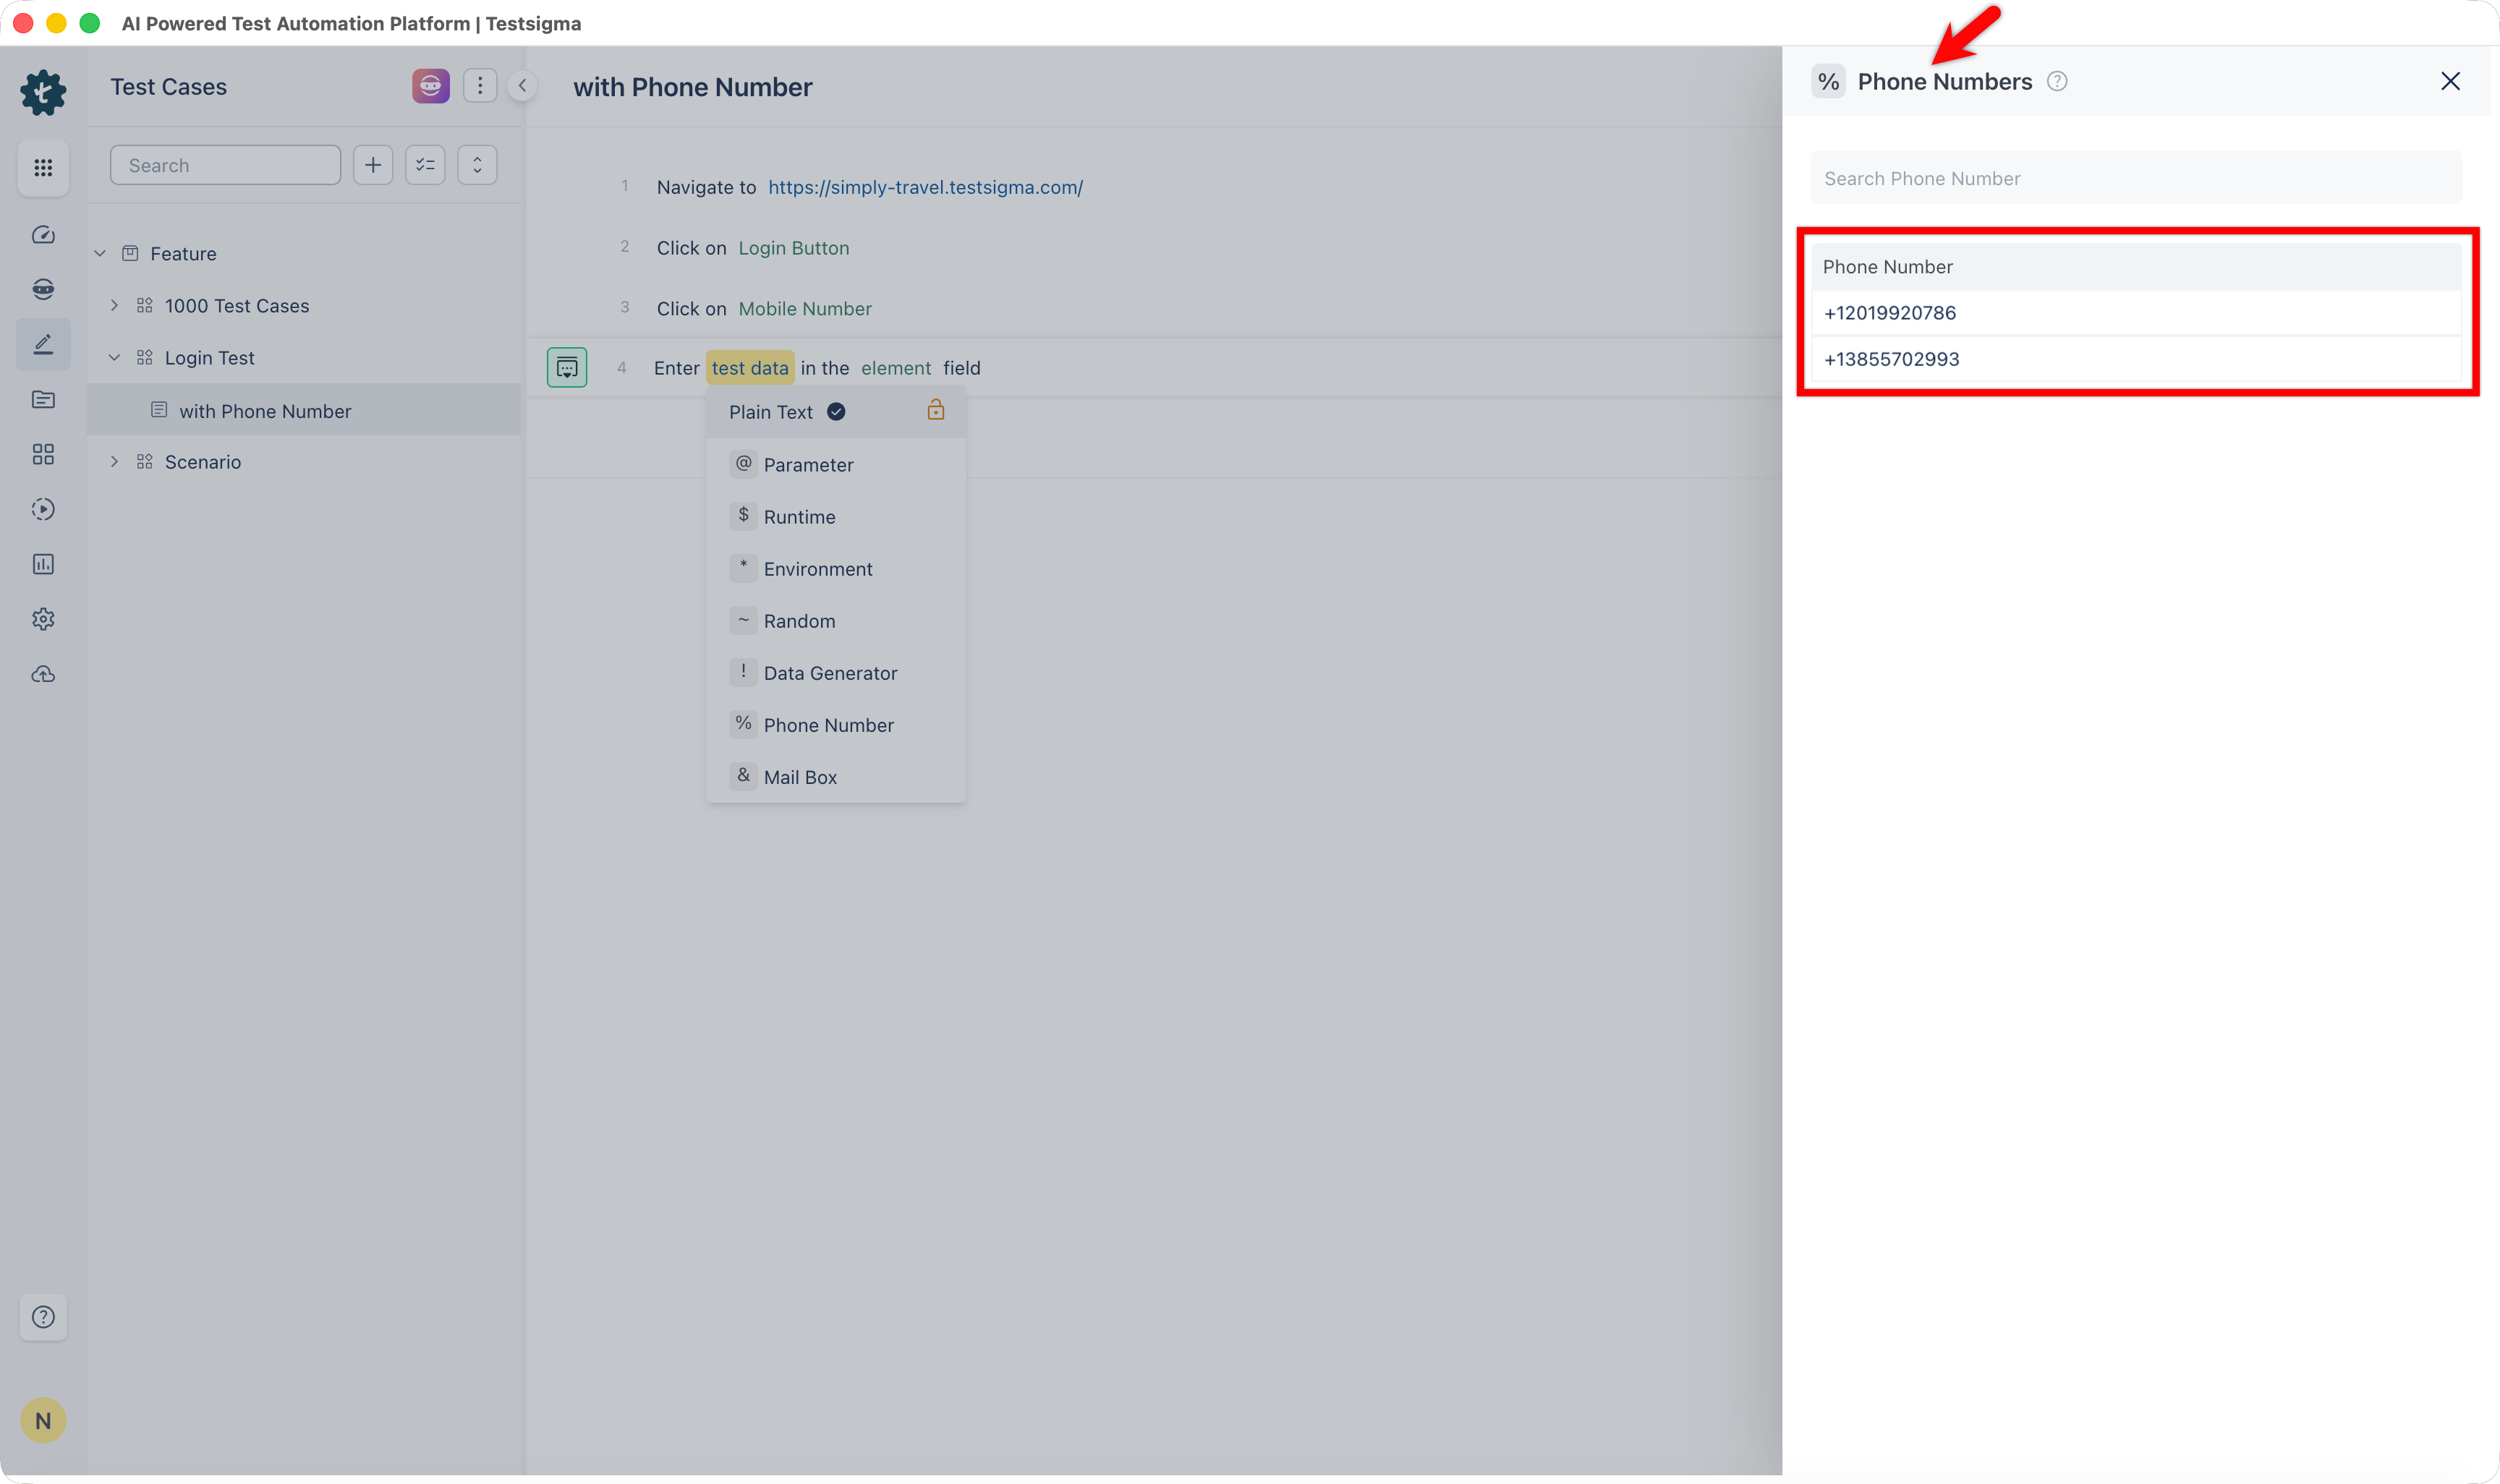
Navigate to your test case, add a test step with the NLP ‘Enter test data in the element field’.

-
Hover over the test data and select % Phone Number from the drop down. An overlay showing the list of available phone numbers (allocated to your account) would open up.
-
Select one of the numbers from the list. This is the number where the OTP SMS will be sent.
We will use the test data generators available in Testsigma to fetch the OTP from the phone number provided in the previous step.
-
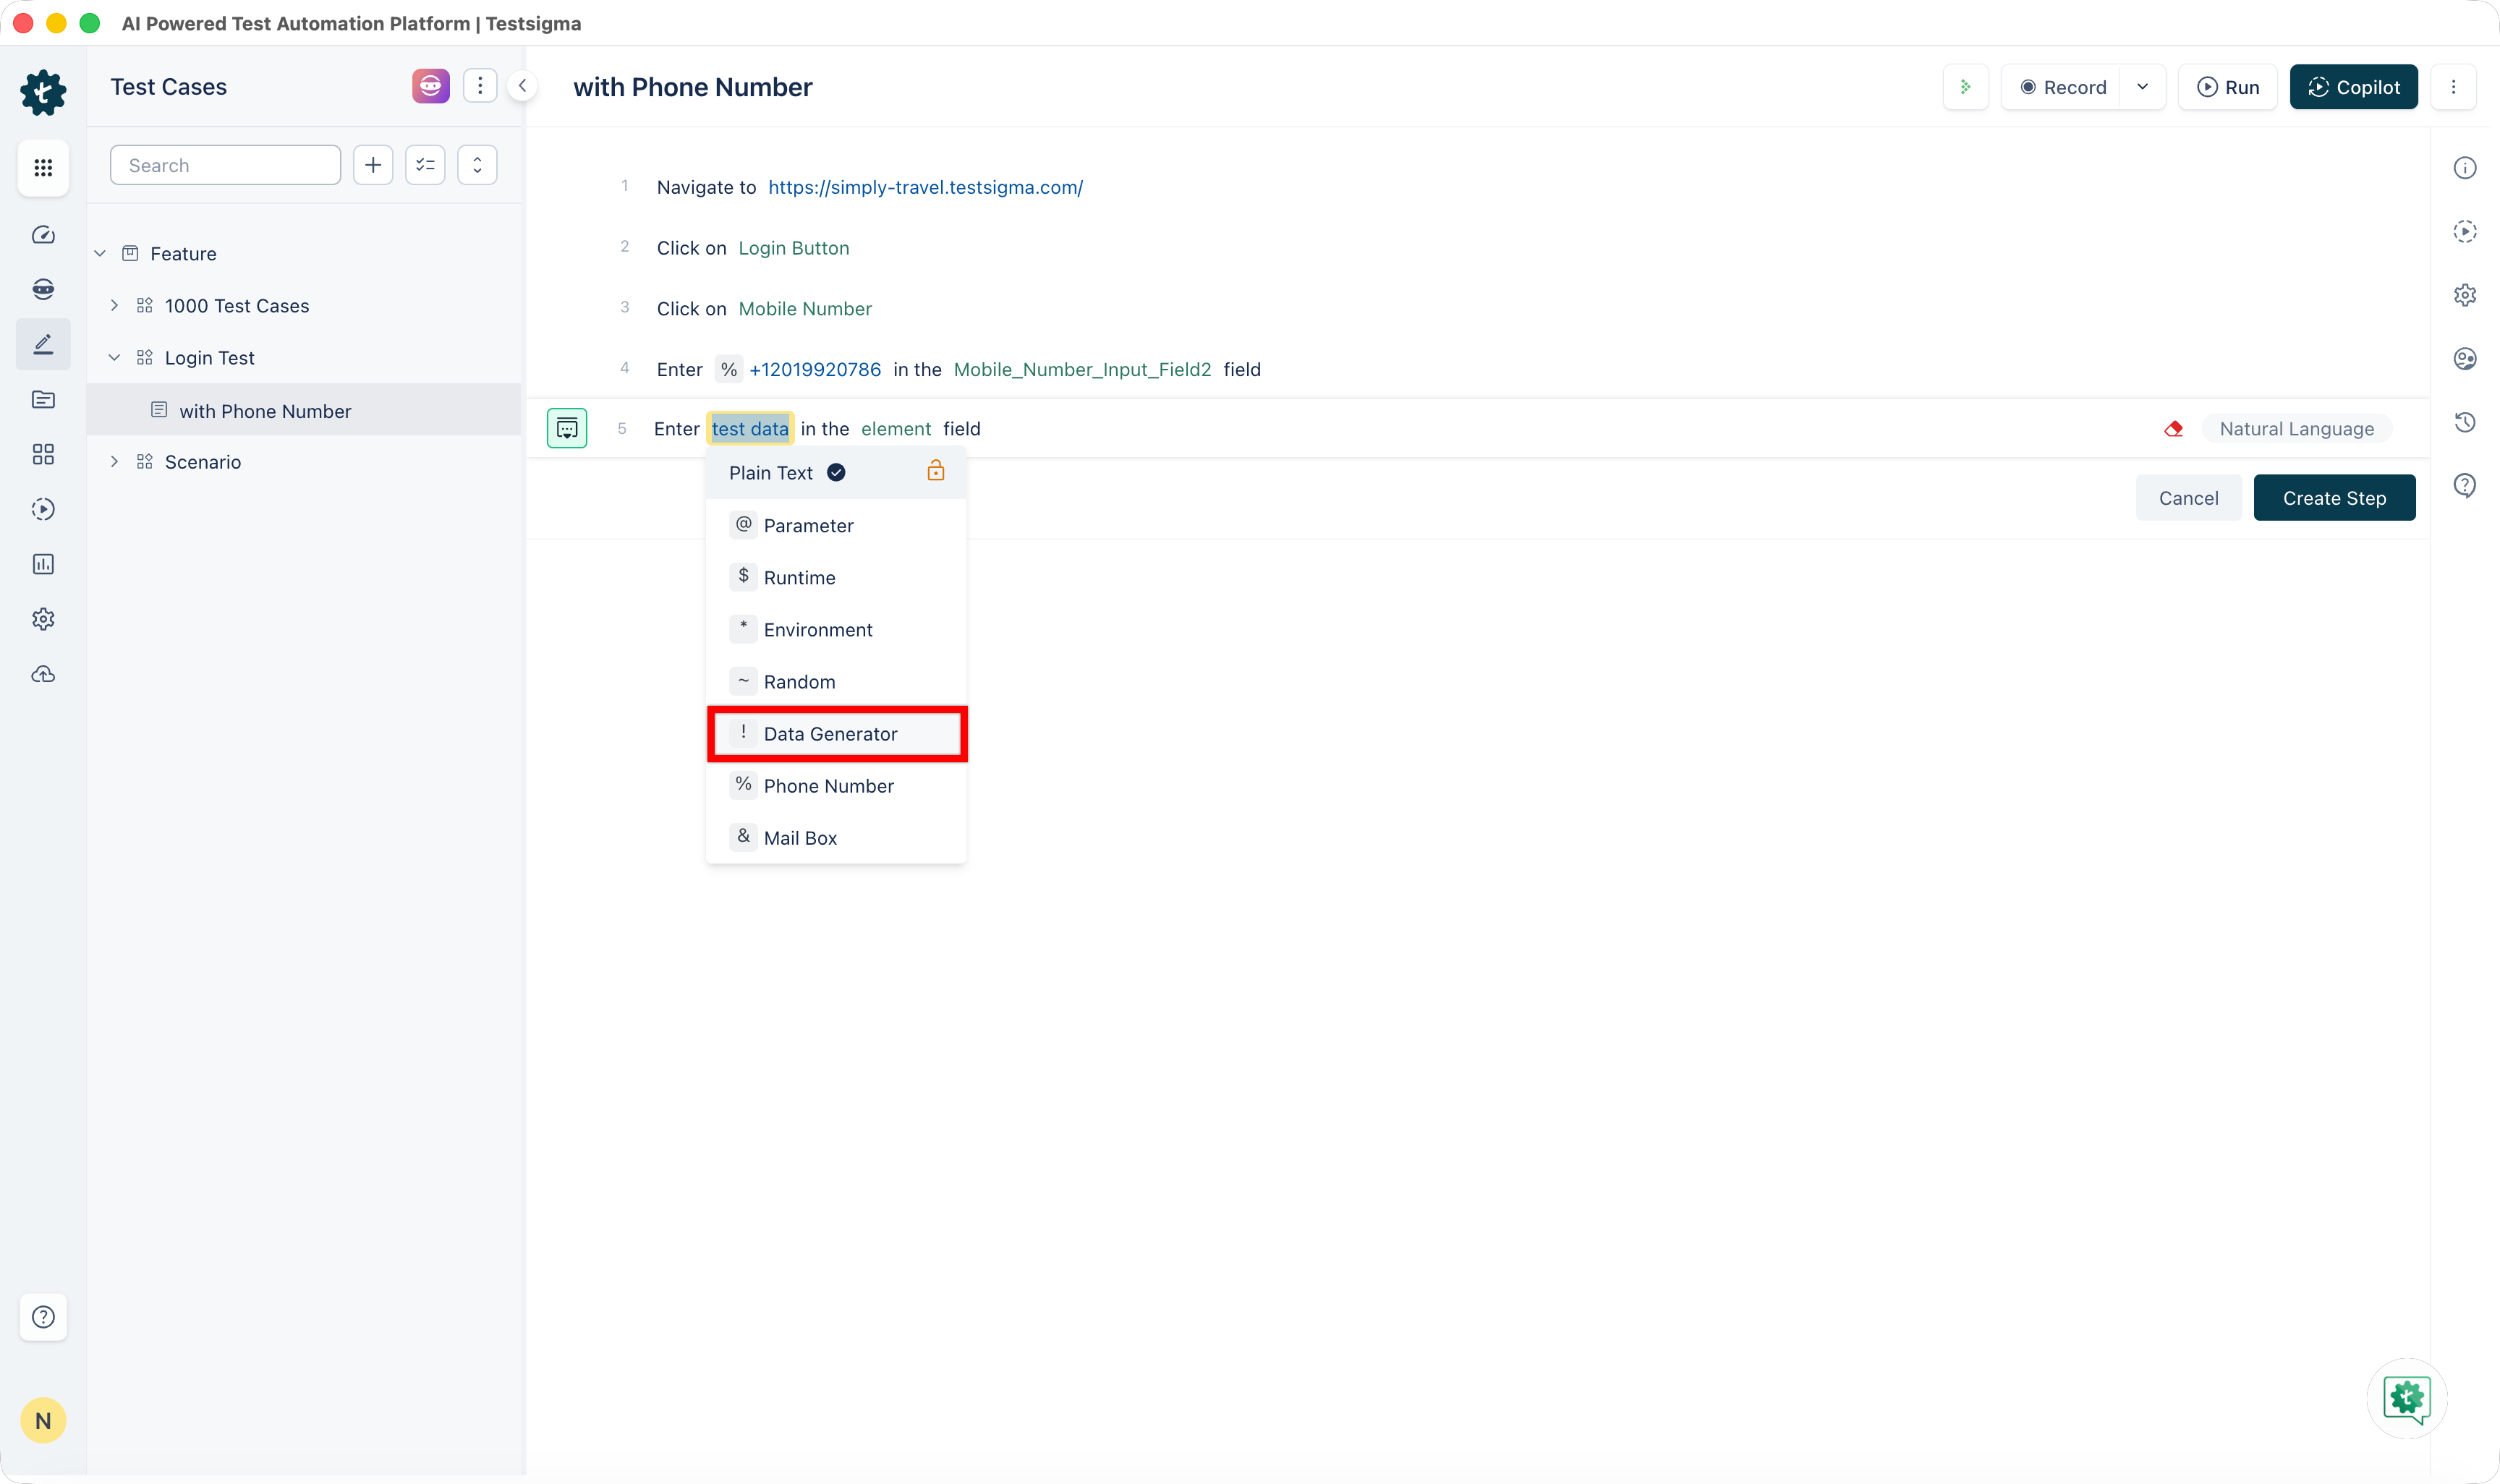
Add a test step with the NLP ‘Enter test data in the element field’.
-
Hover over the test data and select ! Data Generator from the drop down. An overlay showing the list of available data generators would open up.
-
Select the PhoneNumberFunctions in *Function Type dropdown menu, enter the details, and click on Save.

We have successfully created a test case for 2FA authentication.
Set Up and Use Message Forwarding
Section titled “Set Up and Use Message Forwarding”Providing phone numbers for OTP and login purposes is restricted in certain countries. In this case, you can use Testsigma SMS forwarder app that sends SMS messages to a designated mailbox, and you retrieve the OTPs from the mailbox. This section discusses how to set up the Testsigma SMS forwarder app and perform OTP verifications using this app.
Prerequisites
- You should have Testsigma SMS Forwarder application.
Install the App & Setup the Account
Section titled “Install the App & Setup the Account”-
Install the app on a device.
-
Click on the icon in the top-left corner to access settings.
-
Sign in to the app.
-
If you’re using Google accounts, select the Gmail API.
Filter Set-up
Section titled “Filter Set-up”-
Tap on Filters and click the plus icon.
-
On the Set up recipients screen, click the plus icon.
-
On Add overlay, tap on Enter Phone Number.
-
Enter the phone number to which you want to forward messages.
-
Swipe left to access the Forwarding conditions screen. Here, set the forwarding rule. You can specify rules for messages from a specific number or messages containing specific text.
-
Swipe left to access Change the content screen. Here, you can add the phone number of the initial sender of the message and specific words of your choice.
-
Swipe left to access the More Settings screen. Here, you can change the filter name and enable options for notifications and results.
-
On completing all the steps, click Save.
Use Case for Message Forwarding
Section titled “Use Case for Message Forwarding”-
Navigate to the URL
-
Click on Login or Sign Up
-
Enter phone number in the phone number input field
-
Wait for 30 Seconds
-
Use Data Generator to Fetch OTP
-
Submit OTP