Test Cases
Import Test Cases
You can use test case import to move test cases from one project to another within Testsigma. Test cases can only be imported from one application type to the same application type in the target project. This article explains how to import test cases between projects in Testsigma.
Prerequisites
Before you begin, ensure that you have referred to:
Steps to Import Test Cases
Section titled “Steps to Import Test Cases”-
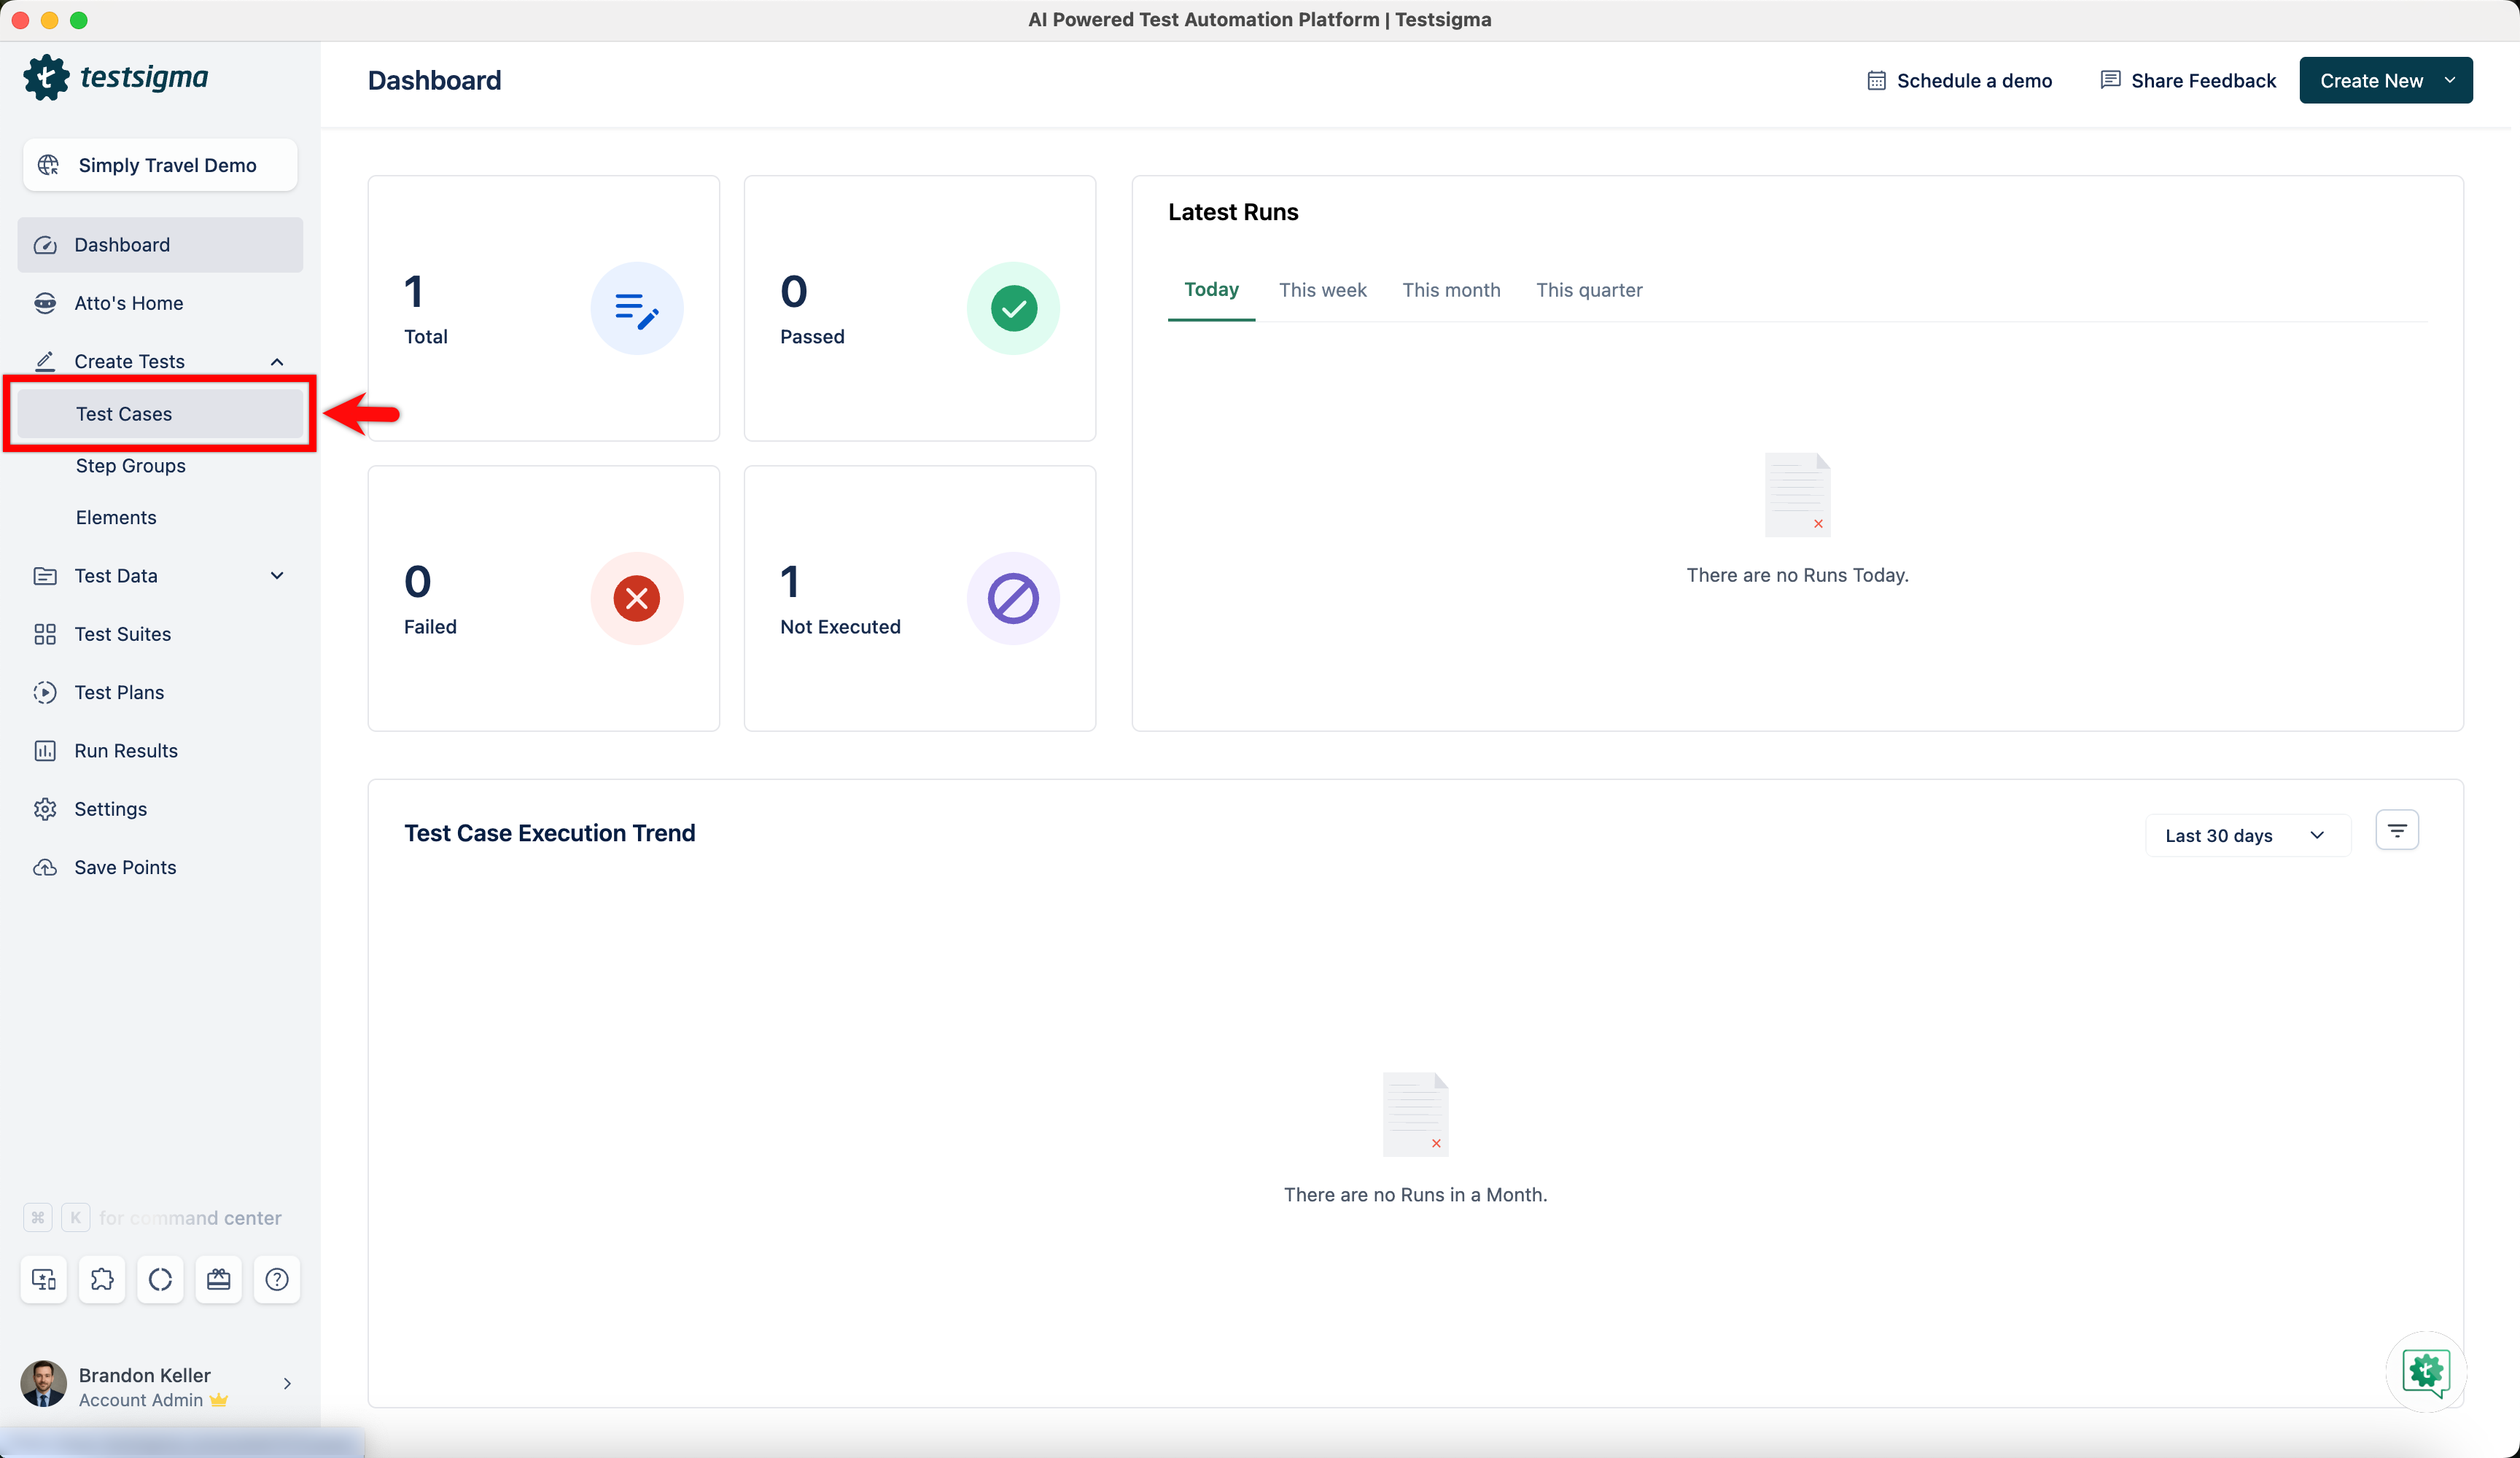
From the left navigation bar, navigate to Create Tests > Test Cases.
-
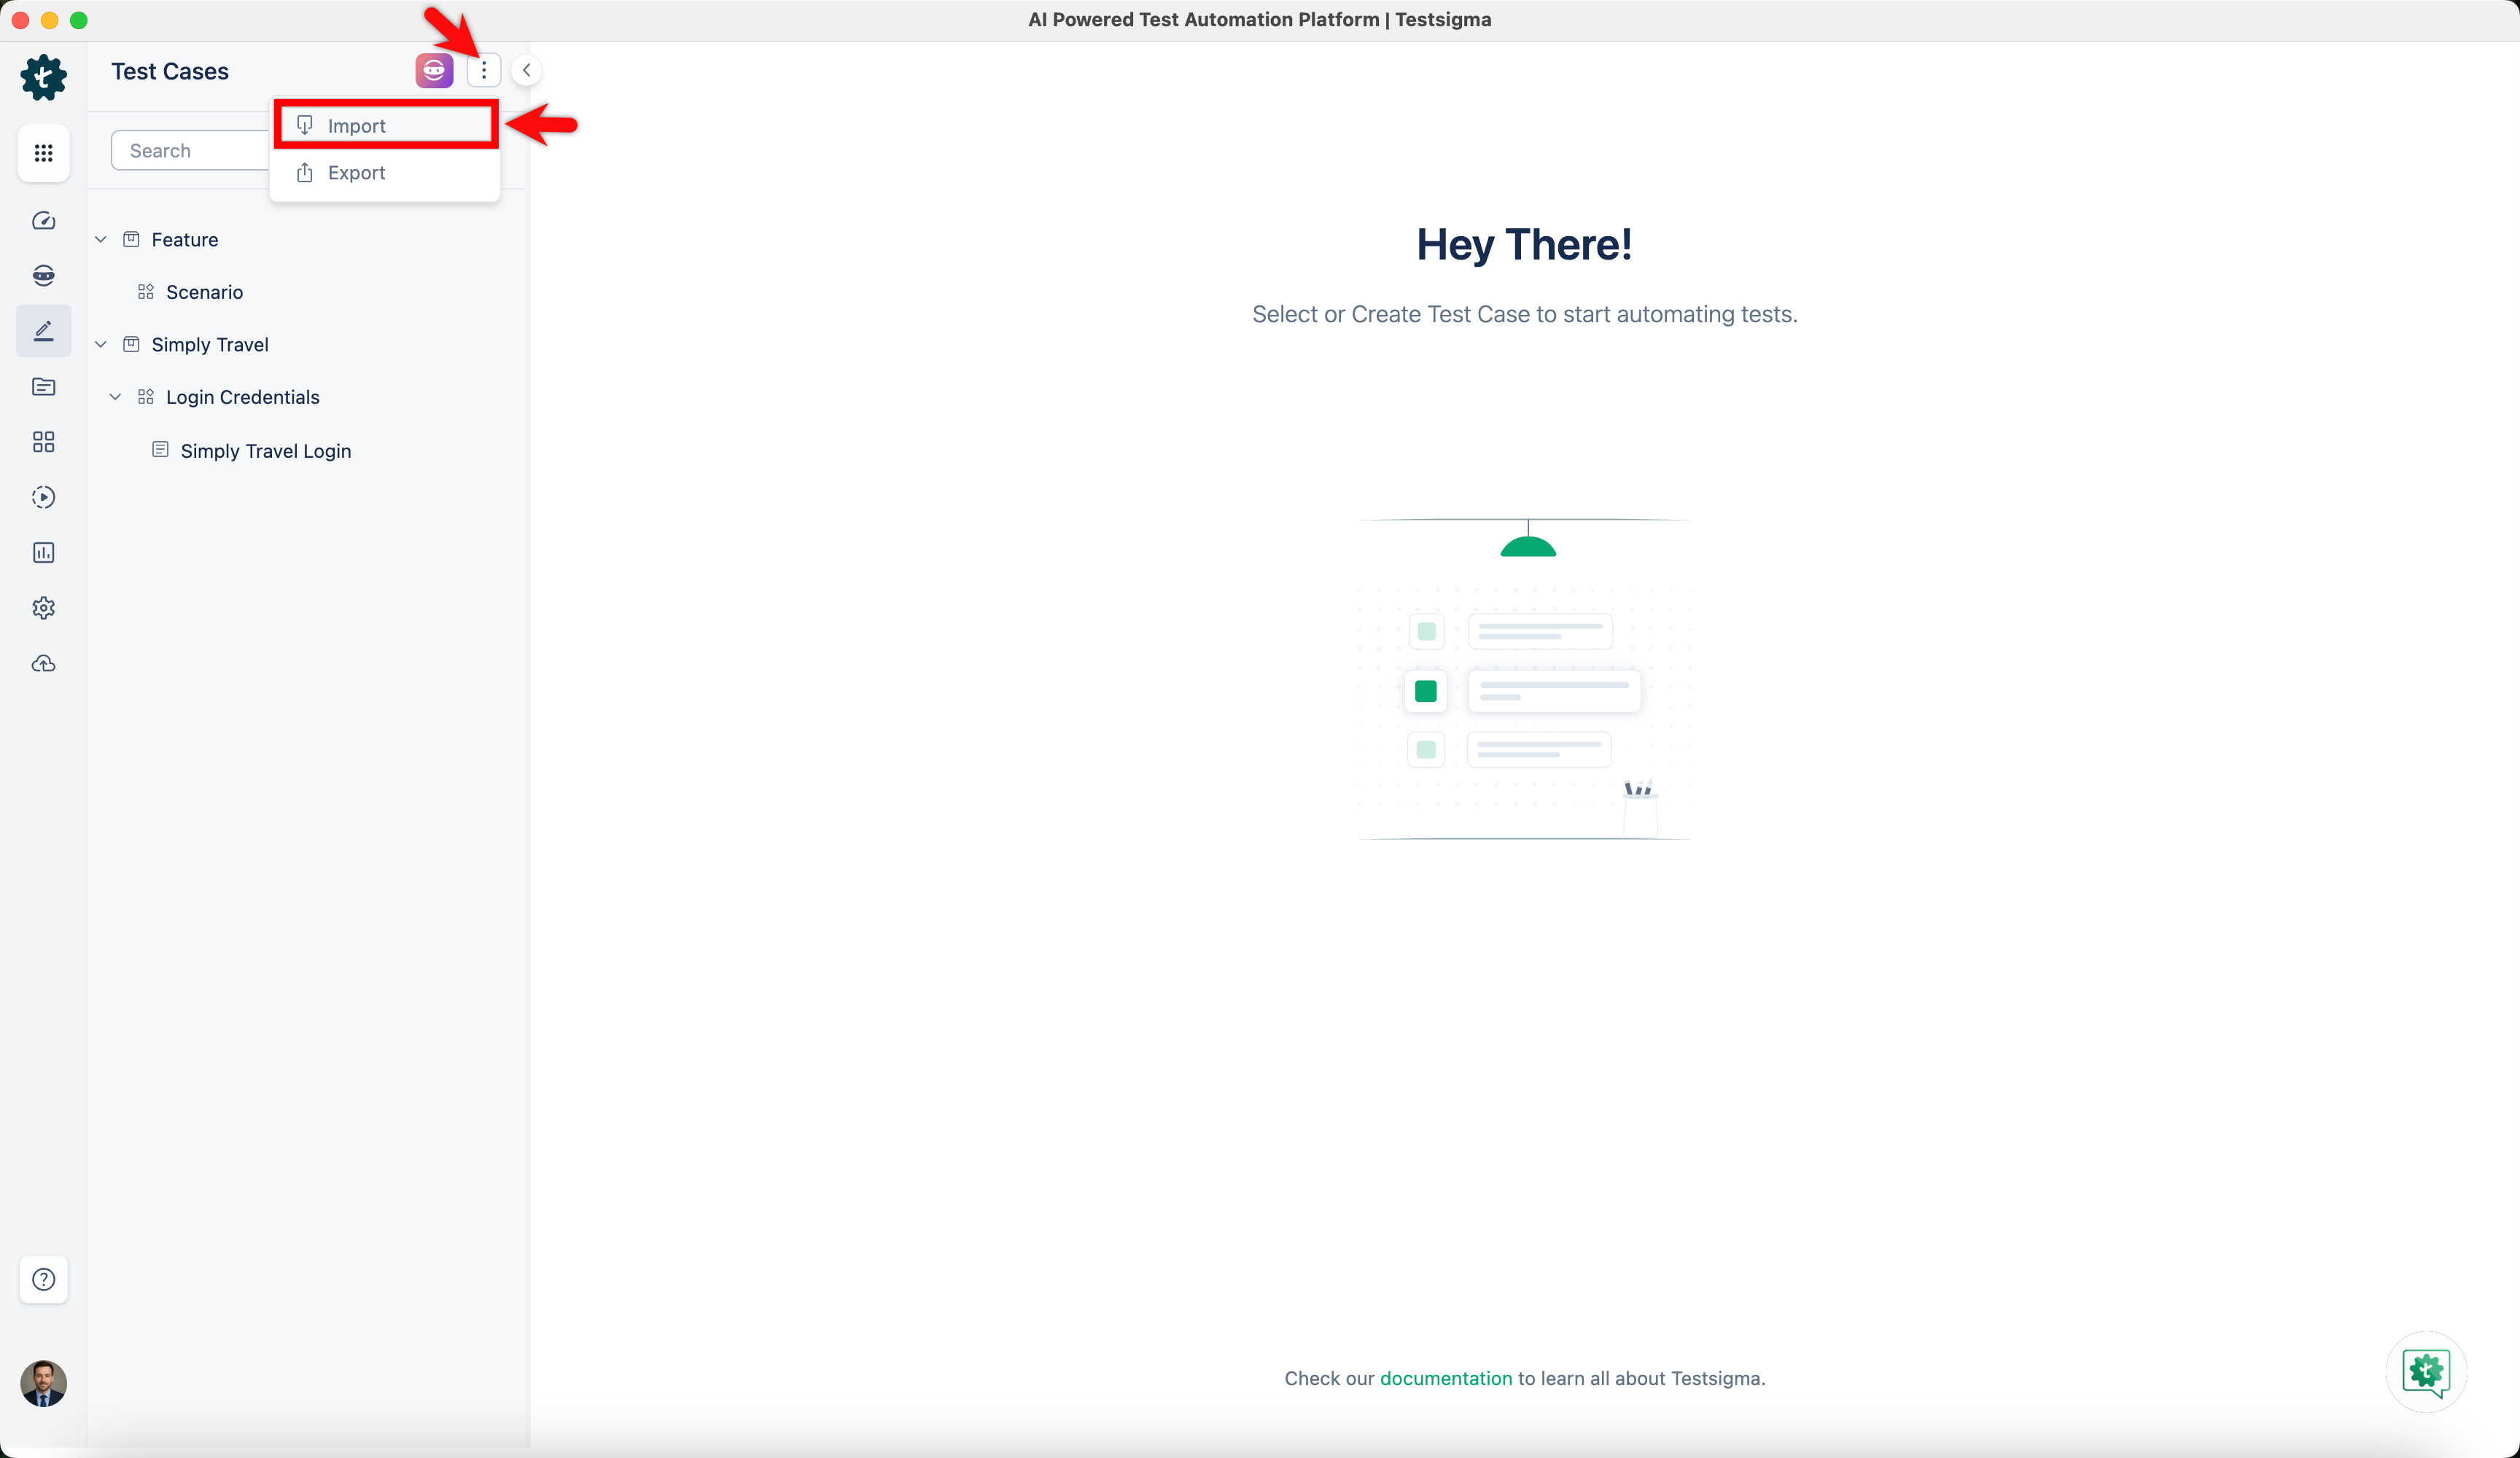
In the Test Cases Explorer section, click the ellipse icon and click Import.
-
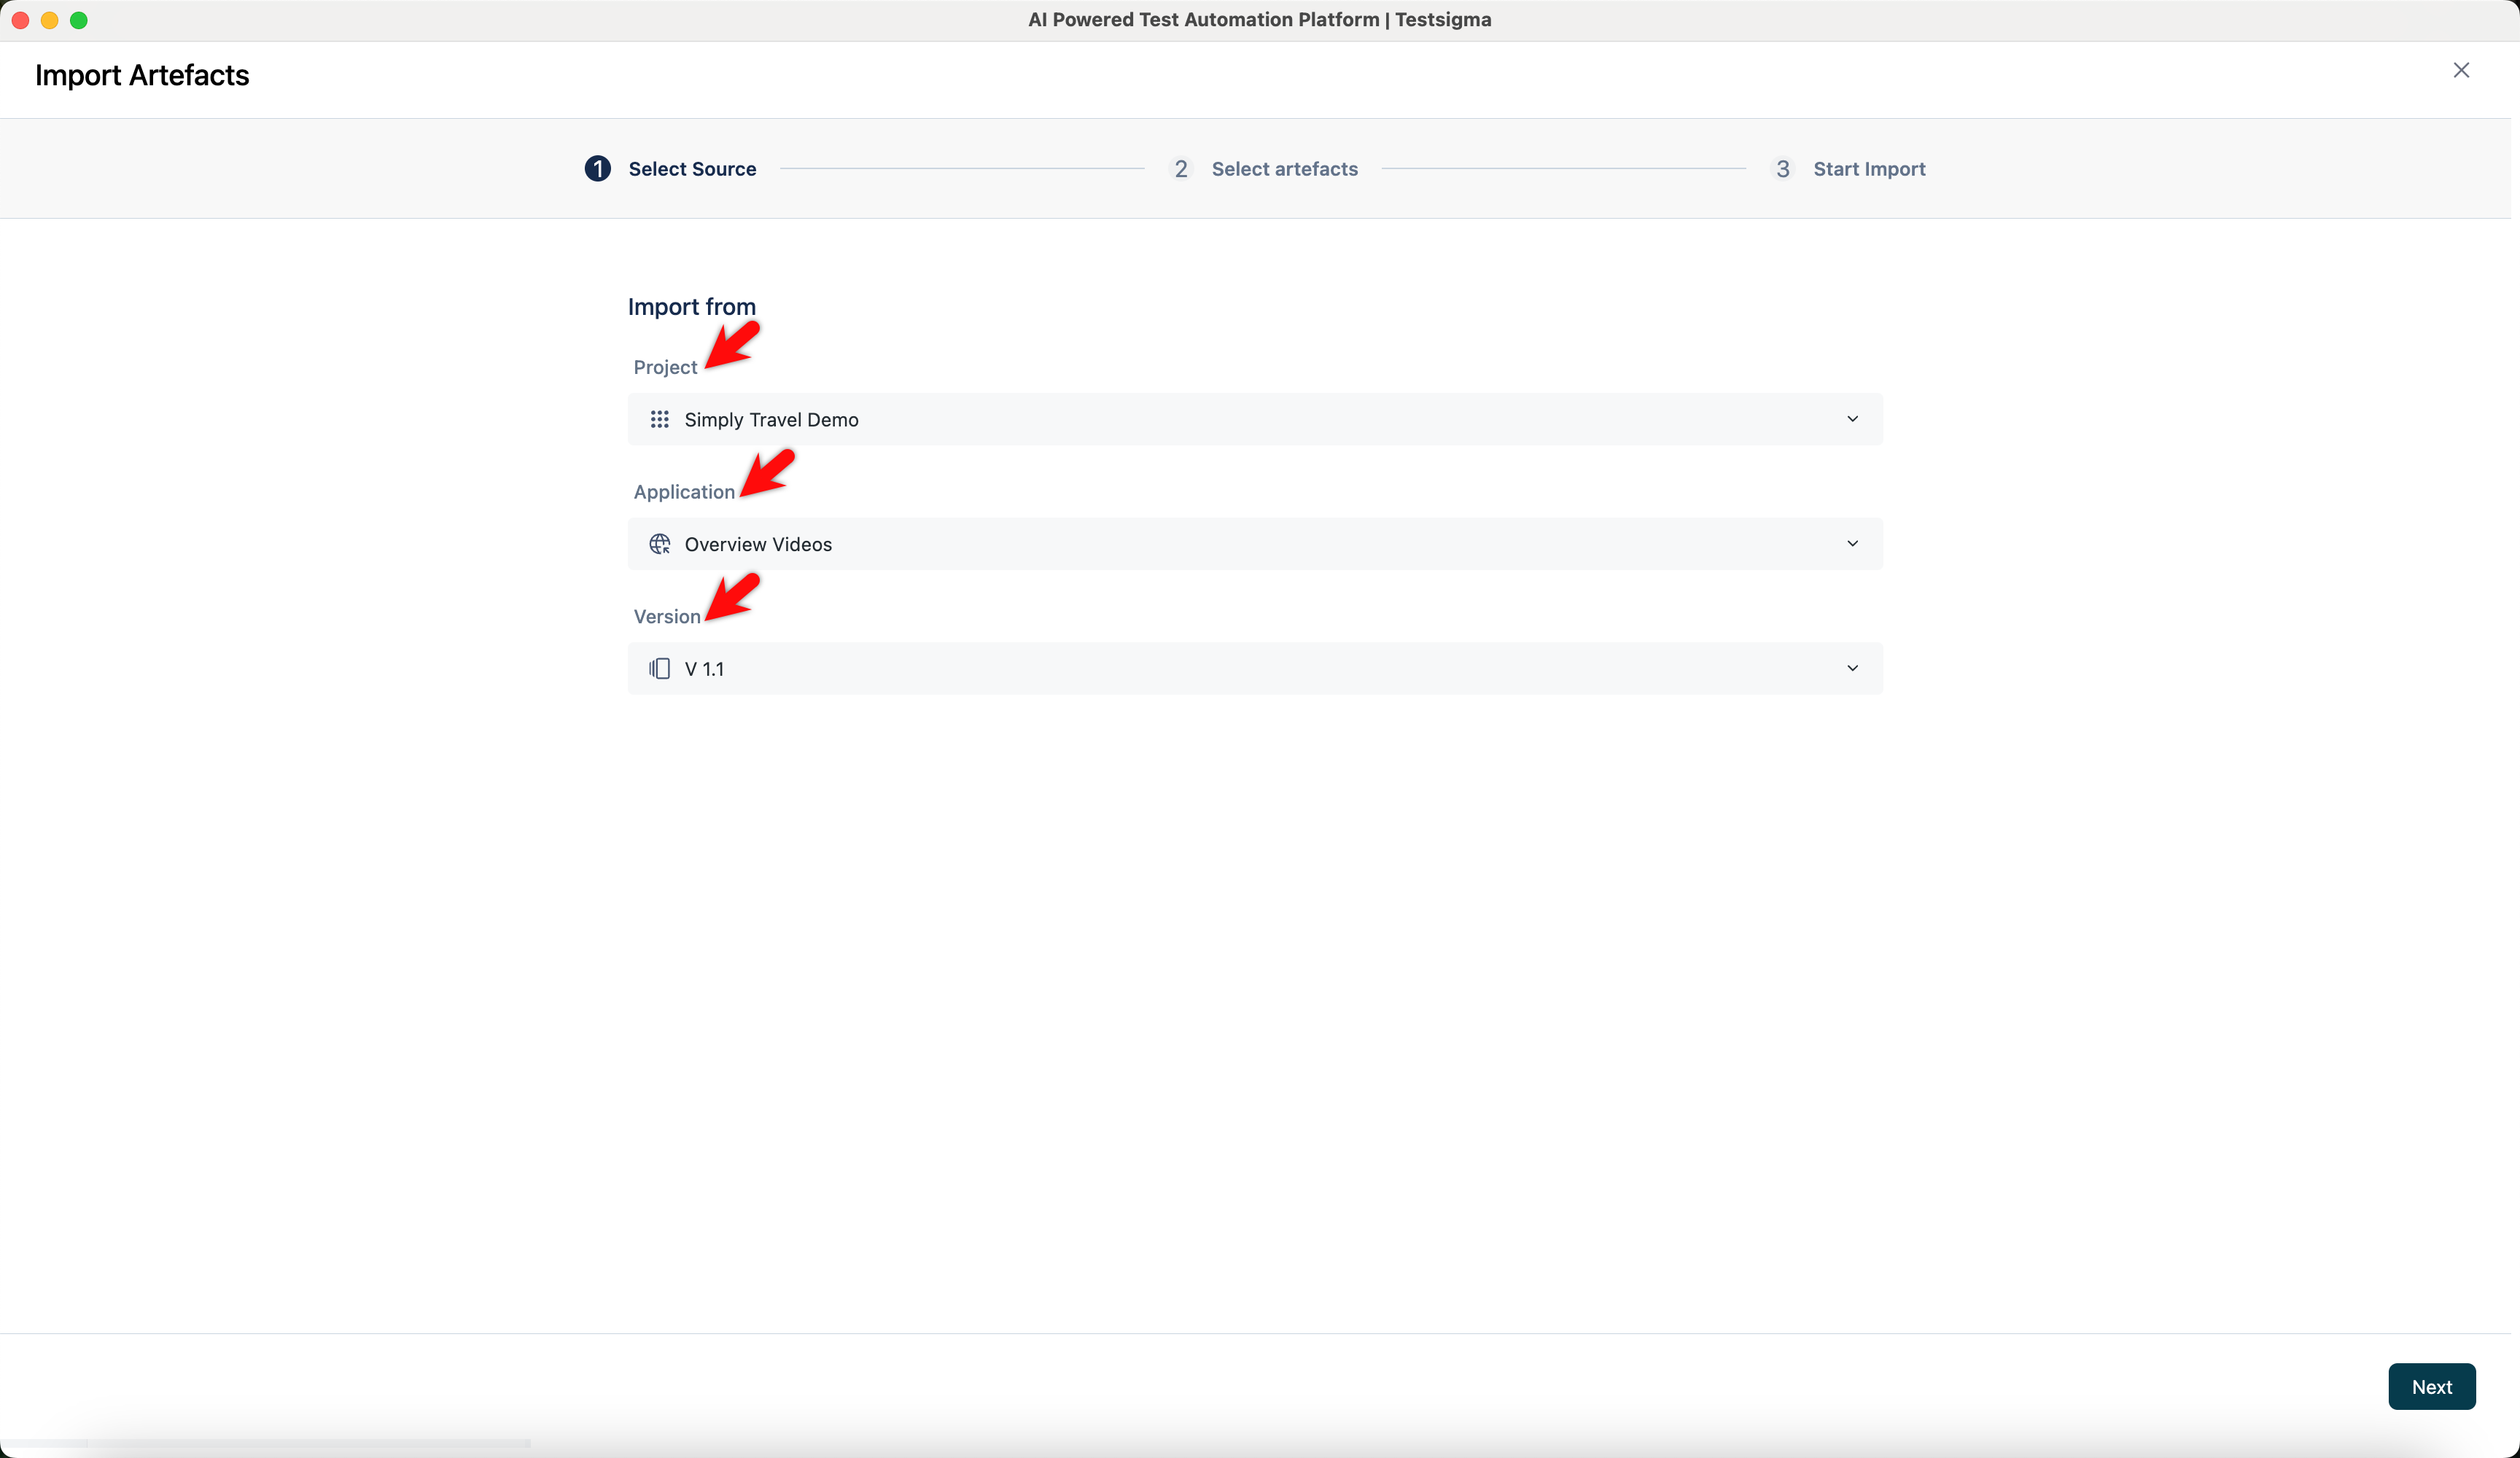
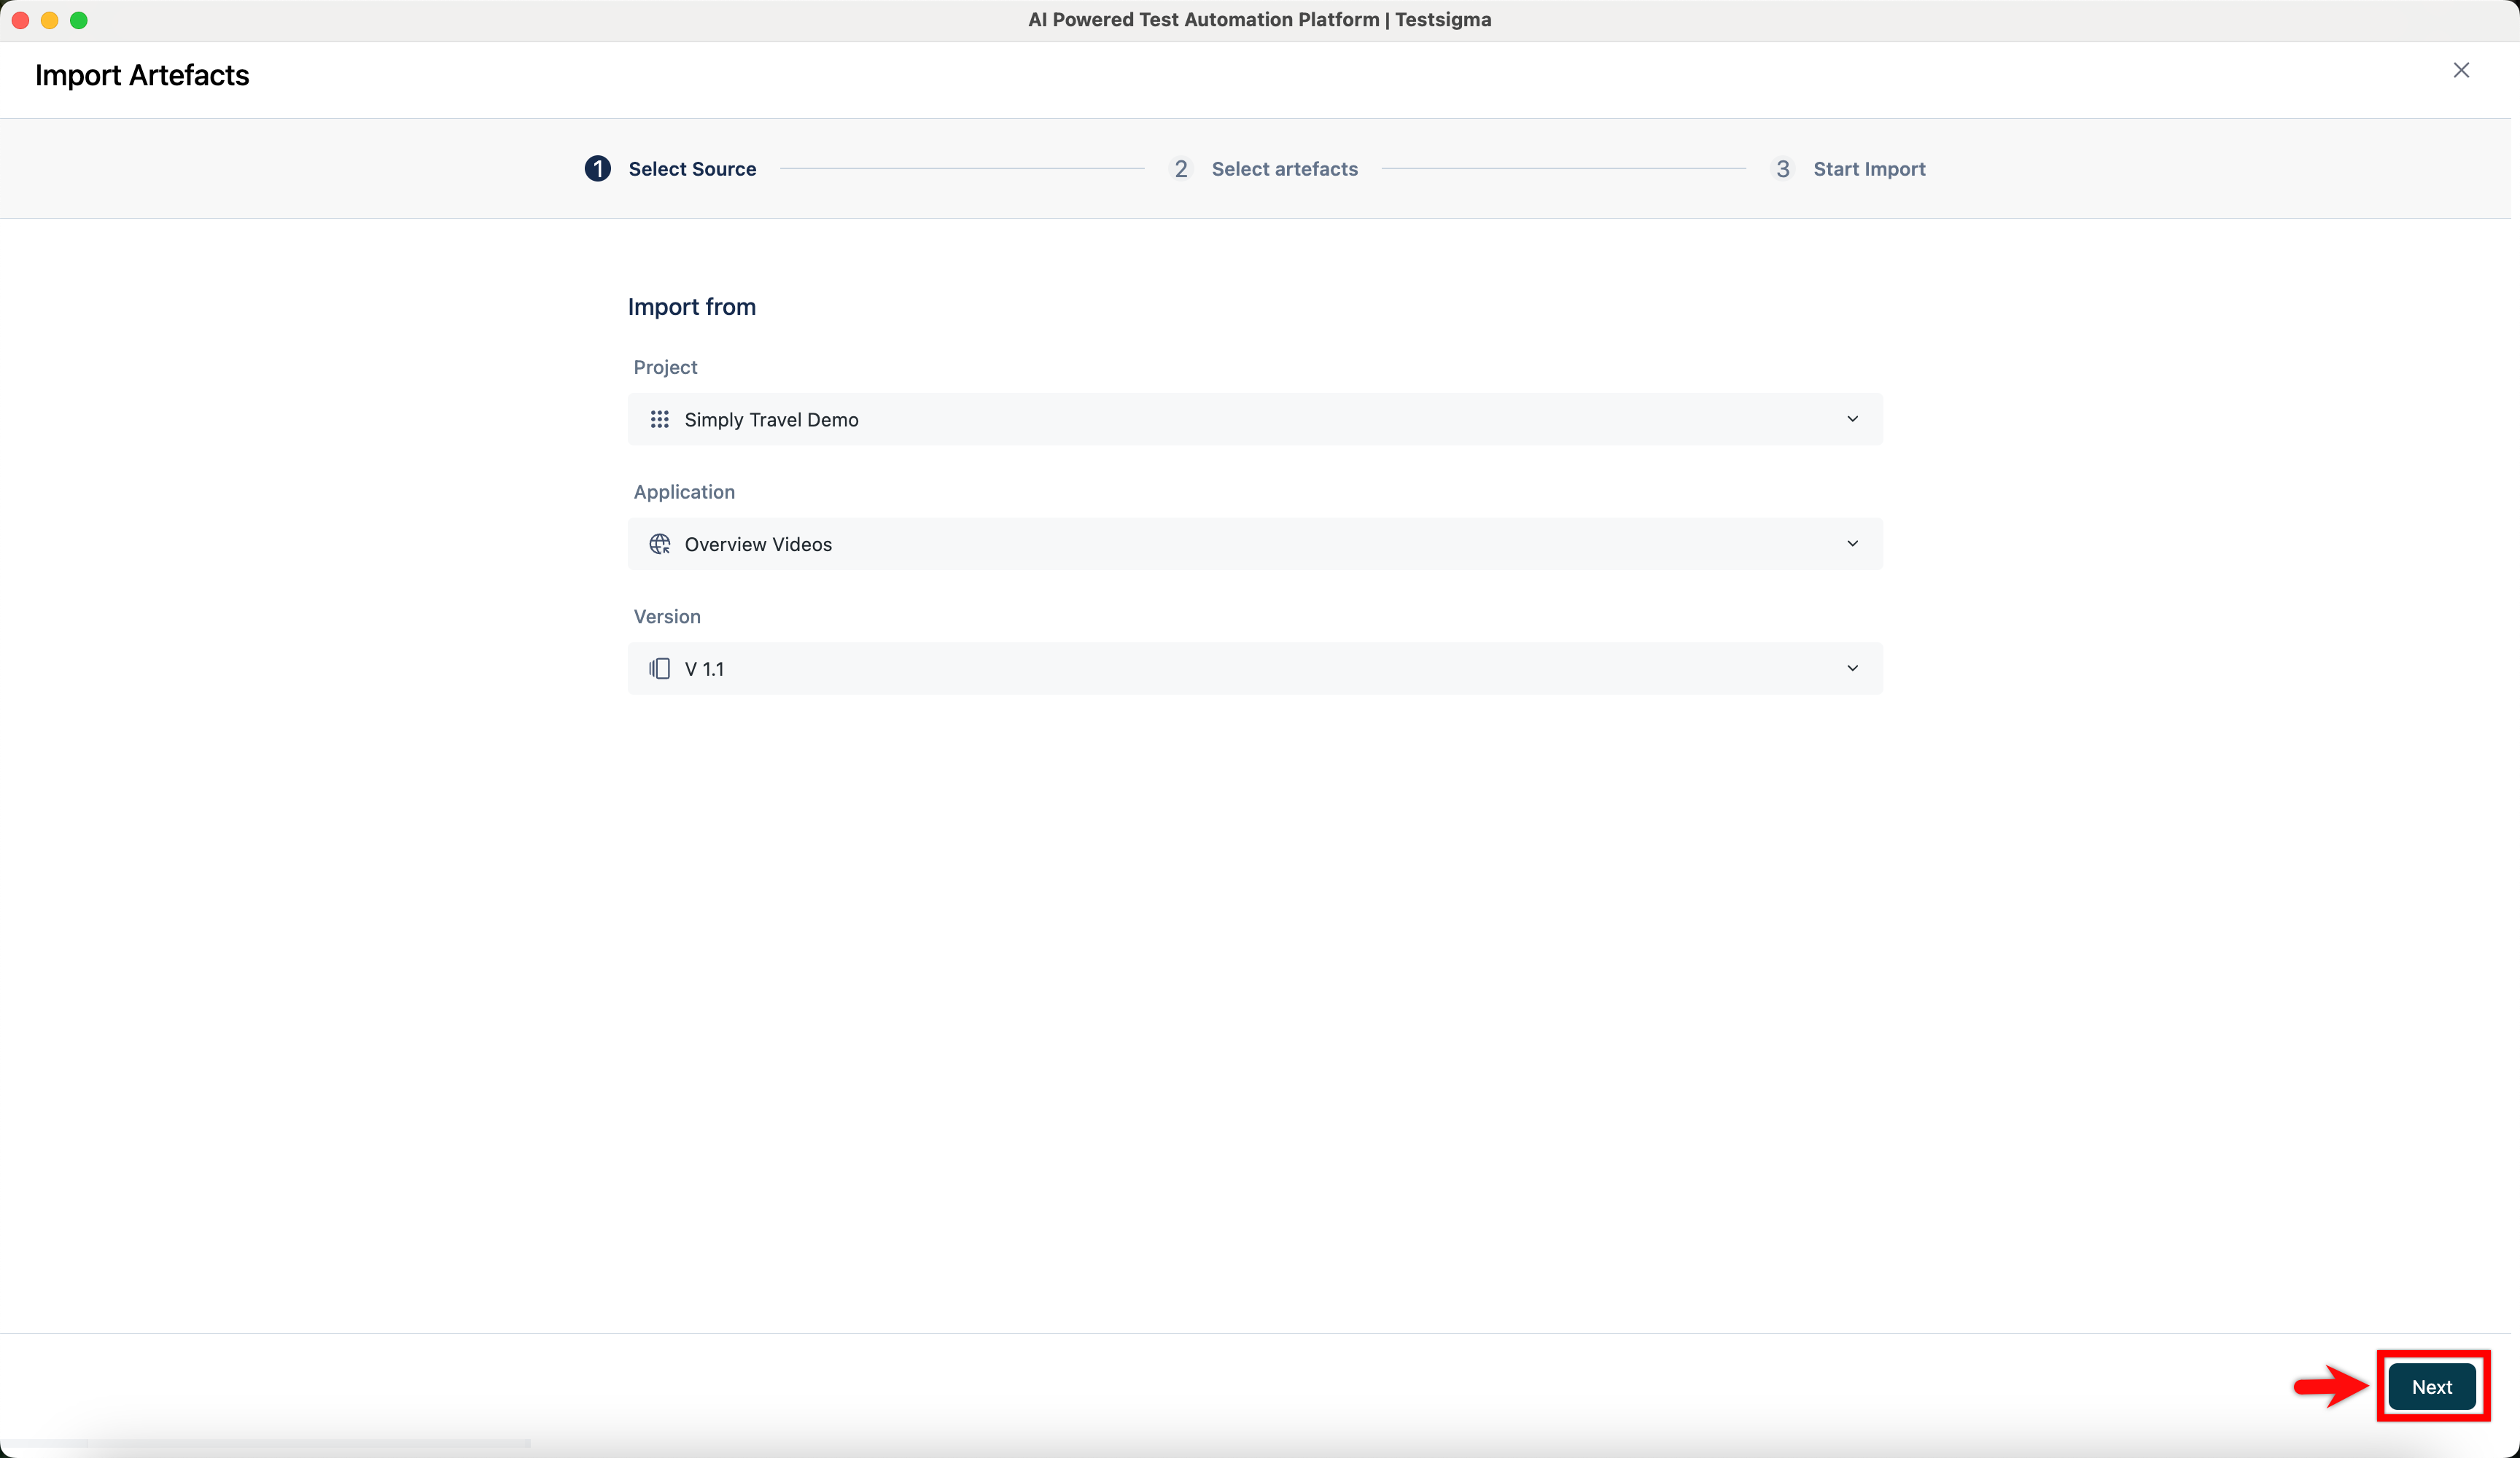
In the Import Artefacts screen, under the Select Source tab:
- Choose the source Project.
- Choose the Application Name.
- Choose the Version.
-
Click Next.
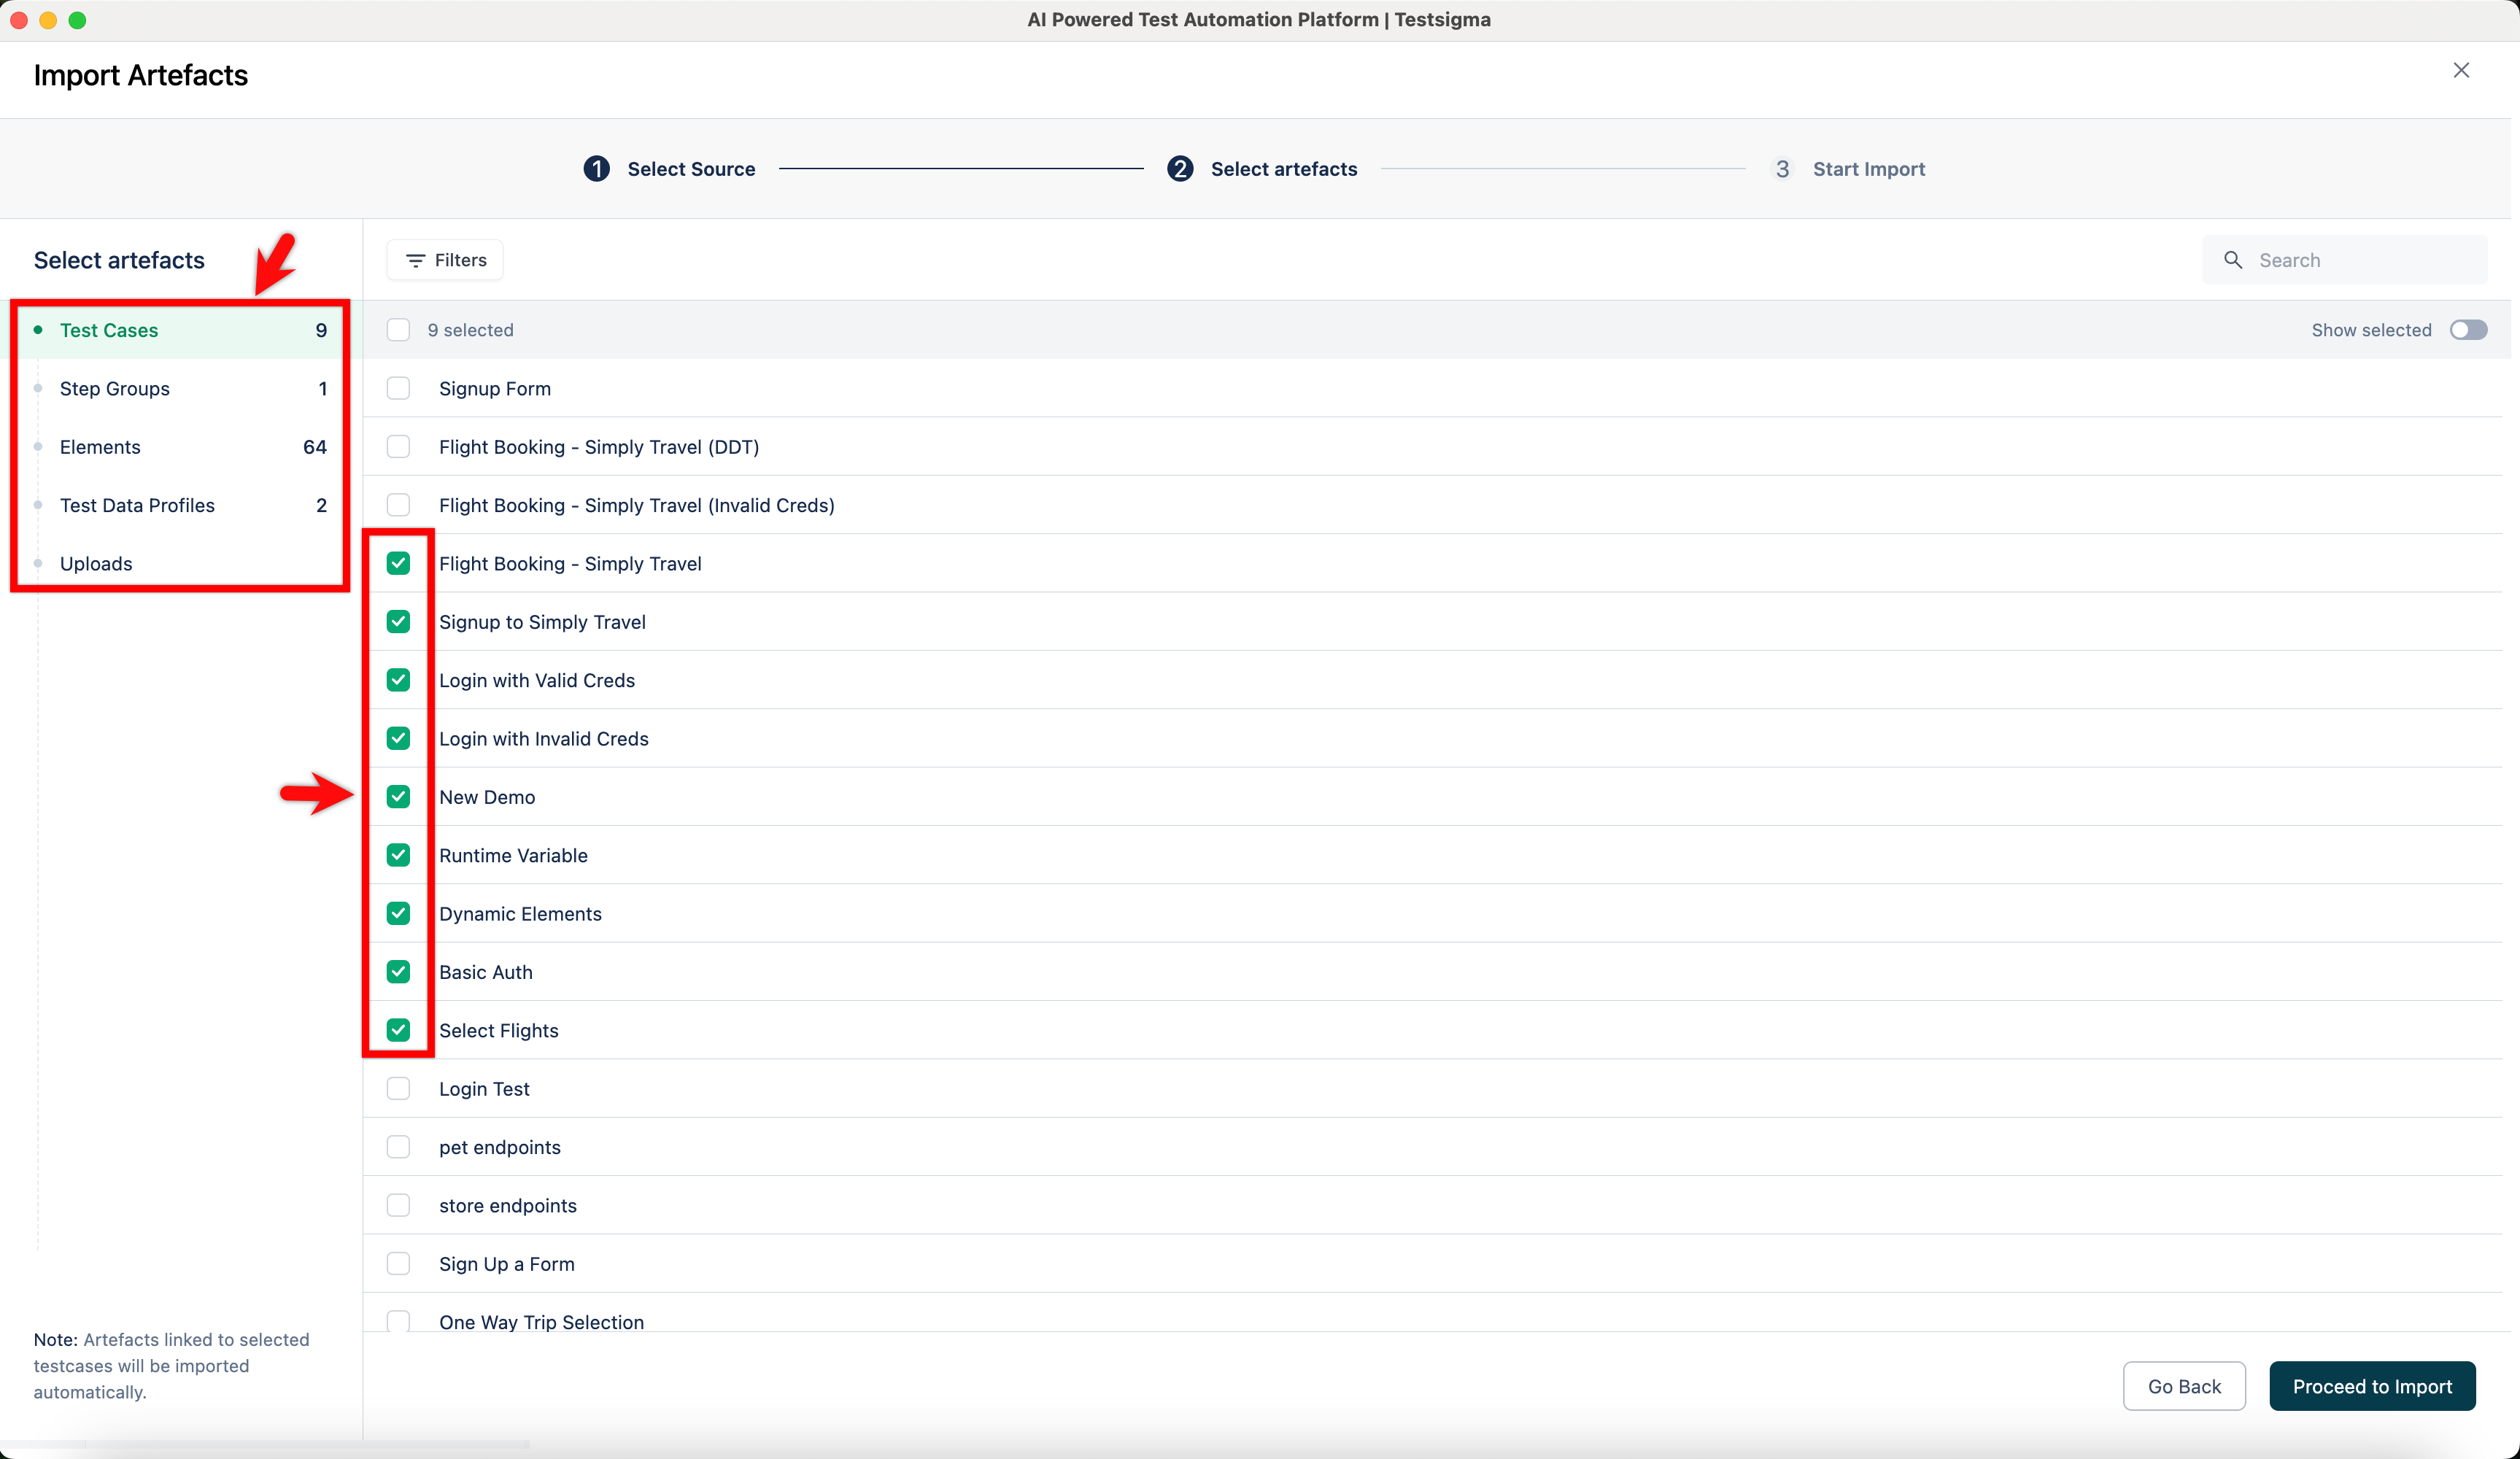
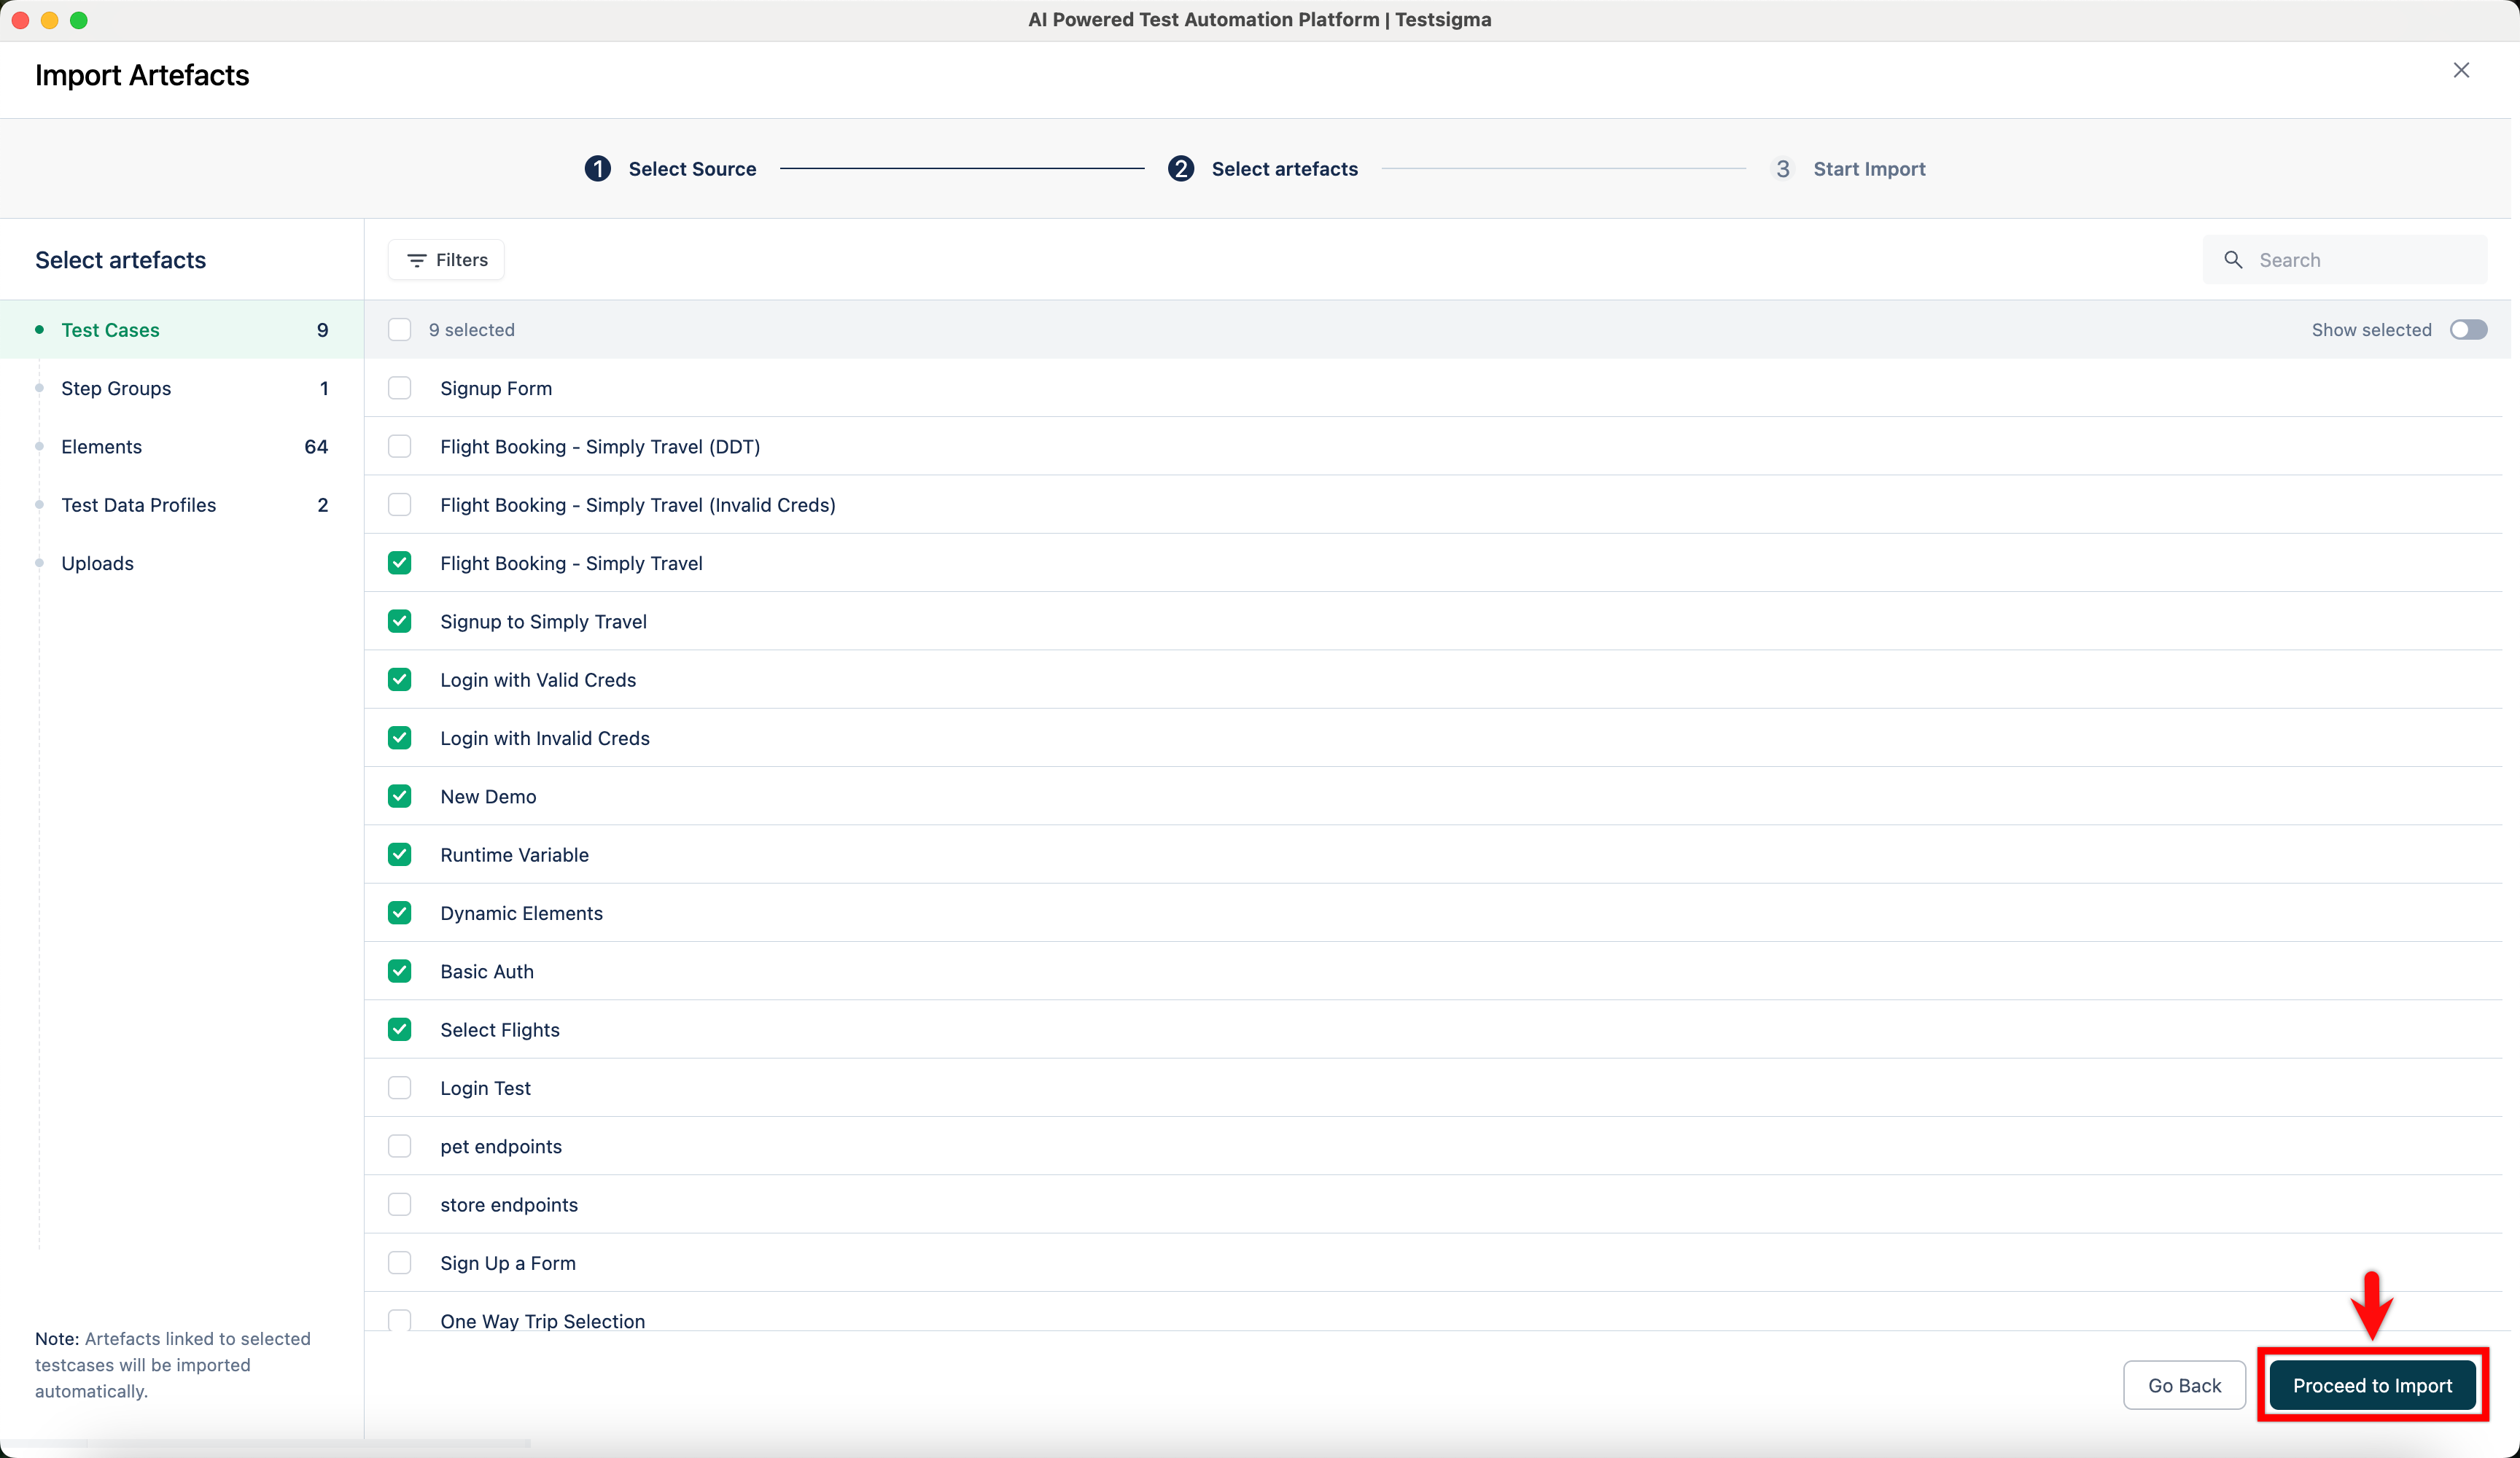
- In the Select Artefacts tab, choose the test cases, step groups, elements, test data profiles, environment variables, and uploads you want to import.
-
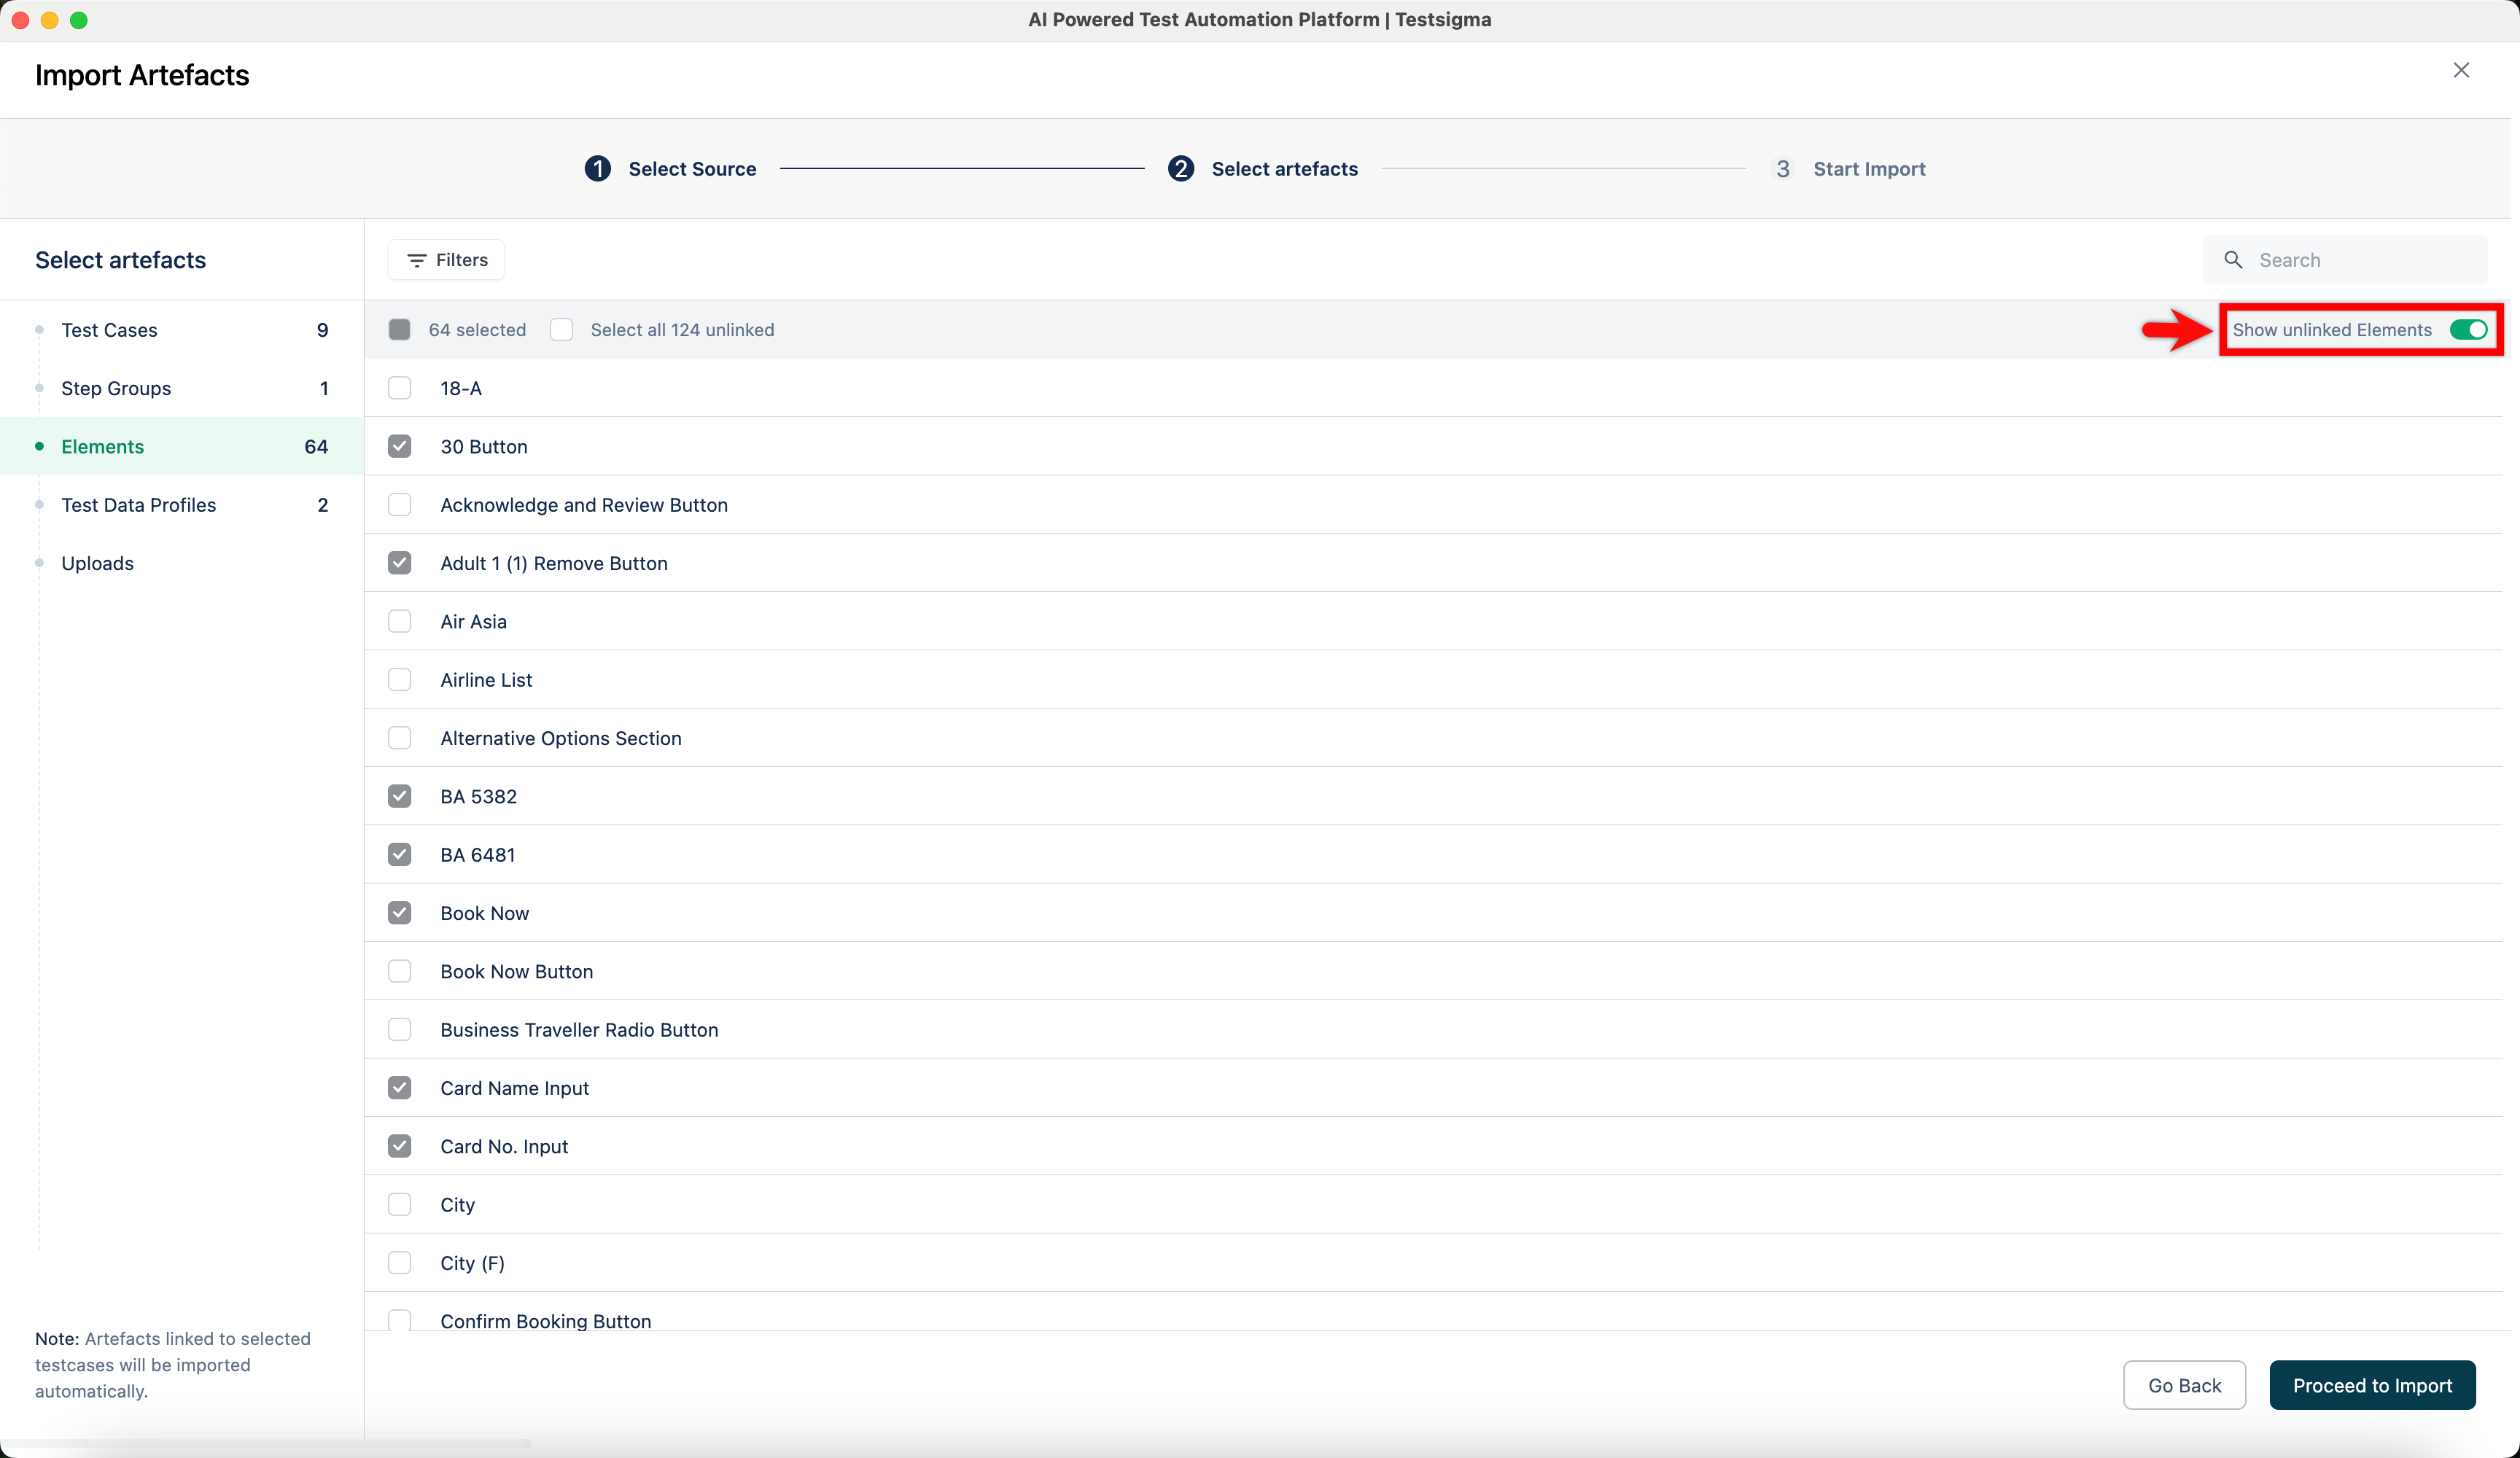
To include artefacts not linked to the selected test cases, go to the relevant tab (e.g., Elements, Step Groups), enable the Show unlinked (artefact) toggle, and select the required ones.
-
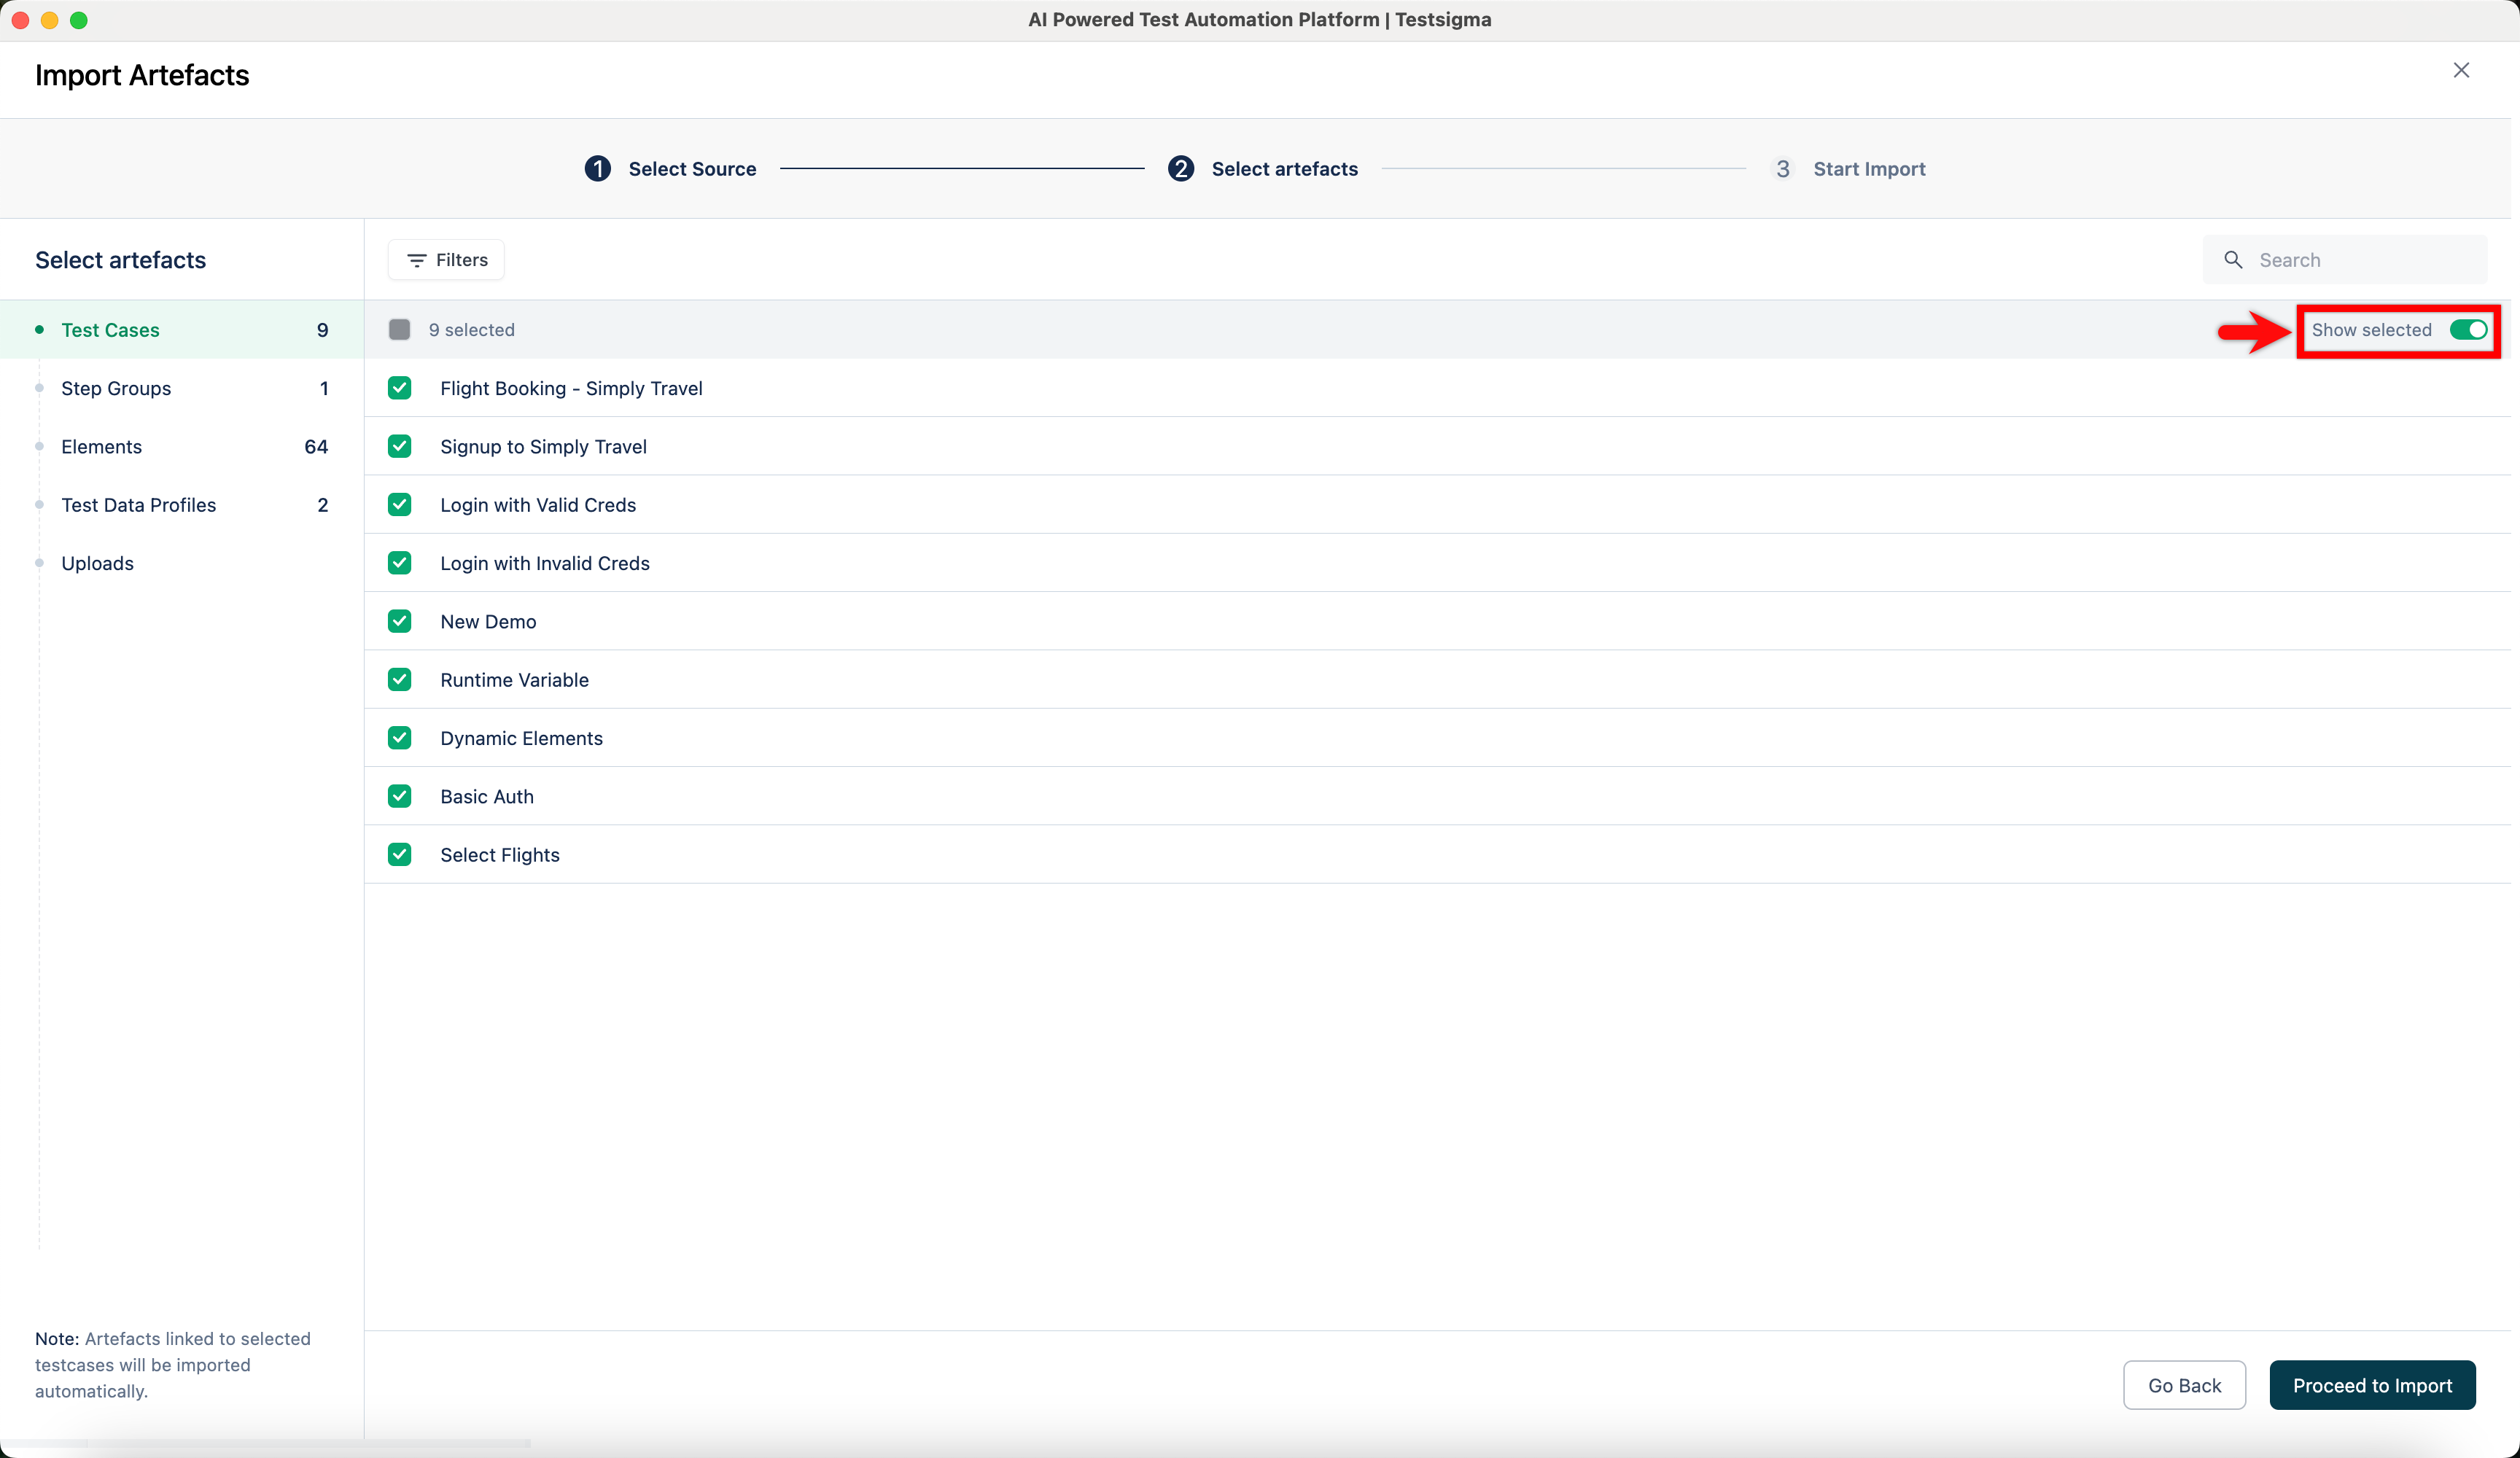
You can enable the Show selected toggle to review your selections in each artefact tab.
-
Click Proceed to Import.
-
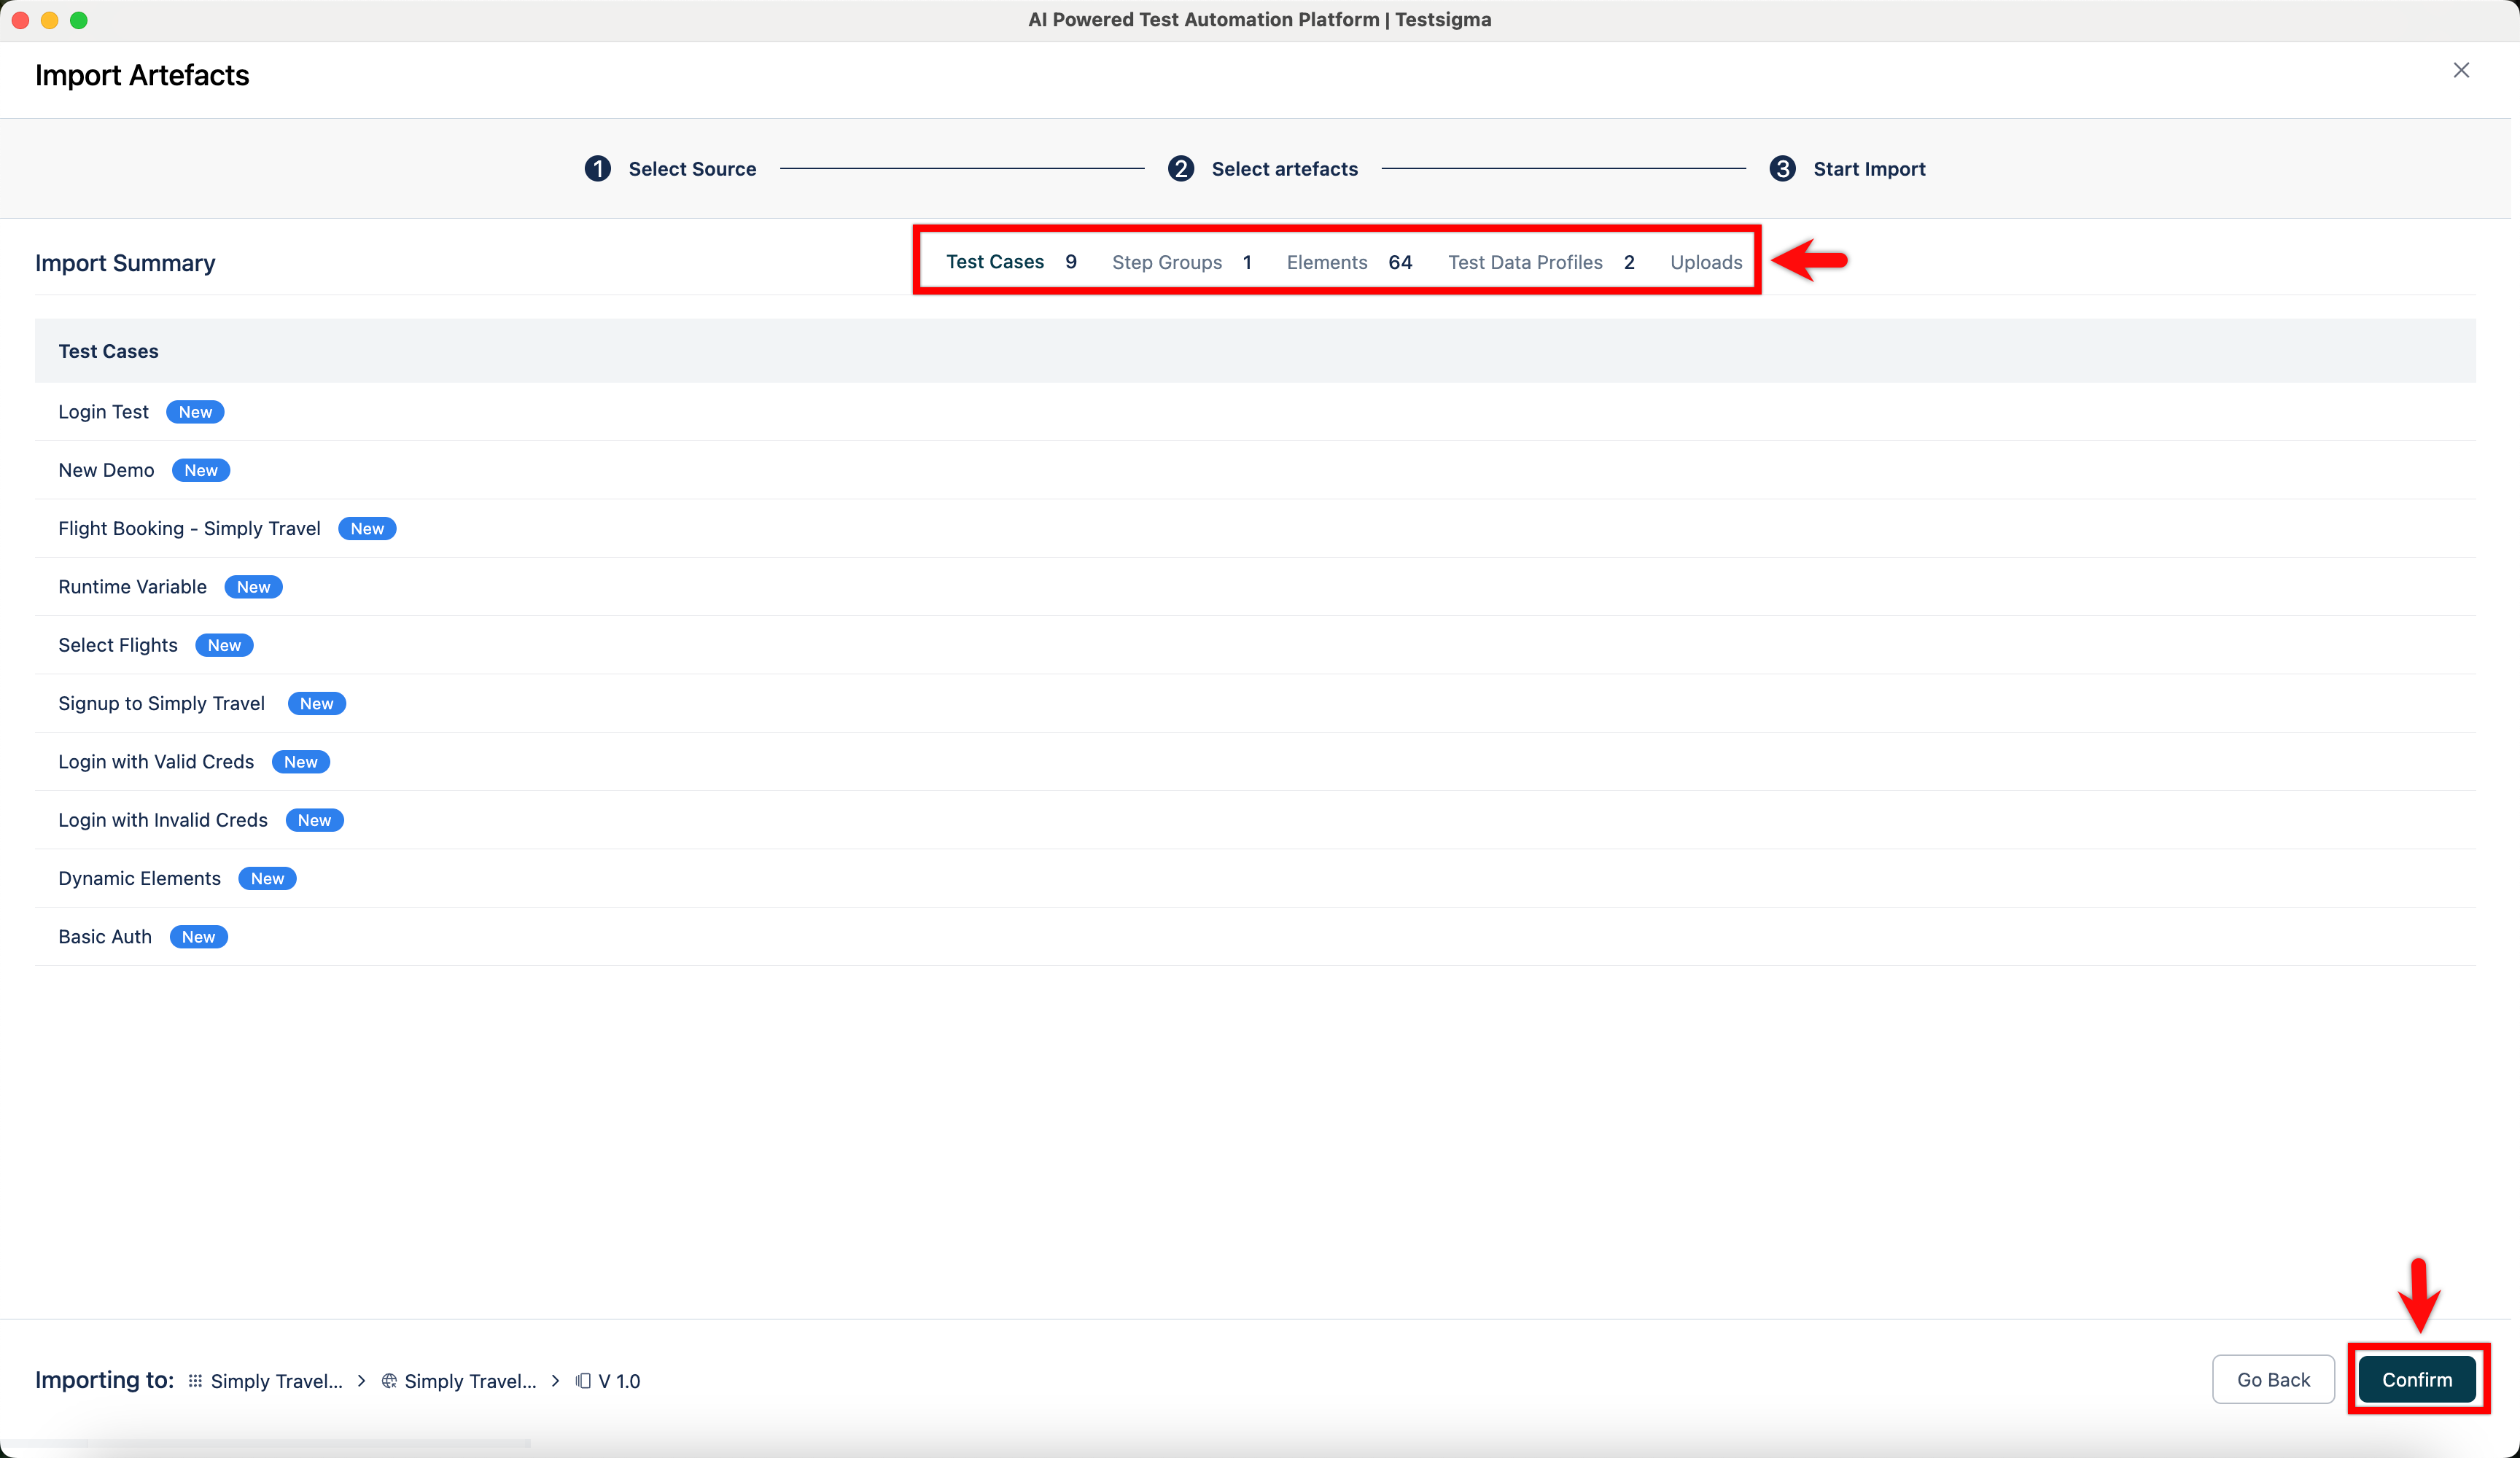
In the Start Import tab, review the selected artefacts and click Confirm.
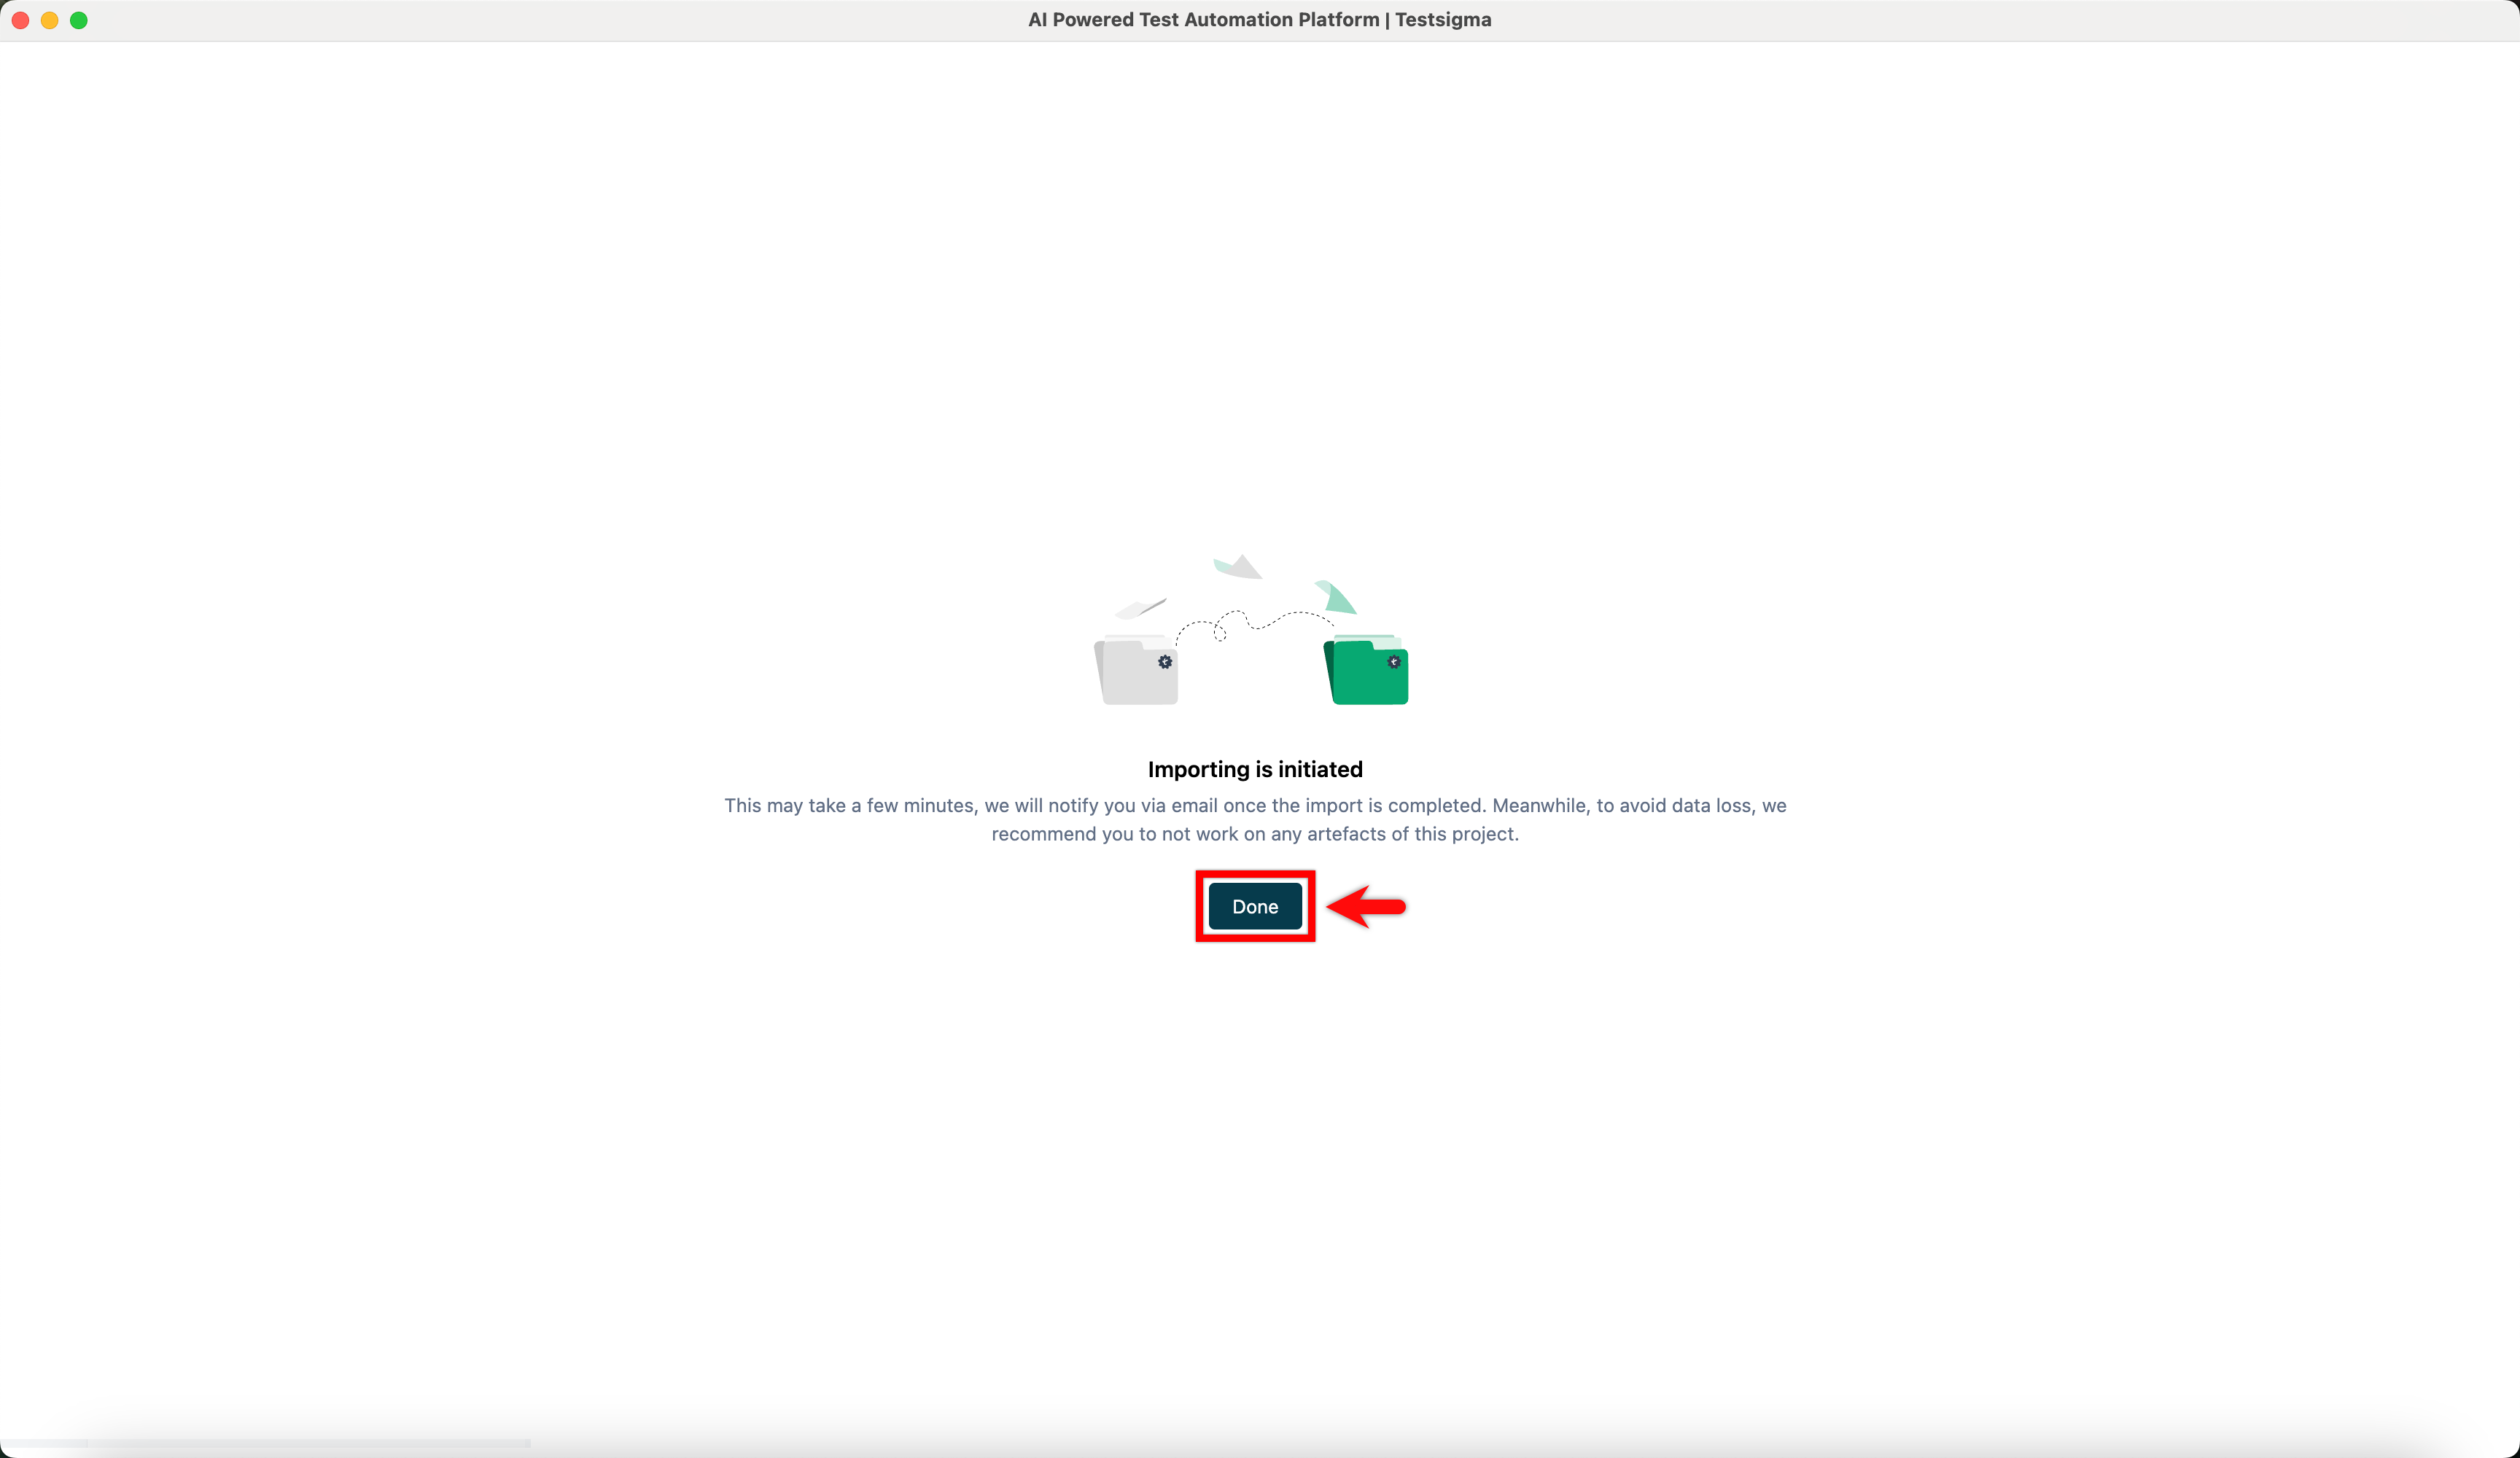
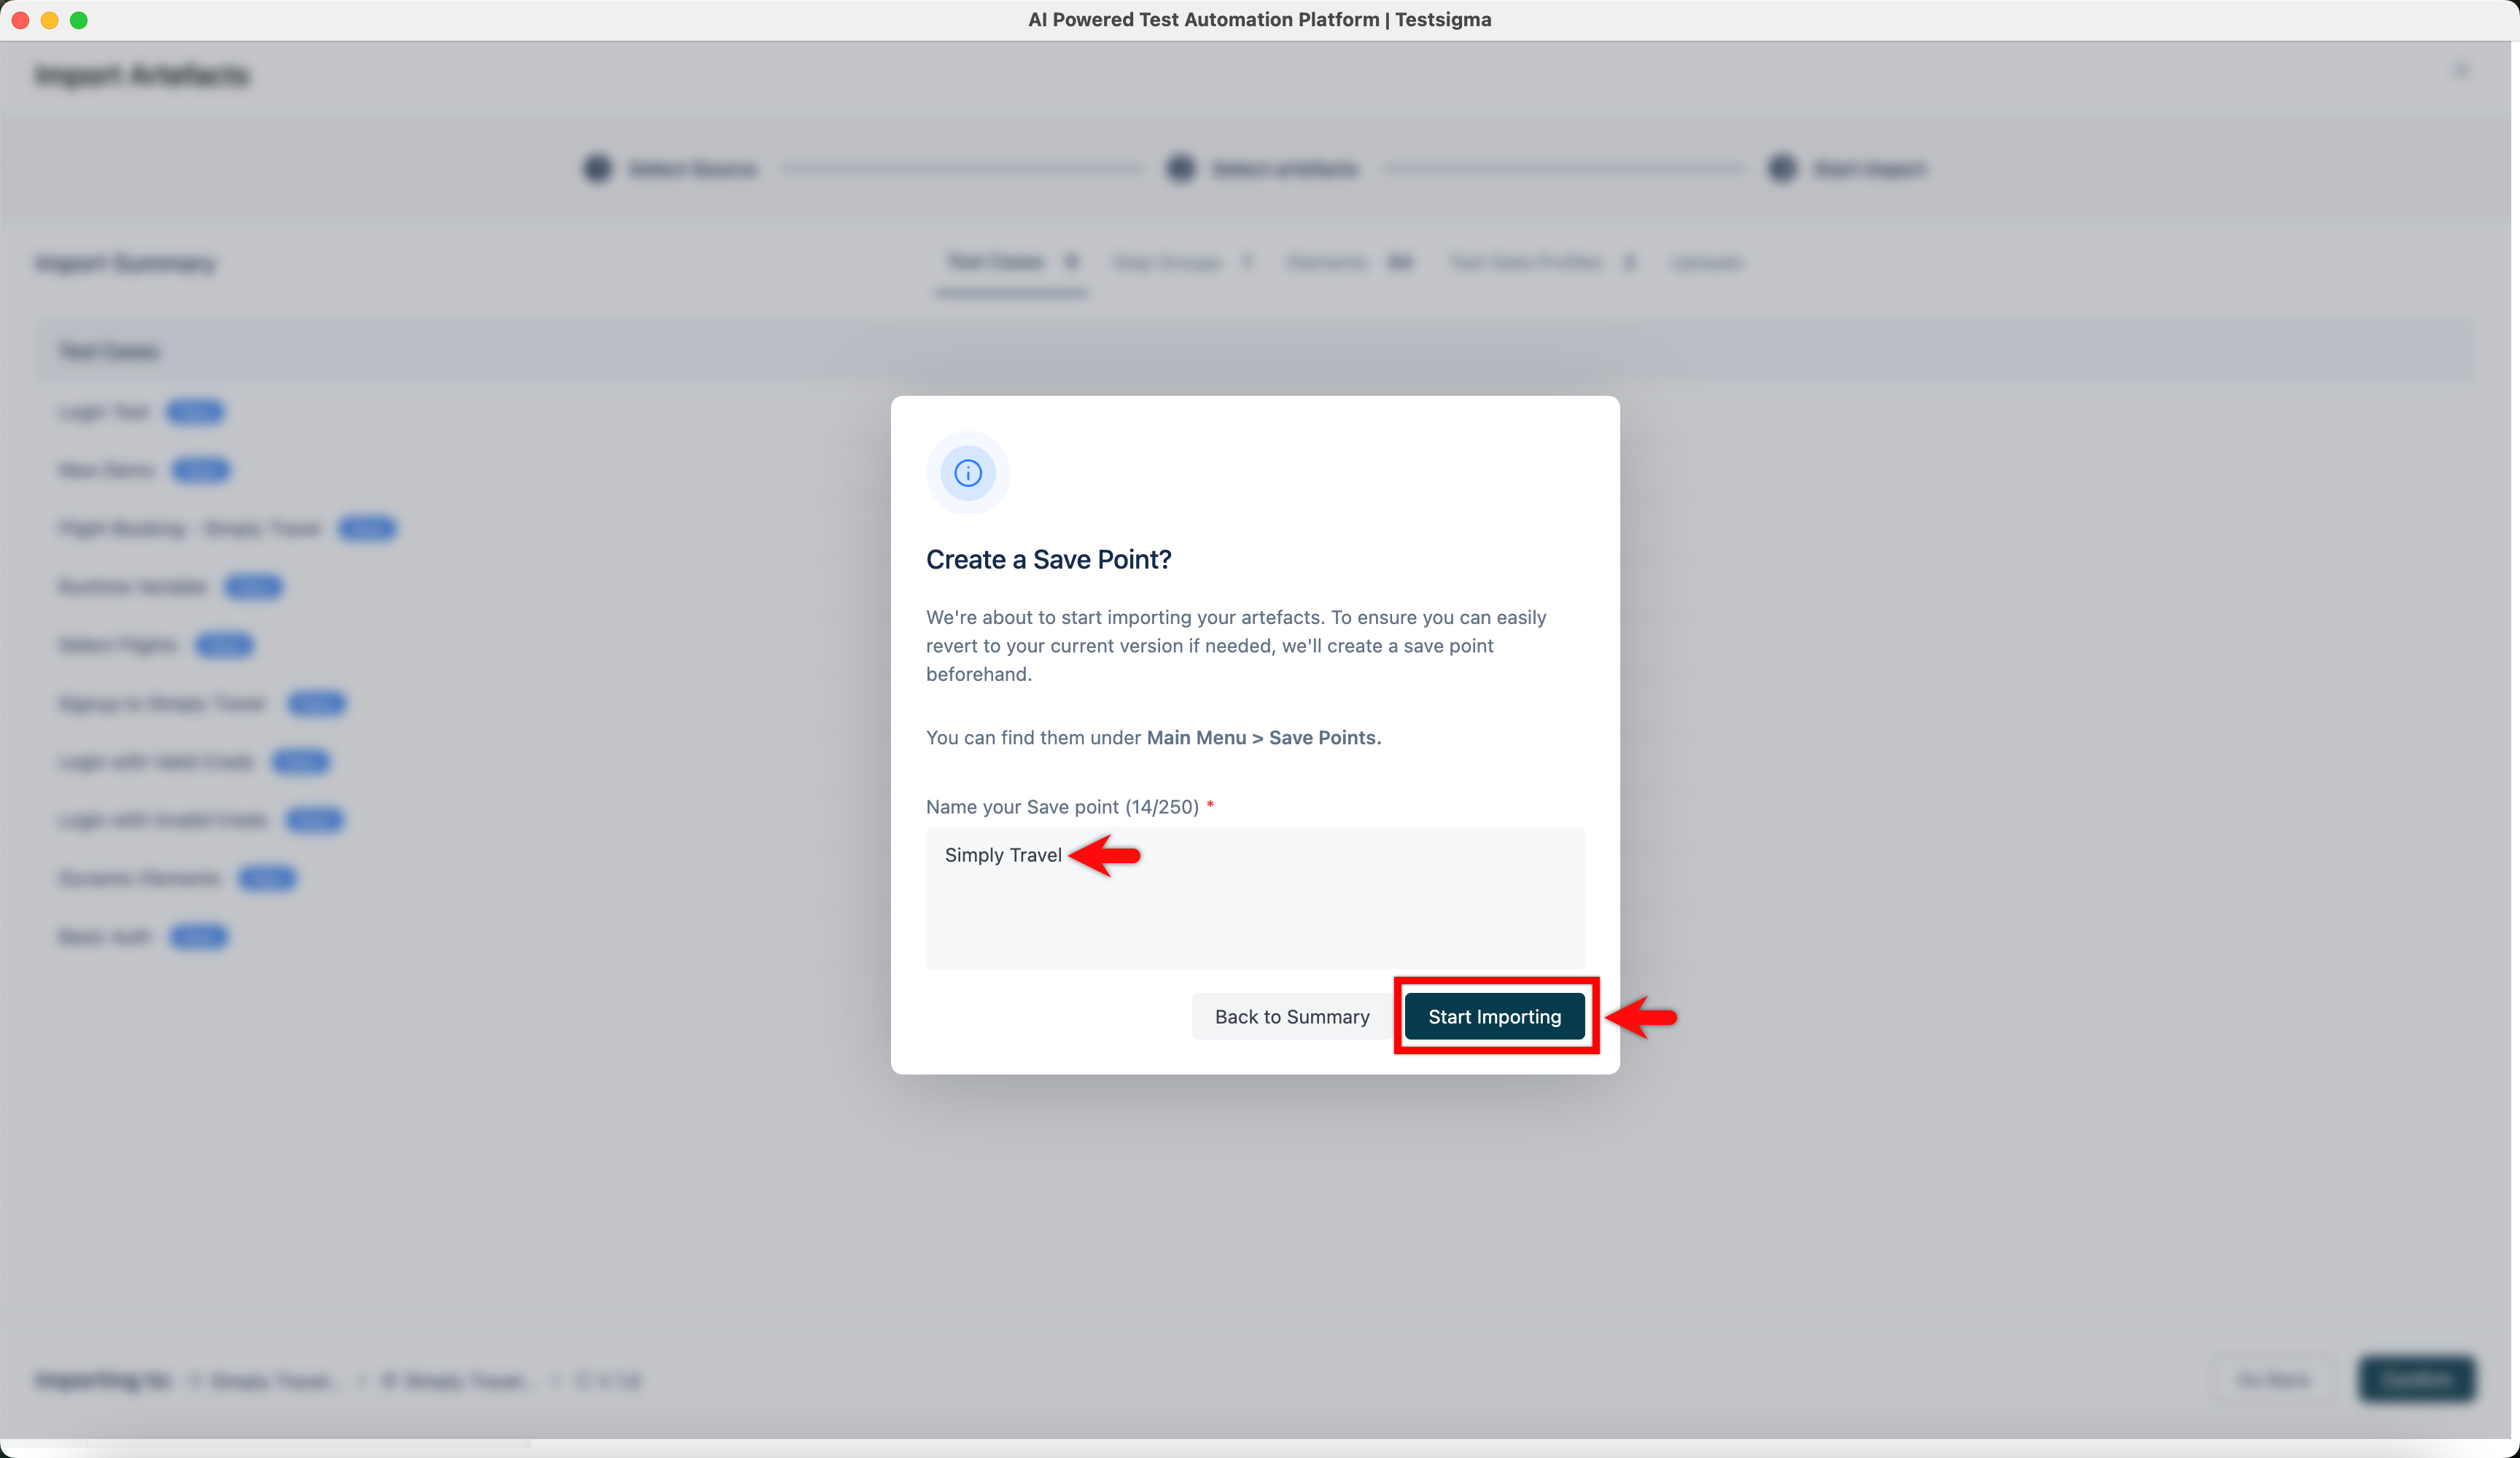
- In the Create a Save Point? dialog, enter a name, and click Start Importing.
- Click Done.