Test Cases
Test Step Settings for Test Cases
Controlling the behavior of each test step can be important to enhance your test coverage. Test Step Settings in Testsigma helps you decide how test cases run and show their results. With these settings, you can define step conditions, determine actions to take when test steps fail, set no of retries if necessary, and more. This enhanced control over the test step also improves the reliability of test results.
Prerequisites
Before you begin, ensure that you have referred to:
Use Test Step Settings
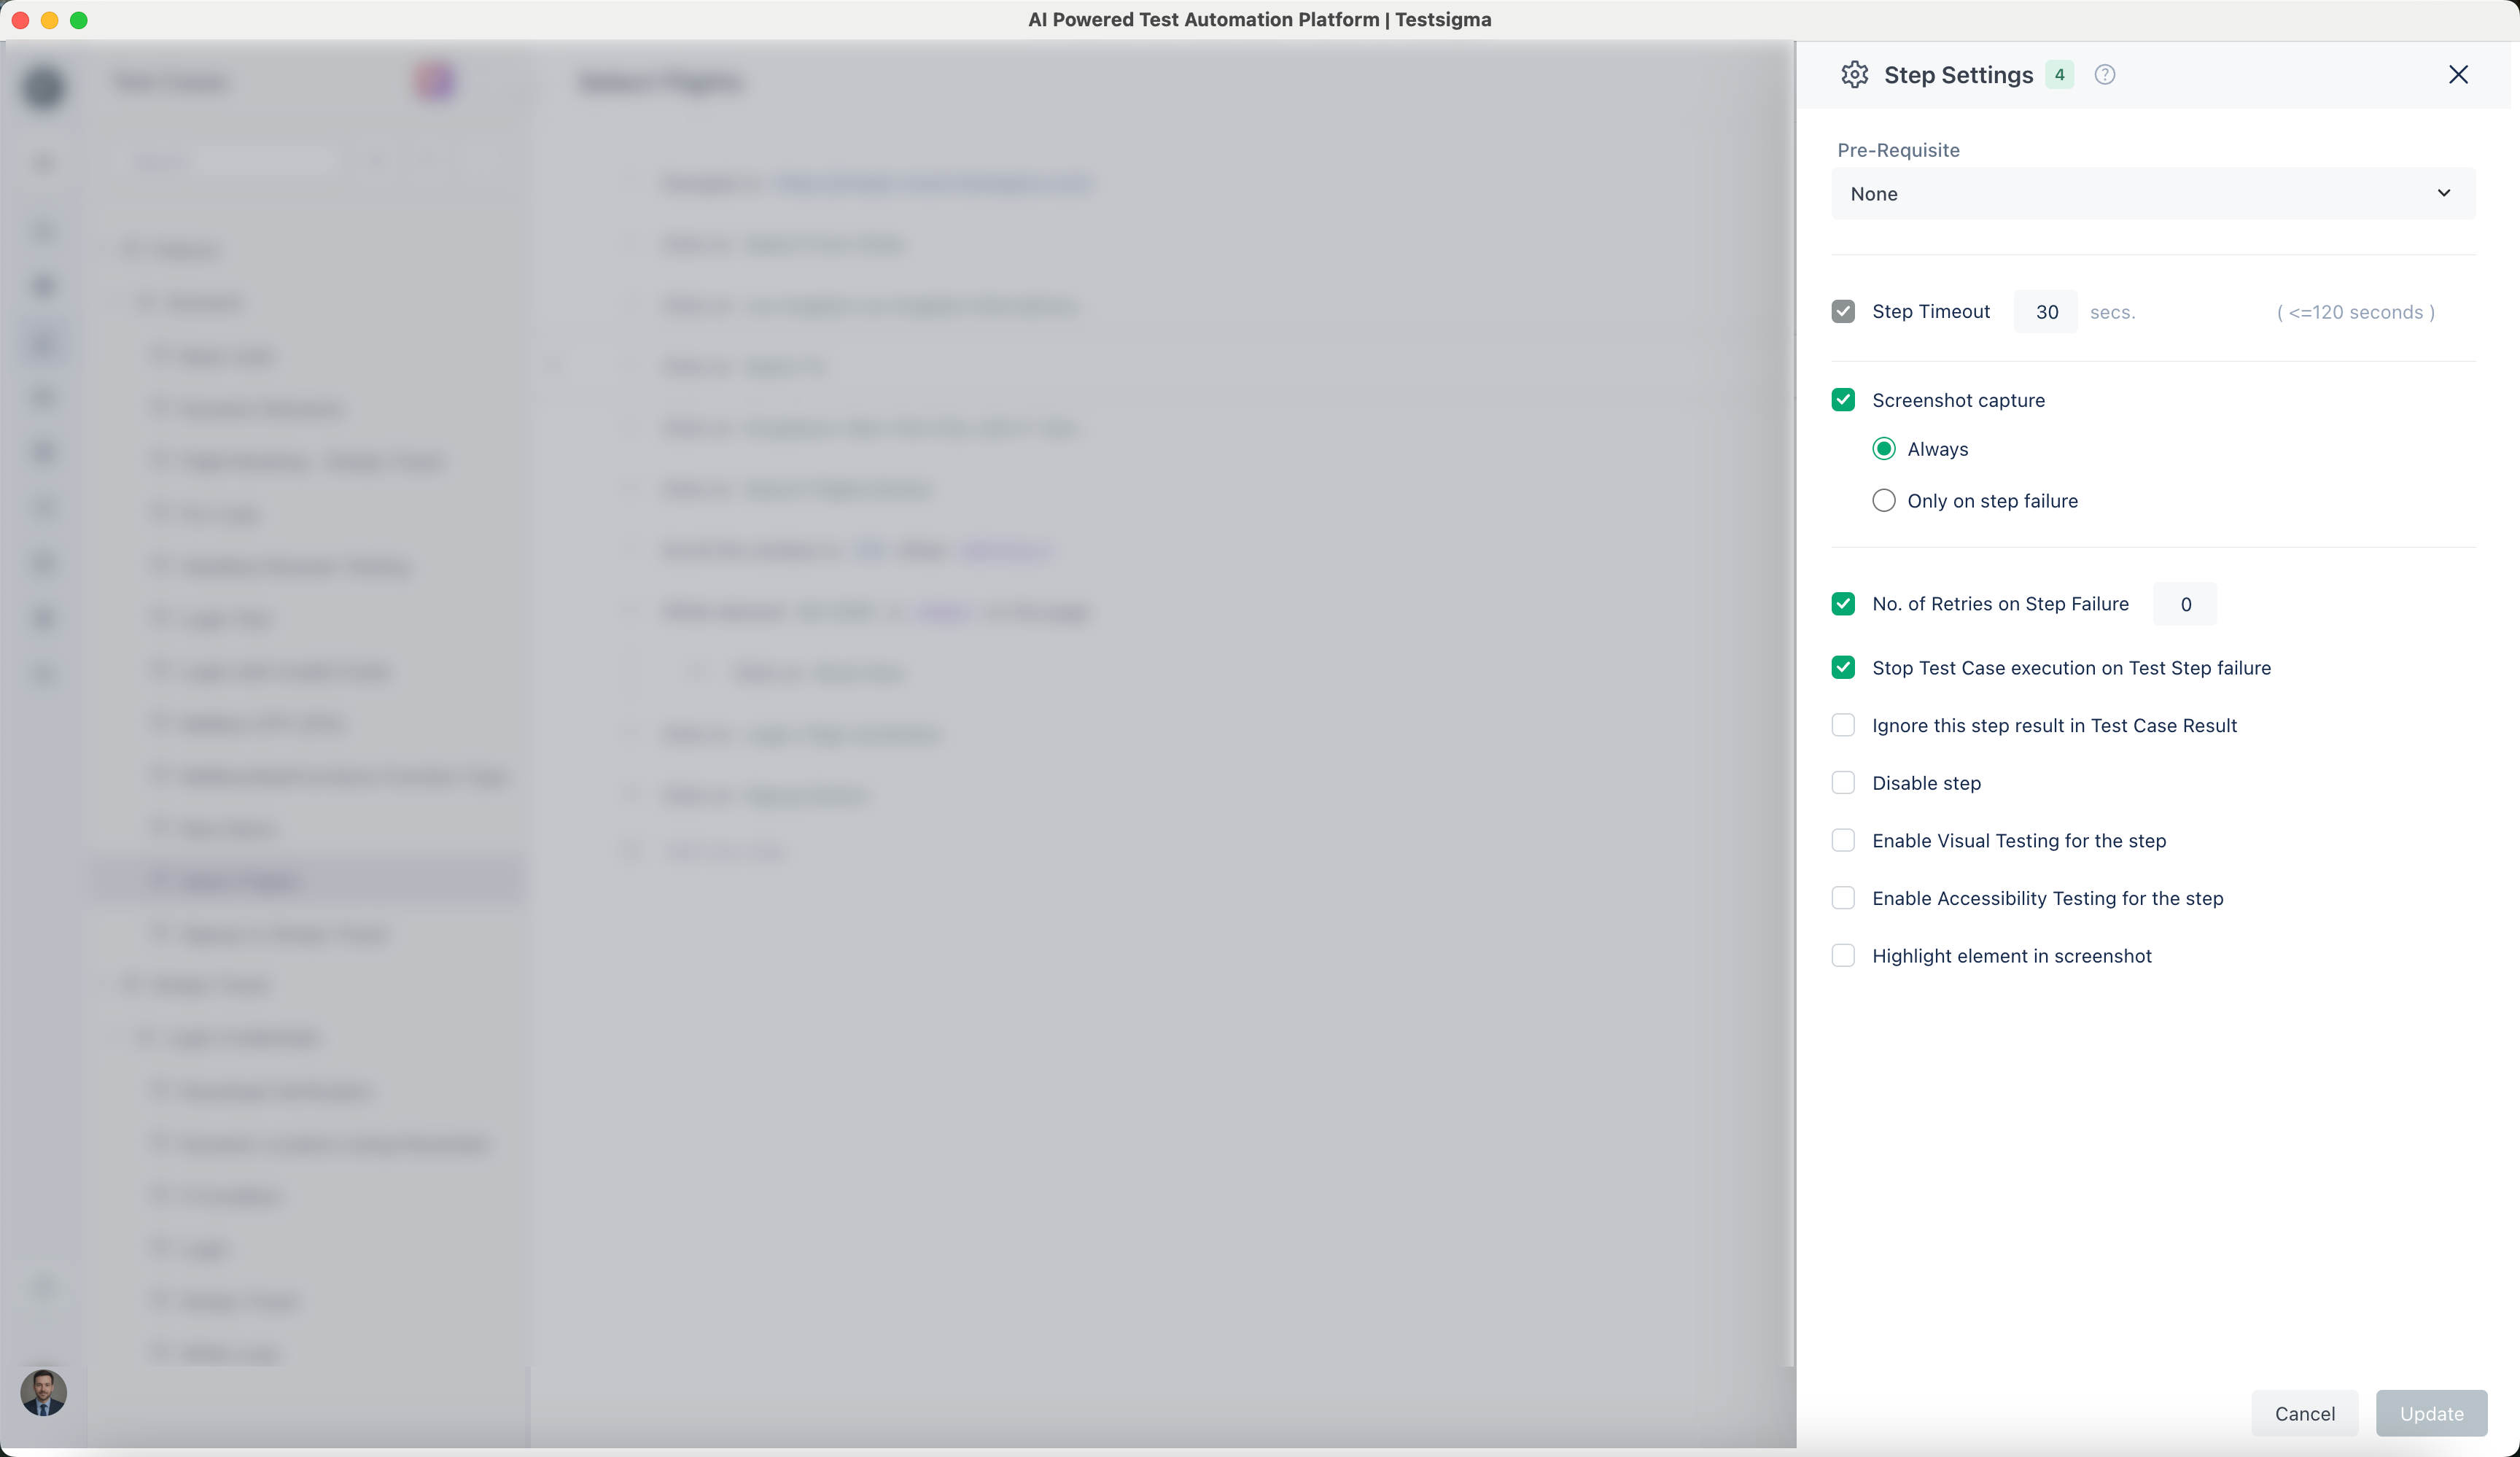
Section titled “Use Test Step Settings”To access Test Step Settings, click kebab menu on any test step, and choose Step Settings from the list.
Below is a summary of the available settings:
| Settings | Description |
|---|---|
| Max. wait time (<120 secs) | Set the maximum wait time limit for completing the test step. It will fail if the test step takes longer than the specified time (up to a maximum of 120 seconds). |
| Retries on step failure (<=10) | Give the number of retries on step failure to decide how many times you want to attempt to execute the test step if it fails. |
| Screenshot capture | Specify one of the following options for screenshot capture at the step level:
|
| Pre-Requisite | Select a prerequisite step from the list of available steps in the same test case. This step must be successfully done before the current step runs. |
| Stop Test Case execution on Test Step | It allows you to terminate test execution if the test fails at any step. By default, this option is checked, and test case execution will stop if the test step fails. |
| Ignore this step result in Test Case Result | It allows you to exclude the outcome of a particular step from the overall test result. |
| Disable Step | You can disable the test step by choosing this option, and the test step will not run. By default, this option is unchecked. |
| Enable Visual Testing for the Step | It allows you to capture and compare the visual appearance of an application’s user interface between different builds or versions. |
| Enable Accessibility Testing for the step | Choose this option to enable accessibility testing for the step to validate that your application meets accessibility standards. |
| Highlight element in screenshot | Choose this option to highlight elements on the product screen for each step. Contact Testsigma support to enable this feature. Navigation: Settings > Preferences > Highlight element in screenshot |
Here’s the screenshot of the available step settings:
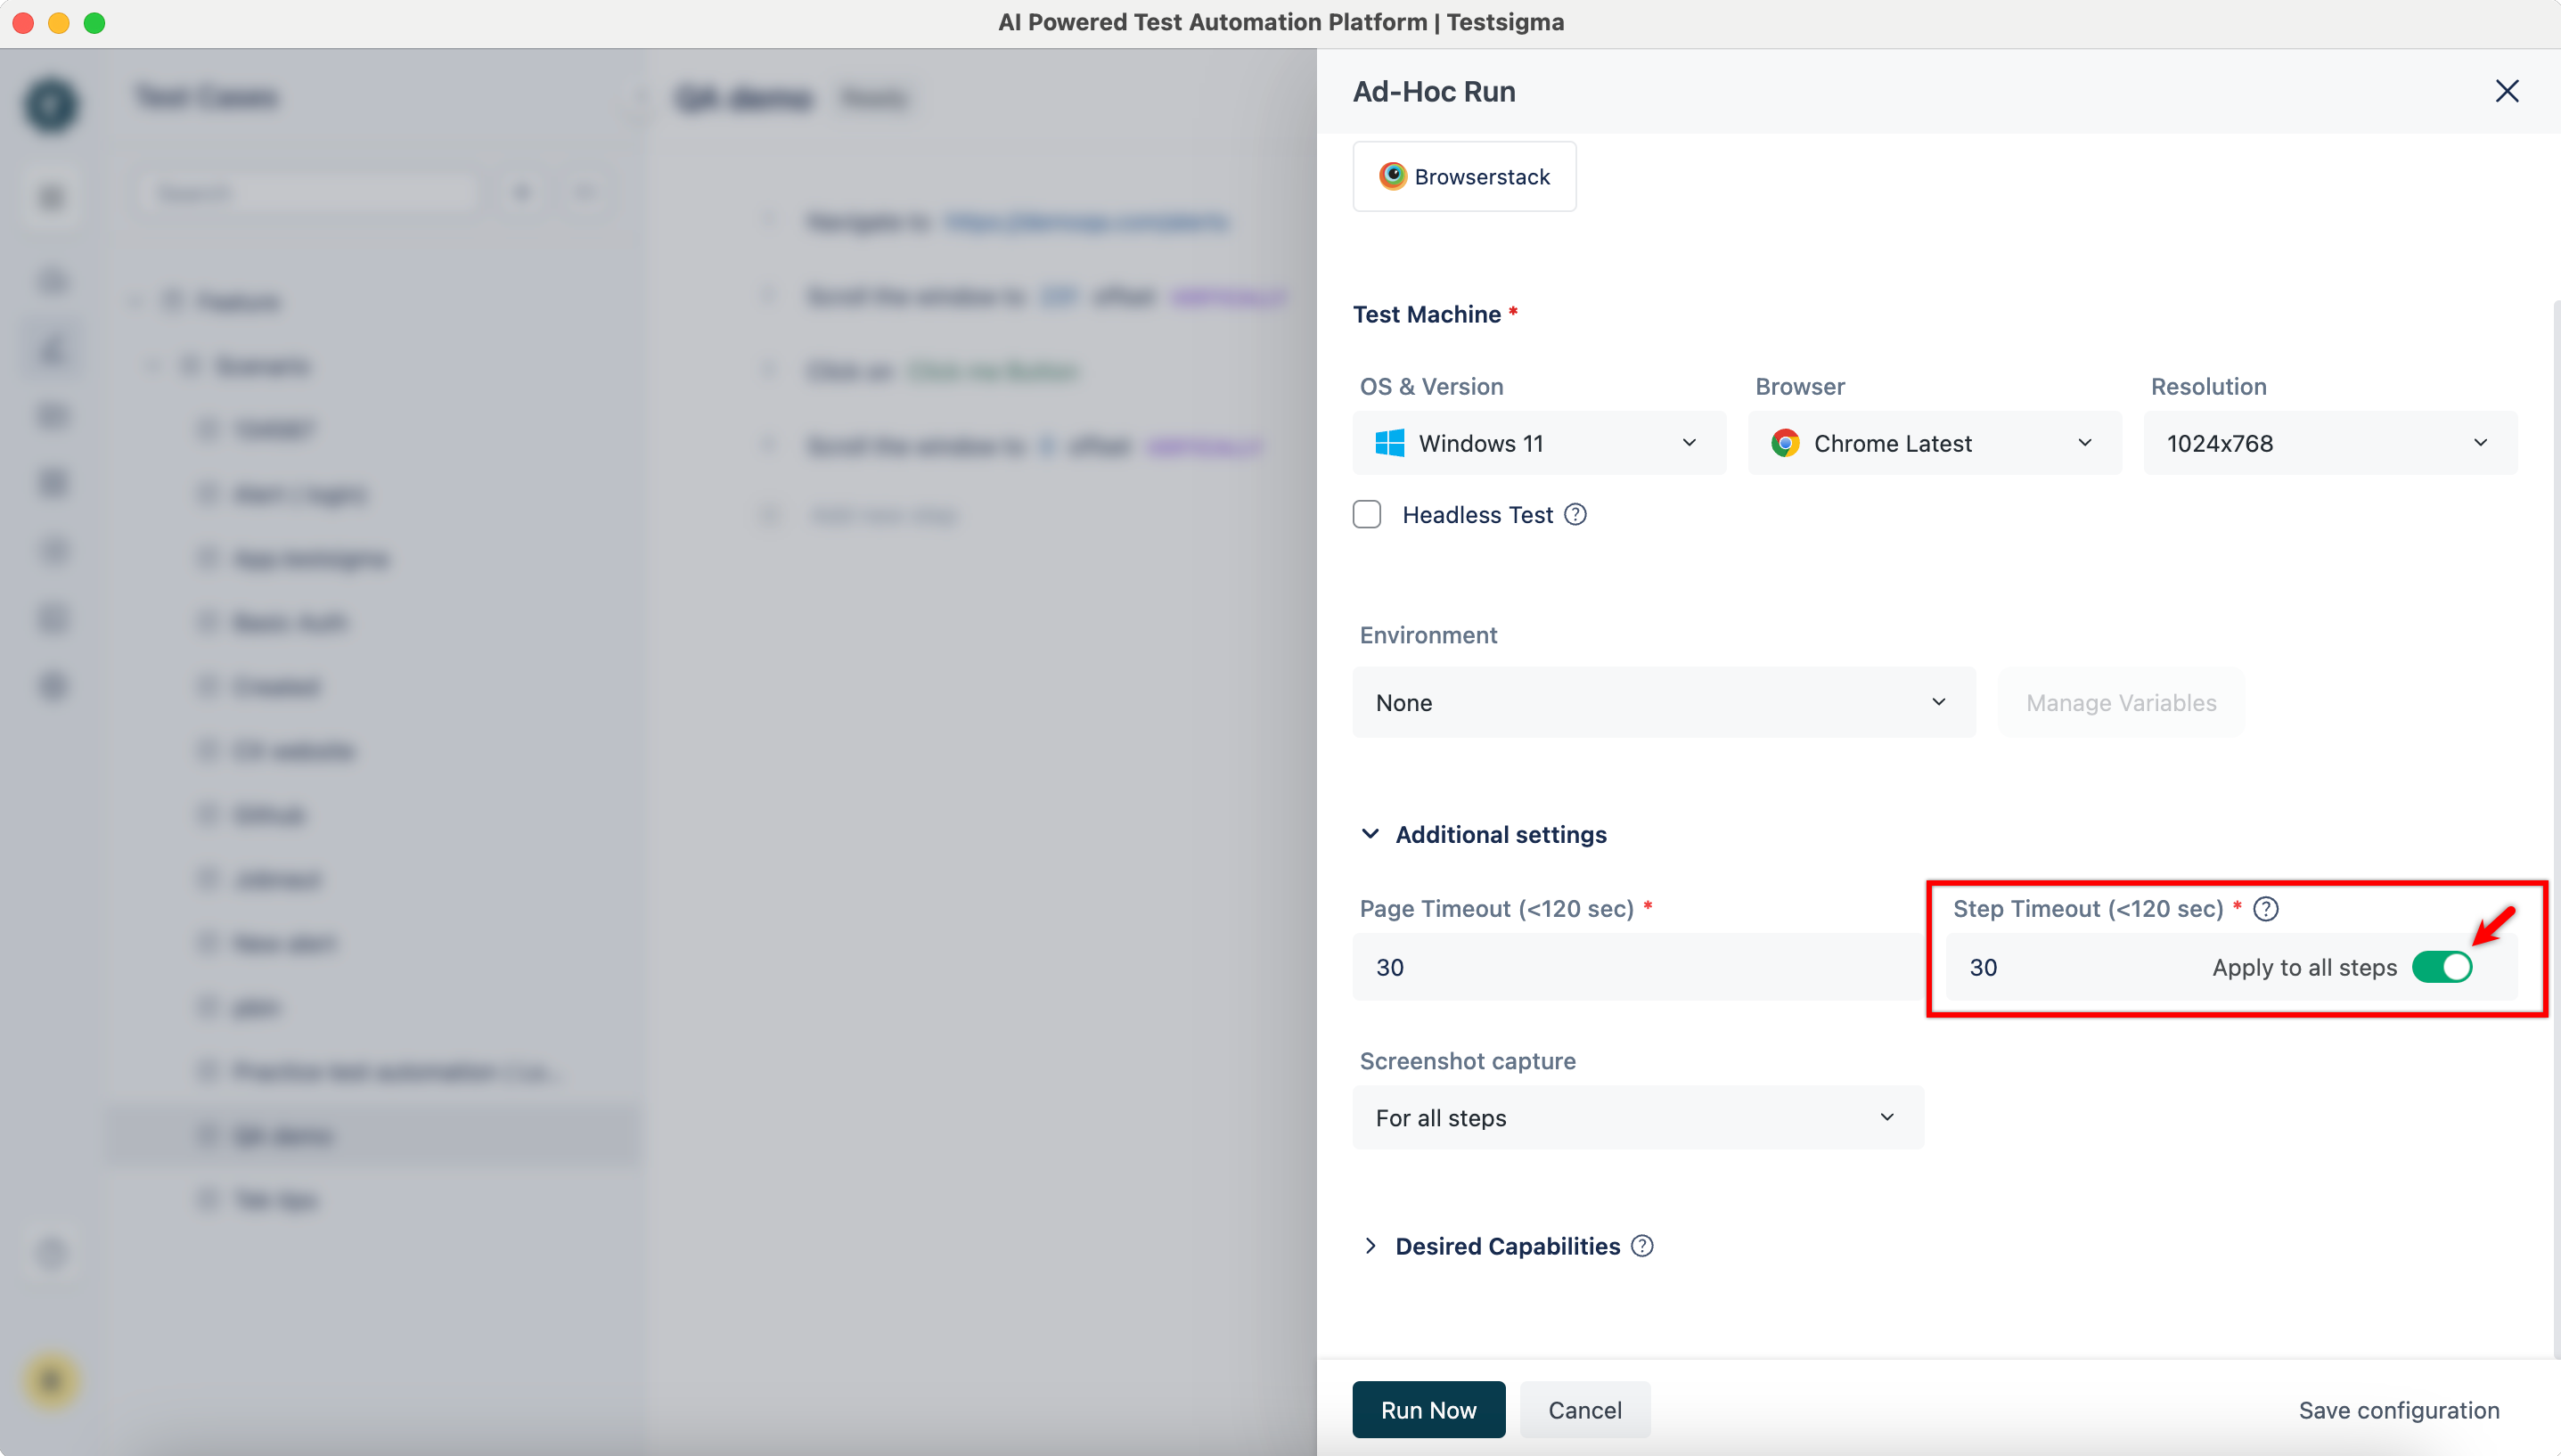
Configuring Global Timeouts (New)
Section titled “Configuring Global Timeouts (New)”The following table outlines how the Global Step Timeout settings & Test Step Timeout interact based on different configurations.
| Scenario | Test Step Timeout | Global Step Timeout | Toggle | Outcome |
|---|---|---|---|---|
| Case 1 | 30 seconds (default) | 30 seconds (default) | OFF | Global timeout (30 seconds) applies universally, as it matches the default step timeout. |
| Case 2 | 30 seconds (default) | 60 seconds | OFF | Global timeout (60 seconds) applies, as it overrides the default step timeout (30 seconds). |
| Case 3 | Some steps customized, some unchanged | Updated value | OFF | Customized steps use their specific timeouts and steps without custom timeouts use the global timeout. |
| Case 4 | Some steps customized, some unchanged | Any value | ON | Global timeout applies to all steps, overriding step-specific timeouts. |
Refer to the screenshot below to enable the Global Step Timeout toggle in the Additional Settings section of the Adhoc Run overlay.
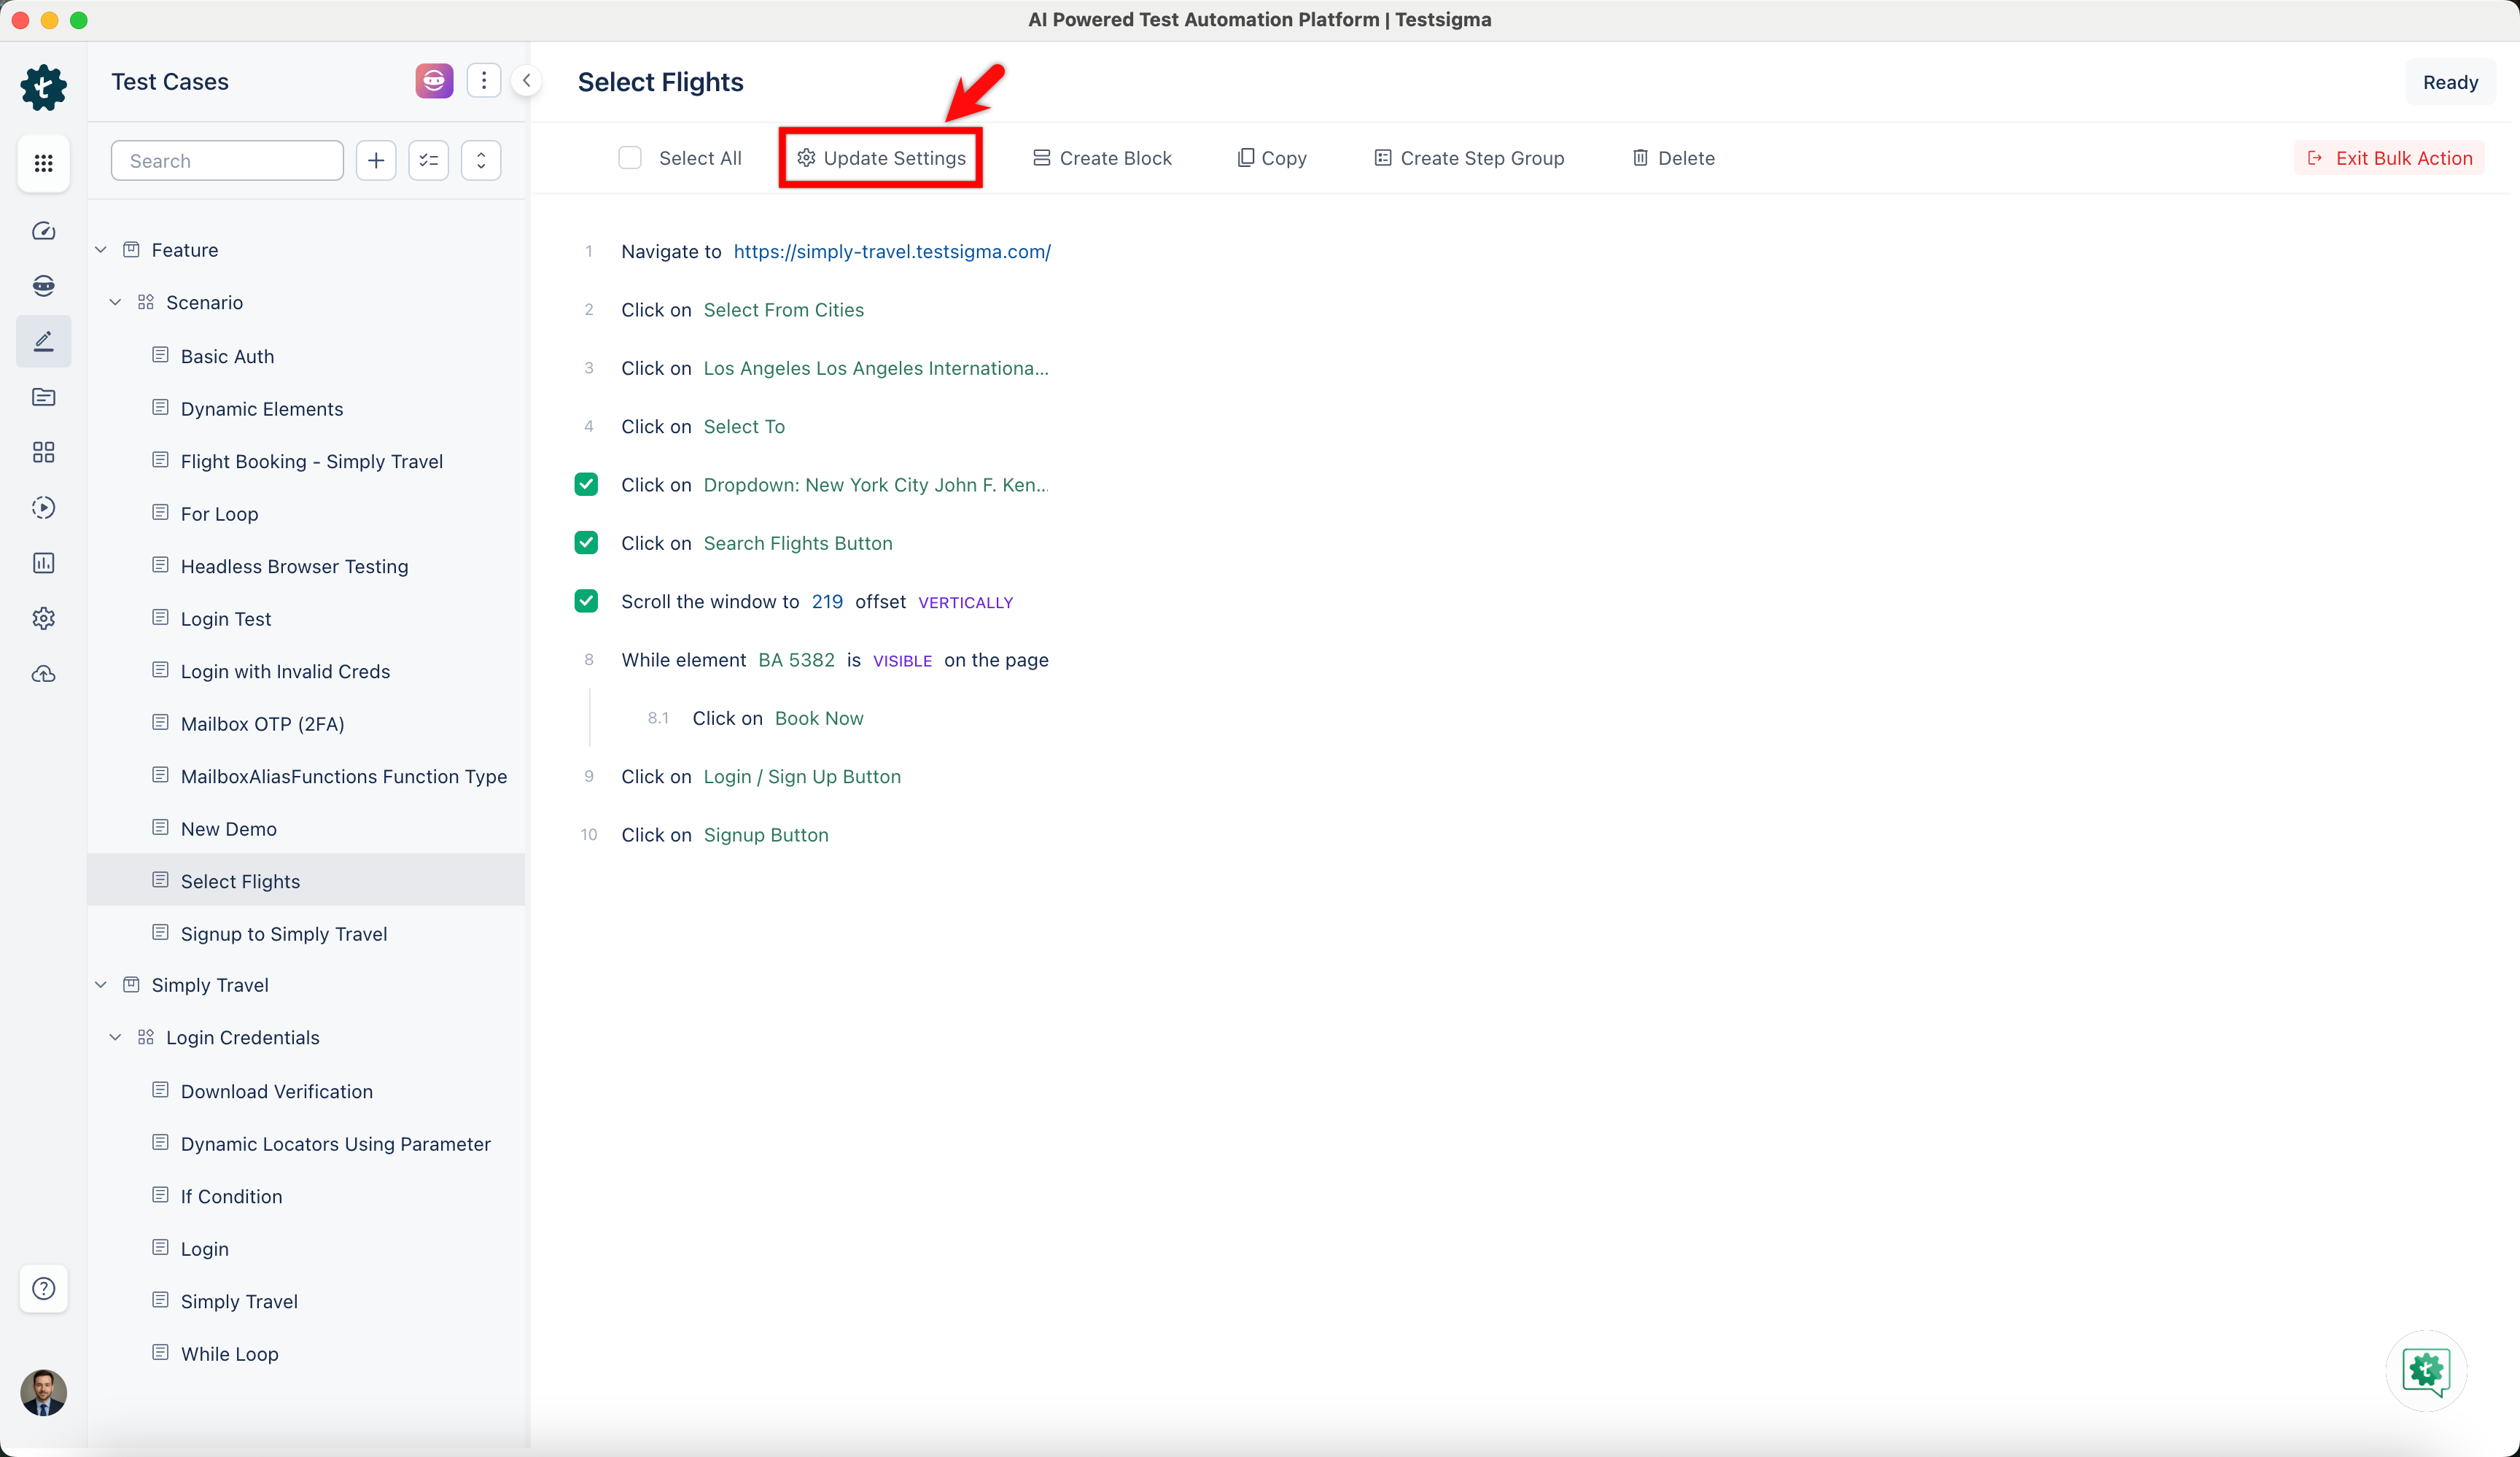
Update Step Settings
Section titled “Update Step Settings”To update several test steps, click the checkboxes next to the test steps you want to update and then click on Update Settings in the menu bar to open a popup window where you can make changes to the settings.